NPR Trees in Photoshop
February 20, 2012

In this mini-tutorial, Onel Pabico shows you how to create non-photo realistic trees in Photoshop and create an action for this process so you can use it again and again, speeding up your work process.
Step 1
Open your png format tree which has no background. Double click on the layer to unlock its state. Press ALT+ F9 (Option+F9 for Mac) to show the Actions panel.
Step 2
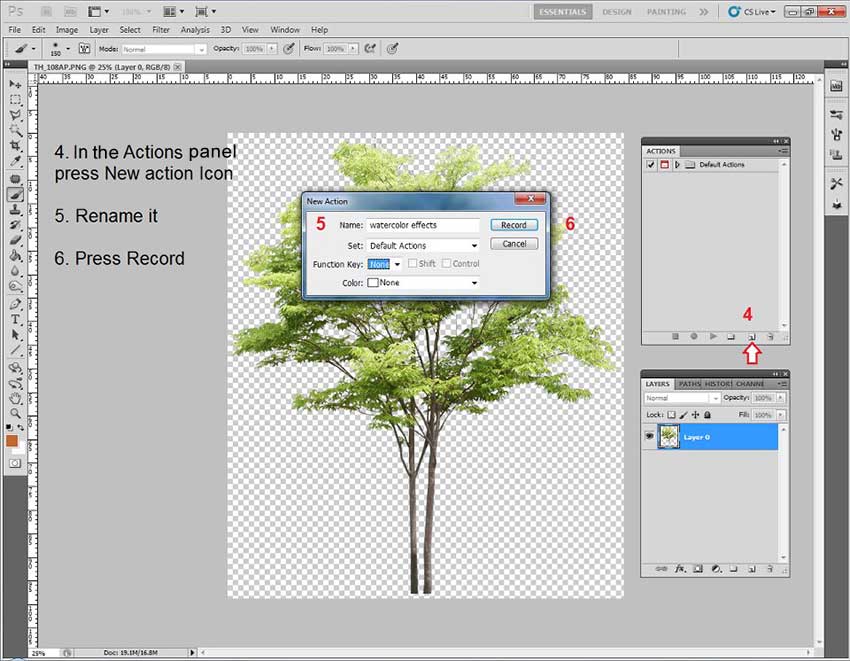
In the Actions panel click on ‘Create new action’ icon, rename it and press Record.
Step 3
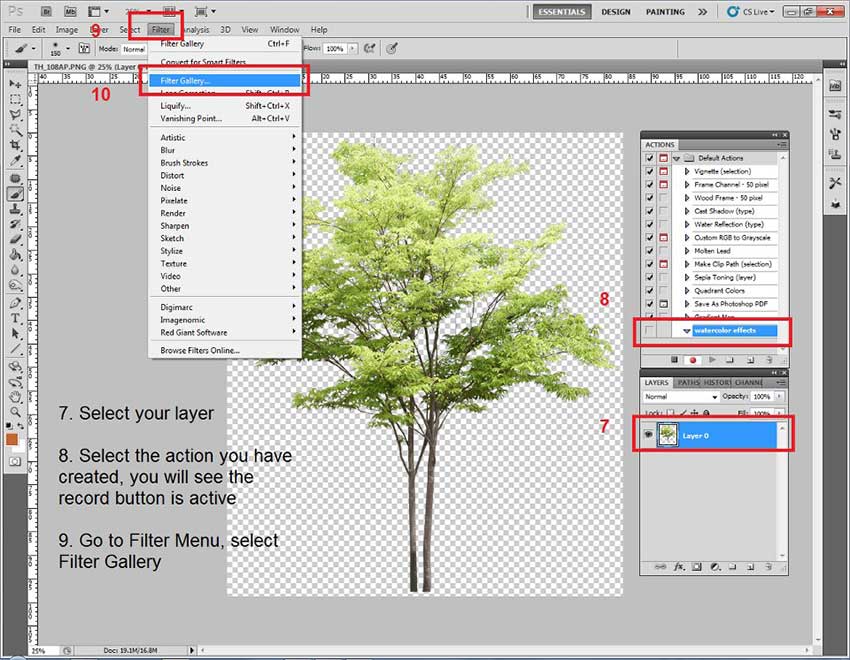
Select your layer first so it is active. From the Actions panel select the new action you named and you will now see that the record button is active. Next go to Filter>Filter Gallery.
Step 4
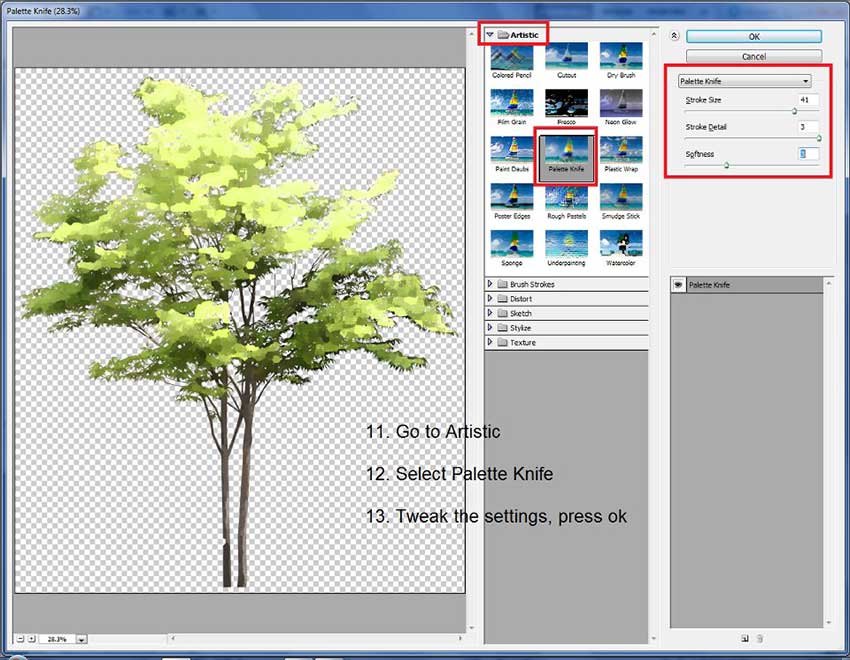
Select the Artistic folder in the Filter Gallery and choose the Palette Knife Filter. Adjust the Stroke Size and Softness as shown in the image below.
Step 5
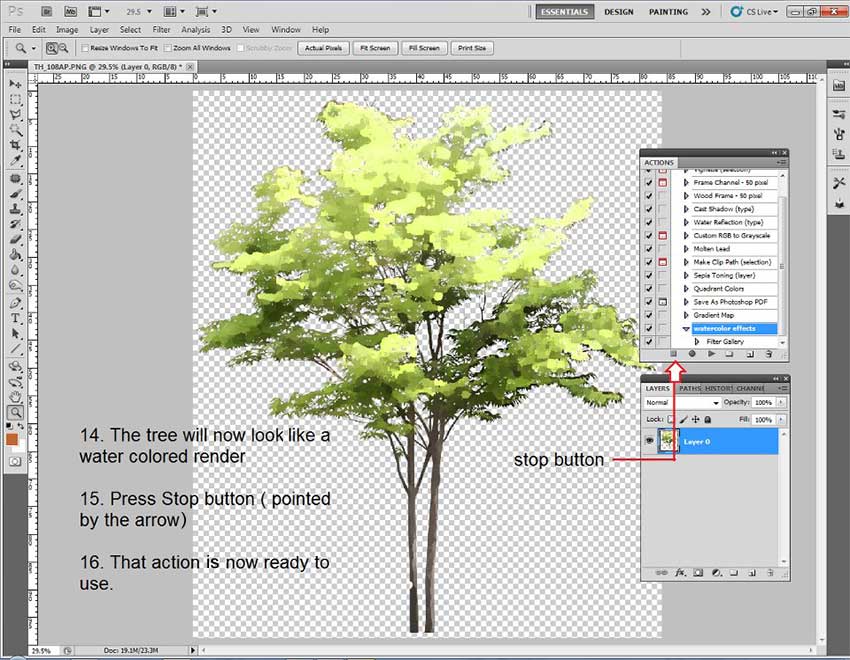
Your tree now looks like a watercolor render. Press the Stop button indicated by the red arrow in the image below. You have now created your new watercolor Action for NPR trees.
Step 6
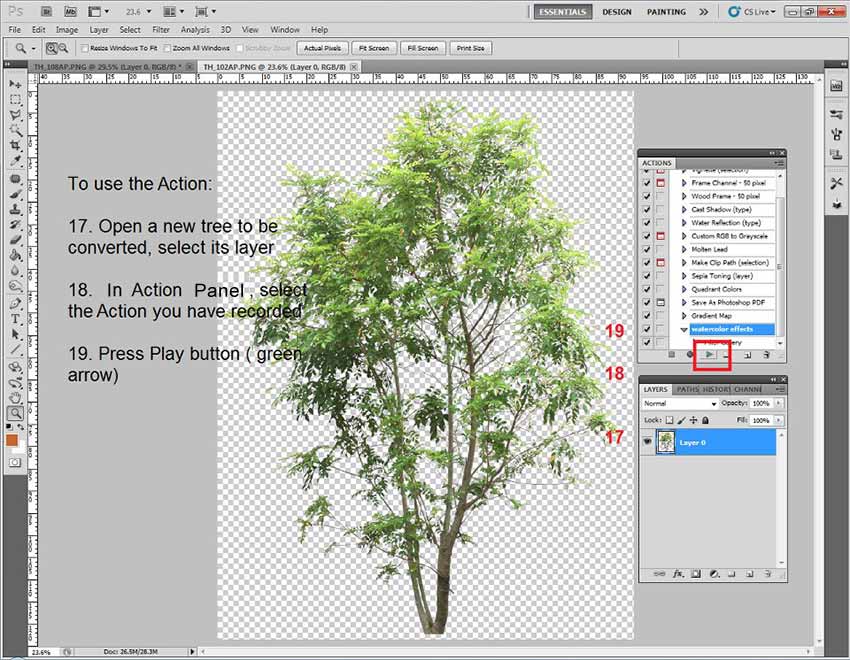
To use your new Action, open a new tree to be converted and select its Layer. In the Action panel select your new Action and press the Play button as indicated below.
Step 7
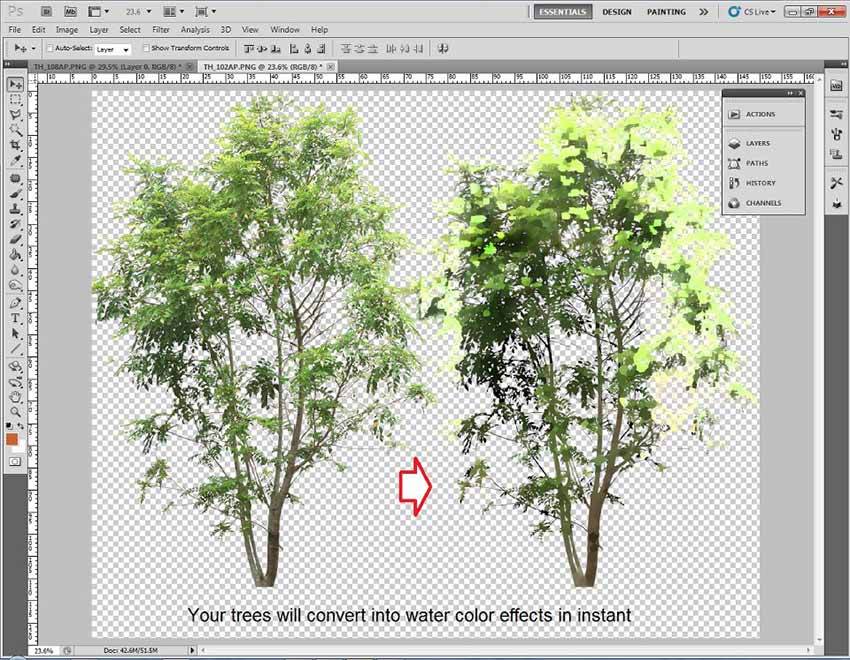
This new Action will convert your trees into a watercolor effect within seconds…enjoy!
I hope you found this little tutorial useful and you will use it to speed up your artistic workflow.
Onel
Make a Tablecloth in SketchUp
February 13, 2012

In this mini tutorial Bayu Yudistiro shows you how to model a 3D tablecloth using SketchUp and Dale Marten’s very useful organic modeling plugin ‘SubdivideAndSmooth’. This tutorial could also be adapted for modeling a blanket for a bed.
Step 1
Model your basic 3D shape (extrude a rectangle).
Step 2
Using the arc tool, draw arcs at the bottom of your basic 3D shape and delete any unecessary geometry.
Step 3
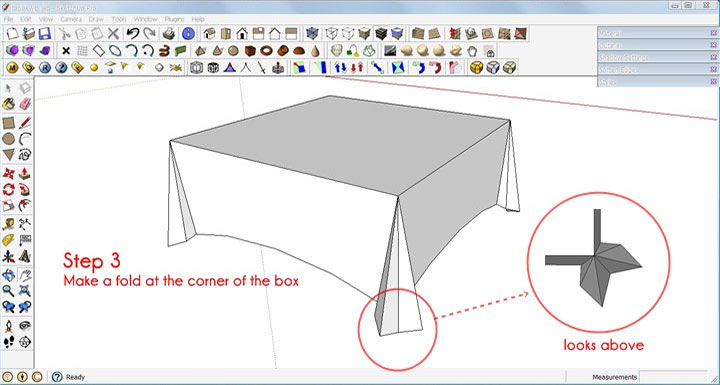
Draw a fold for each corner of your 3D box
Step 4
Make three extra simple folds for each side of the box.
Step 5
Connect the point of the folds with lines as shown in image below.
Steps 6 and 7
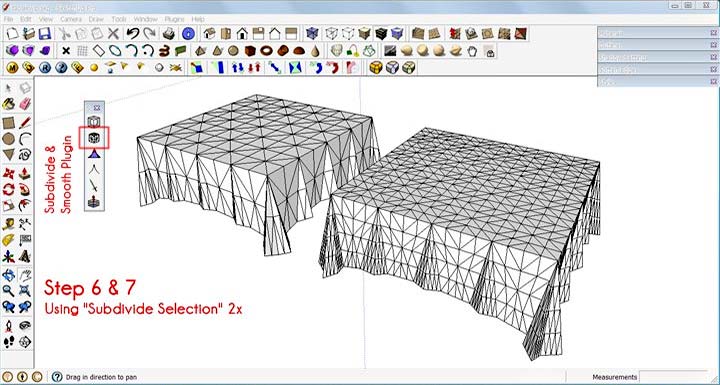
Using the Subdivide and Smooth plugin, select’Subdivide Selection’. Do this two times too divide up the geometry.
Step 8
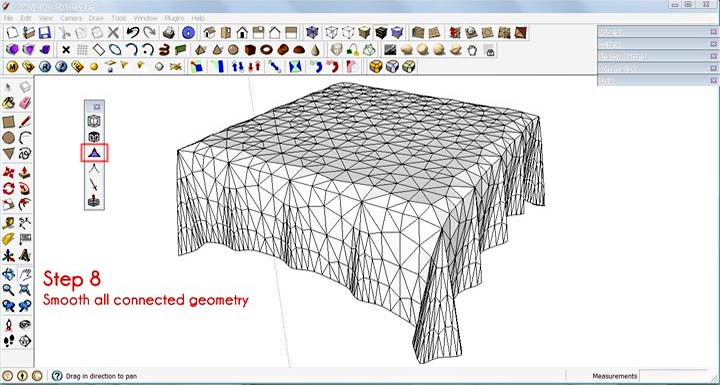
Using the the plugin again click on ‘Smooth all connected geometry’.
Step 9
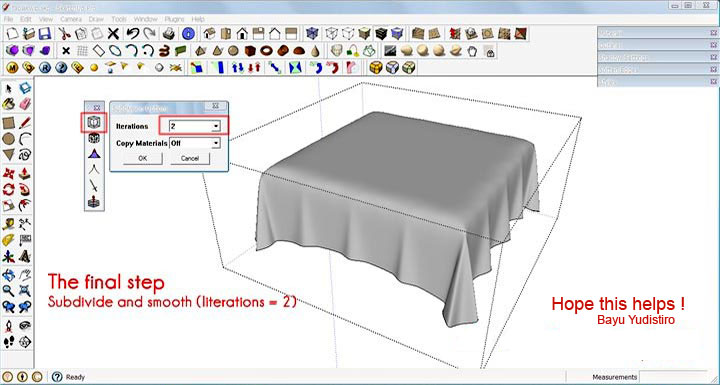
The final step. Select ‘Subdivide and Smooth’ in the plugin and set the ‘Iterations’ value at 2. You should end up with something similar too the image below.
I hope you find this useful in your 3D modeling projects and daily workflow.
Cheers
Bayu


