Wrapper Material and Matte Shadow Tutorial
Wrapper texture and matte shadow in V-Ray for SketchUp is useful for integrating 3-D objects in different HDRI scenes. This shadow plane technique will enable us to simulate shadows on HDRI map. I personally use this technique whenever I want to make a test render of different 3-D vehicles and any small objects integrated in HDRI scene. In this tutorial, I am going to show you how to render this matte/shadow pass using V-Ray 3.4 for SketchUp.
STEP 1: Load the SketchUp model
Load the SketchUp model car> adjust the SketchUp ‘Shadow Settings’ (follow the parameters)> adjust the camera scene based on your preferred view> then save your ‘Scene(s)’.

Load the SketchUp model
STEP 2: Test render (Default setting)
Run a test render using V-Ray Sun as the main light source. Using default settings, you can see that there is no cast shadows in the rendered image.
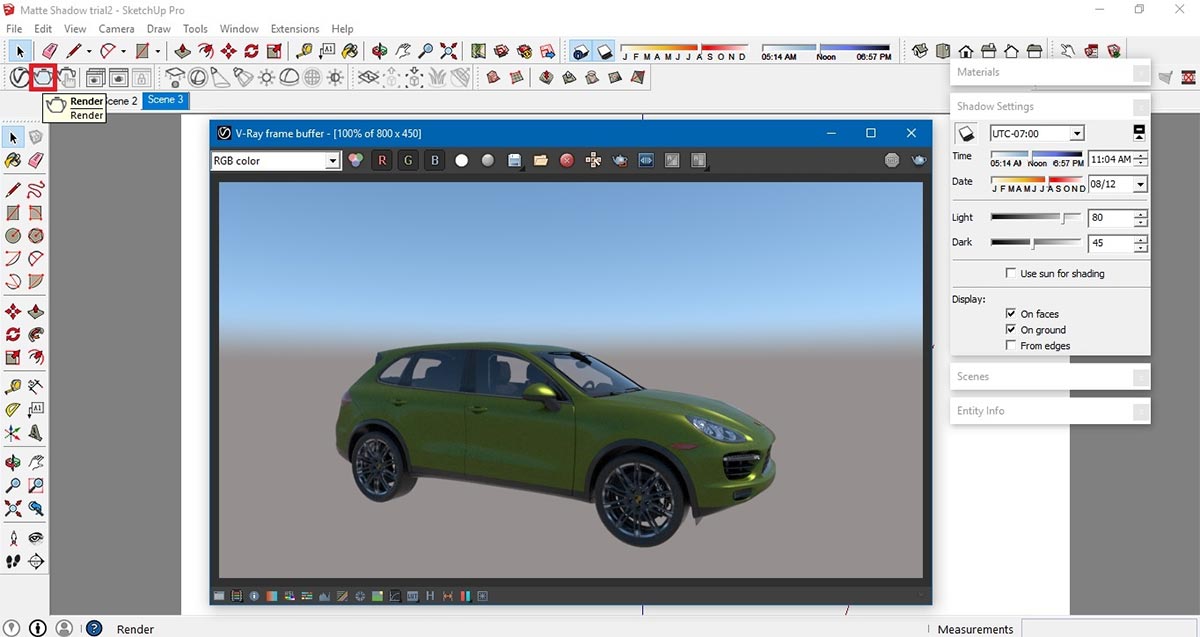
Test render (Default setting)
STEP 3: Insert V-Ray Infinite Plane
In order to cast shadows properly in rendered image, follow the procedures. Insert ‘V-Ray Infinite Plane’ to your SketchUp scene. This will act as a base of your model. Adjust the ‘V-Ray Infinite Plane’ and place it at the bottom of your model.
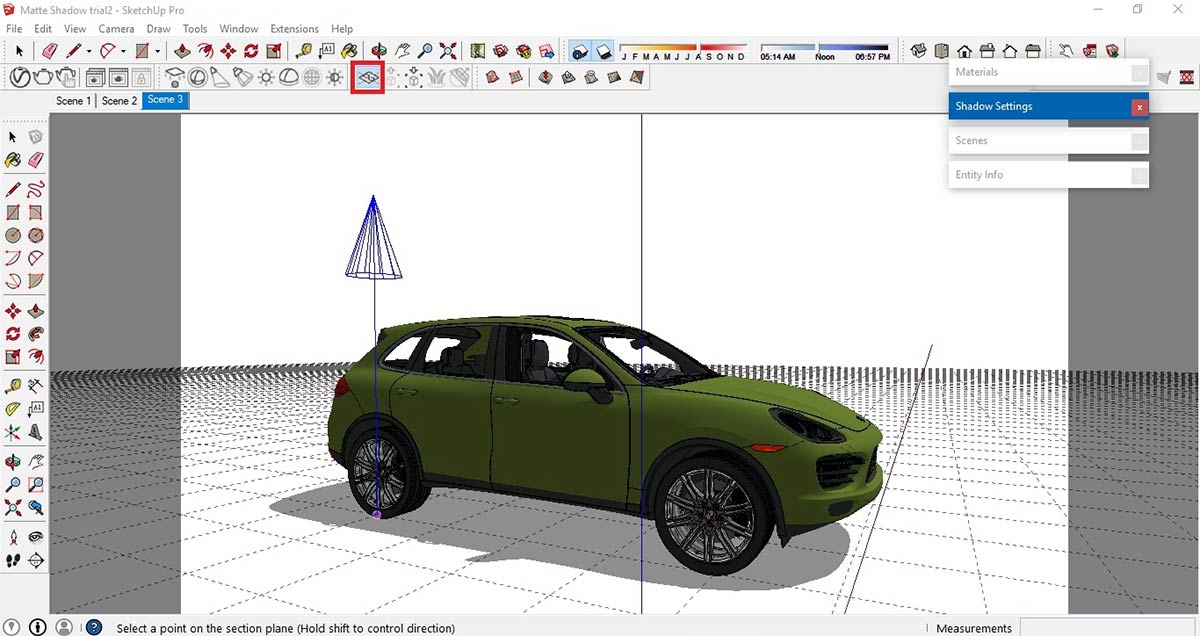
Insert V-Ray Infinite Plane
STEP 4: Add Generic Material
In the ‘V-Ray Asset Editor’, click the ‘New Material’ icon and select ‘Generic’.

Add Generic Material
STEP 5: Add Wrapper Material
In the ‘V-Ray Asset Editor’, click the New Material icon and select ‘Wrapper’.
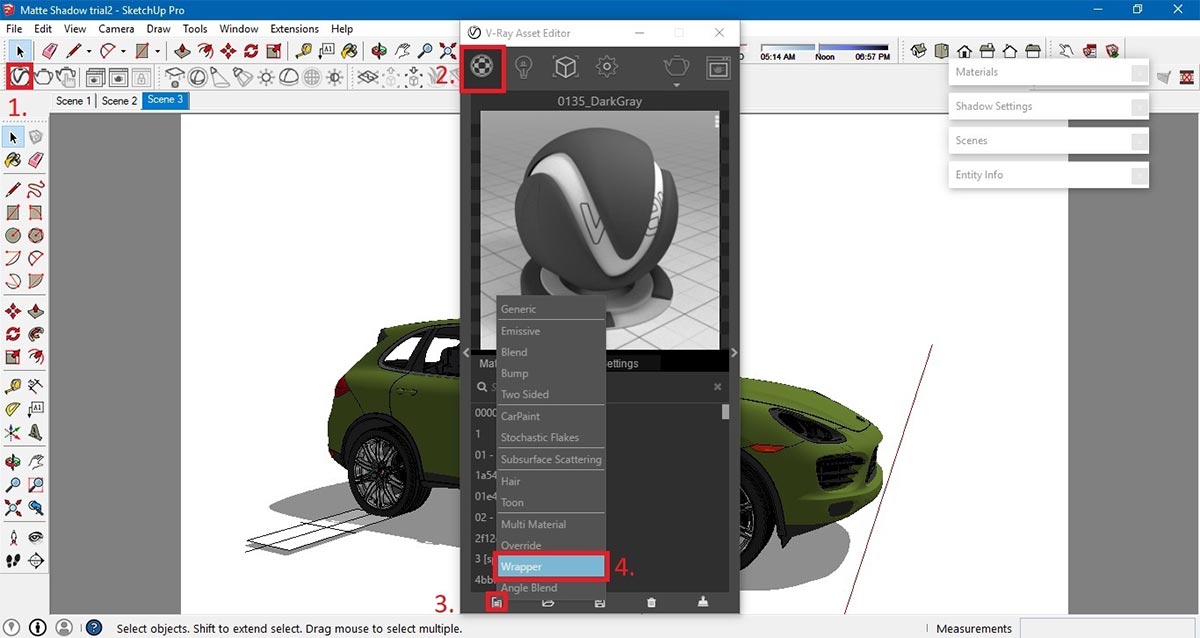
Add Wrapper Material
STEP 6: Wrapper Settings
Follow the parameters for Wrapper settings. Make the Generic as the base material for Wrapper texture. Activate the following: ‘Matte’ and ‘Shadows’.
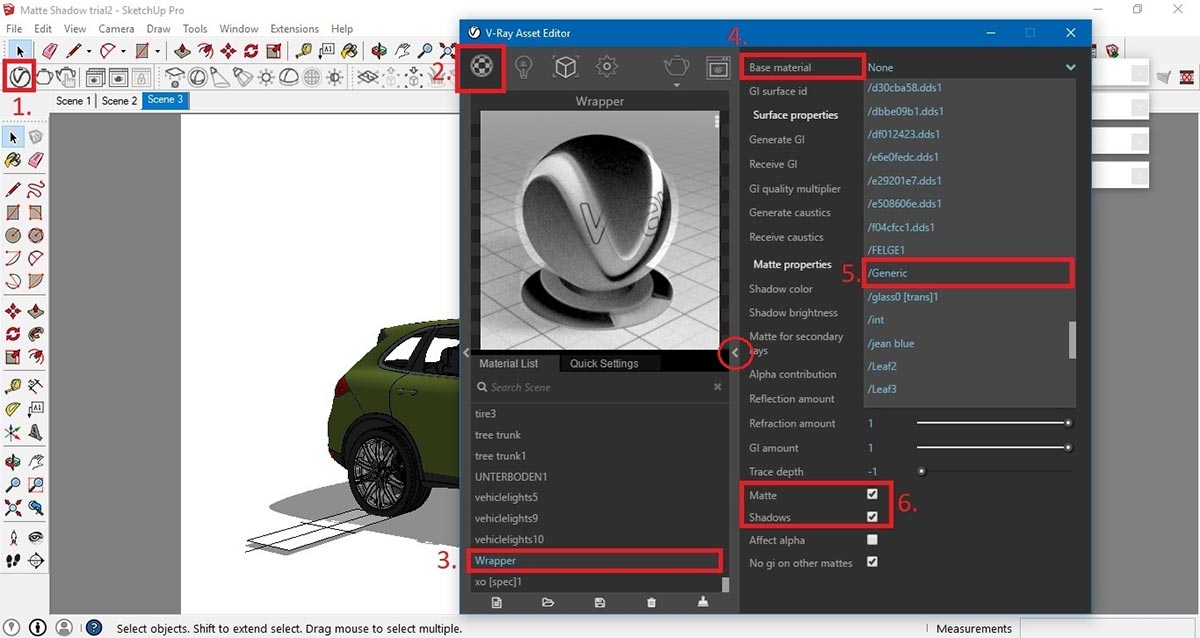
Wrapper Settings
STEP 7: Apply Wrapper Material
Apply the Wrapper material to V-Ray Infinite Plane. To do that, go to SketchUp scene and select the ‘V-Ray Infinite Plane’ object. Under V-Ray Material list, right click on the Wrapper material and click ‘Apply Material to Selection’
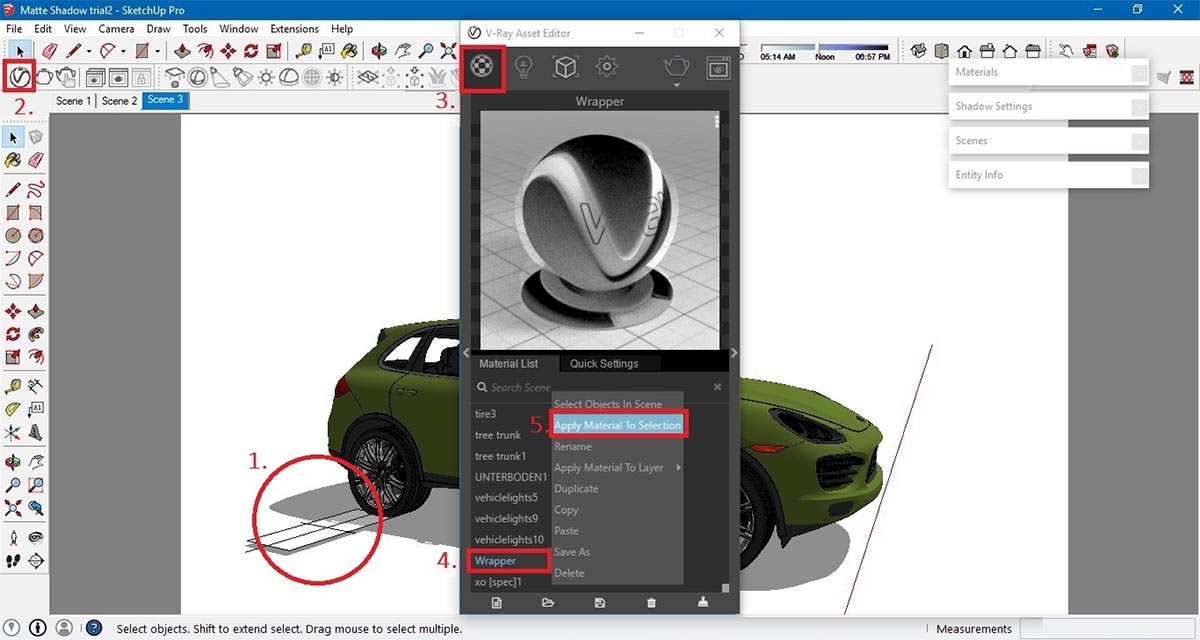
Apply Wrapper Material
STEP 8: Run Test Render (V-Ray Sun)
Run a test render using V-Ray Sun as the light source. After applying the V-Ray Infinite Plane and Material wrapper to the scene, notice the appearance of cast shadow during the render test.

Run Test Render (V-Ray Sun)
STEP 9: Load HDRI
In order to load the HDRI image, go to Settings, under the ‘Environment’ tab, click the slot for environment map located at the right side of the ‘Background’. Load the HDRI under the Bitmap> File tab. Set the view setting to ‘UVWGenEnvironment’ with spherical option as mapping type. In order to adjust your preferred view, change the value under the ‘Rotation> Horizontal’ option.

Load HDRI
STEP 10: Background and Camera settings
In order to create a brighter rendered image, make some adjustments in the Background and Camera settings. Under Camera settings, increase the value of Film Sensitivity (ISO), reduce the value of Aperture (F number) and Shutter speed. This is the most common settings in order to make the image brighter. This particular parameters may also refer to Triangular Exposure. In order to make the HDRI more visible to your rendered scene, adjustment ‘Background’ by increasing the multiplier value.

Background and Camera settings
STEP 11: Render settings
Adjust the render settings.
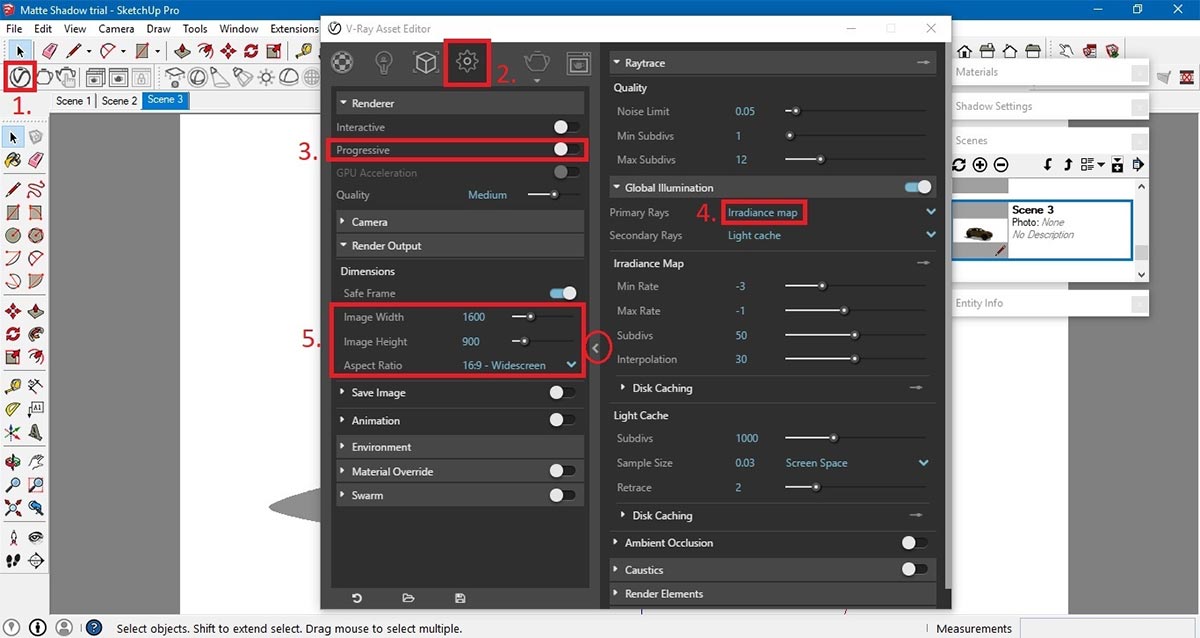
Render settings
STEP 12: Insert 3D entourage>go back to the last save scene> then click render
Insert additional 3D entourage to your scene, this will enable us to create a more dramatic render output in terms of shadow shading effect. Go to your last saved scene then click the ‘Render’ button.
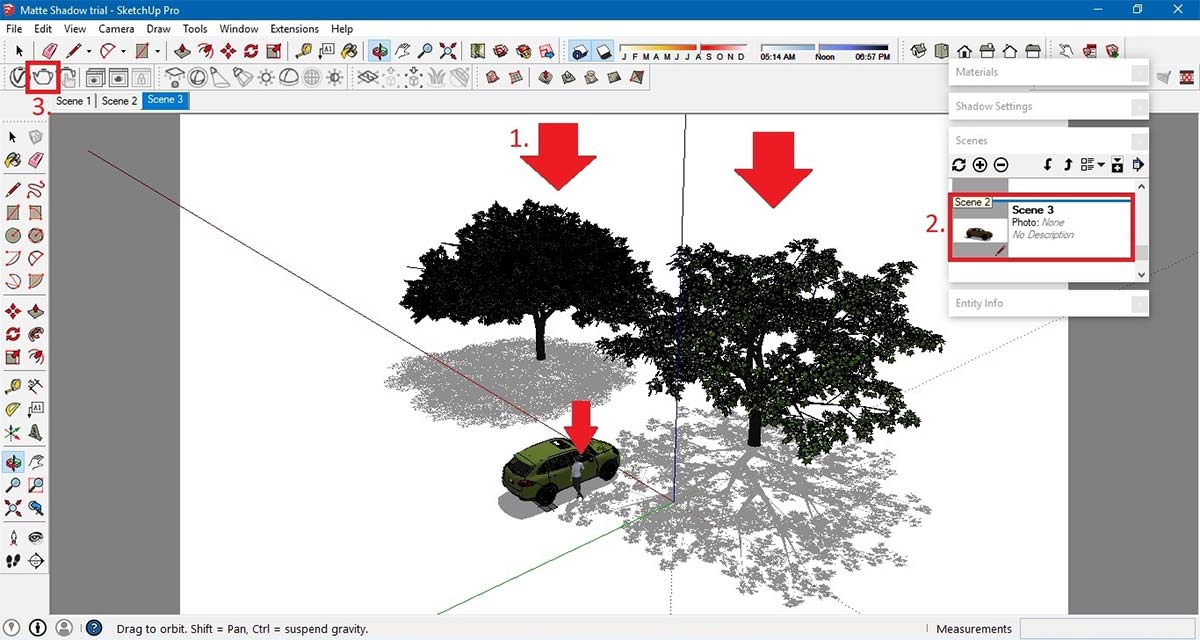
Insert 3D Entourage

Raw Render Result (SketchUp 2015+ V-Ray 3.4)

Final Render (SketchUp 2015+ V-Ray 3.4+ Photoshop+ Picasa)
Thanks for reading!
Benedict Caliwara
To see more of Benedict’s work visit his website here.


Interested.
Excellent tutorial…