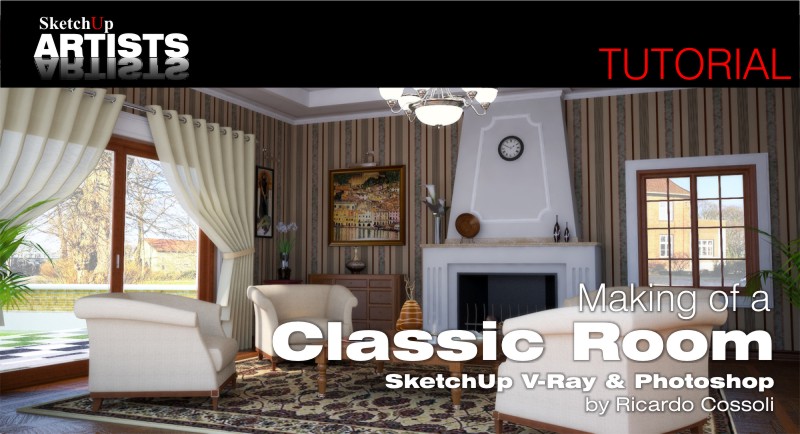
Making of a Classic Room
 Making of a Classic Room by Ricardo Cossoli
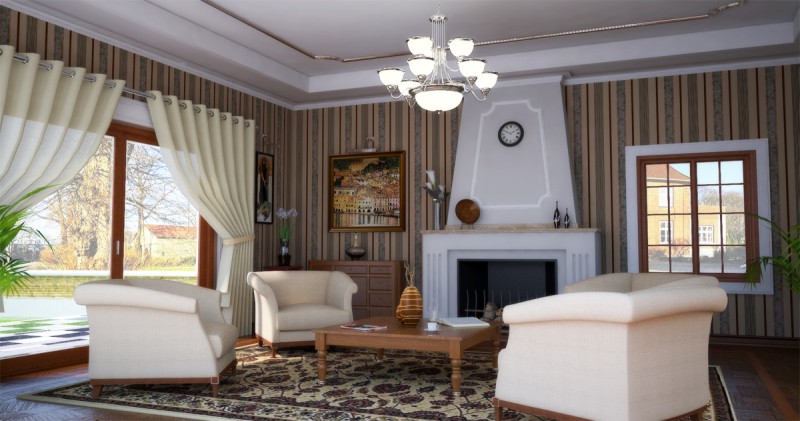
The ‘Classic Room’ scene was fully modeled in SketchUp with the help of some free available plug-ins.
It is a classic style room with details of moldings, illuminated with natural light from the scene and only the light support in the middle of the room is a resolved V-Ray emitting material.
After the modeling process I will apply the textures, at the same time doing various tests to adjust the lighting and reflections of different materials.
I will finish without placing an environment (background), that I will add later in Photoshop . I must therefore save the rendered image in Png. format because it supports different opacities of materials.
In addition to adding a Photoshop background (a high-resolution image of a landscape), I must adjust the contrast, lighting levels, glare and blur, add a second layer which I will merge with the original layer using the overlay method , then lower the opacity from 25 to 30%. These settings are of course very subjective and depend very much on each and every individual case, scene, taste, lighting situation…
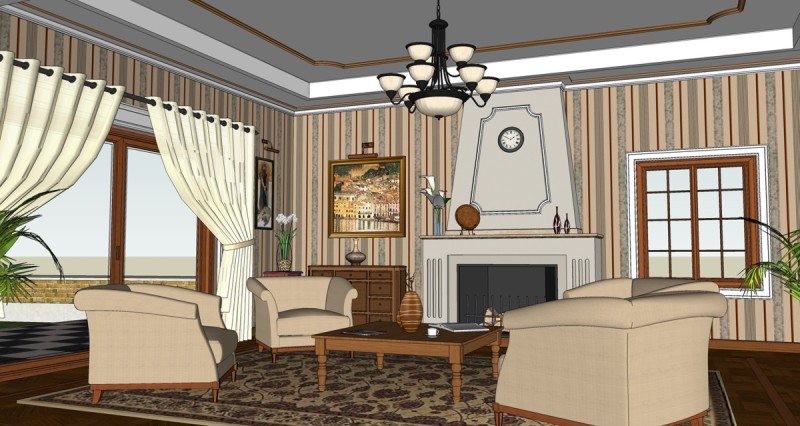
Step 1. Here is the original SketchUp scene I started with . All the details are clearly visible before the rendering and post- production process.
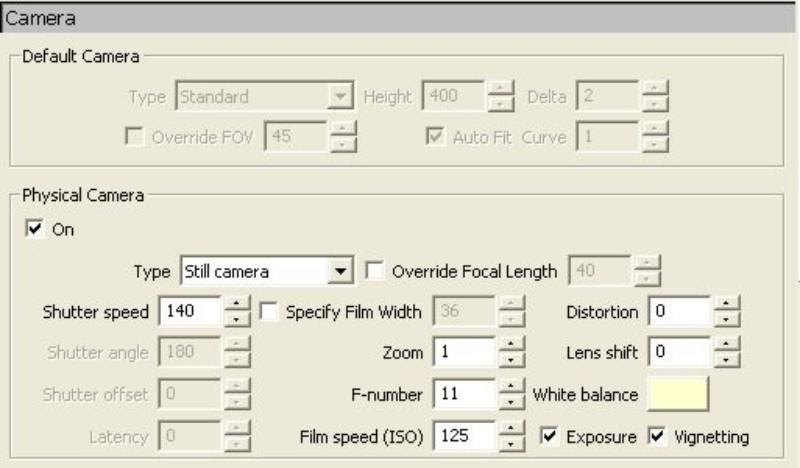
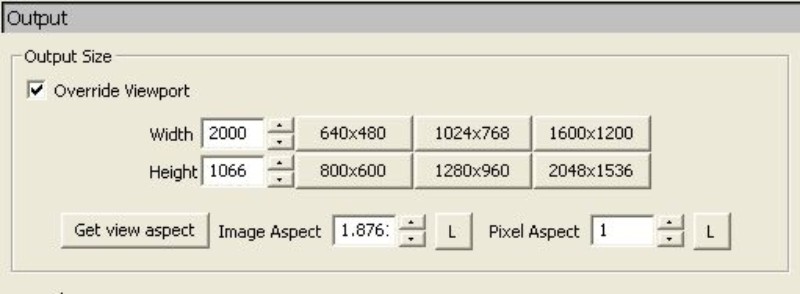
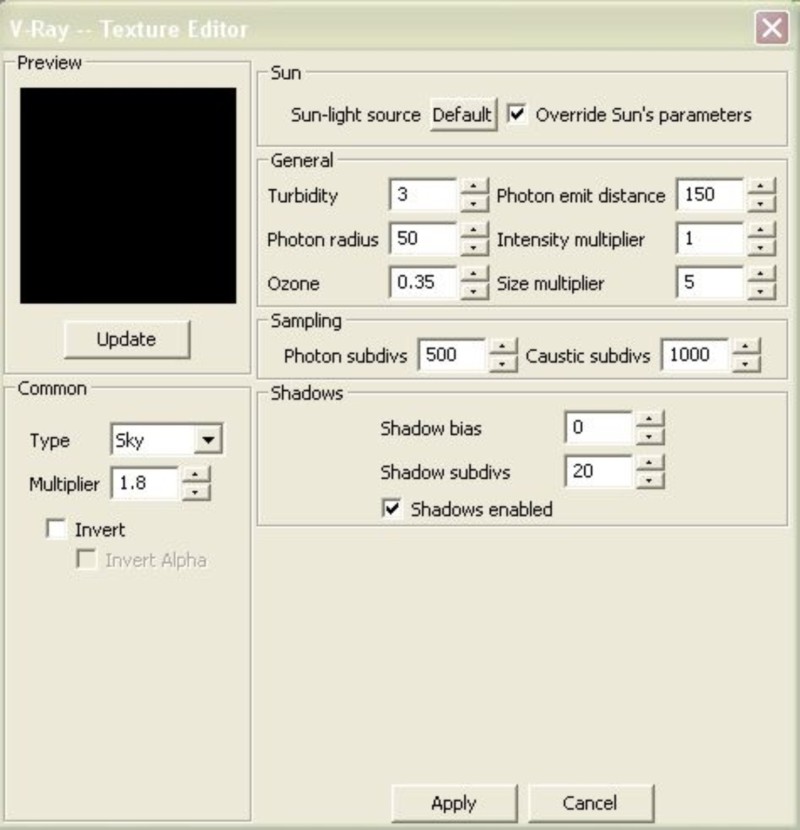
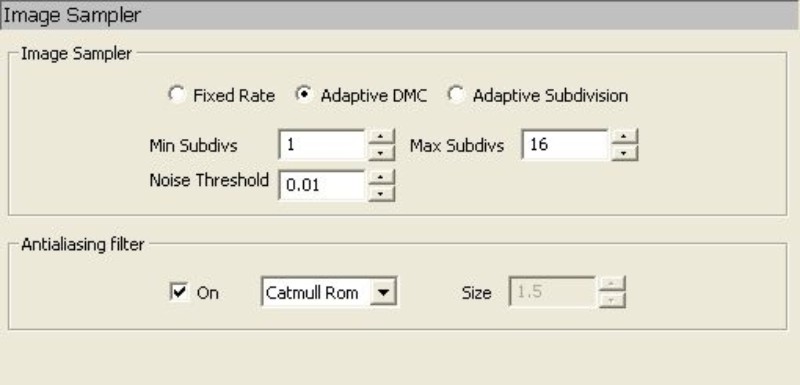
Step 2. Rendering Options in V-Ray 1.5 (Continued)
Step 3. Rendering Options in V-Ray 1.5 (continued)
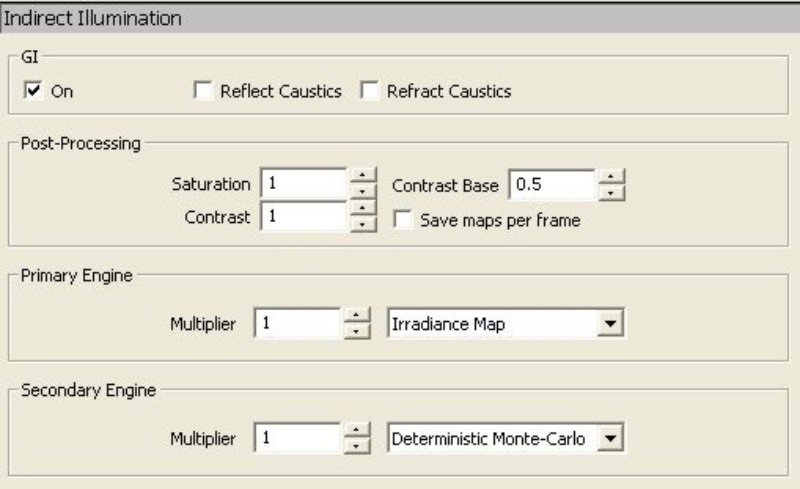
Step 4. Rendering Options in V-Ray 1.5 (continued)
Step 5. Rendering Options in V-Ray 1.5 (continued)
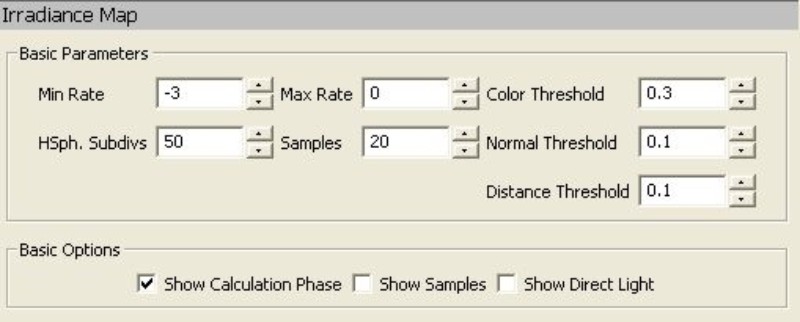
Step 6. Rendering Options in V-Ray 1.5 (continued)
Step 7. Rendering Options in V-Ray 1.5 (continued)
Step 8. Rendering Options in V-Ray 1.5 (continued)
Step 9. Rendering Options in V-Ray 1.5 (continued)
Step 10. Rendering Options in V-Ray 1.5 (continued)
Step 11. Rendering Options in V-Ray 1.5 (continued)
Step 12. Rendering Options in V-Ray 1.5 (continued)
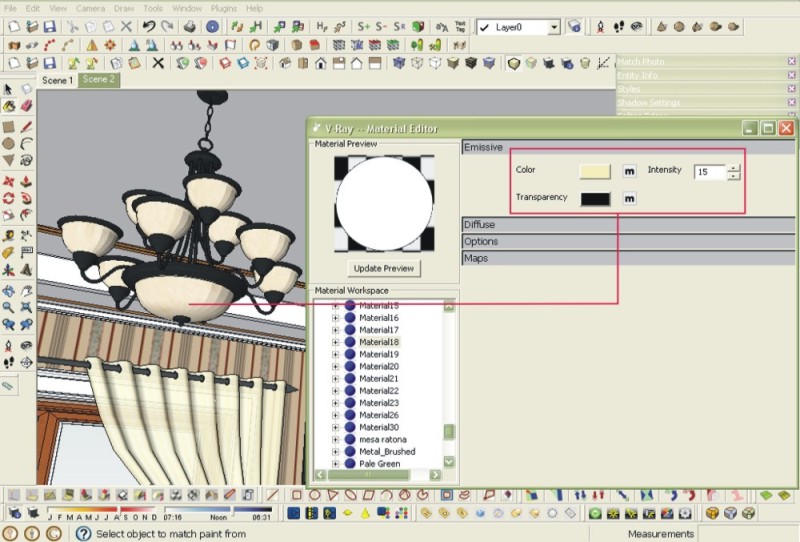
Step 13. The chandelier is a diffusion material. Later in post-production (Photoshop) a diffuse glow effect is applied.
Step 14. This is the original image exported from SketchUp
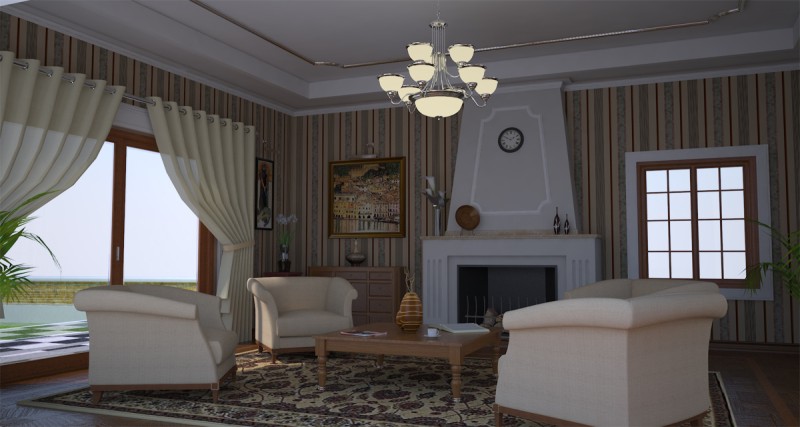
Step 15. This is the render output as it came out of the render engine. Before the post-production process in Photoshop it is necessary to adjust different light settings and color corrections as detailed below.
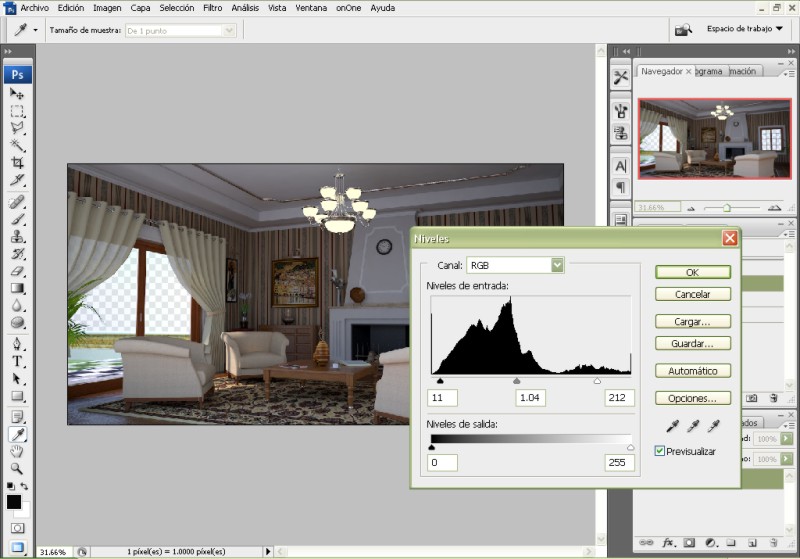
Step 16. Correction of Levels in Photoshop will improve the overall lighting of the scene.
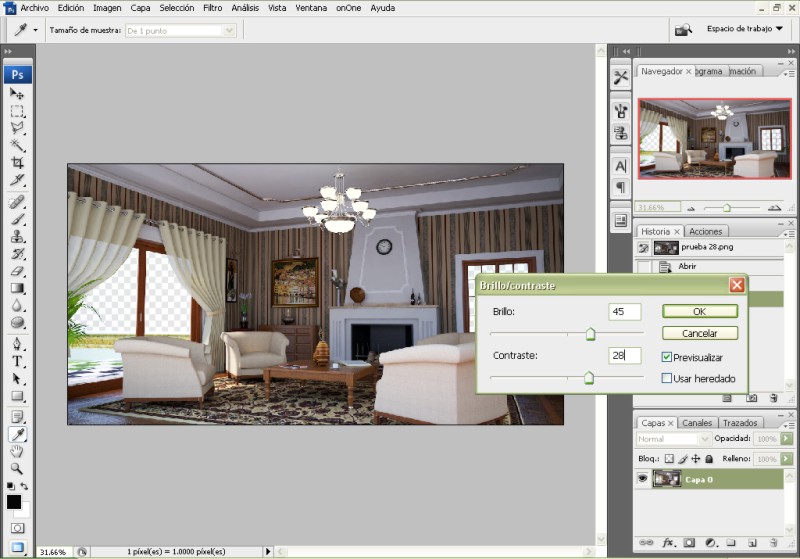
Step 17. Correction of Brightness and Contrast will give greater depth to the lighting of the image.
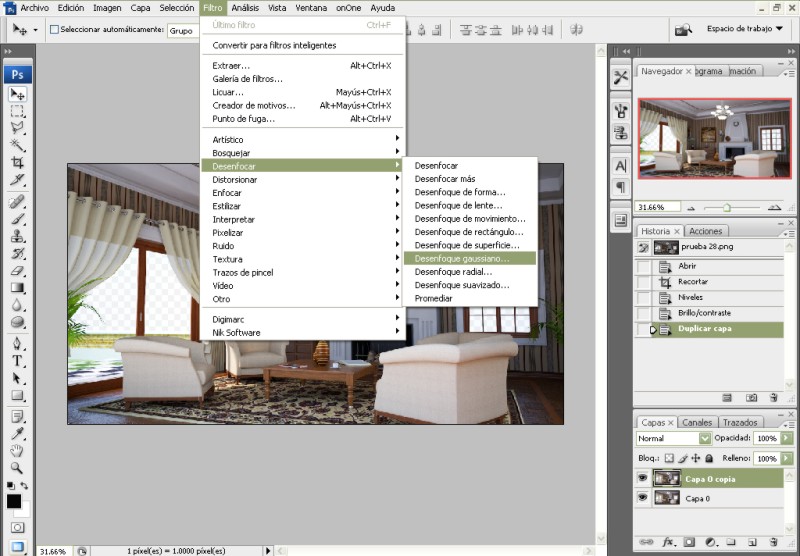
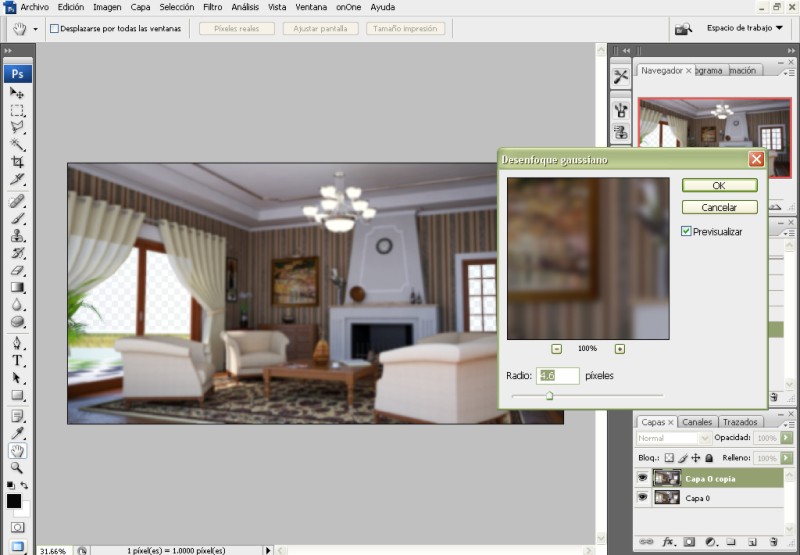
Step 18. Before applying Gaussian Blur, it is necessary to duplicate the original layer (Ctrl + j).
Step 19. Apply a slight Gaussian Blur. Besides using the Gaussian Blur filter an option is also to apply a diffuse glow to give more radiance to the highlights of the scene.
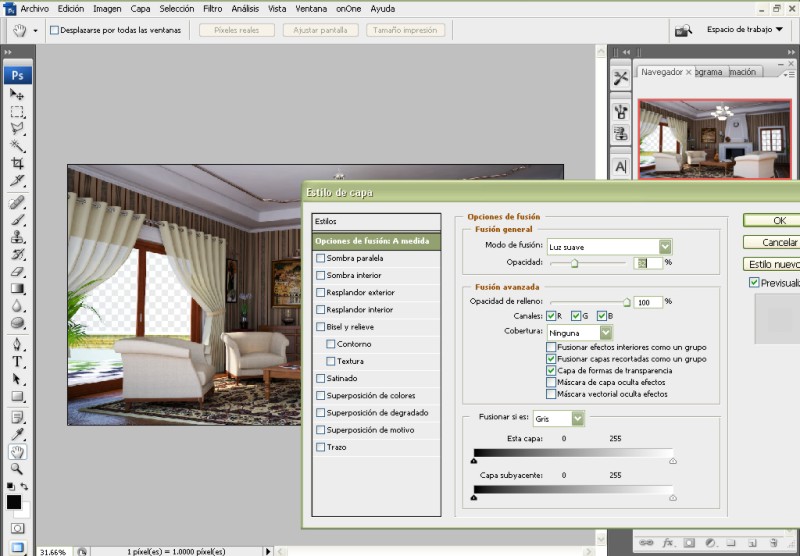
Step 20. In the Blending Options> Layer >Soft Light adjusting Opacity up and down until (about) 30%.
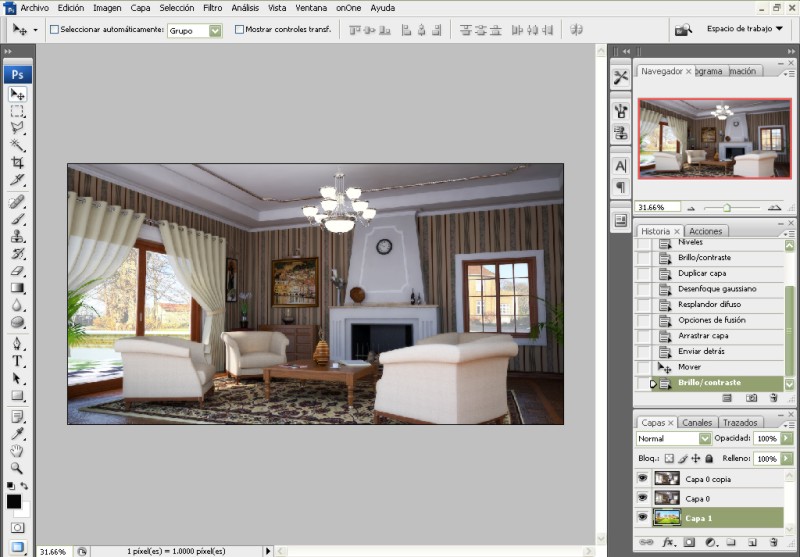
Step 21. A high resolution landscape image is applied as the background.
This is the finished image after rendering, lighting adjustments and incorporation of the background image in Photoshop.
I hope you enjoyed my tutorial.
Ricardo









Muito muito obrigado Ricardo Cossoli.
Thanks FOniXRula, i’m glad you liked
Beautiful work. Could you steer me to a software that will allow me to create a virtual rendering image using an original jpeg image.
This is for real estate purposes. I would like to achieve the fine quality shown here but it must be done by editing the image and not by drawing a new one.
Thanks much, Charles
very great tut,i like it so much but the pictures of step 2 and 2 is dead,can u upload again please?thanks for share best tut 4 SU
@Long image in step2 seems ok, is there still a problem?
ok thanks admin,all pictures of this tut are ok
Hi there again Ricardo could you plz help me? im having problems with the wood texture in the vray sketchup, for example: wood texture in furniture ” i put the texture in the position up to down in one leg and left to right in other leg, and do the render and the image doesn’t correspond.
i cant understand why. i search for something like this but i cant find any topics.
if you could give me any tip i would appreciate
Thank you for this helpful tutorial. I would enjoy it even more if you would provide the original sketchup file so that we readers could download it and follow along with the tutorial.
Thanks again!
Hi Dan, some tutorials come with the original SketchUp file and other resources, though not many at the moment. It is really up to the author whether they want to add their model to the tutorial or not. We always ask though and we hope to have more with up and coming tutorials.
Regards
James
Hello,
Very nice work and many thanks for sharing your knowledge with us.
Would you please help with a problem that I am having?
I’m trying to render an interior scene, SU + Vray, where I use both natural lights (vray sunlight and rectangle lights for the windows) and emissive materials for the iluminating objects, like sconces, lamps, etc. But the objects that have emissive materials don’t show in the render… it’s like they are hidden. (and they’re not).
Please help solve this little problem.
Regards
Andrei
Andrei, here is a tutorial on emissive material by Nomer Adona …might help http://www.sketchupartists.org/tutorials/sketchup-and-v-ray/lighting-with-v-ray-for-sketchup-definitive-guide-part-2/
what plug-ins did you used sir? and any plug ins that you will suggest to me ?
Sorry sir why does the pictures of step 2 and 3 can’t be opened? hopefully I can see the image. The tutorial is amazing
thanks