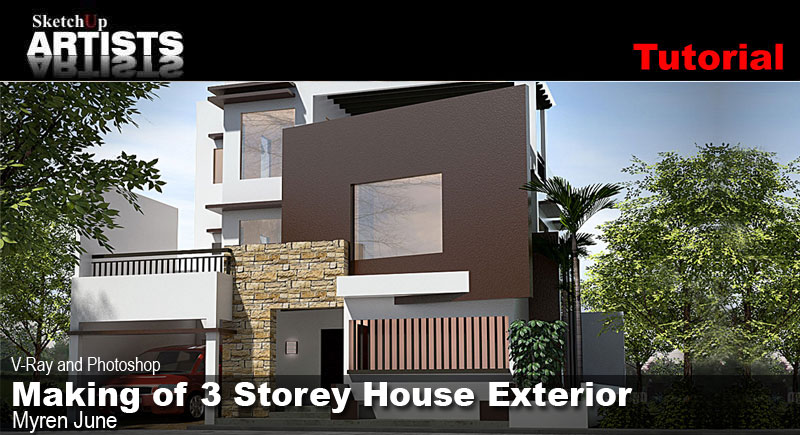
Making of 3 Storey House Exterior

Architectural designer Myren June shows us his workflow and settings in this exterior render using SketchUp, V-Ray and Photoshop.
Step 1
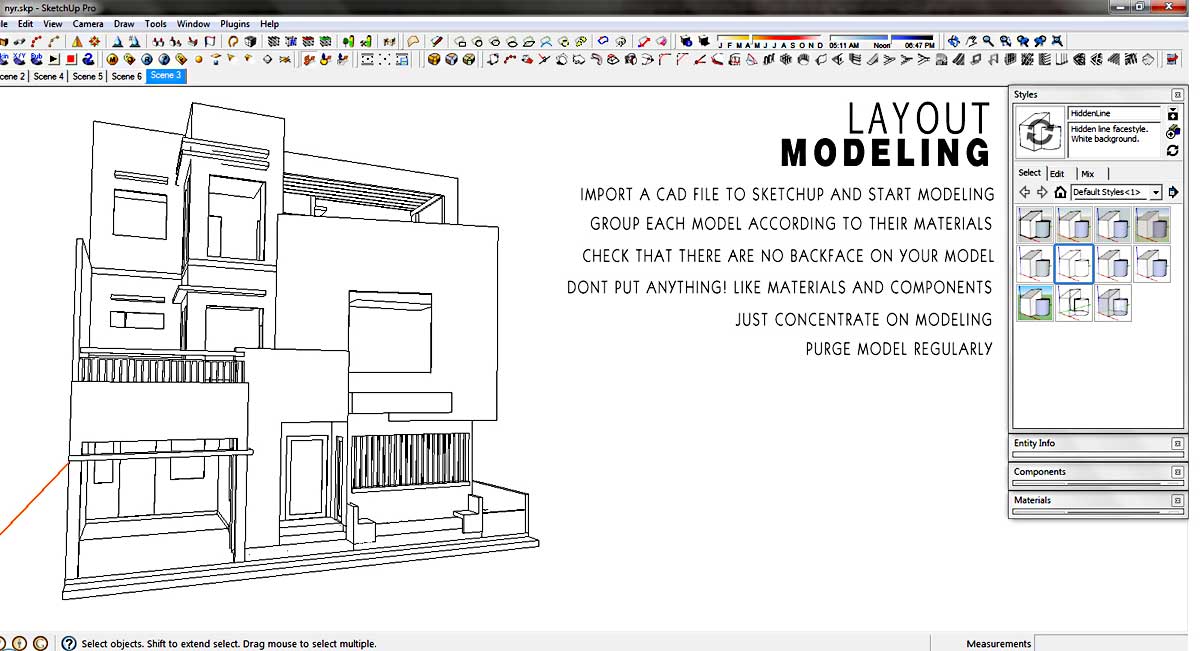
Import your model. Make sure all your faces are facing the right way (no back faces facing outwards). At this stage add no materials and just concentrate on getting your model right.
Step 2
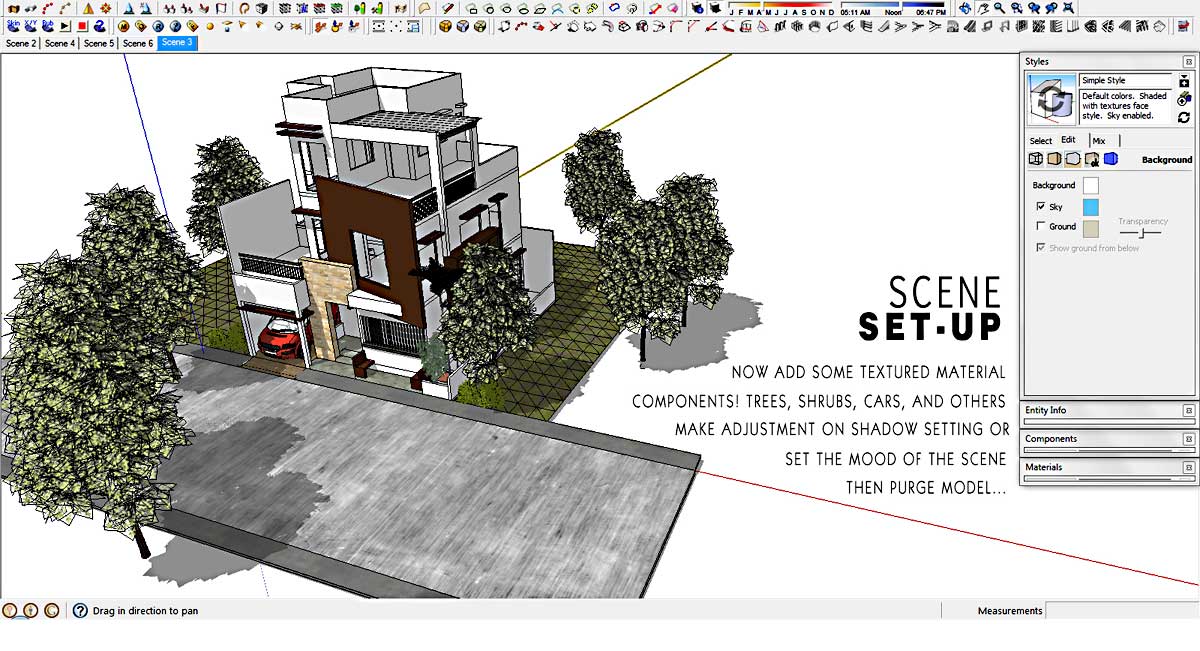
Now start adding some materials. Also any entourage to help enhance your scene. Set your shadow settings the way you want to set the mood for your scene. Don’t forget to purge your model too (helps in keeping the file size down).
Step 3
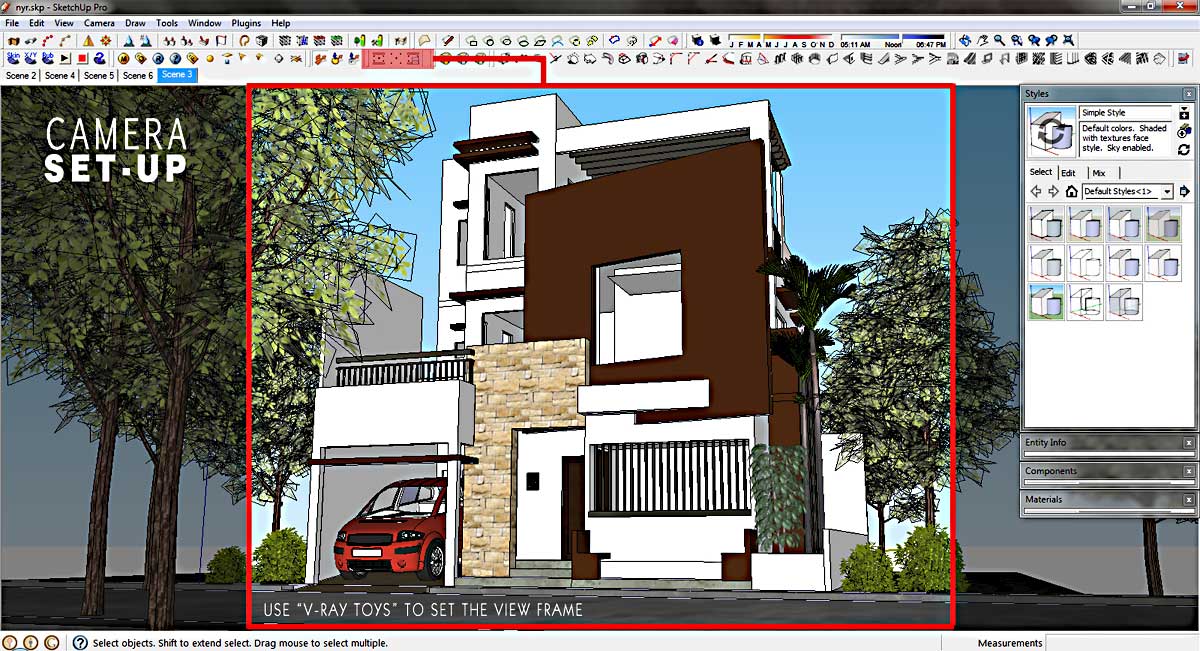
Use ‘V-Ray Toys’ to set up your View Frame.
Step 4
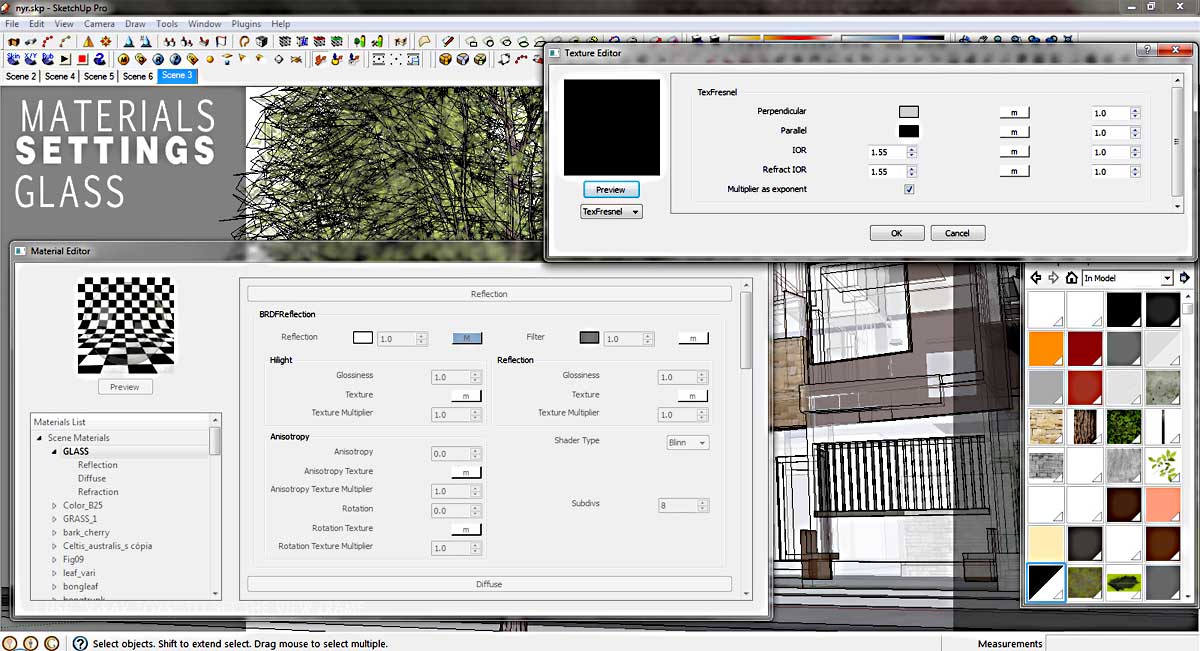
Glass material settings.
Step 5
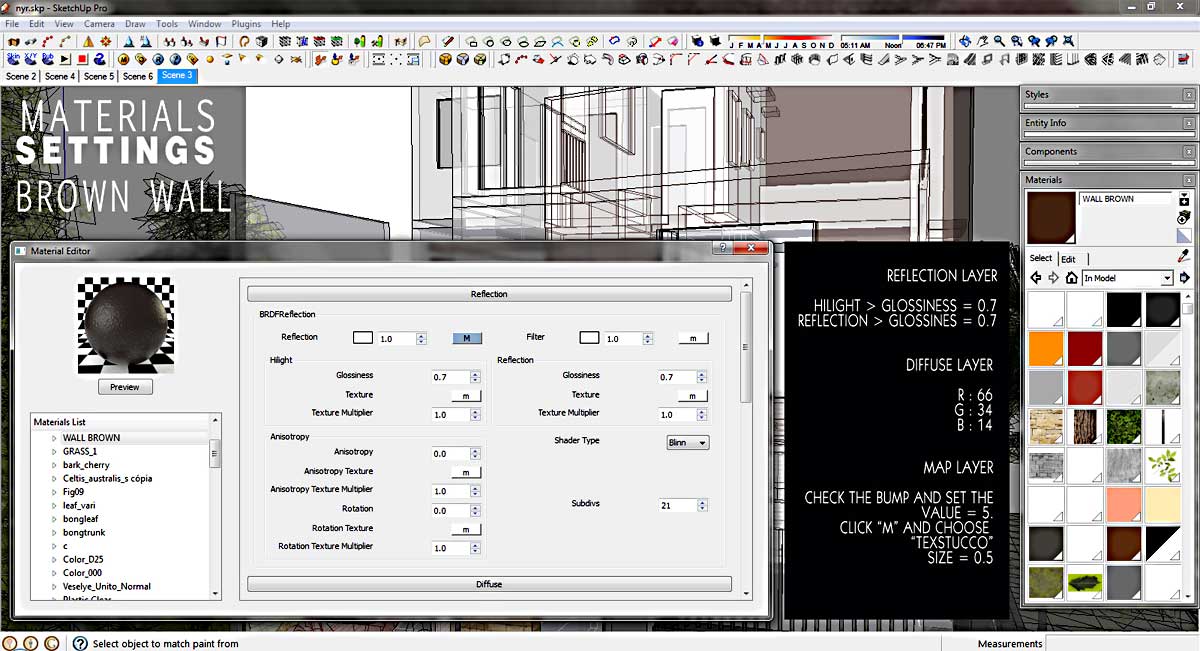
Brown wall material settings.
Step 6
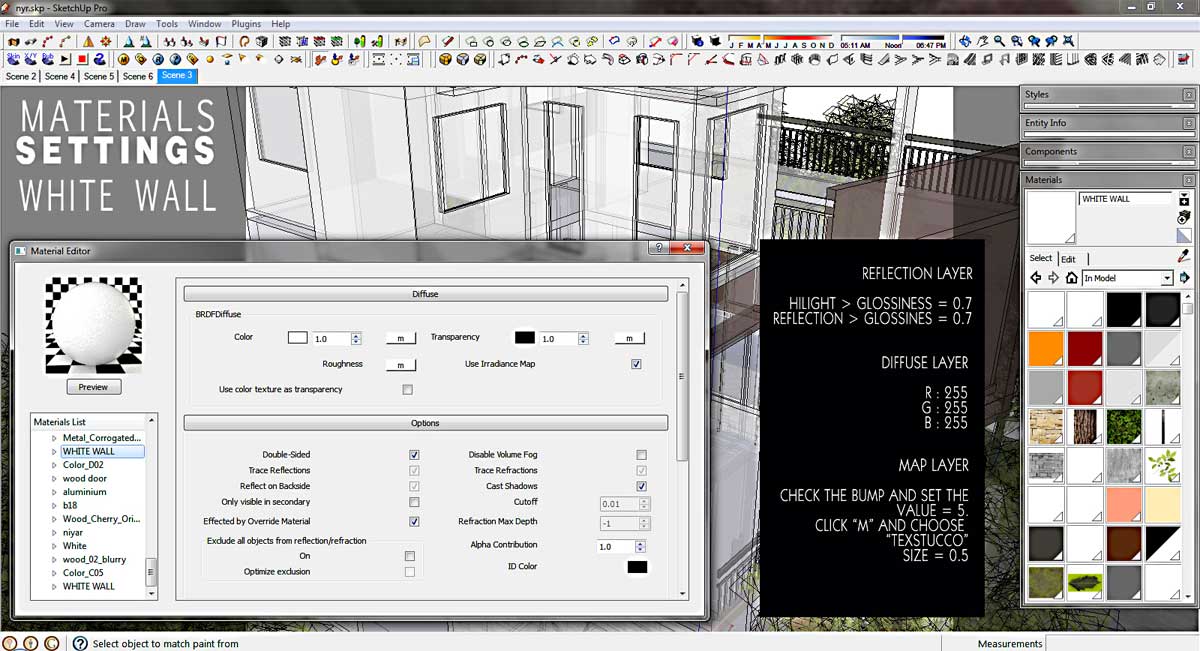
White wall material settings.
Step 7
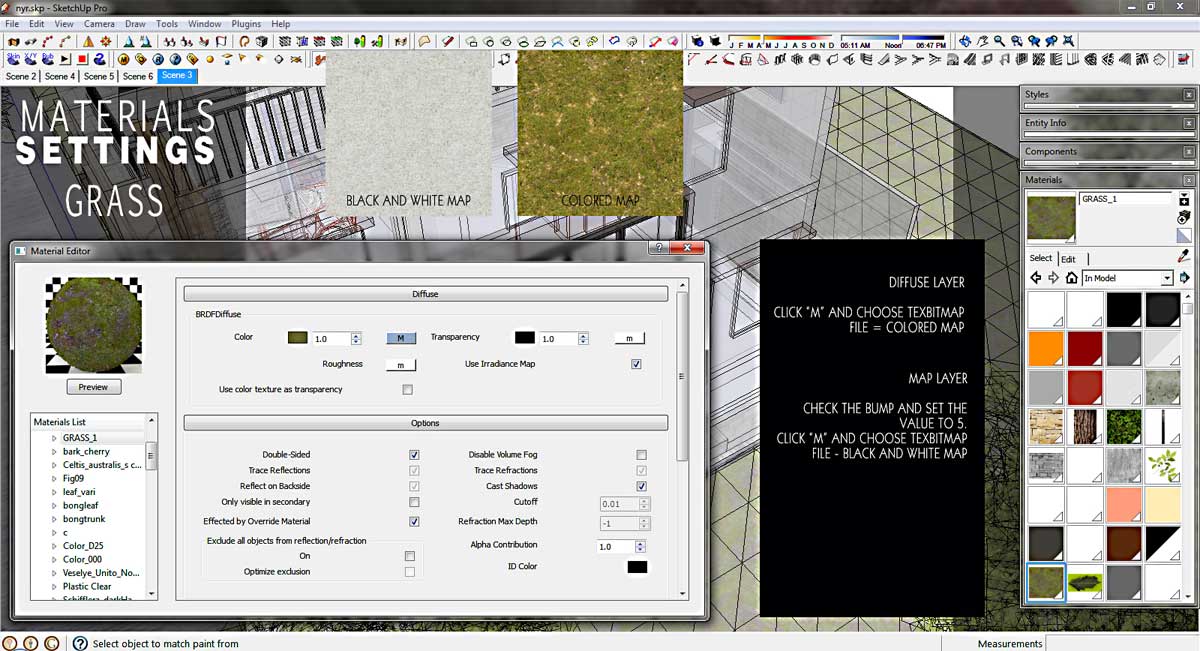
Grass material settings.
Step 8
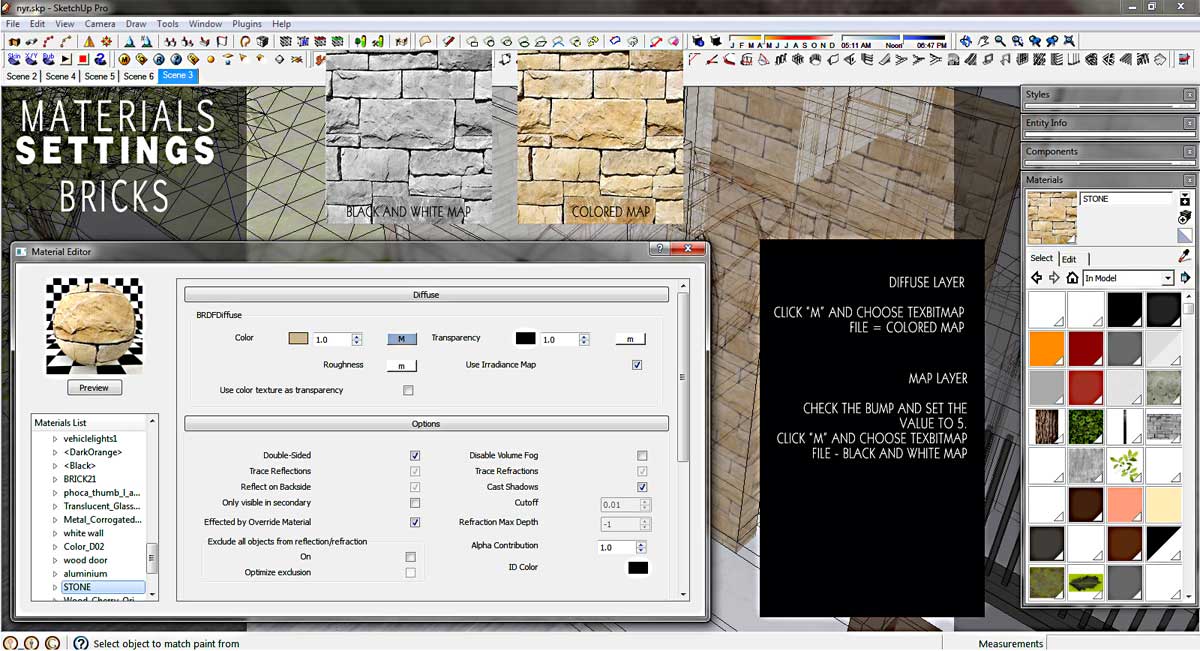
Brick material settings.
Step 9
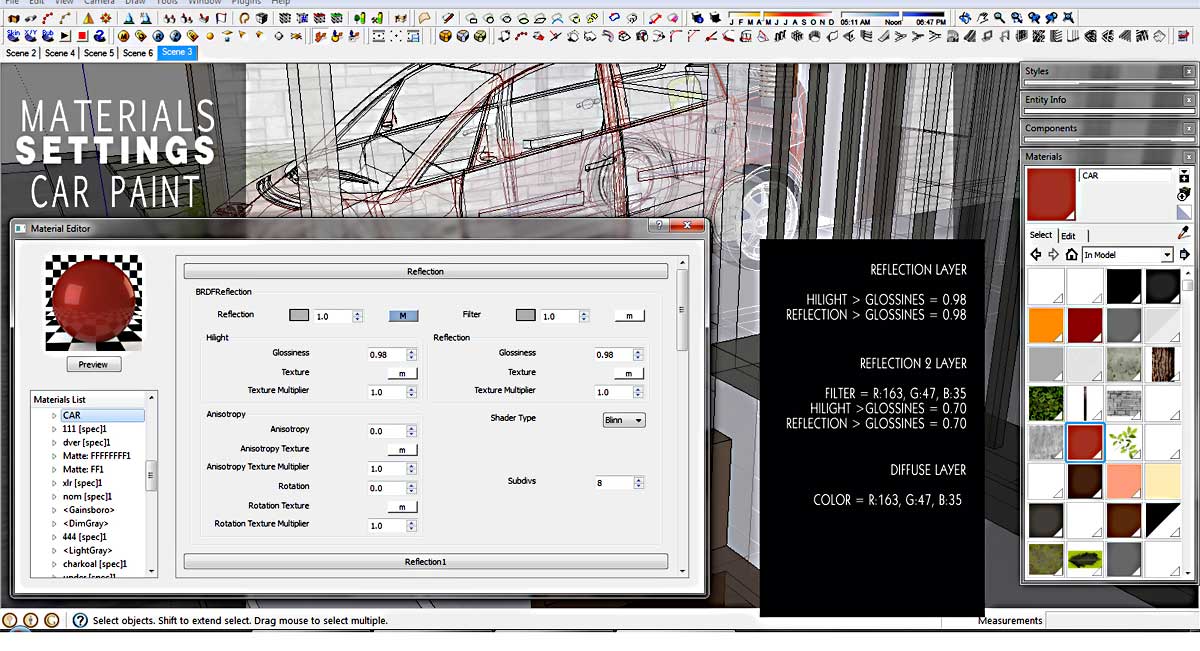
Car paint material settings.
Step 10
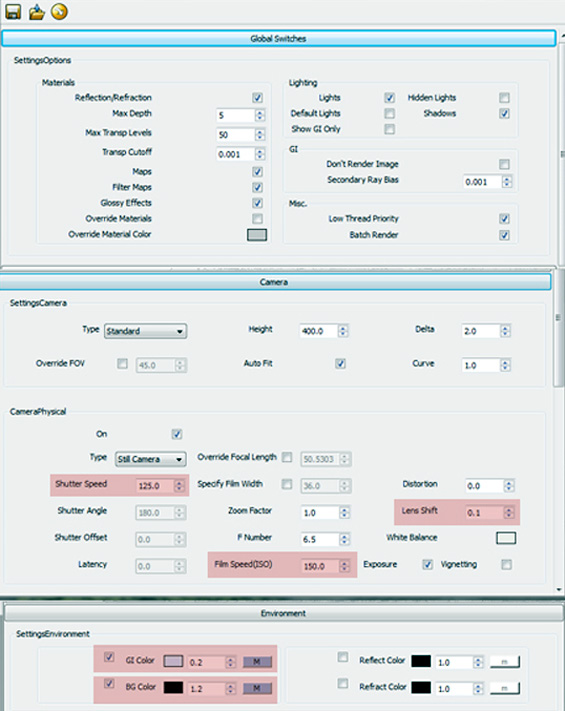
V-Ray render options; Global Switches, Camera and Environment.
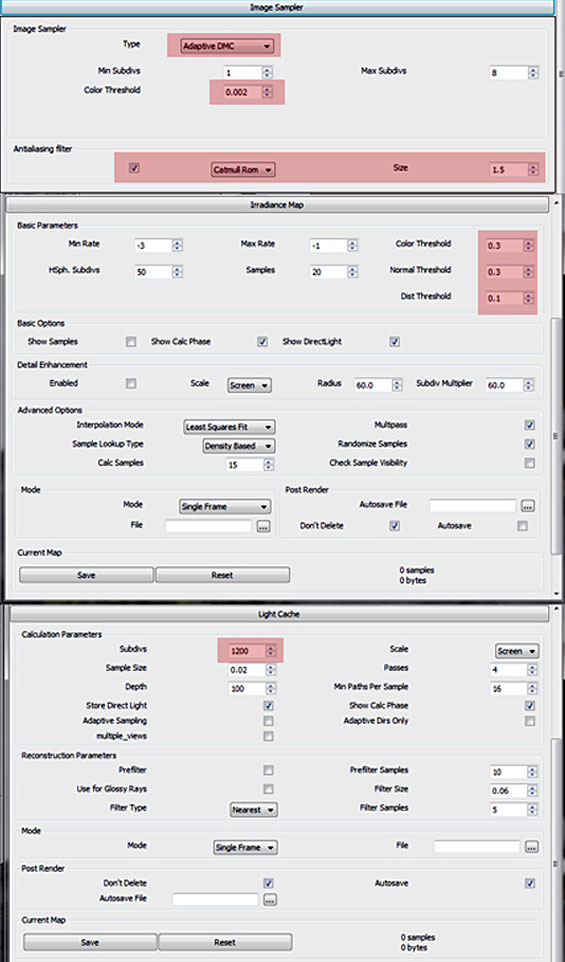
V-Ray render options; Image Sampler, Irradiance Map and Light Cache.
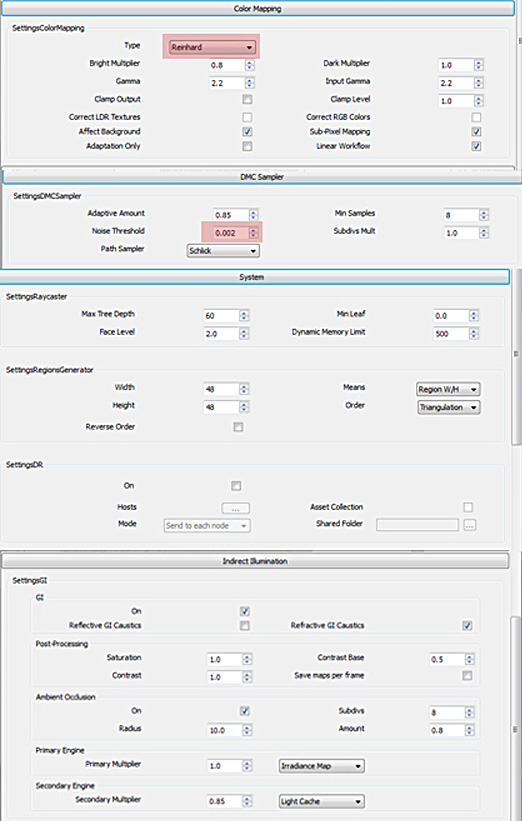
V-Ray render options; Color Mapping, DMC Sampler, System and Indirect Illumination.
Step 11
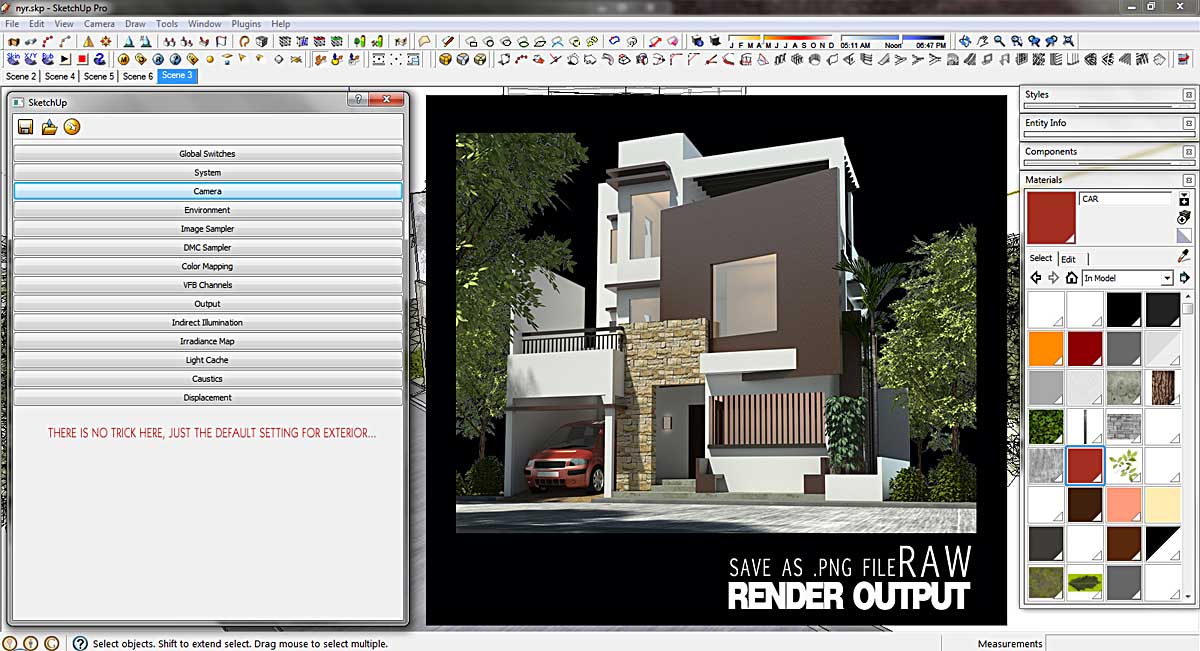
Default setting for exterior and save file as a PNG.
Step 12
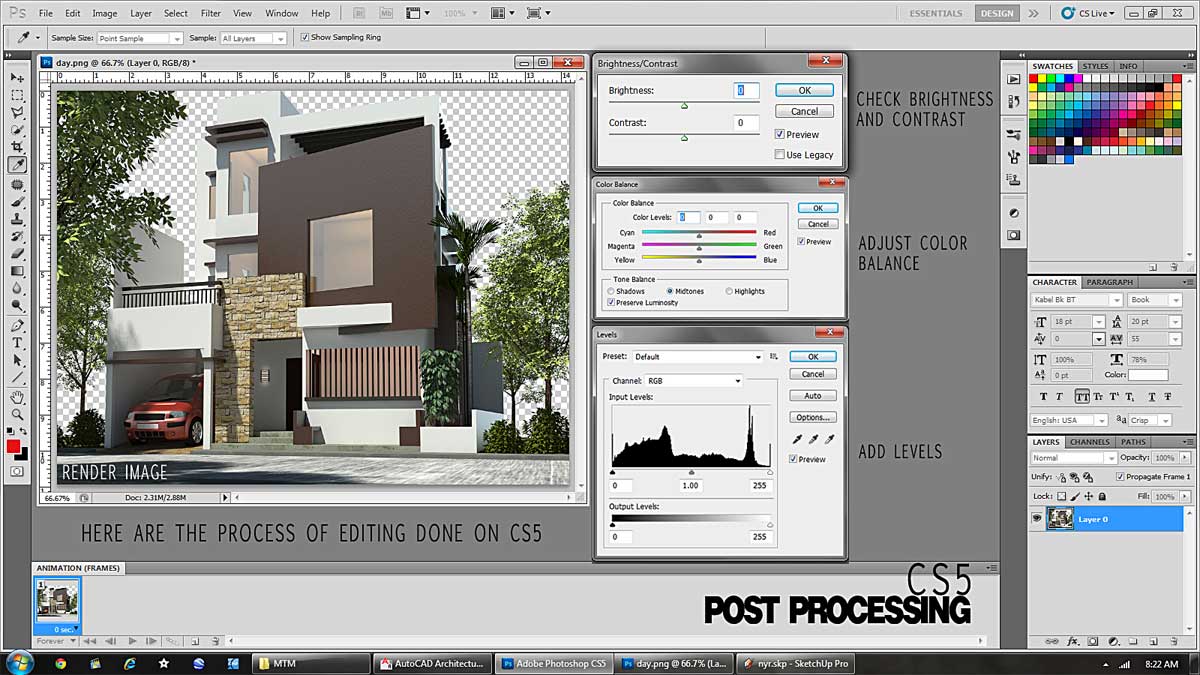
Post Processing in Photoshop. Check Brightness and Contrast. Adjust Color Balance. Add Levels.
Step 13
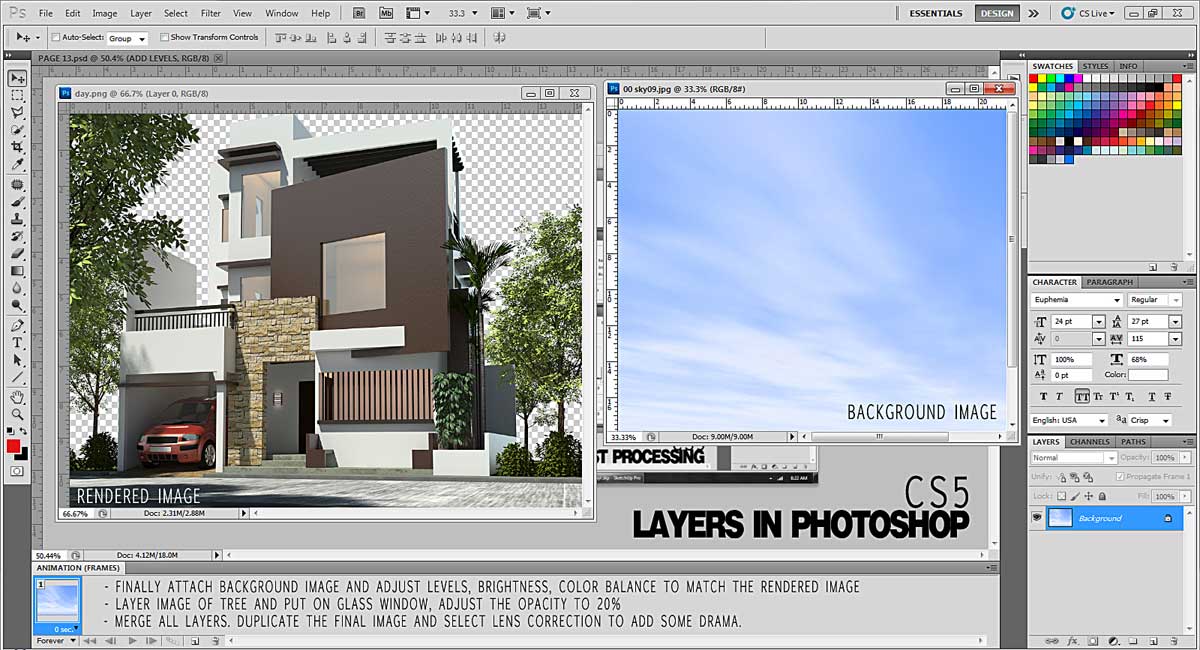
Finally attach background image and adjust Levels, Brightness and Color balance to match the rendered image. Layer image of tree in foreground and add to glass window, adjusting Opacity to 20%. merge all Layers and duplicate final image and select lens Correction to add some drama.
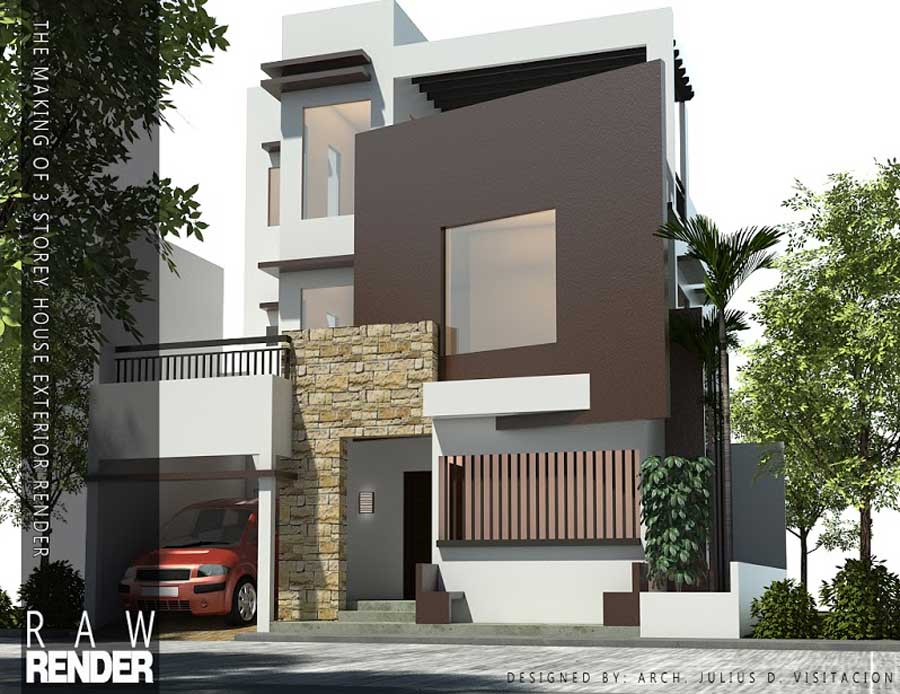
Raw Render
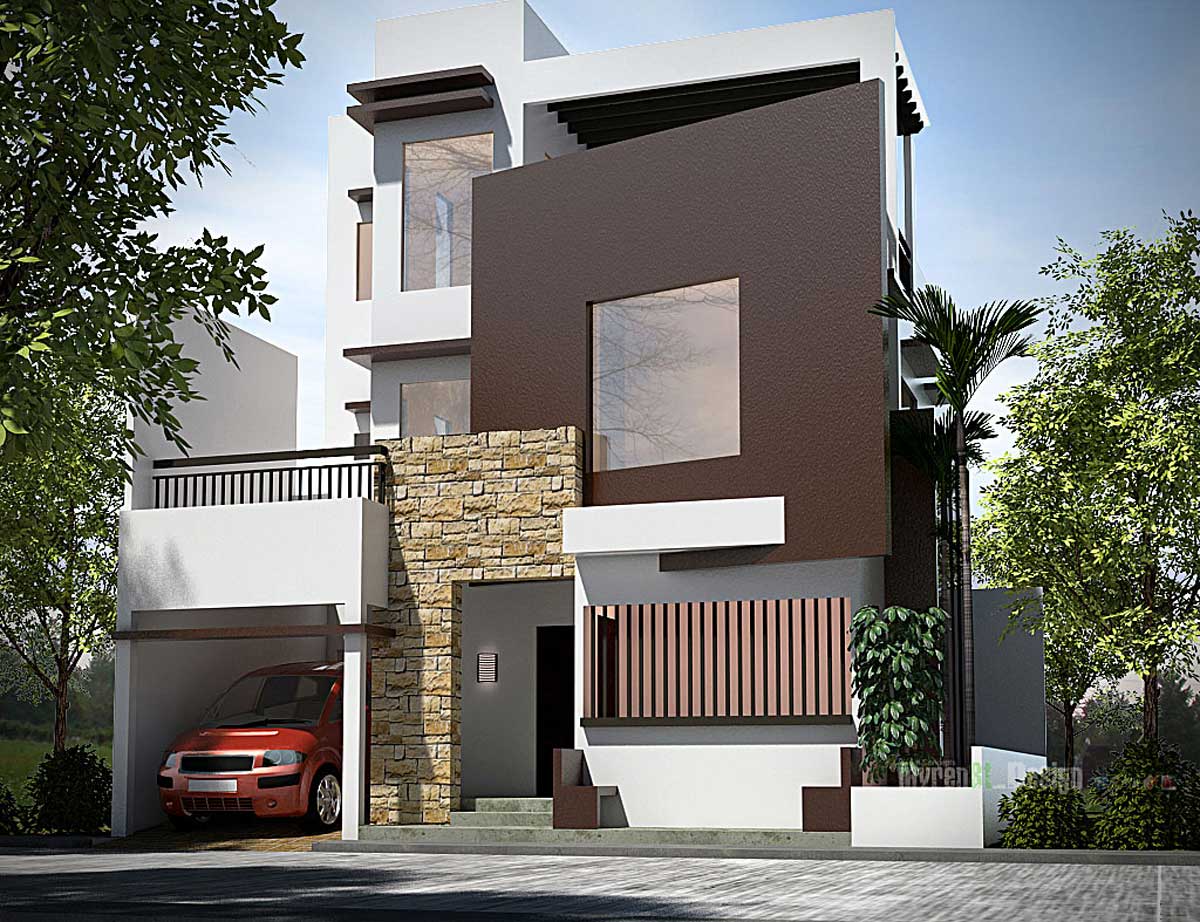
Final Render
Thanks for reading!
Myren June
Find out more about Myren and his work here at his website.



I tried this set up but all i got is a black rendered picture. 🙁 Please help
Very well written training contents, Also it may be possible to educate the students on the kind of Hardware / Graphics card used.
Amazing tutorial.
the reflection on the mirror,
i assume it was done on photoshop.
yes?
Where is the model file?
Hi Bernard
There is no model file with this tutorial, but I am sure you can practice with your own or one downloaded from the 3D Warehouse.
Hope this helps.
this is amazing , keep it up .
Thankyou
Very well-written and informative training tutorial! Thank you for sharing. By any chance you work with/render VR content?
all i got from this was an over exposed render
wow… I just discovered this site.. I’mpressive
I have changed all the settings as you have mentioned. My render has become too slow. It’s stuck in Running RT engine, setting up 1 thread (s). There is only black screen while rendering. Any suggestions?