Fast Way to Achieve a Nice Digital Watercolor Render
 By Majid Yagenegi
In this tutorial we are going to achieve a nice digital watercolor render using SketchUp and the render engine ‘TwilightRender’. We will also do a little post-processing with Photoshop (or your desired photo editor). This effect could also be achieved using any render engine that is based on MLT algorithm that will produce a whole vision of the scene while it is ‘noisy’. I have tried to use ‘noise’ as a possibility and part of the process.
As a painter, I personally prefer NPR rendering. Natural NPR SketchUp renderings are also amazing, but you may need some more artistic ones. If the answer is yes – this tutorial is for you.
Natural SketchUp renders don’t have any light source nor reflections, while Twilight renders could give us those goodies. I especially prefer those settings that are based on MLT algorithm because they will give you a sense of the whole picture, also with noise, which will certainly be sweet for our final result.
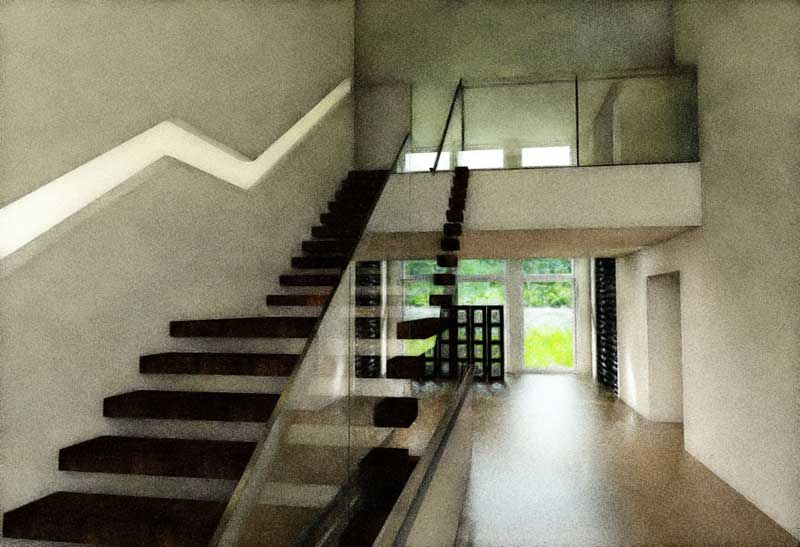
Step 1. After modeling I spent about 10 minutes to adjust materials and lights. Try to keep the main reflective surfaces and ignore minor ones. Then I add a HDRI for the environment and start rendering. Keep the render size matching the sketchup view as shown in the image below.
Step 2. The image below is a 4 minute render (originally 920 x 629 pixel, resized to 800 x 546, to be the same size of pure SketchUp output but with a tiny dots texture).
Step 3. Then I reduced the noise in Photoshop. You may also prefer Neat Image, that will keep the final result more colorized.
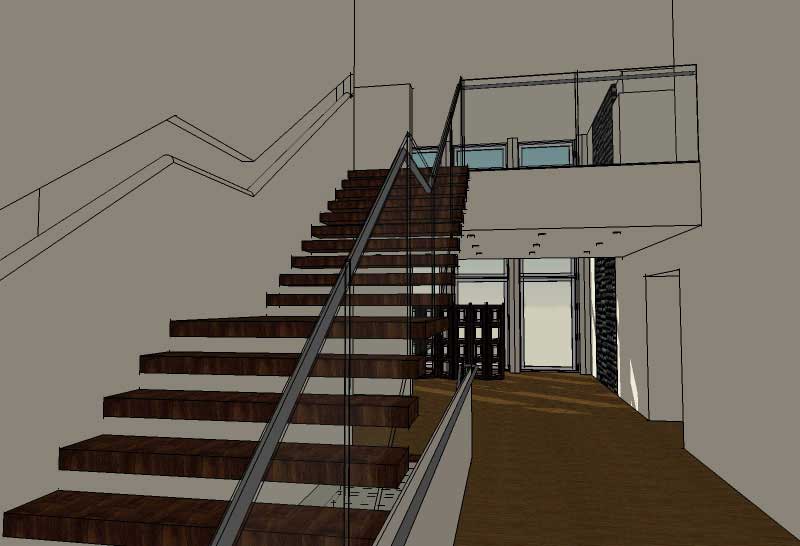
Step 4. Also we will need a pure SketchUp render. Here shown in the image below is an extended edge style with a green-blue dark sky.
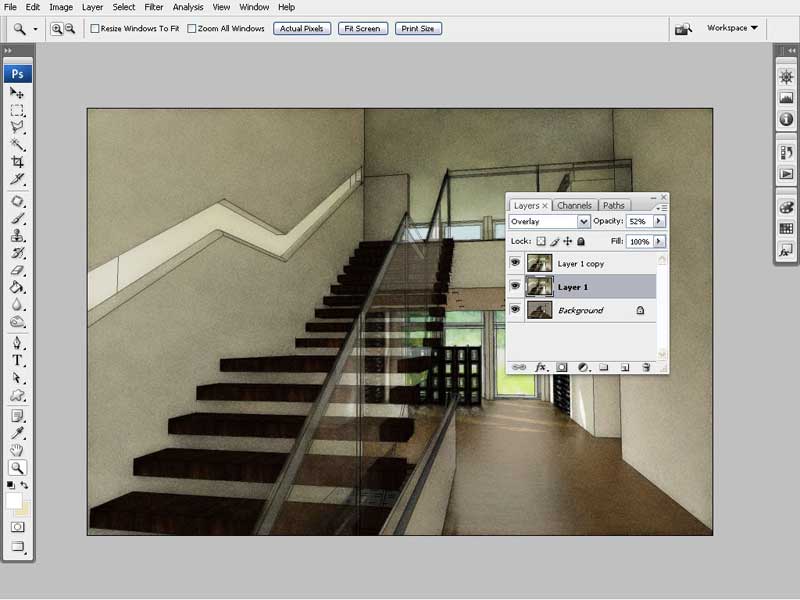
Step 5. Now go to Photoshop (or your desired photo editor) to combine these two renders. The base image is pure SketchUp output . Then put the Twilight render over it and duplicate it so you have 3 layers. Here are layer settings:
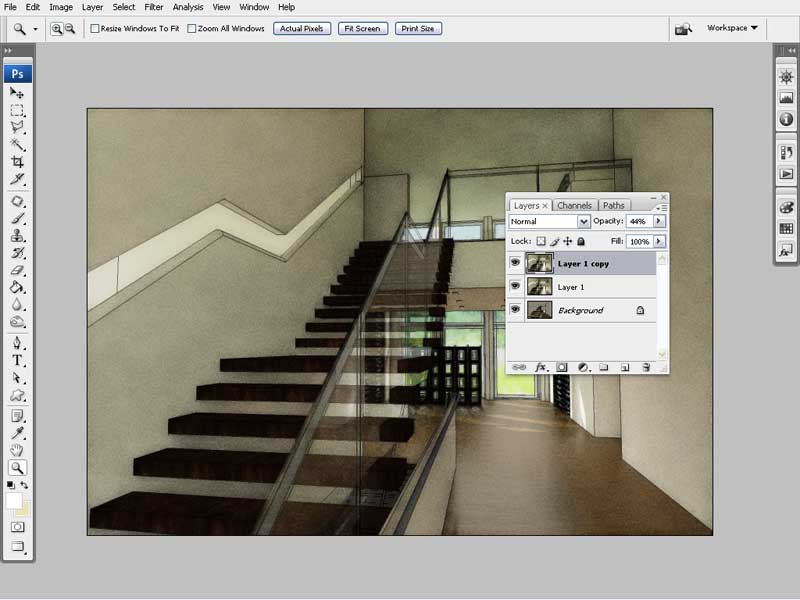
Step 6. And this as well:
In Step 5 it shows the middle image has an Overlay blending mode with an opacity of about 50%, while the upper one in Step 6 has a Normal blending mode with an opacity of about 40%.
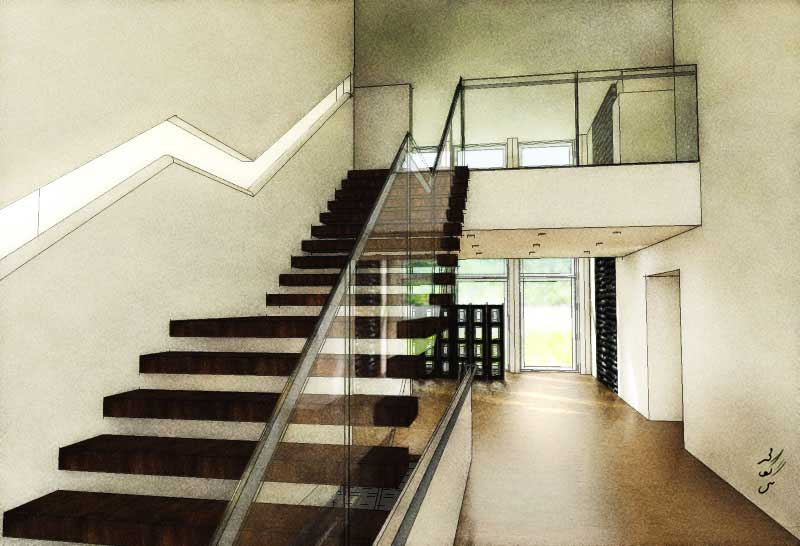
And here is the final result after merging all layers, and a bit of level adjustment. You may also be interested in using a texturizer filter to mimic a more realistic watercolor effect.
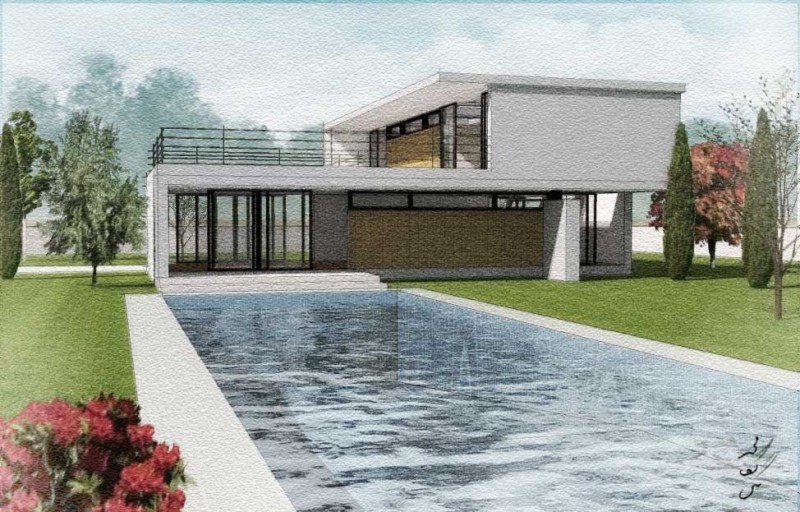
And here is the exterior image using the same technique.
Hope you find this short tutorial useful in your work-flow.
Majid




A beautiful image and such a simple method.
Thanks Majid
Well done and thank you mate!
So simple! I thought there was to be a more elaborate workflow than this!
Proof that simplicity is it’s own reward!
Nice work and thank you for the tutorial.
However, I must have missed something, how do you get the tiny dot texture?
Thanks. Ben
Dear Ben, as I’ve declared in the 2nd paragraph , this must be done using those presets that use MLT, i.e in TWi…go to Tech settings–>3.progressive–>choose preset 03 or 04
cheers
nice image and tutorial mate….going to try it out sometime
a.o.a
nice work
what u advice for the best rendering engine for the sketchup
i am trying podium and vray for sketchup for photorealistic images
but not getting the best results
thanks
dear mate, you can choose your render engine , by visiting their webpages, and surfing the forums..
a.o.a
nice work
i am using sketchup pro 7 i am looking for the best rendering
plugin for sketchup for photorealistic images
what u think about the twilight .. i saw it at ur page
thanks
b.regards
Twilight is relatively new, but the feedback so far is that it’s great. Reasonably priced and easy to use…
great work, thanks for taking the time to do this.
great work,
i have a problem with setting the image size, i make the width 2000 but i keep getting the final image 800×500, how can i make it bigger?
my twilight is licensed!
@AhmaD..might be a problem with your licence? Check with the Twilight Forum
Majid good technique
wonderful. looks very real and professional..
HI Majid
I’m wondering if you did anything different in the exterior scene to get the the water color paper effect This is very apparent in the sky and parts of the wall. Did you use a bump map or anything special in Sketchup. I’d love to see a tutorial for this one.
Thanks
Elliot, yes, I add bump on water material.
soon will have a tut on water material 😉
such a great tutorial! and such a great method!