Making of High Rise Apartment

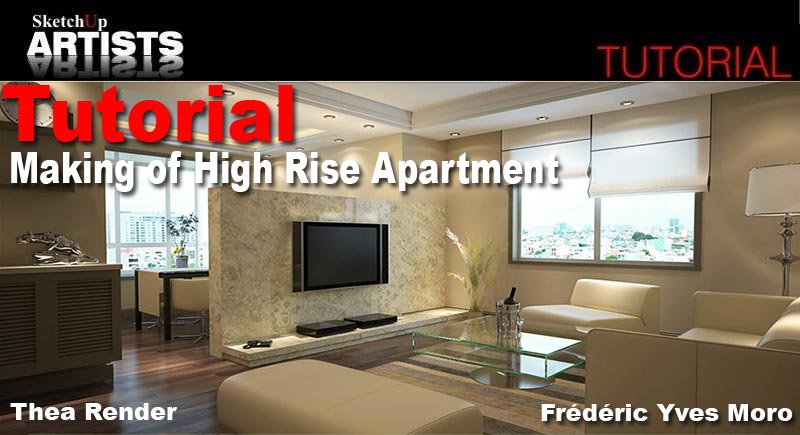
 Frédéric Yves Moro is an experienced professional interior designer and contractor. Originally from France, he now lives in Vietnam with his family. He has recently taken to using Thea Render and it’s SketchUp Plugin, having used Twilight Render for some time in the past, with great success. He has currently been using Thea Render to present his design ideas and final propositions to his clients. Most of the time Frédéric uses SketchUp to design spaces, interiors, walls, ceilings and decoration in his projects.
In this, his latest tutorial, Frédéric shows us how he uses Thea Render in his workflow. Frédéric has also kindly shared the scene in a Thea Render Scene Pack and the actual SketchUp model so you can follow this tutorial, step by step with all the resources you need. You can find these at the end of this tutorial. Enjoy and happy rendering!
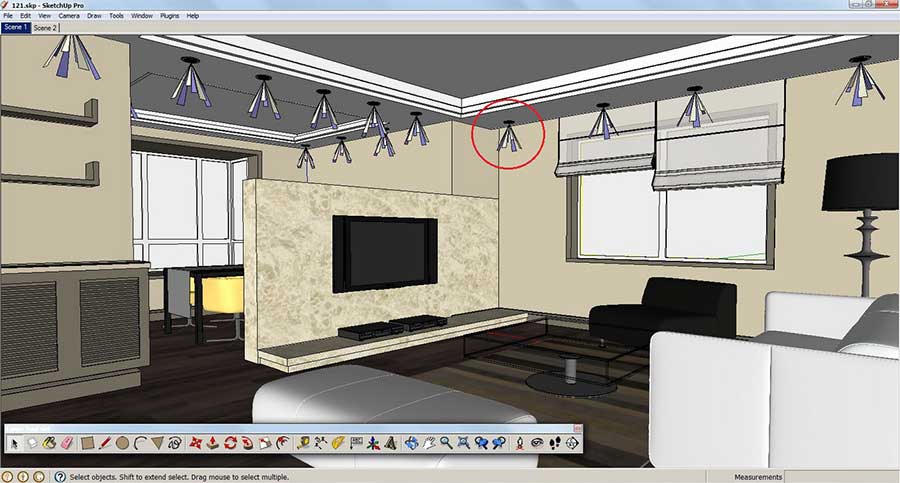
Step 1. Setup the Scene in SketchUp
To make a nice scene and make my job easier I used Dale Martin’s Profile Builder and Fredo’s Round Corner for some modeling and Jim Foltz’s famous Mover plugin for placing components. The spotlights that you see in the picture are made by me and I used the Thea exporter “Lights placing tool”. These lights are components and with the Mover plugin I copied and placed the spotlights where they were needed. At this stage I don’t mind about the sunlight as I will easily manage this after in Thea Render.
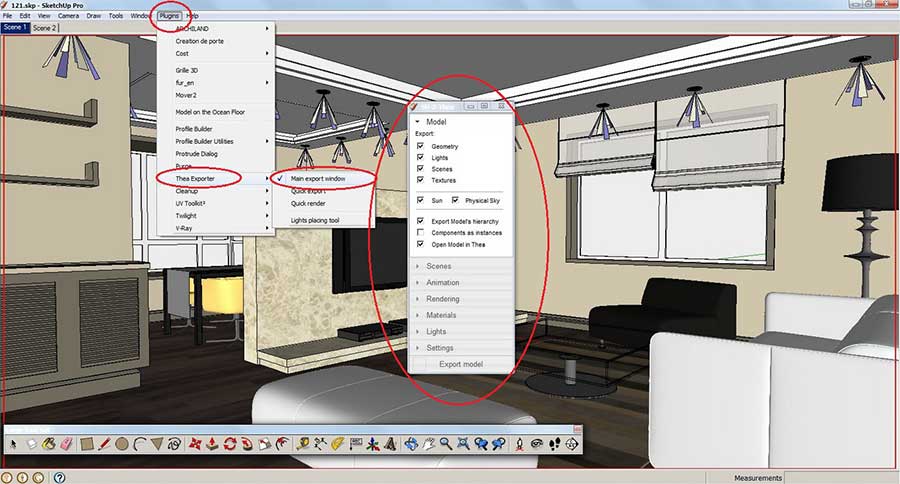
Step 2. Your Scene
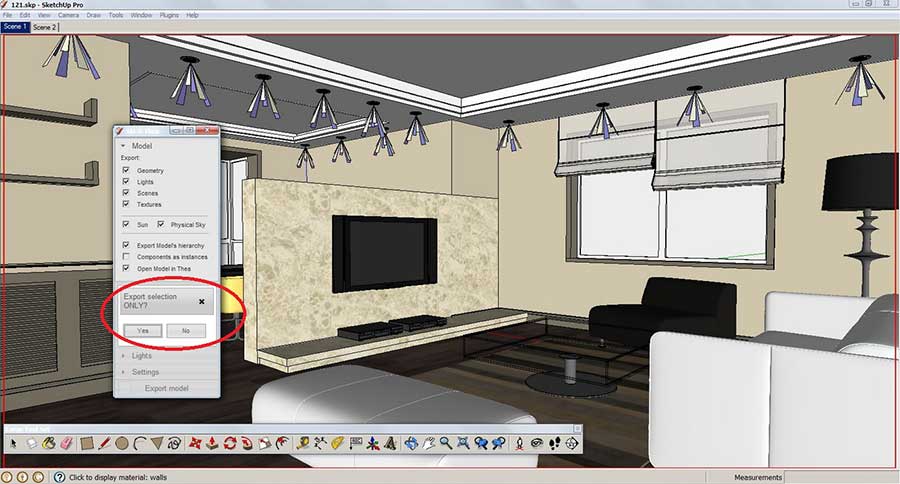
When the scene is ready and you are happy with it, go to Plugins>Thea Exporter>Main export window.
Step 3. Light Setup
First click on lights in the Thea exporter. Select a light in your scene; in this case they are all the same so select which ever light you want. Set Power at 1 and Enabled. Next load your IES file and importantly, under Shadow select Soft and make sure it is Enabled.
Step 4. Camera Resolution
Select Scenes in the Thea exporter. Choose custom and resize your view. I normally render it at 1400/700, but it’s up to you. Go to Scene 2 ( if you are using the supplied tutorial model) and do the same thing. You will see a red frame on the screen, adjust if needed.
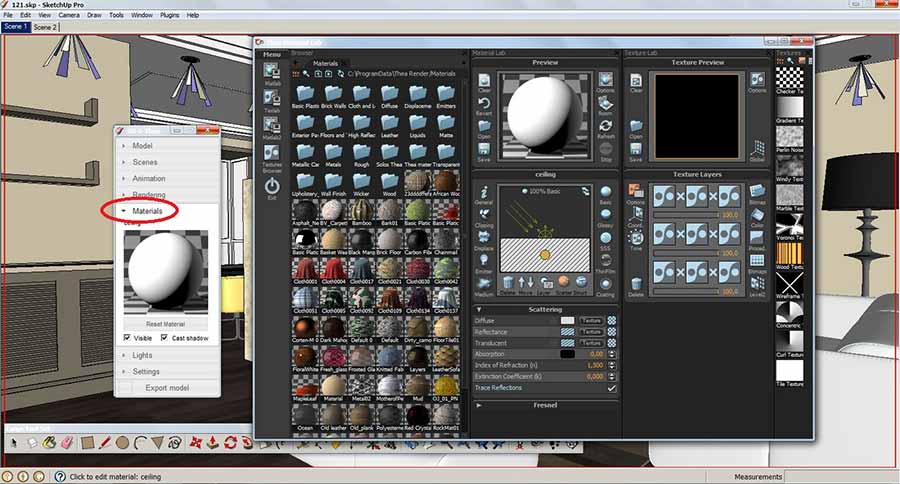
Step 5. Material Editor – Ceiling
Material setting with the Thea exporter window; you can setup the material settings here or after in Thea. In this case, the ceiling material is a pure white matt paint, so with the materials tab selected in the Thea exporter window, I double click on the ceiling in the Sketchup model and the Thea Material Lab opens. I leave this material like it is. You can repeat this on every material in the scene. I only use Diffuse, Bump Map, Reflectance and Translucent on my materials if needed. In Thea you can make crazy things as Thea supports multi-layer materials.
Step 6. Export Scene
Once you have edited your materials, click on Export model, select a folder for your scene to be exported to. Thea render will open automatically. For this particular scene it takes about 1 minute.
Step 7. Rendering – The First Step
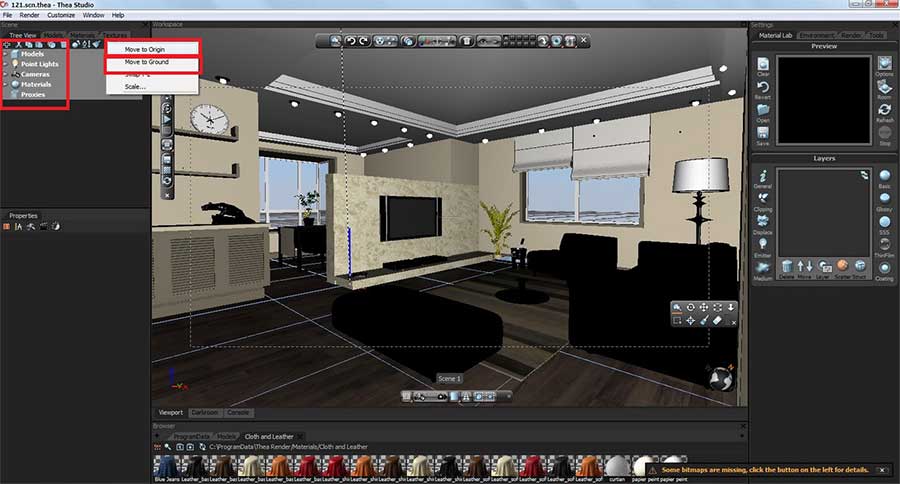
The first thing that I do when I have exported the scene is to select Move to Origin and Move to Ground the entire model. It will be easier after to merge some decorative 3ds models into good positions, as you can see already in the image below.
Step 8. Material Editor – Wooden Floor
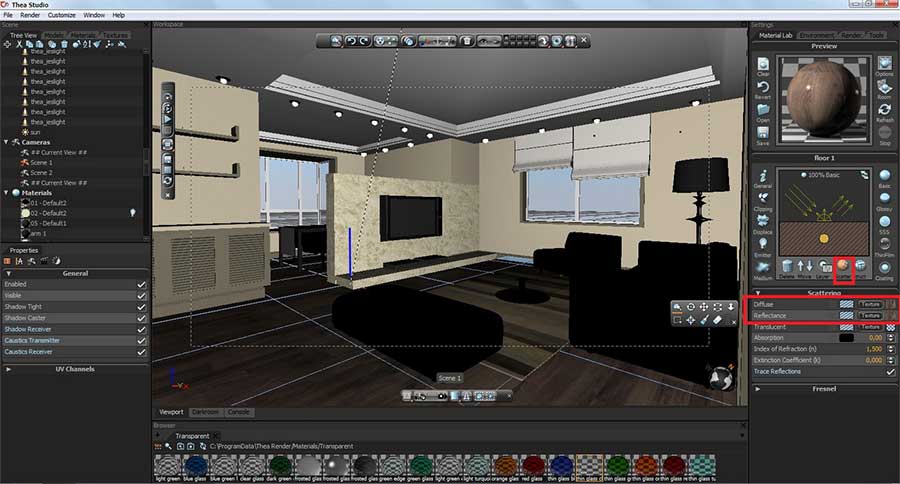
As I say previously you can edit your material in SketchUp in the Thea exporter window, but I prefer to edit it here in Thea Render. Don’t be put off by the numerous settings that you see. I really use simple materials. In time, you will eventually see that it is very easy to use. As you can see I want to edit the wood floor, I have the diffuse already, I add the same map for the reflectance (It works well with this).
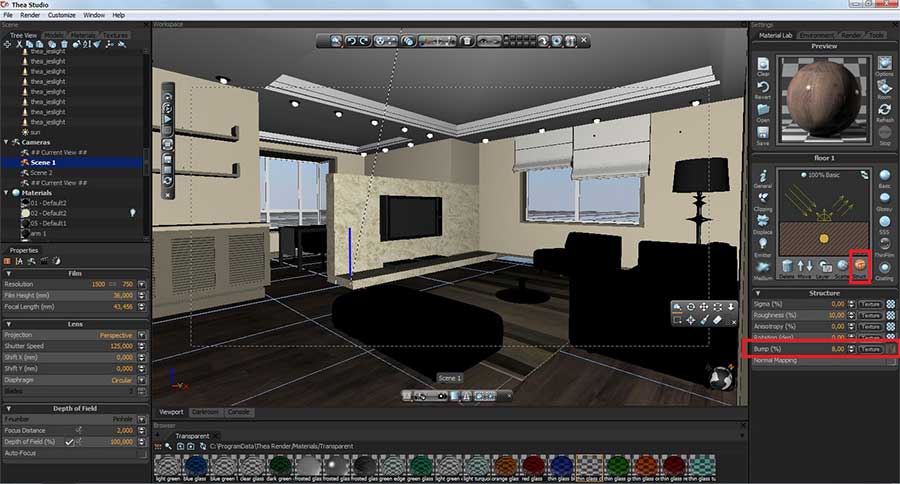
Step 9. Material Editor – Wooden Floor Bump
I need some bump on the wood floor so I add the same map struct-bump. And that is it for the floor.
Step 10. Material Editor – Leather Material
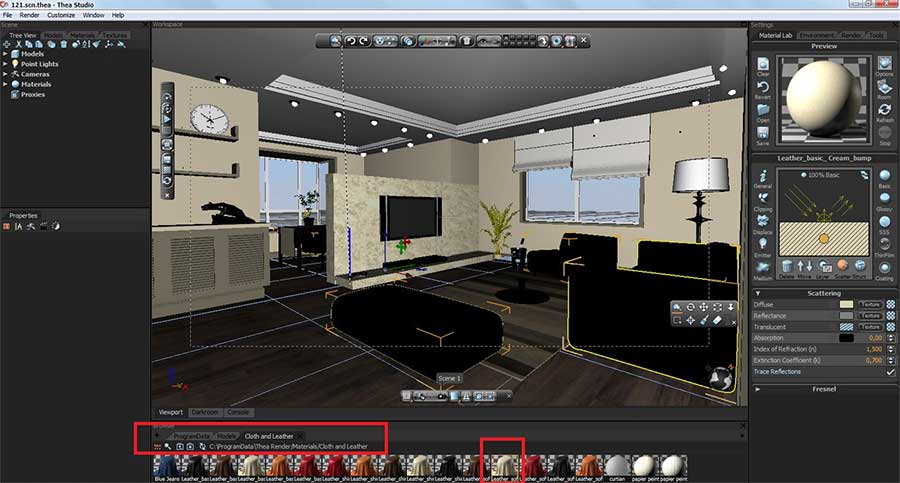
Thea Render comes with a lot of good basic materials (thanks to the developers). In this case I want a clear leather material for the sofa, the armchairs and dining chairs. I select the models in the scene pressing the Control key. I then apply the leather material by clicking on the material in “Cloth and Leather “ library.
Materials – Tip
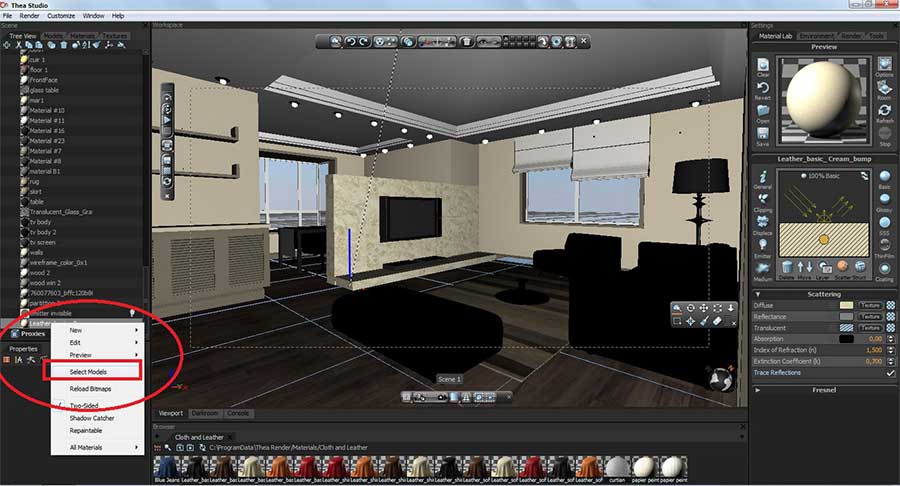
This is very practical and worth remembering. In the Tree View on the left, you can find a material in your model by clicking on the specific material you want in the Tree View. You can then select all models in the scene which have that same material by then right clicking on the highlighted material you chose in the tree and then selecting Select Models in the context menu. It is very easy, better than clicking in the actual scene and sometimes missing one…
Background
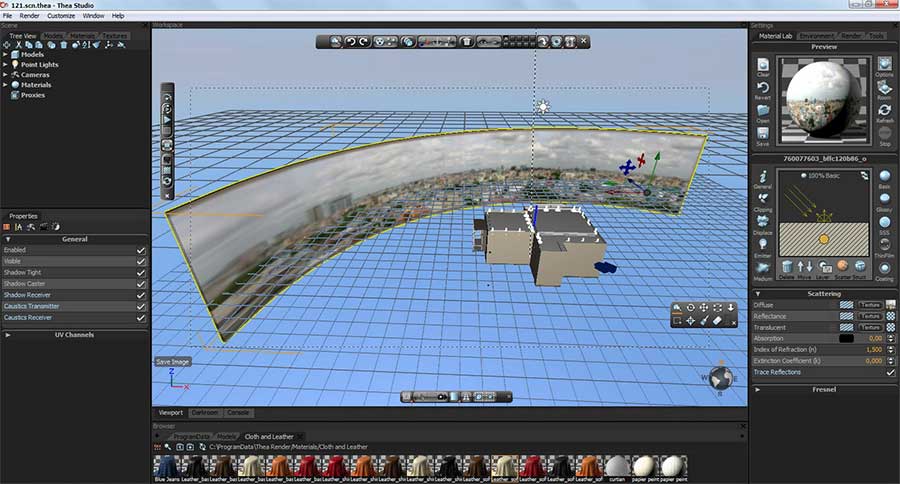
With Thea Render, in the Environment option, you can use Background Mapping, Flat or Spherical, HDR, there are numerous choices in doing this. For this background, in SketchUp, I made a curved plane with a panorama that I found on the web. I found this to be more practical for me in finding a good position for the background.
Step 12. The Background – Four View Interface and Model Library
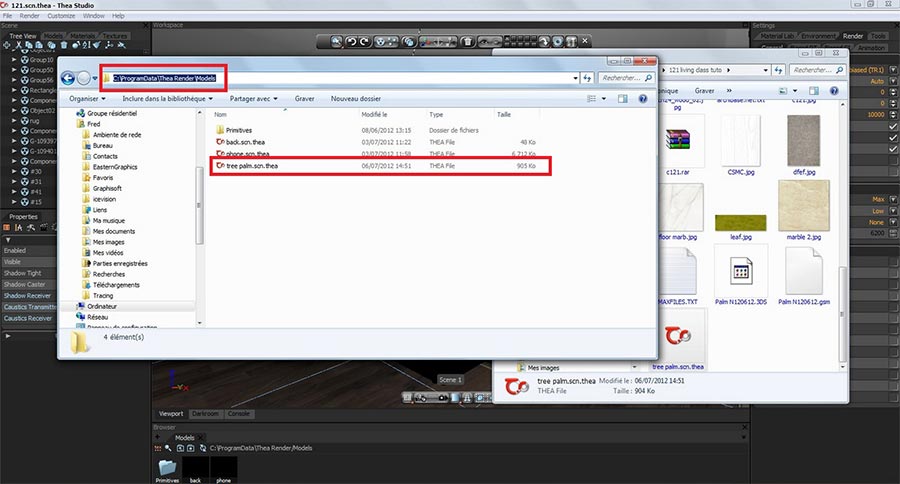
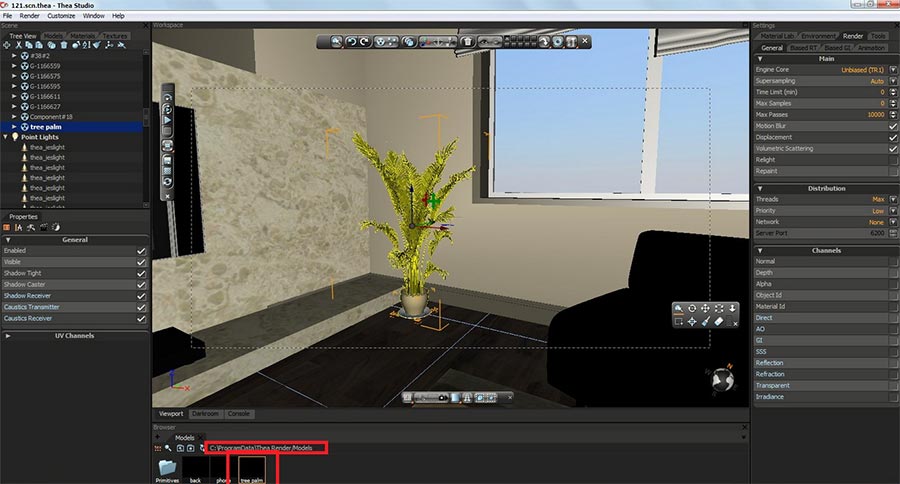
By clicking on the 0 key, you can have a viewport with 4 views, it’s very good for putting a model in a good position. As you might notice in the browser I have selected the Model. For me it is one of the most important advantages of Thea Render, that being once you have a nice model, for example a nice piece of furniture, or whatever you like, you can put it in the Thea Model Library for future use. Just put your model in – C:\ProgramData\Thea Render/Models. It’ s the same thing for a materials, once you have made a new material, you can save it in – C:\ProgramData\Thea Render/Materials. After working for a month, I now have a huge material and model Library in Thea Render….very useful and time saving!
Step 13. White Material
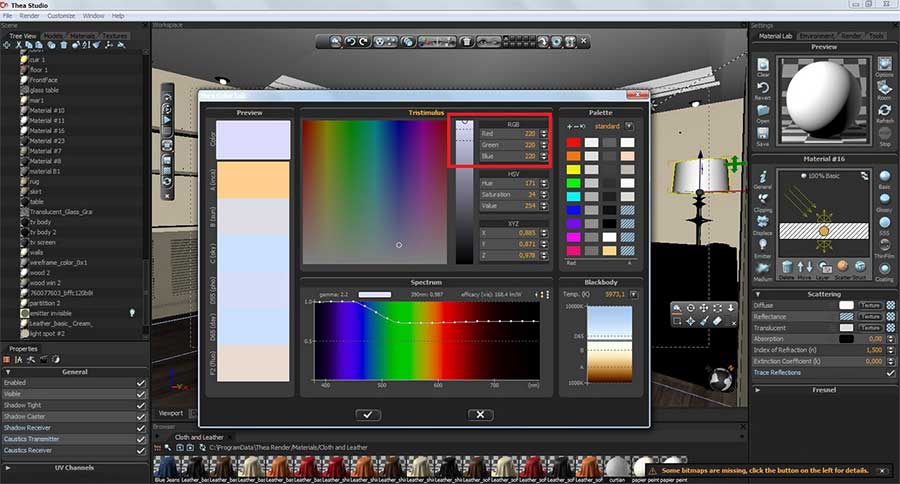
This is very important, for white material, the RGB amount must be set at its maximum, that being 220-220-220. The material will look much cleaner in the render.
3ds Models – Tip
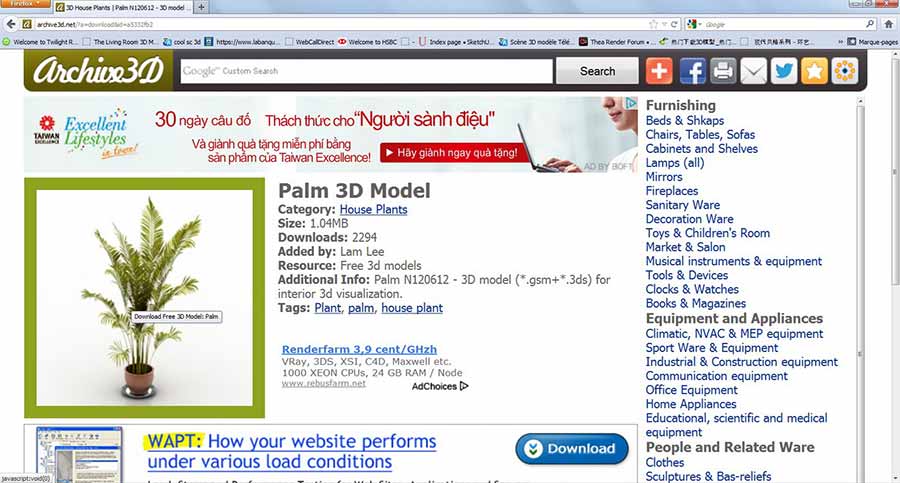
As we know SketchUp has its limits when it comes to high poly models, so I usually get my models from (sometimes sofas, furniture etc) and merge the models into the scene. I usually use Archive 3d.net for my source of 3ds models. For example, the palm tree in my scene was sourced from this site and downloaded into the scene.
Step 14. Merge 3ds Model Into Scene
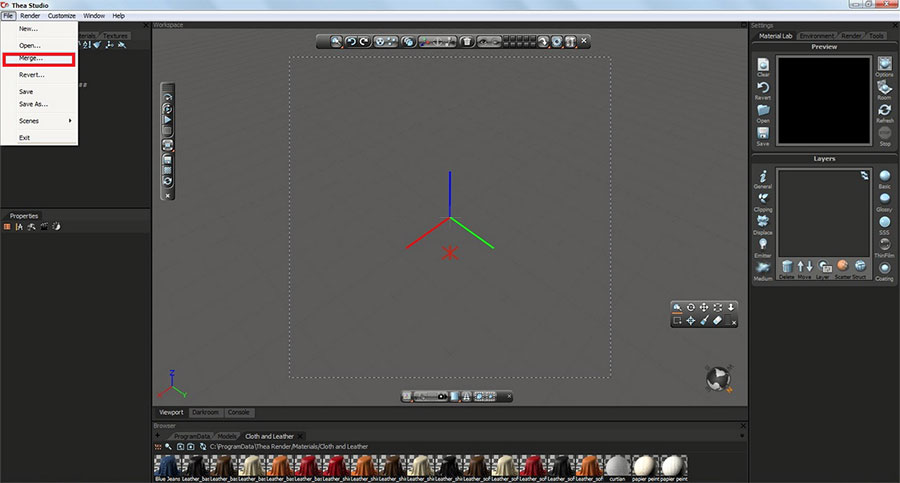
I open Thea Render and click on Merge to import the 3ds file.
When you merge a 3ds file you have a lot of options to choose from as shown in the image below, the process is better described here: Thea Studio Overview.
Step 15. 3ds Material Setup
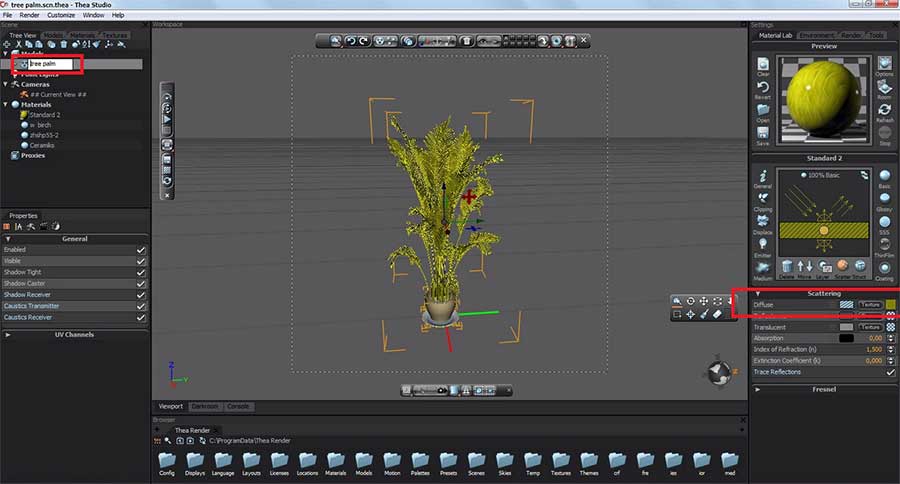
I next setup the material for the imported 3ds model.
Step 16. Save Model
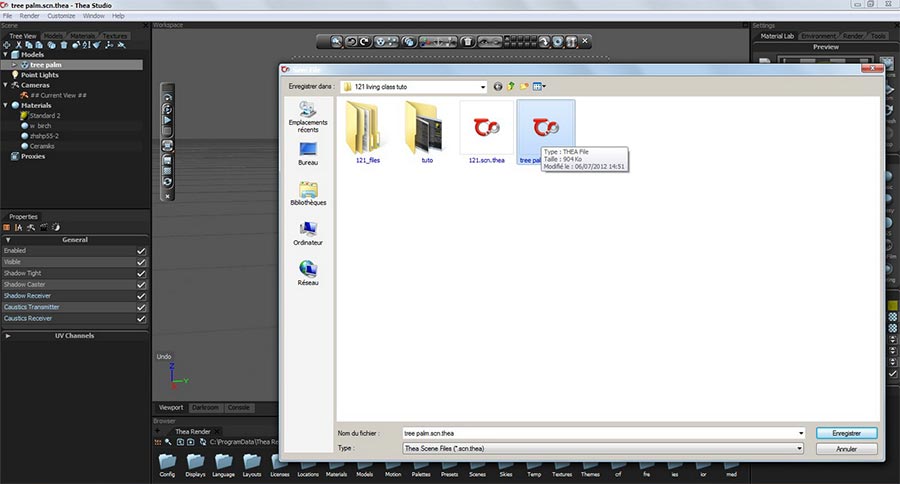
I save the 3ds model as a Thea Render model.
Step 17. Add Model to Library
Add this model to The Thea Model Library C:\ProgramData\Thea Render/Models.
Step 18. Add new Model to Scene
As you can see the tree palm is in the model library, by double clicking on it, it merges in the scene. I can place it where I want.
Step 19. Sun Position
On the left, in the Model Tree View, I click on the sun and it appears in the viewport. I place the sun where I want. I leave the parameters as they are, no change is needed.
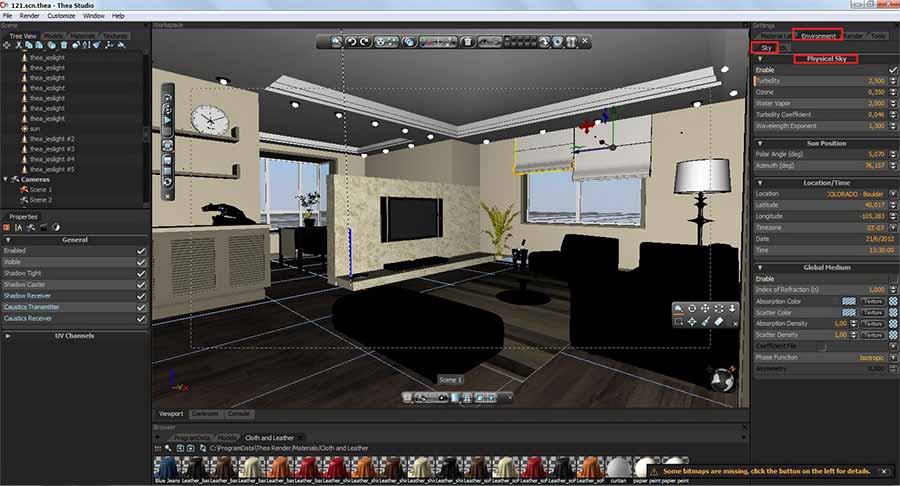
Step 20. Physical Sky
On the right under Environment settings you can find the Physical Sky. You can change the intensity and many other parameters to your own personal choice. Again, I leave it as it is, no changes.
Step 21. Real Time Preview Render
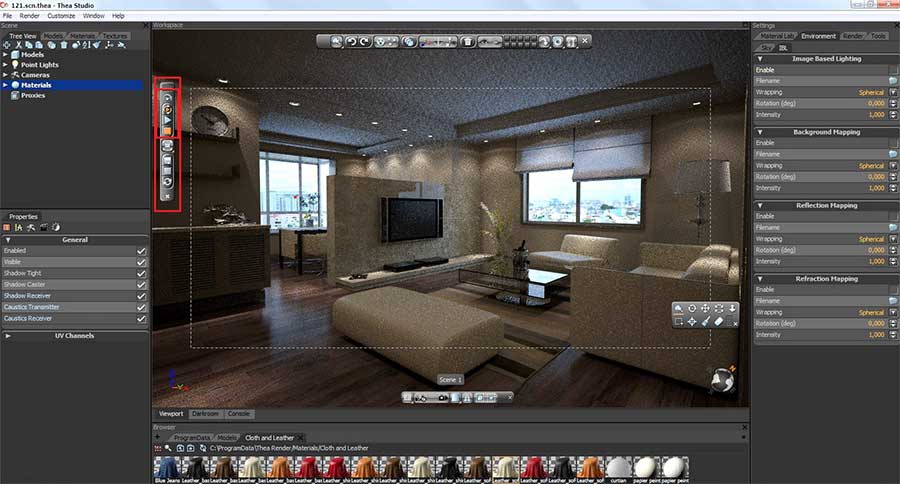
Another useful aspect of Thea Render that I like, is after adding some more decorative items, you can have a real time preview render in the viewport. The interactive preview render works quickly and is superb for quickly adjusting lights and materials. In less than 3 minutes you can figure out what your render will look like. Another good point in Thea Render.
Step 22. Render
It’s time to start the render. I go to the Darkroom, on display I change some settings on the camera, I choose the render setting, TR1 (for my renders I always use the TR1 preset – unbiased mode) and then render…
Step 23. Render Time
I let it cook until at least 50 passes. It will take about 4 hours on my laptop, but with a good computer, 1.5 hours.
Step 24. Post Pro – Noise Filter Settings
Once I have my render, I reduce the noise a bit with Neat Image (as I would with my output renders using Twilight Render).
Step 25. Final Post Pro
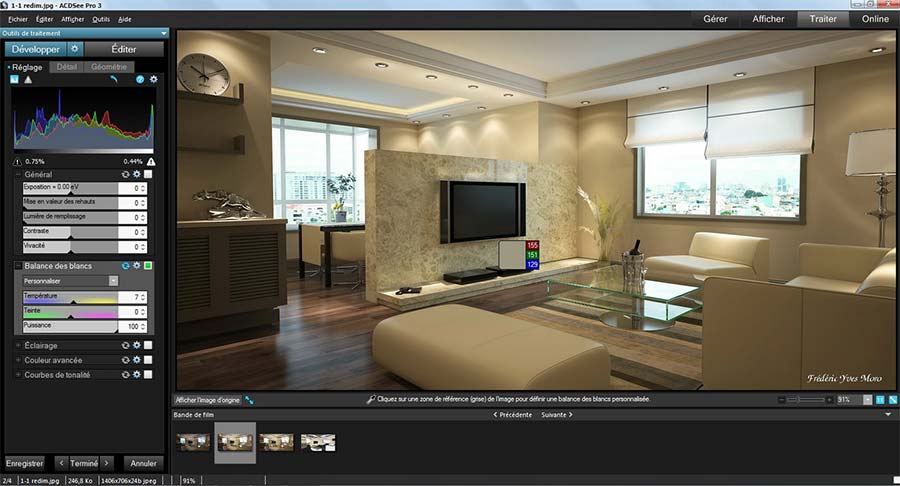
I use Acdsee pro to change the temperature a bit , sharpen a little, add a frame and signature. You can of course use the photo editor of your choice (Photoshop for example).
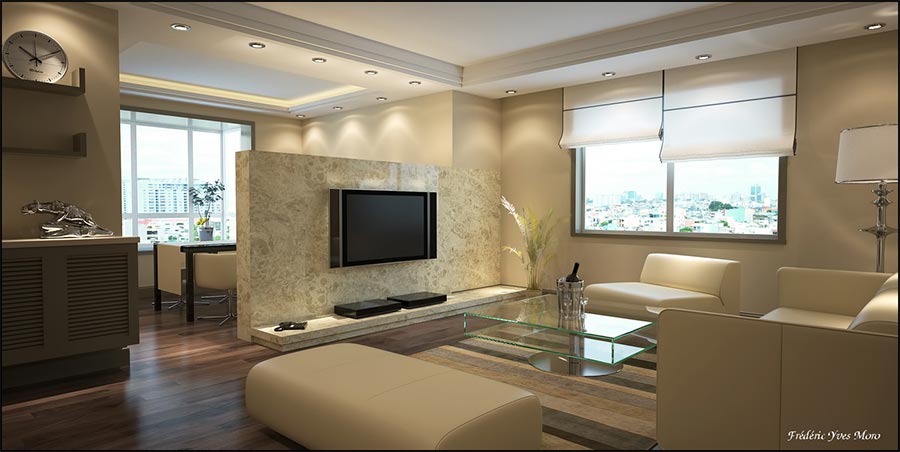
Final Image
Thanks for reading!
Frédéric
Tutorial Downloads
This is the link to Frédéric’s Twilight Render tutorial here at SketchUpArtists.









Thanks for sharing your workflow and download pack.
I saw some of your work in Thea site. It is really impressive
i wish i can match your calibre! sketchup is in my blood since
ver3 i just love this app and thea as well.
Cheers
i’ve always admired you and inspired from you dear fred
super great, lovely and exciting tutorial 🙂
thanks a million
How to edit, create, setup a point light ON thea or inside the thea render? thx.
Thank you very much