Shaderlight – From SketchUp Model to Finished Render

By Kate Marshall
The Shaderlight plug-in for SketchUp lets you render great images from inside Google SketchUp. As a fully integrated plug-in, Shaderlight lets you see your image ‘develop’ as you work, interactively updating every time a change is made to any SketchUp scene. As this is the beta release, the full release will be available this September (2010) and will contain real-time MELT changes. What this means is you will be able to edit Materials, Environment, Lights and Textures in real-time without having to re-render. This tutorial is a great way to get started with Shaderlight.
This tutorial shows you how to get from SketchUp model to finished render in five easy steps using the new Shaderlight for SketchUp Beta plug-in. With no complicated settings to master, any SketchUp user can achieve great results with a minimum amount of fuss.
1. Starting your render
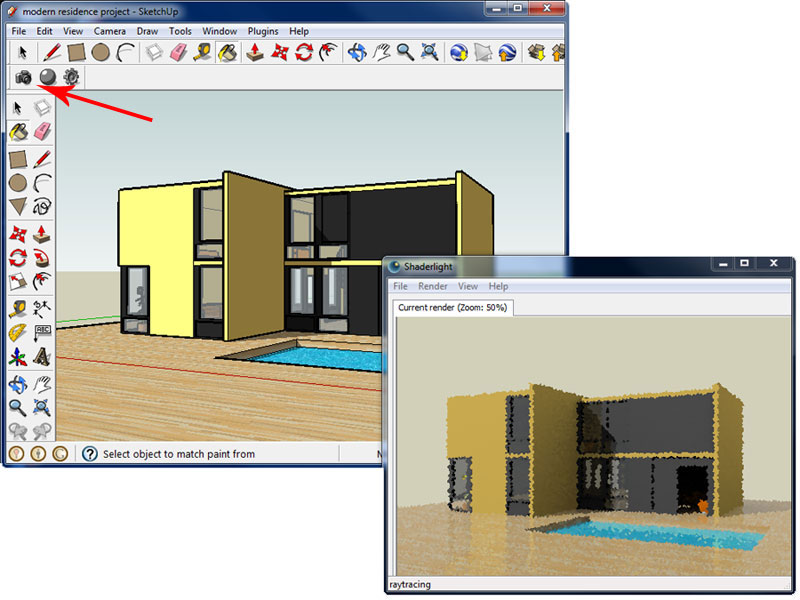
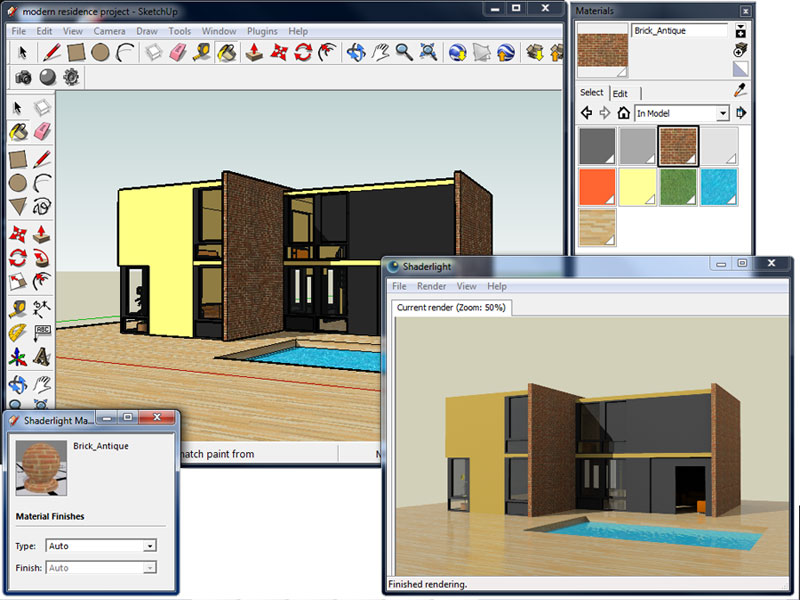
With Shaderlight installed, you will see three buttons appear in your SketchUp window, start render, material editor and render settings. Click on the camera to start your Shaderlight render and you can see it begin to progressively refine in the Shaderlight render window.
Shaderlight for SketchUp fully supports SketchUp’s material library so as this model already has some SketchUp materials applied, Shaderlight automatically converts them in to fully textured Shaderlight materials as well as applying automatic lighting using SketchUp sun, sky and shadow controls.
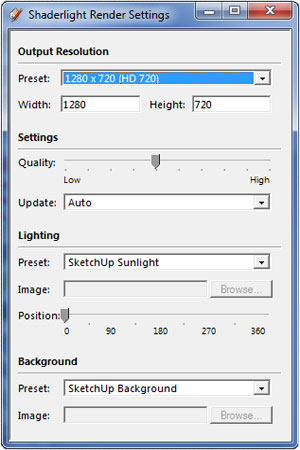
Shaderlight Render Settings
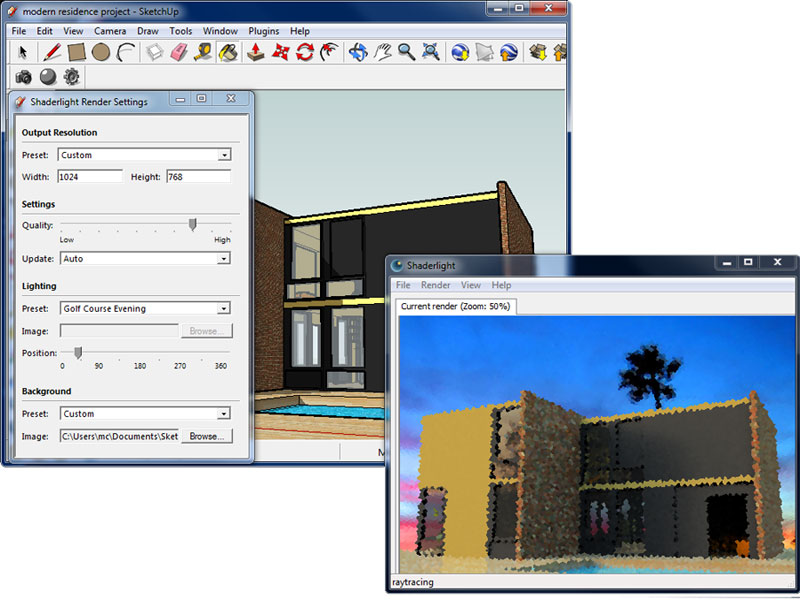
The Shaderlight settings menu controls render resolution and render quality. The Shaderlight window will show your render at the resolution specified and quality setting.
We’re rendering our image at 1280 x 720 and at a medium quality setting for quick results. We do recommend that you choose a medium quality setting when setting up your scene and then when you’re happy, increase the quality for a production ready image.
With auto updates switched on, the Shaderlight render automatically updates every time a change is made to your SketchUp scene.
2. Applying Materials
Apply materials to your model using the SketchUp paint bucket, just as you always do. You can then use the Shaderlight Material Editor to add different finishes to all your “in model” materials. To make it even easier, Shaderlight already sets “Auto” finishes to all of the materials in the Google SketchUp library so you don’t have to do a thing to get great results.
We’ve applied a brick finish to a couple of the walls in this model which, with bump maps automatically applied, adds subtle relief to the brick texture for increased realism.
With the auto material applied, you can fine tune your material finish by using the simple drop-downs in the Shaderlight material editor. The Shaderlight material ball will show the finish you’ve selected in real time.
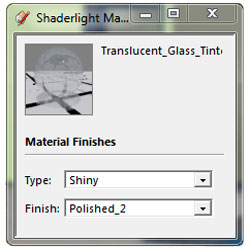
Material Finish
So that we can see inside our model through the glass in this scene, we’ve selected the translucent glass material from the SketchUp material library and then adjusted the finish by selecting shiny and polished from the drop down menu to add some reflection to the glass.
Using the left mouse button and scroll wheel to zoom and pan around our image, we can focus on specific areas of the render to make sure we’re happy with the settings applied.
3. Setting Lighting
The lighting and grey SketchUp background need to be adjusted so that any reflective materials such as the windows in this scene have something to reflect.
The beta version currently supports SU sun and sky and HDR lighting however more advanced lighting features will be included in the full release of Shaderlight for SketchUp later this year.
In the lighting section of the settings menu you can choose from a selection of preset HDR’s or add your own. We’ve chosen ‘Golf Course Evening’ for our render to create a quick outdoor sunset effect. As we rotate the HDR using the position control on the settings menu you will see that the shadows will automatically update.
The beauty of Shaderlight is that you don’t have to wait for your render to finish or re-export your scene if you want to change anything. You can continue to make adjustments to any part of your scene and your Shaderlight render will automatically update.
4. Adding a Background
Using the render settings menu you can choose to a background for your image.
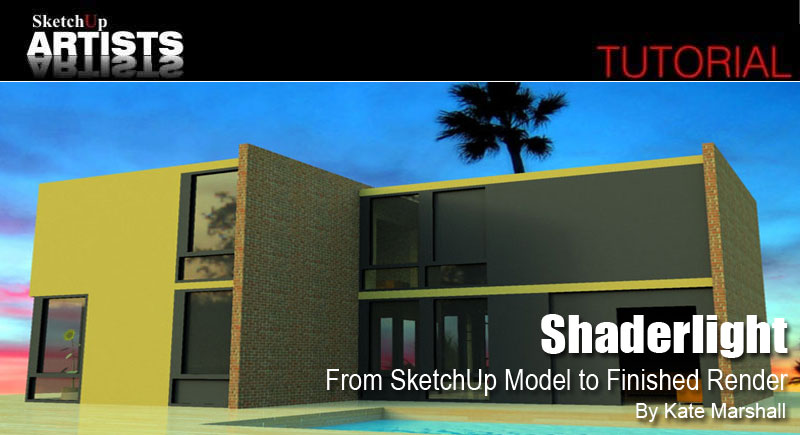
With options for SketchUp background color, IBL environment or custom background it’s simple to apply a background image to your render. For our beach house image we’ve applied a nice sunset image. We can then re-size and position our model in the scene and it will interactively update until we’re happy with the final shot.
5. Final Render
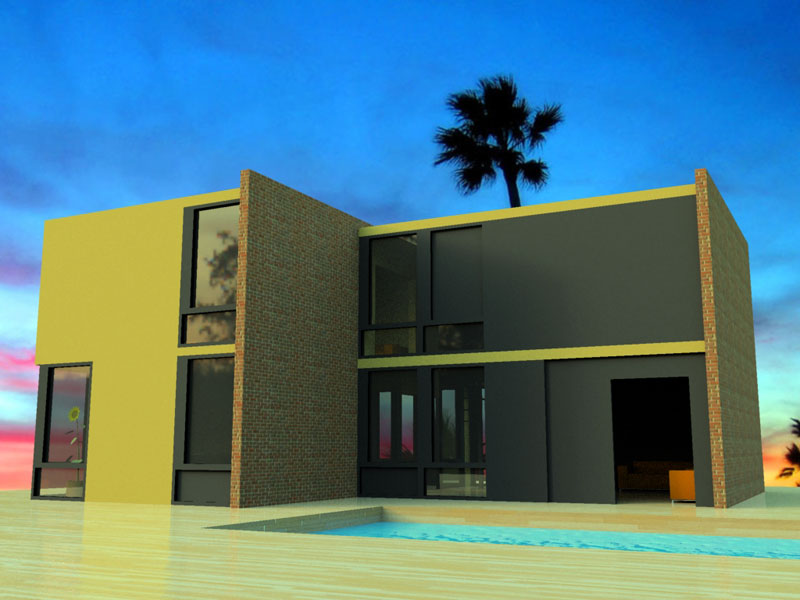
With our render complete we can zoom in to 100% to see our final image at full resolution.
The beta release of Shaderlight for SketchUp is available to download from www.artvps.com
Thanks for reading this tutorial on the basics and I hope you found it useful.
Kate Marshall
Resources
Shaderlight for SketchUp help manual PDF can be found here.
Here are a couple of video tutorials from the Shaderlight website to also help you get started.
Finally here are a series of short 1 minute videos outlining the basic features of Shaderlight for SketchUp, these can be found here on the Shaderlight website and are constantly being updated.




Just wanted to say I just stumble upon this. I am a sketch up user, that has not yet experienced pov ray, or other light rendering aspects of sketch up. I use a mac and am interested in trying this out. Do you know when you will have a mac version available?
Also, what is the price for this plug in. I tried the plugin on a pc and it seems the free beta version is not a very good quality, or I am doing it wrong. Can you let me know this info…much thanks,
A mac version I am sure will be happening in the near future but they are working on getting the Windows version sorted out first. This is only the beta and will have many more features in the finished version due out this September and priced at $199. You can find out more at their website:
http://www.artvps.com/
Its nice to render with Shaderlight and its very easy to finish model of SketchUp particularly with Shaderlight.
como se descarga o otra forma de obtener shaderLight para poder utilizar
gostei….
i just run in this website, im a fan and a new user for sketchup and its alway a big thing for me evry time i think how can i render a quality rendered sketchup model. i have to ask how can a buy this plugin?
I’m not sure why but this site is loading incredibly slow for me.
Is anyone else having this problem or is it a issue on my
end? I’ll check back later on and see if the problem still exists.
We have had to do some recovery work, so all should be well now.
its nice to render with Shaderlight