
The Making of Carillon: a digital watercolor tutorial
 In this tutorial, we will explore the different techniques of applying watercolor effects in digital rendering using a different combination of different software. Actually, this is my first attempt to try a non-photorealistic rendering style and I found it very effective to apply this style in composing such architectural landscape visualizations. Software used: SketchUp, Photoshop, FotoSketcher and Picasa.

SketchUp
1. First, view your models in perspective mode, then adjust the scene based on your preferred point of view.
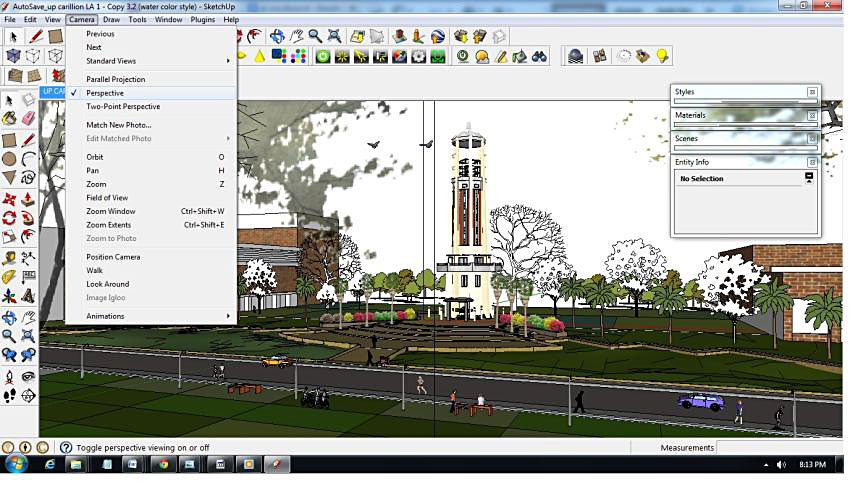
Choose Your View
2. Set-up your SketchUp model with default styles such as shaded with textures and edges. Enable fog and shadows in order to accentuate the vanishing point of view. Save your scene: view>animation>add scene, and click create scene. This will enable us to get back to the same view and settings you created if needed.
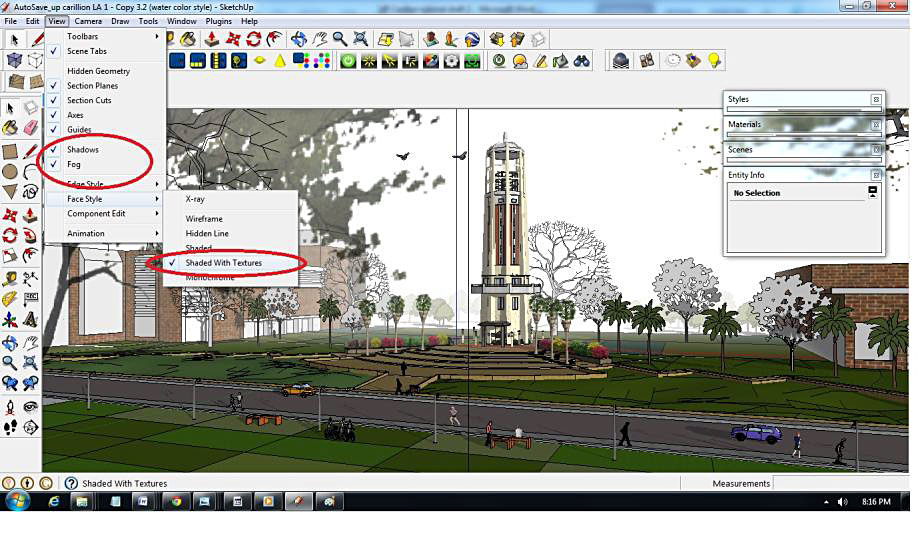
Default Settings

Add Scene
3. Group your model into a number of Components or Groups. Here, select the model(s)>press the right click button>select Make Group. This will enable us to easily hide and unhide the selected Groups when creating and exporting our scene into 2D images.
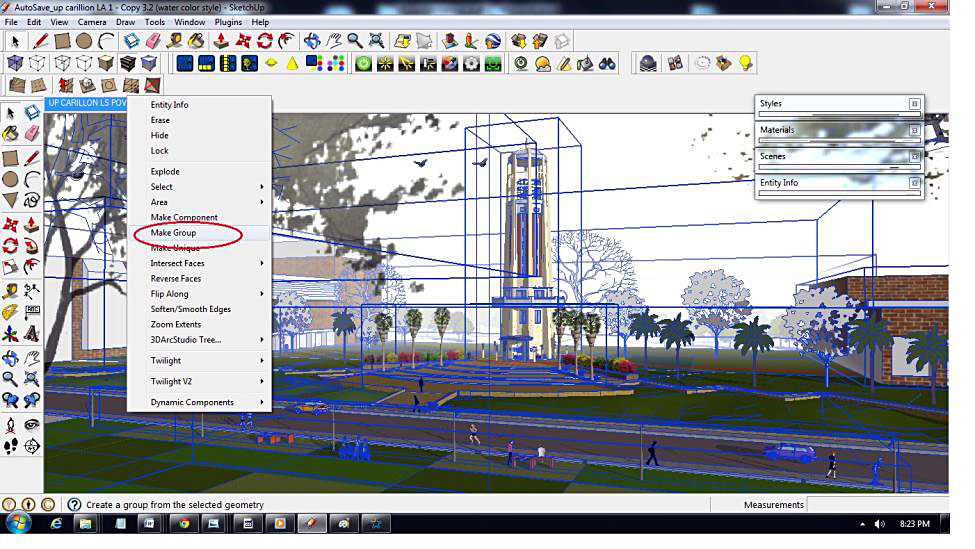
Group Models
4. For the next step, we will export our grouped geometry into 2D images, in different view styles. Later we will open all the exported images in Fotosketcher for watercolor rendering and layer them in Photoshop.
a. First image, select the main Grouped model (Carillon) and hide the other Groups/Components.

Carillon Model
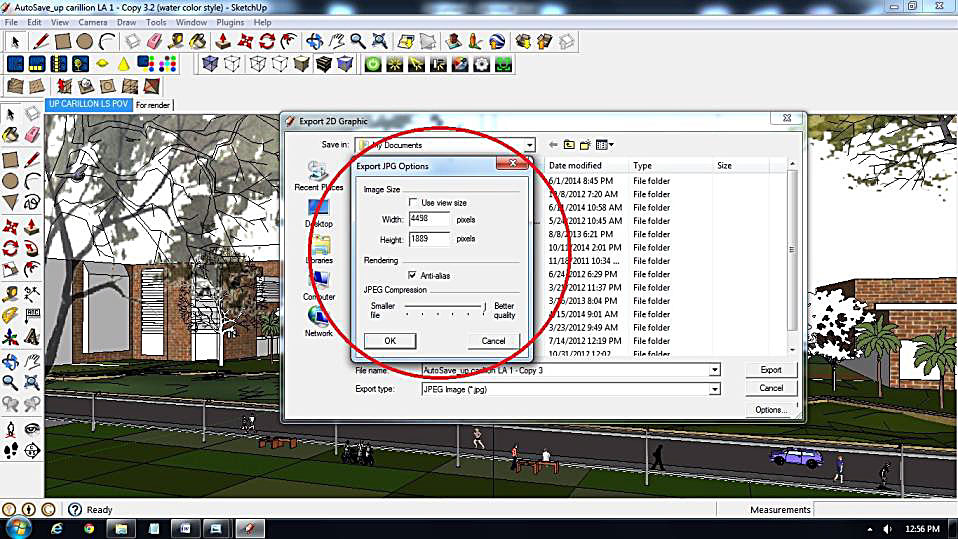
b. Export the selected Grouped model with Edge, Shaded/Texture, Fog and Shadows turned on. Go to File> Export> 2D Graphic and save in JPEG format. Export the image in high resolution or better quality. Make sure that all images have the same dimensions (size), so that we can Layer the images properly in Photoshop.
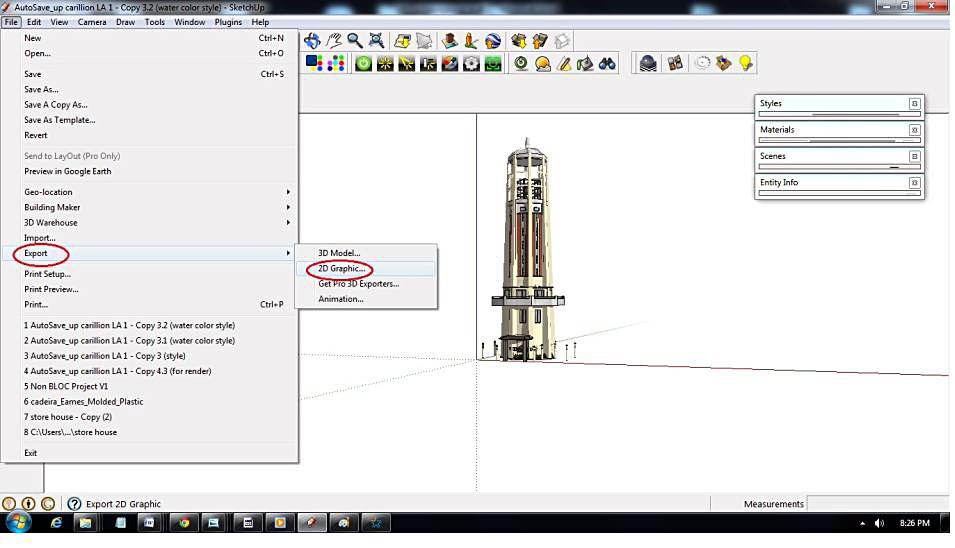
Export and Save as JPEG
Images All Sized the Same
c. For image 2, select the buildings then Export the object using the same view Style (Shaded with Texture + Fog and Shadows on).
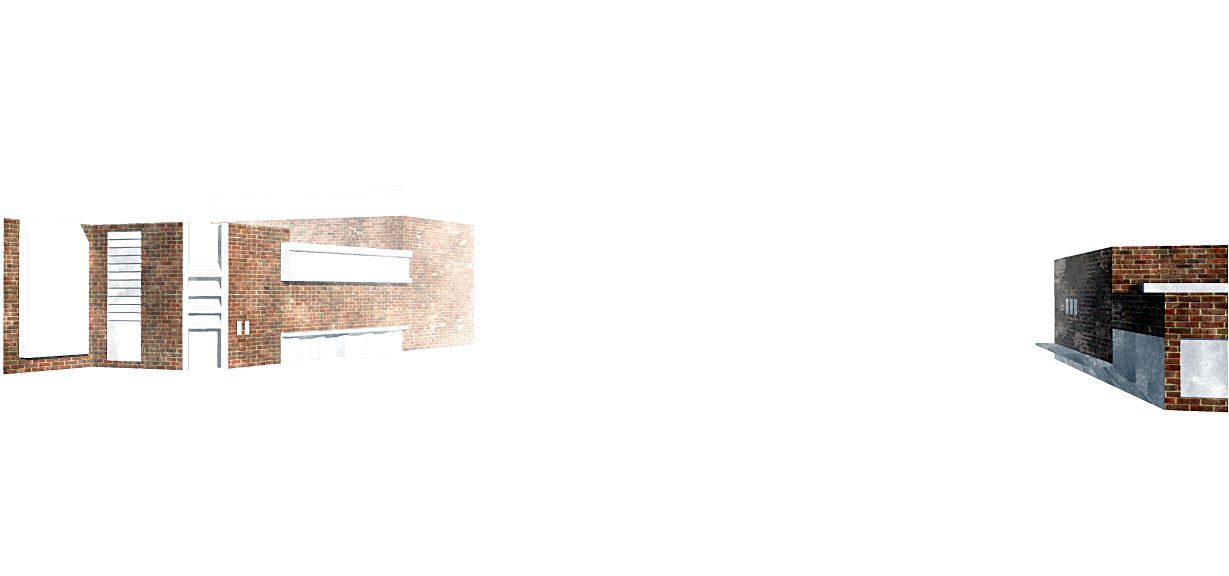
Image 2
d. For image 3, set the image to Monochrome Style and add some construction lines in order to simulate subtle reflections on the ground plane.
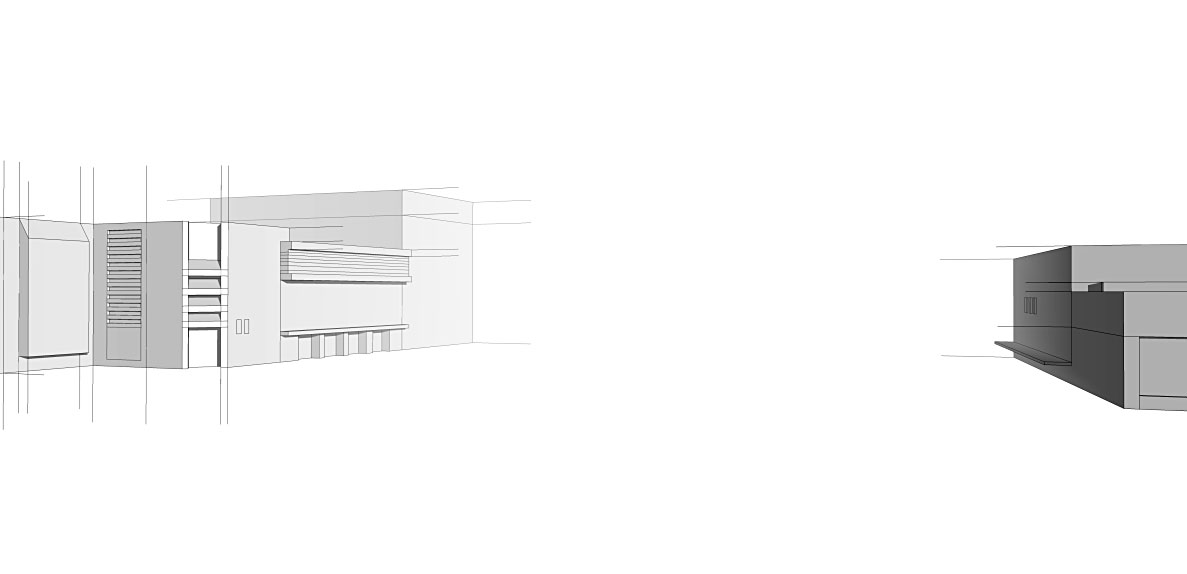
Image 3
Using the same Group, you can add construction lines by extending the Edges. Go to Window>Styles>Edit and select Extensions with a value of between 60-80 in the box. Another method of building a construction line is by simply using Tape Measure tool.

Add Extensions
e. For image 4 (ground area), export the image with the following Styles (Shaded with Texture + Fog and Shadows on, Edges turned off.
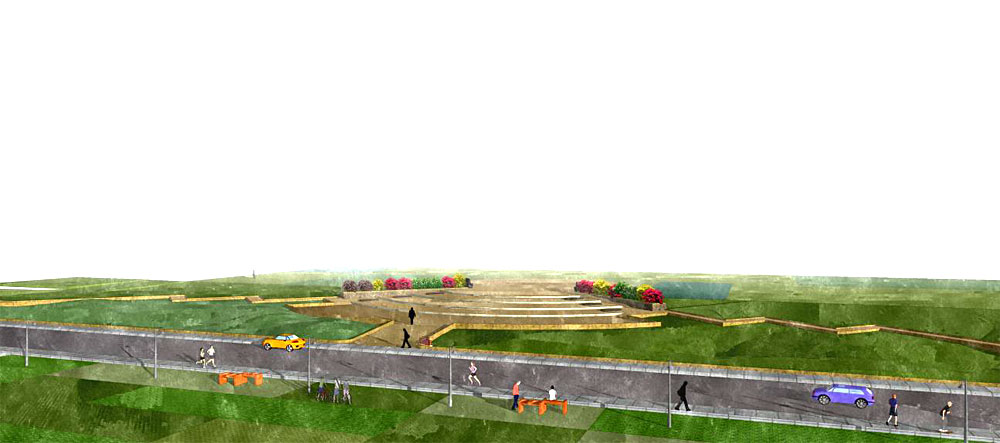
Image 4
f. For image 5 (same model) select the ground and export the component in Monochrome Style.
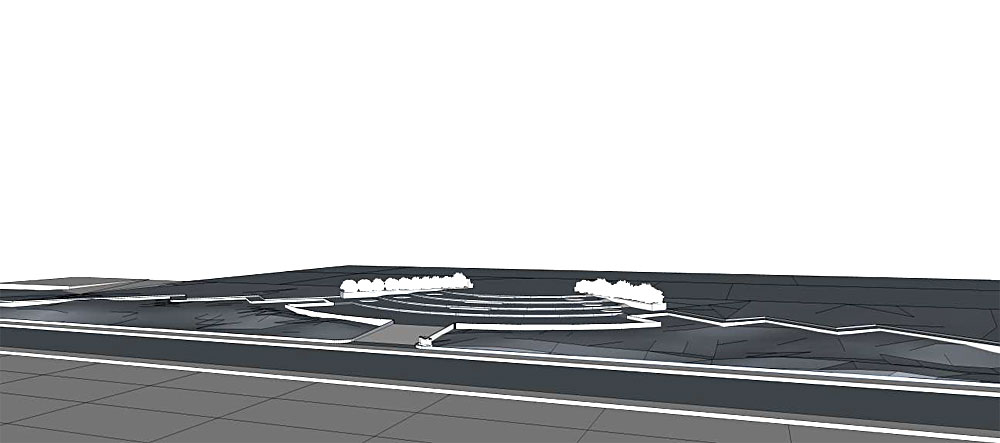
Image 5
g. Export the textured trees (image 6 and image 7).
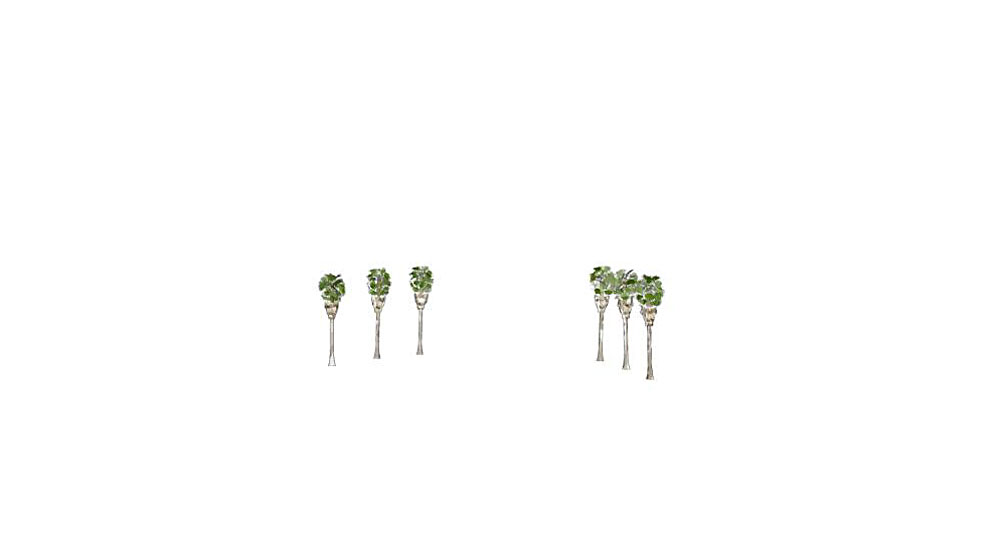
Image 6
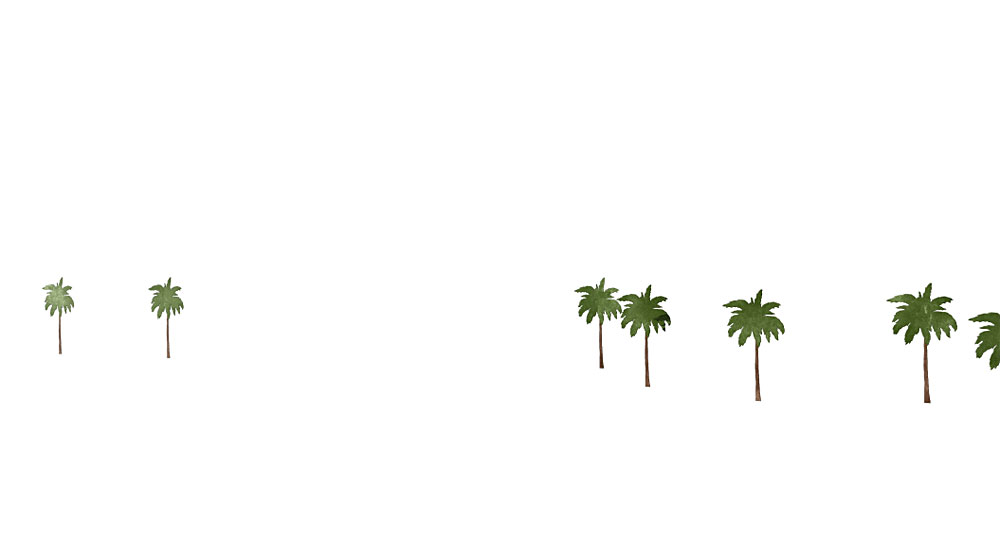
Image 7
h. Export non-textured trees (image 8).
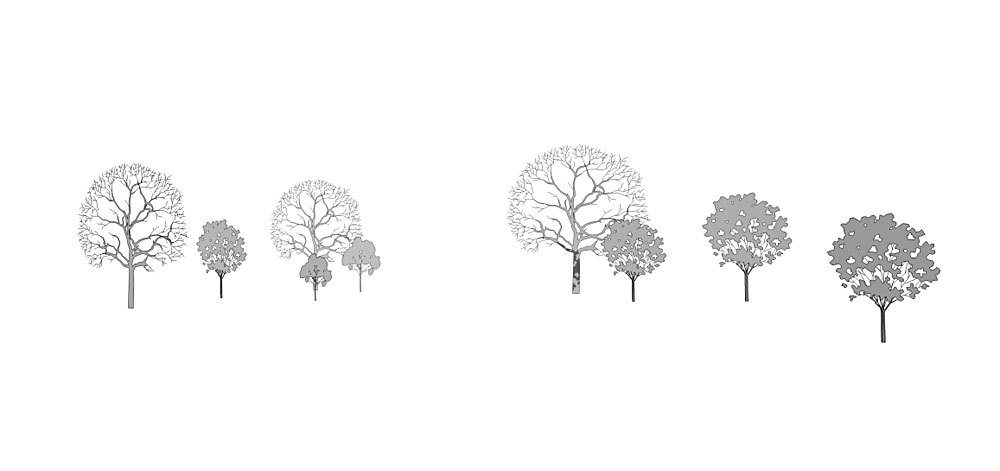
Image 8
I. Export the textured and non-textured tree branch (image 9).
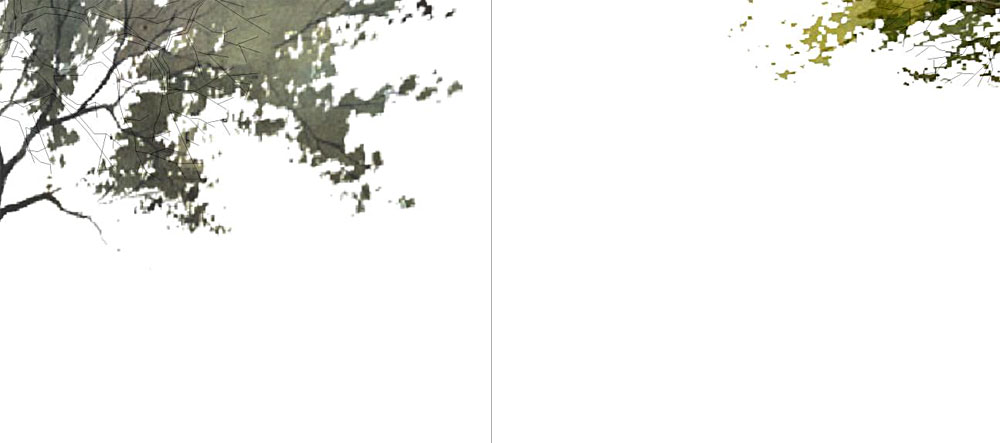
Image 9
j. And finally the flock of birds (image 10).

Image 10
Fotosketcher
After we have completed exporting all the scenes into 2D images, were ready to apply the watercolor effects using Fotosketcher. Open your first image in Fotosketcher and select from Painting Effects your watercolor style. I prefer the watercolor style ‘Painting 5’. Do the same procedure for all your exported color images. The monochrome images are not run through this filter process.
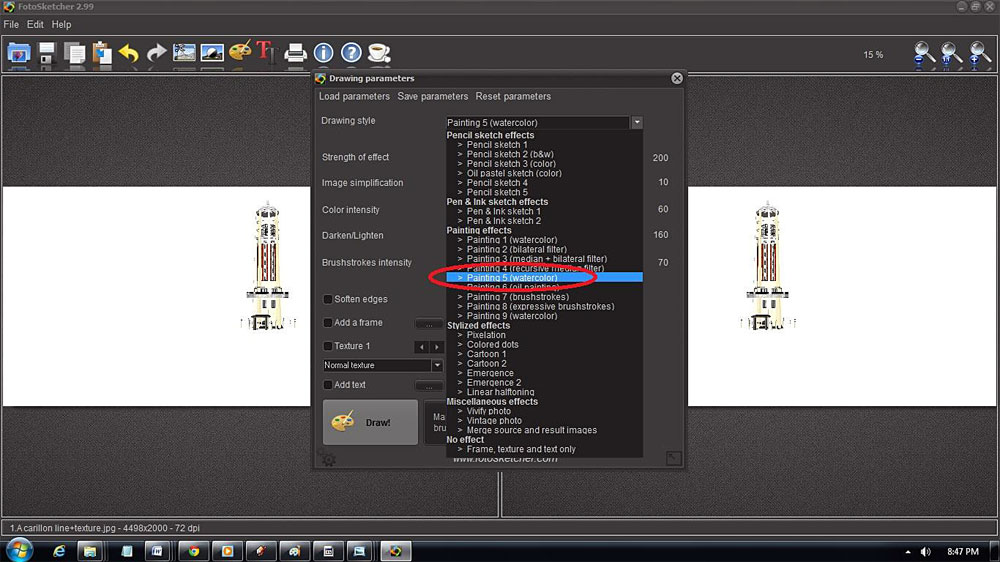
Fotosketcher Settings
Photoshop
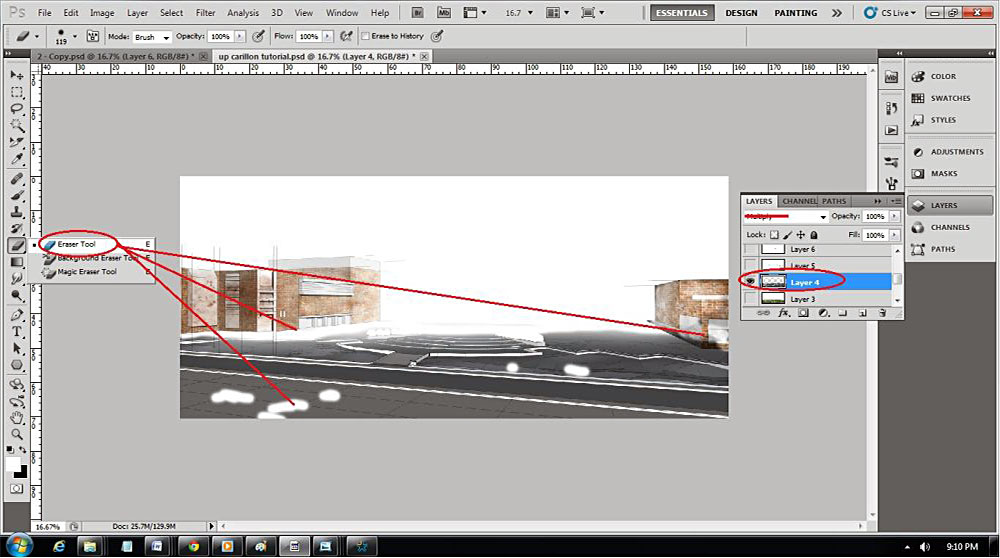
After we have changed all the images into our watercolor effect, we are now ready to Layer the images using Photoshop. Each image will be placed one on top of each other in Layers. This is why we made them all the same size. 1. Open the edited watercolor images 2 and 3 (buildings) in Photoshop. Adjust the Blend Mode to Multiply. Apply the Burn tool and Dodge tool on the brick texture. Insert a brown parchment watercolor texture on the white surface and erase the excess colors. Erase the dark area in the Monochrome Layer.
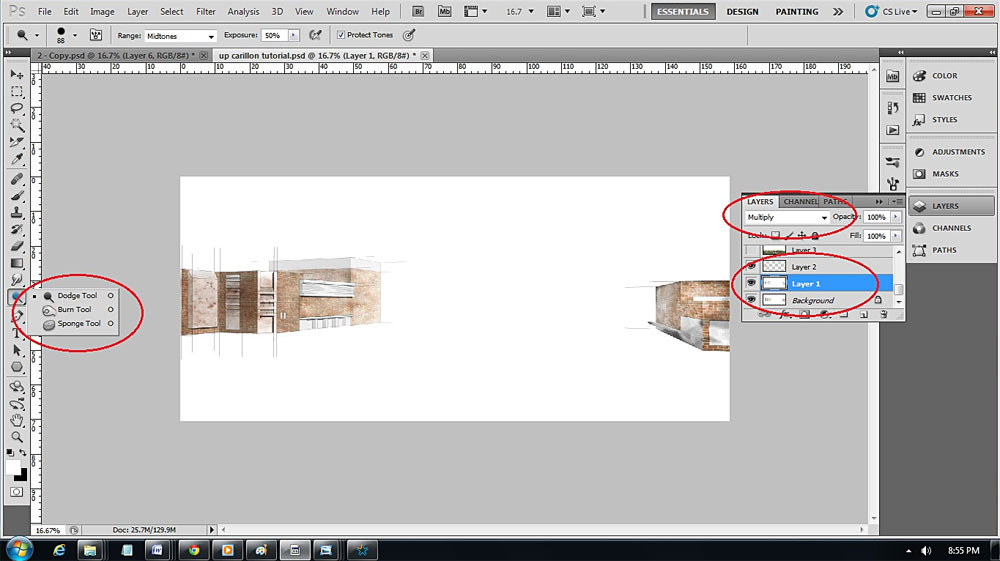
Blend Mode to Multiply. Apply the Burn tool and Dodge tool on brick texture.

Brown Parchment Watercolor Texture
2. Open the watercolor image 4 (ground- color), and set the Blend Mode to Multiply. Apply the Smudge tool on the cars and plants.

Blend Mode to Multiply and apply Smudge tool to cars & plants.
3. Apply the Dodge tool to the post lights.
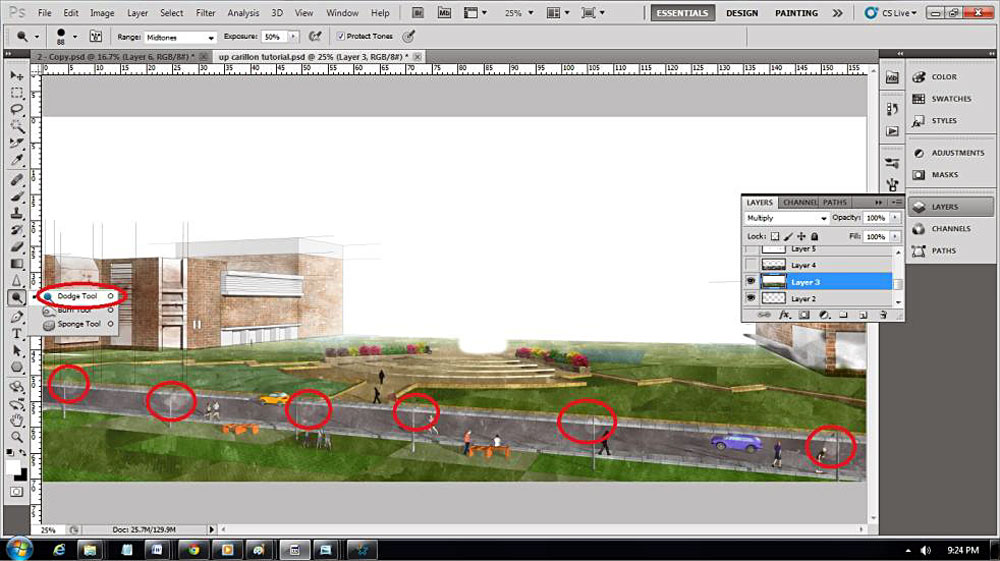
Apply Dodge tool to the post lights.
4. Open the image 5 (ground-monochrome) and set the Blend Mode to Soft Light. Erase the upper portion of the image.
Set Blend Mode to Soft Light.
5. Open the images 6, 7 and 8 and set the Blend Mode to Multiply. Open the Carillon image 1 and also set the Blend Mode to Multiply.
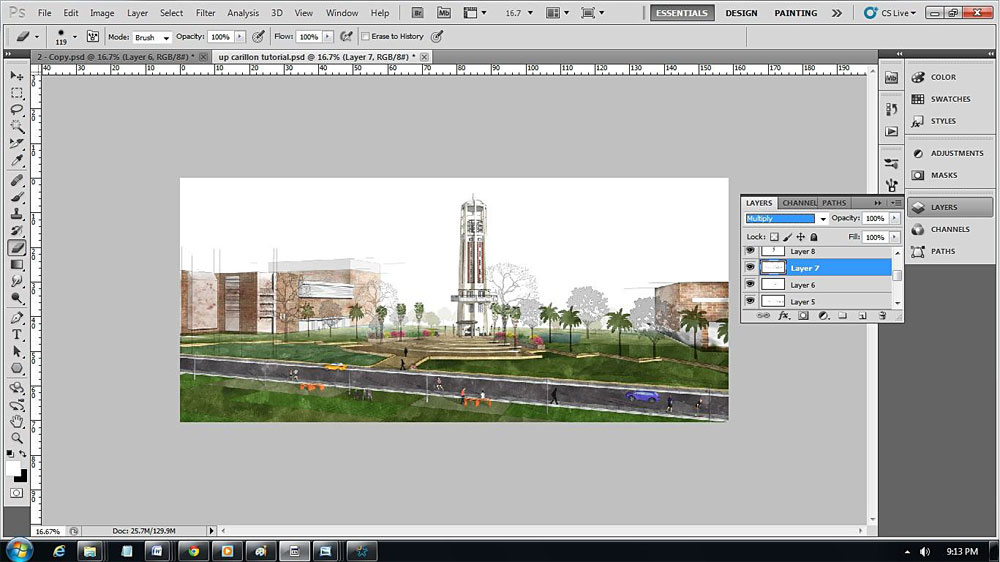
Set Blend Mode to Multiply.
6. Erase the unnecessary surfaces on Layers 7 and 3.
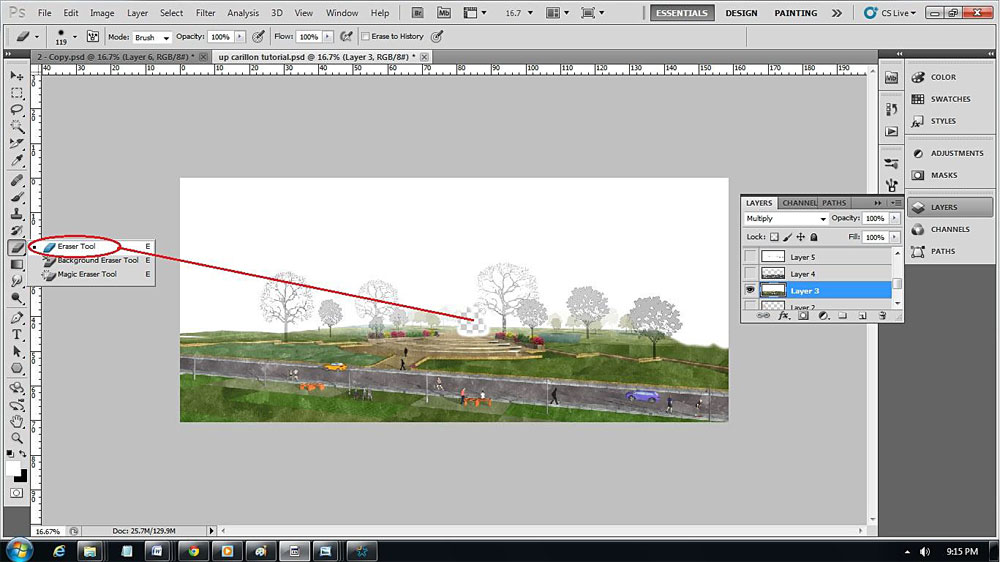
Erase the Unnecessary Surfaces.
7. Insert a ready-made watercolor sky background, and set Blend Mode to Multiply. Press Ctrl+T to adjust the size of the image. Erase unnecessary parts.

Add Sky Background
8. Open the images 9 and 10 (tree branch and birds) and then set the Blend Mode to Multiply. Apply the Smudge tool on the tree branch, especially on the pixilated area.
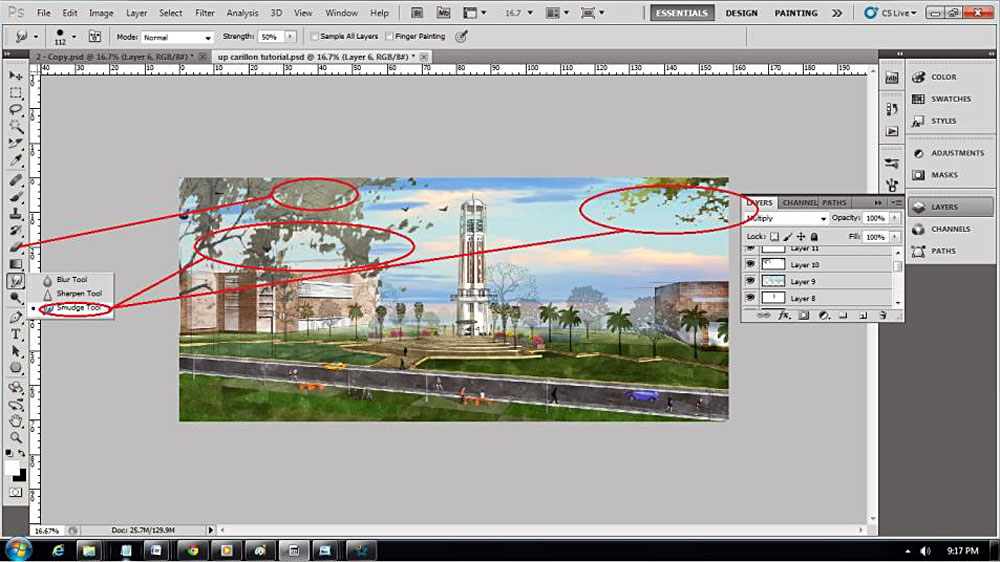
Add images 9 and 10 (tree branch and birds).
In order to enhance the image with a more authentic watercolor style, you can add some watercolor paper texture as an alternative. With a few further minor adjustments, here is the end result of our watercolor image, layered in Photoshop.
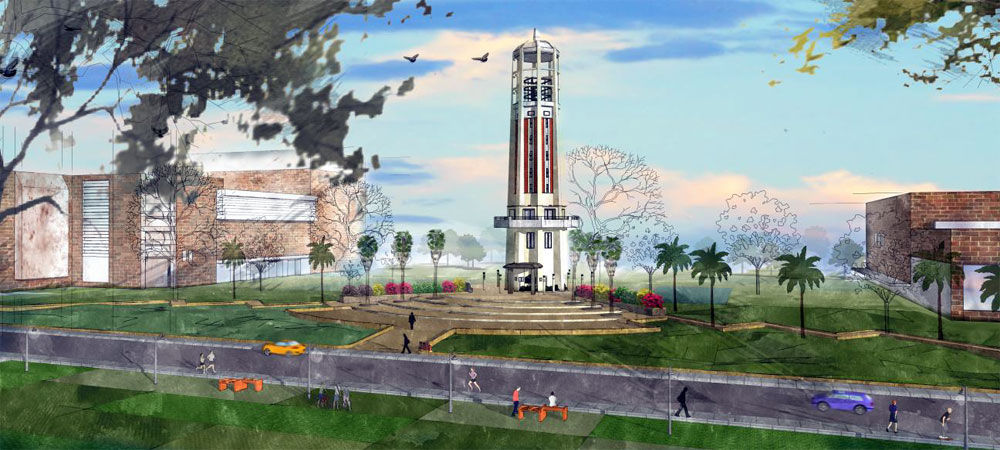
Final Photoshop Image
Picasa
After a long process of layering and editing, were going to enhance our watercolor image using Picasa. 1. Adjust the brightness and contrast 2. Sharpen the image 3. Posterize the image 4. Adjust the brightness and contrast
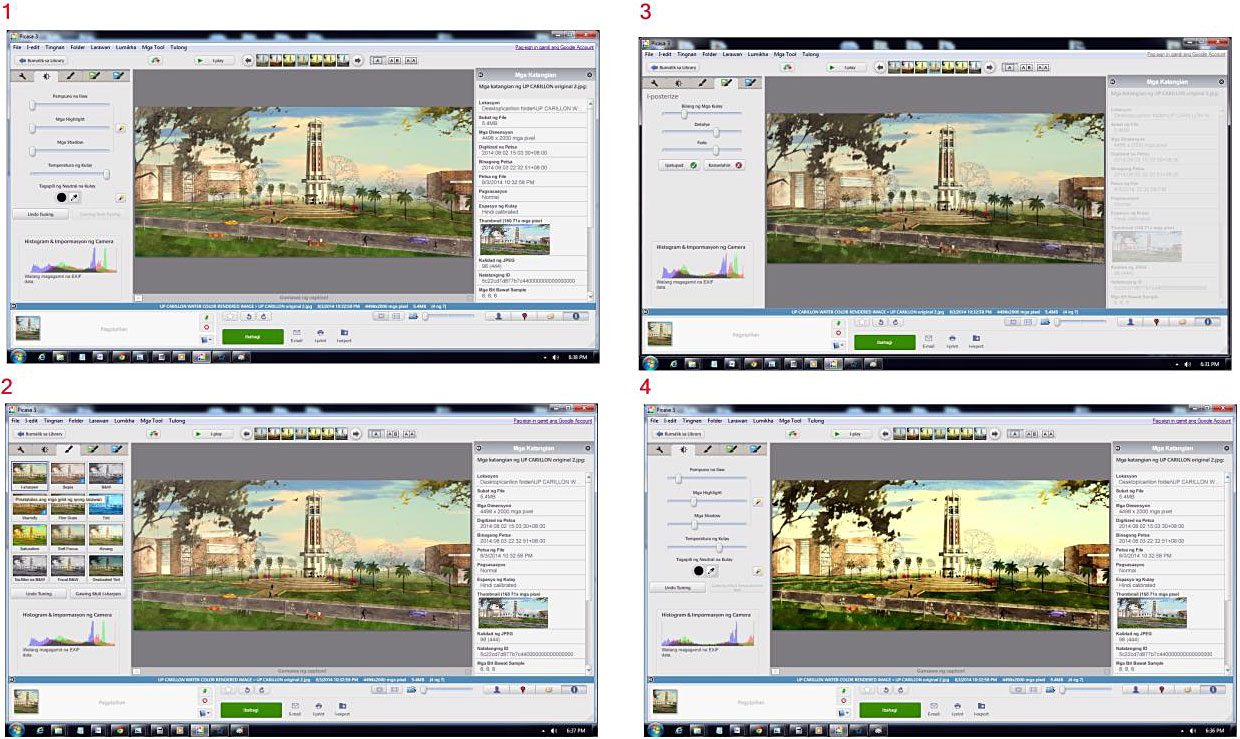
Picasa Workflow
This is the final image.
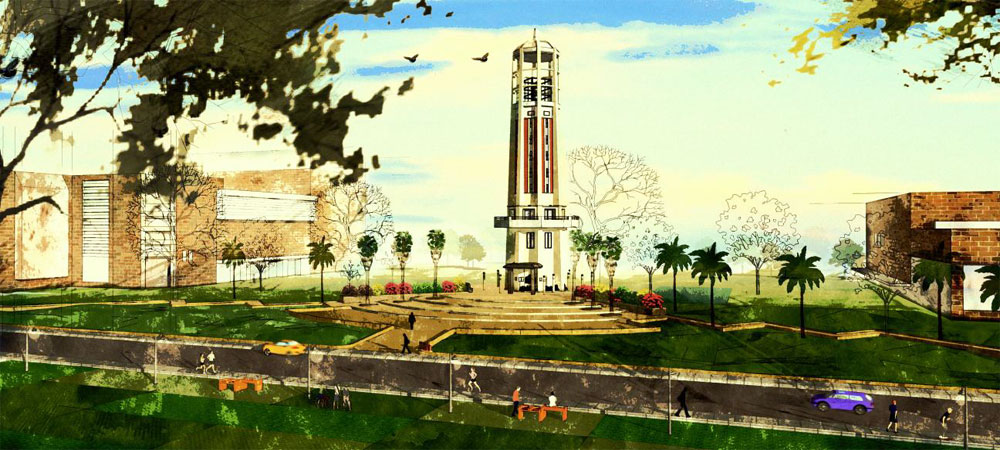
Final Image
Thanks for reading this tutorial. Hopefully you will be able to use some of my techniques in your own way as you discover your own style in watercolor rendering.
Benedict Martin Caliwara
Profile Builder 4

Artisan Organic Toolset

PlaceMaker Version 3
Skimp Pro Import Extension

BIM Bundle Special Offer!
SketchPlus Artist Bundle !
Bevel Tool
V-Ray 5 for SketchUp E-Book

want to know about stereo matte painting. please send one example to my email id, step how to do.