Soft Colored Pencil Line Technique

By Jason Christiansen
Jason Christiansen is a seasoned architect with years of experience. After receiving his Bachelor of Architecture degree from Philadelphia University, Jason spent years honing his design skills in an architecture firm before founding his own company, revision21 visualization. Jason has his own unique style and here he shares some of his knowledge and workflow with this NPR style and technique that will produce some really professional looking final images for presentation.
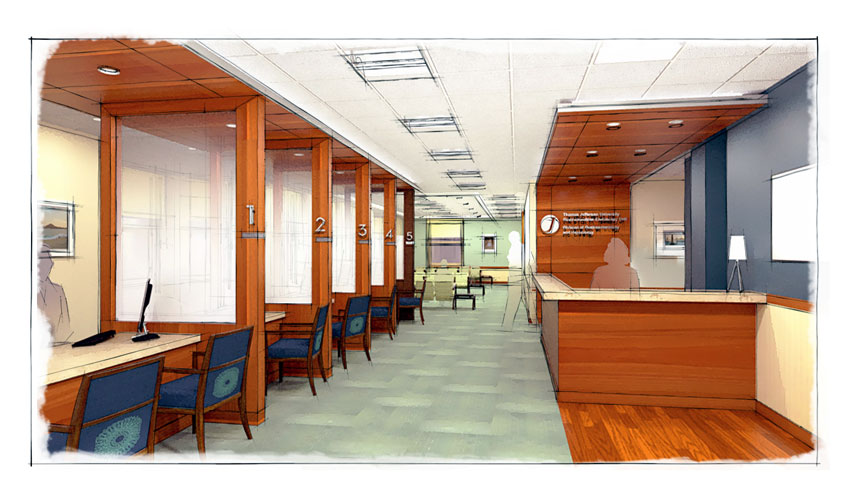
 In this tutorial Jason shows you how to achieve a nice, simple soft colored pencil look, for your rendered images of SketchUp models or scenes. Jason uses the renderer Twilight Render for his initial colored output image (though any 3rd party renderer will do) and few line export images from SketchUp for overlaying on Photoshop. Jason also uses the freeware Fotosketcher in this tutorial.
1. Firstly, let’s be sure we have a Scene saved in SketchUp, since we’ll be exporting multiple images to overlay in Photoshop and we need these views to all align exactly. This can be done by going to View>Animation>Add Scene.
2. Next create a render with your favorite 3rd party renderer. This process will obviously vary, so lets assume you know what you’re doing. Take note of the final resolution and output your image, which is 1500w in our case.
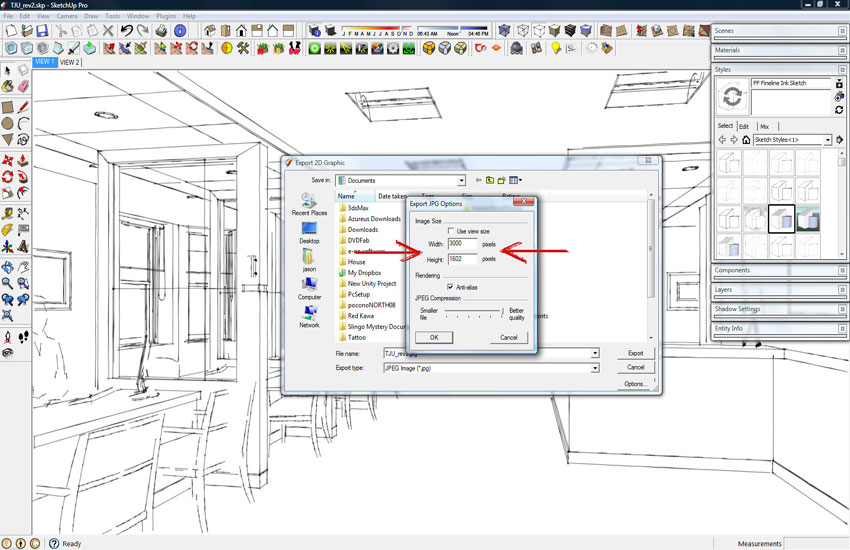
3. Now we need to export some line work overlays. Select your style of choice. I typically choose something slightly sketchy. This is personal opinion based on the final look you’re shooting for. Be sure to select the hidden line as your face style so that the output is a white background and black line work. Ensure that you are in the exact scene that your render output from and go to File>Export>2D Image. Click on options and set the resolution based on the resolution of your render. I typically double or even triple these numbers to get the clearest possible output. Export and save.
4. Export two or three images with varying line extension on each. Range them from no extension to 20. This will take some experimenting on your part.
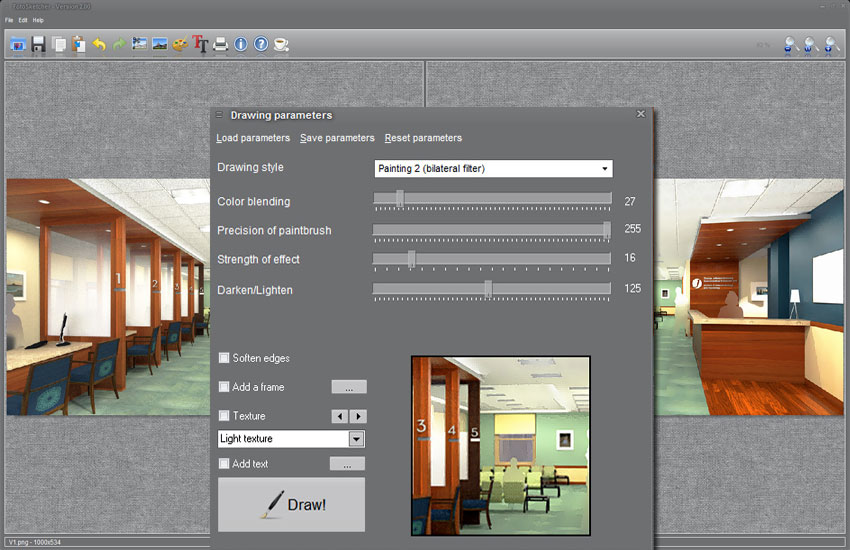
5. If you haven’t yet installed Fotosketcher, go to Fotosketcher.com and take care of that. Open your rendered image in Fotosketcher and do some experimenting with the various filters until you have something you’re happy with. This process is really dependent on the particular image and the desired final look. The median + bilateral filter gives great results for this type of image. Once you’re satisfied, save the altered image.
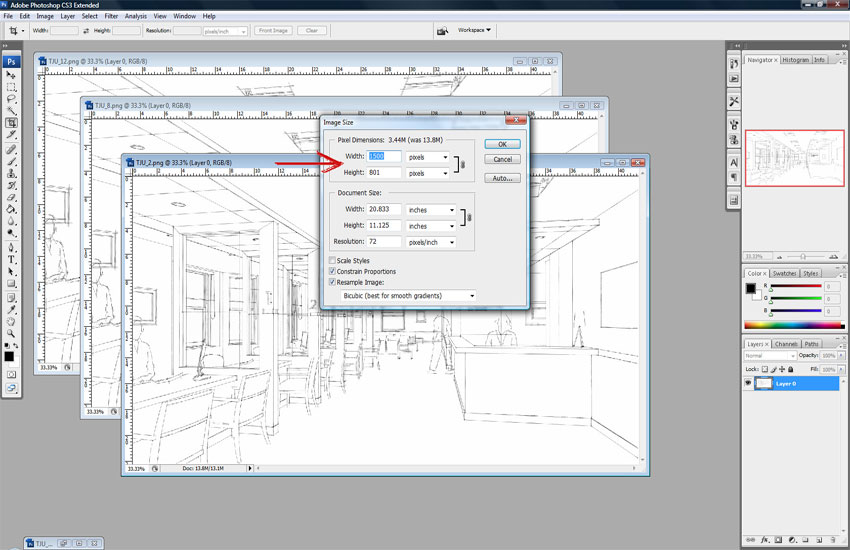
6. Open all images in your favorite image editor. I’m going to reference Photoshop for this tutorial. First adjust the resolution of your line work images to match your renders. Now we’ll start overlaying.
7. Start with the original render as a base. I’ll assume you’ve already tweaked and adjusted to get the image where you like it, so that won’t be the focus here at all. Drag everything on top of the base, starting with the Fotosketcher image and moving up to the line work with the shortest extension.
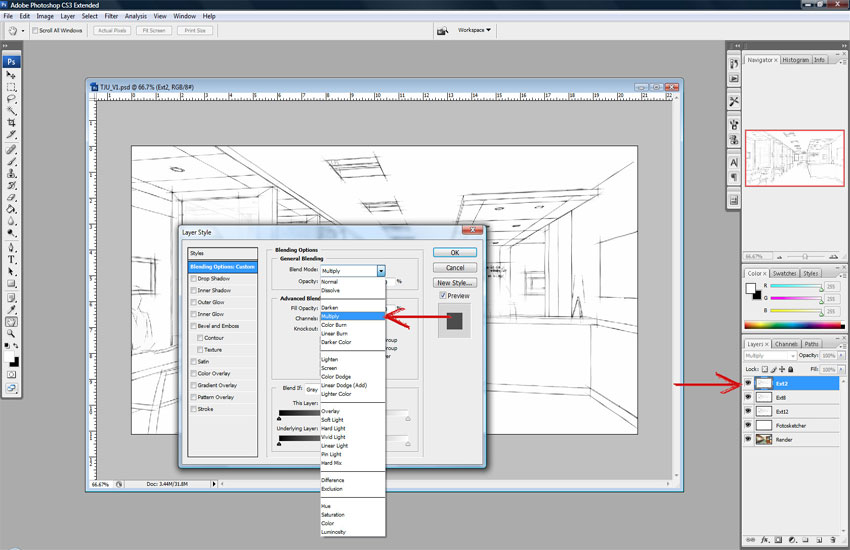
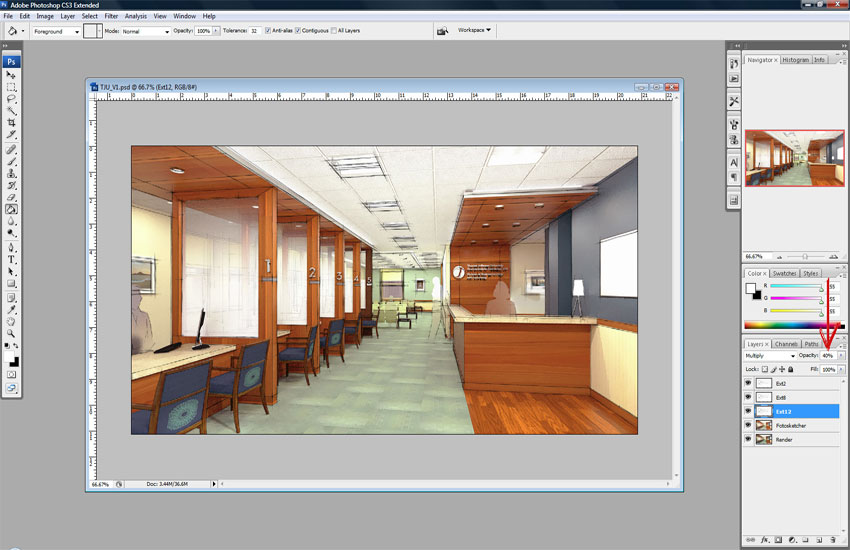
8. Right click on the first line work layer and click on Blending Options. Select Multiply from the drop down and click OK. Do this for each of the line work layers.
9. Next adjust the opacity if each of these layers. Those at the bottom with the longest extension should be the lightest. As with other elements of the tutorial, this is again is going to be dependent on the particular project and take some experimentation.
10. Focus on the Fotosketcher layer next. Adjust opacity of this and let some of the original render show through and give a little more depth and detail.
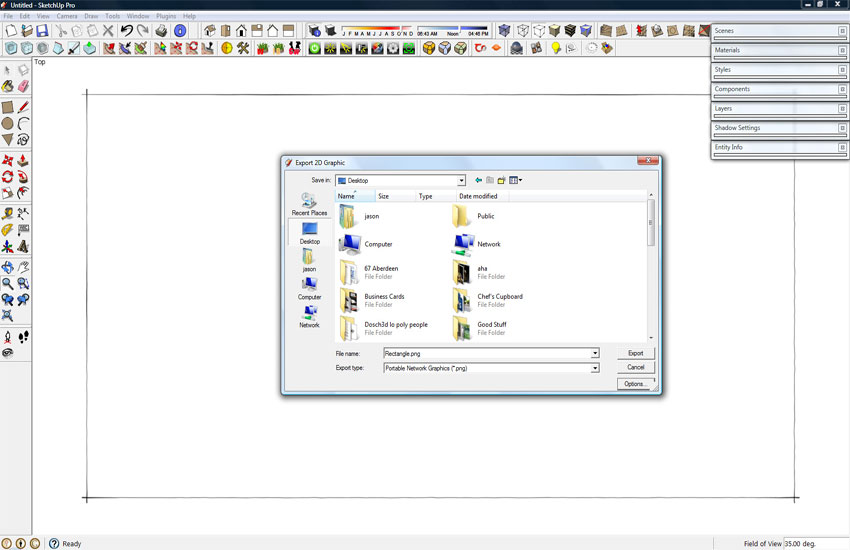
11. Go back into SketchUp and draw a rectangle to match the proportions of the final image. Choose the same Style as the other images, choose a top view, and Export a 2d image.
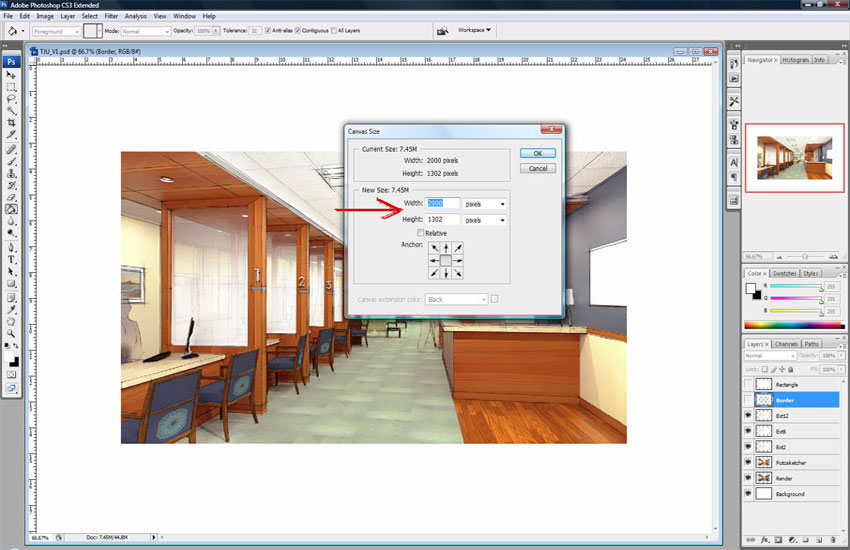
12. Now, back into Photoshop and go to Image> Canvas Size and expand the canvas. Go big, you can always trim it down later. I’m going to do 500 pixels in either direction.
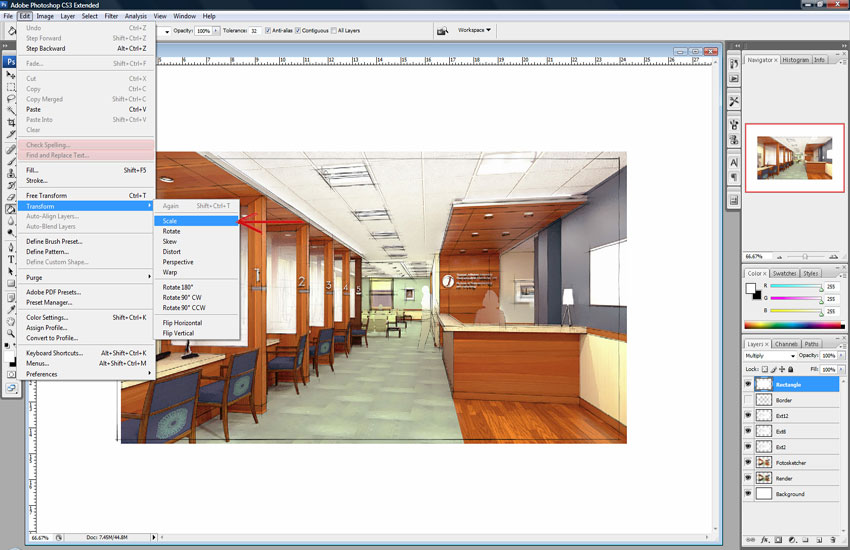
13. Open the rectangle and drag it on top of the layer list. Right click on the layer and repeat the Blending Options procedure. Go to Edit>Free Transform>Scale and re-size the rectangle to frame the image.
14. Now for a little artistic expression. Let’s do a little choppy white frame under the rectangle. This can be done either by adding or subtracting, or a combination of both. Create a new layer under the rectangle and choose the Brush tool with a chunky, rough brush and set the opacity somewhere between 40-60%. Paint along the interior of the frame, leaving a rough edge. If you go too far with it or don’t like what you did, choose the Eraser tool with a similar brush and set the opacity around 40-50% and erase away some of your border.
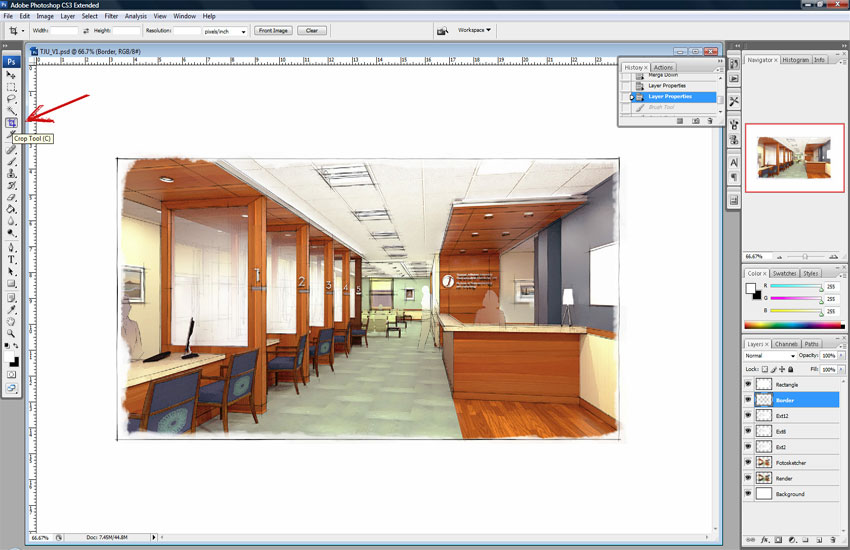
15. Finally, use the Crop tool to trim the borders to where you like them… and viola! No real magic here but it does take a bit of an artistic eye to get the background, the opacities of the line work, and the painted edge looking good.
I hope you enjoyed my tutorial and go on to produce some really great images for your presentations.
Good luck and thanks for reading!
Jason






excellent, beautiful… i like the workflow so much. su, fotosketcher, ps.. very nice.
all the connection between sketchup and photoshop must be conducted as a way that we should take care….why? becoase the things below will happen as everyone like that…
wink!
with some regards to my friends Mohammad send me the link!
thank you for sharing, nice tut. thumb up.
Great technique! I was wondering what line style you used? The line work really works well over the rendered image.
As soon as I saw the image I realized there was some post production to soften…nice. I think you should display the image or parts of the image to really demonstrate what you have achieved and to show the differentiation. Well done.
Thanks
for sharing.
Jim
[…] Read the full tutorial at sketchupartists.org […]
[…] Sketchupartists.org has released a new tutorial from Jason Christiansen. Read it more by clicking HERE. […]
Thanks for your sharing.I like this style.And it may help my work.