
The Making of Oculus

First of all, I would like to thank you for taking the time to read this article, and big thanks to SketchUpArtists for publishing it. ‘Oculus’ is my work presented to the Ancient Rome Competition and hosted by humster3D.com. I Hope you will like it.
INSPIRATION AND REFERENCES
The first task was to find the theme for my image. My election of the Roman Pantheon was influenced by 2 main reasons: Completed in its present form during Hadrian’s reign, in ca. AD 128, is the largest non-reinforced concrete dome in the world and remains as one of the most monumental feats of engineering. And second, with the Pantheon I wanted to represent one of the most important historical events: The invention of concrete by the ancient Romans, which led to the liberation of the shape from the dictate of the traditional materials of stone and brick.
Theme ideas.
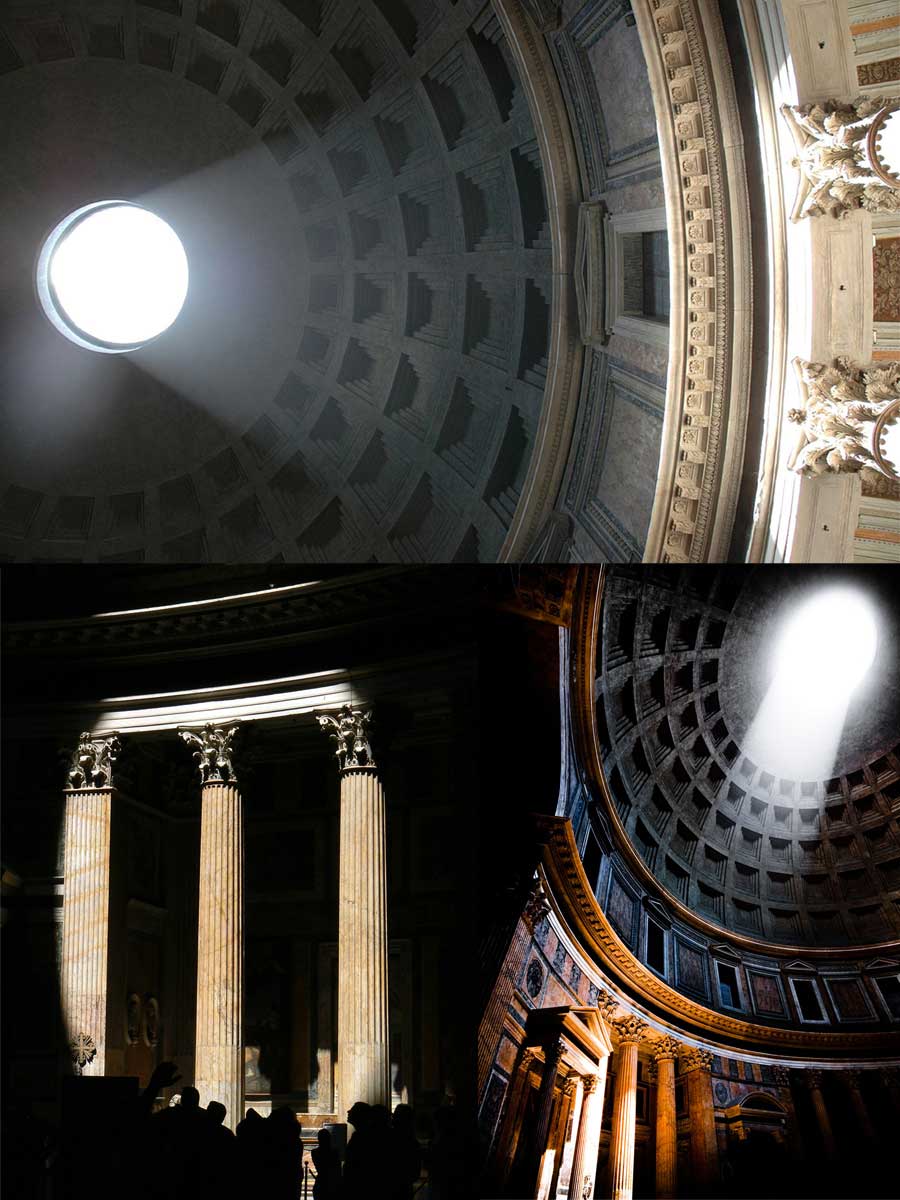
Next step was to search for reference material like: drawings, blueprints, photos, etc. of the Pantheon, this material was crucial to be able to model as close as possible to reality.
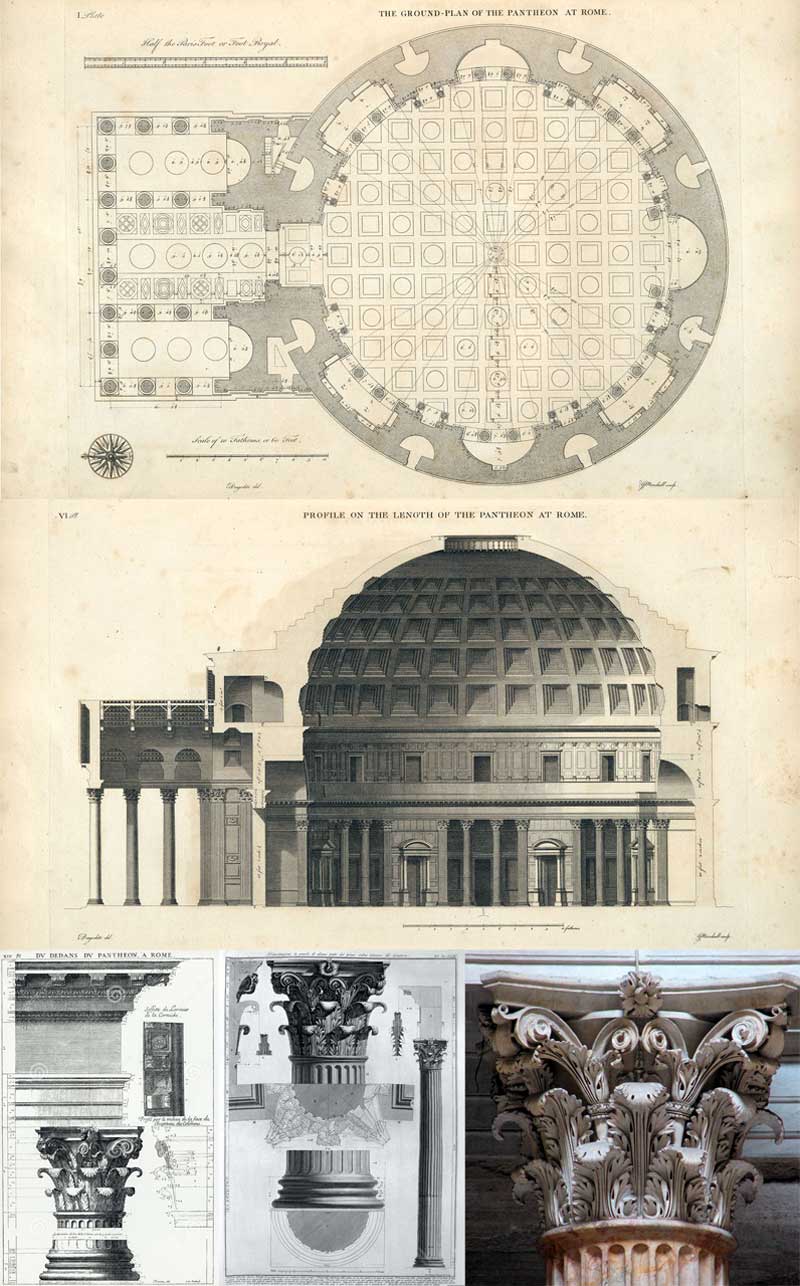
Reference material.
MODELING AND CAMERA
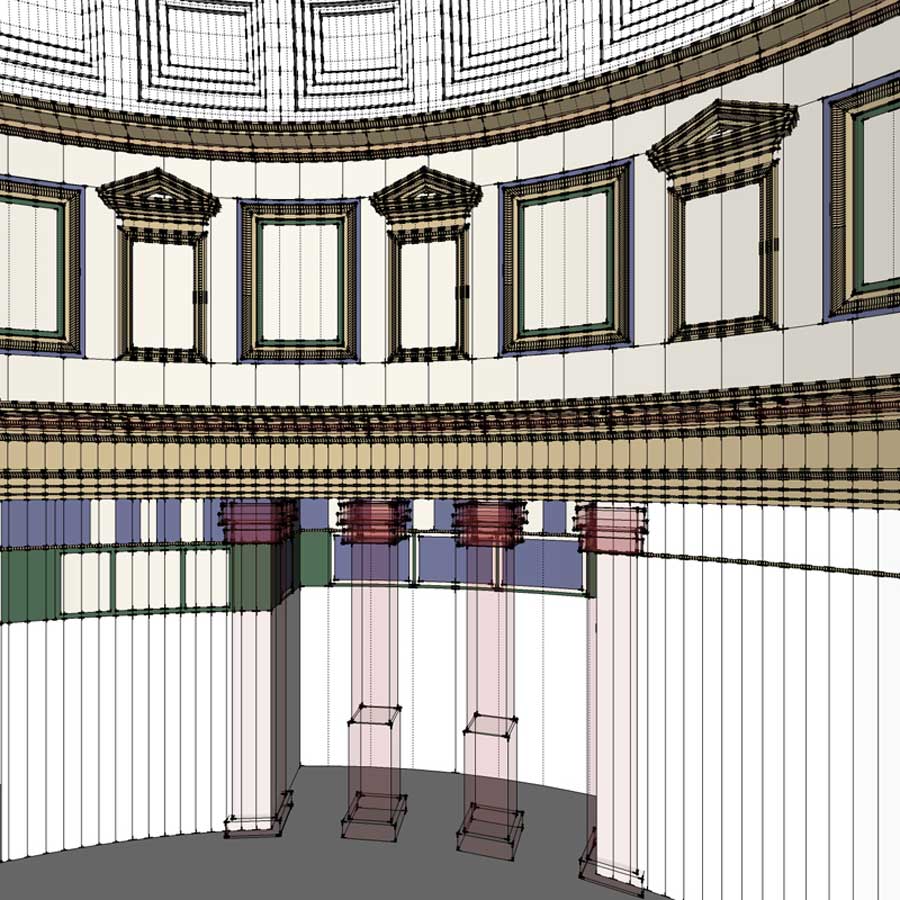
The setup of the scene was done inside SketchUp and Maxwell Render. In my workflow I used SketchUp to model the general scene and used Blender to pay attention to the details.
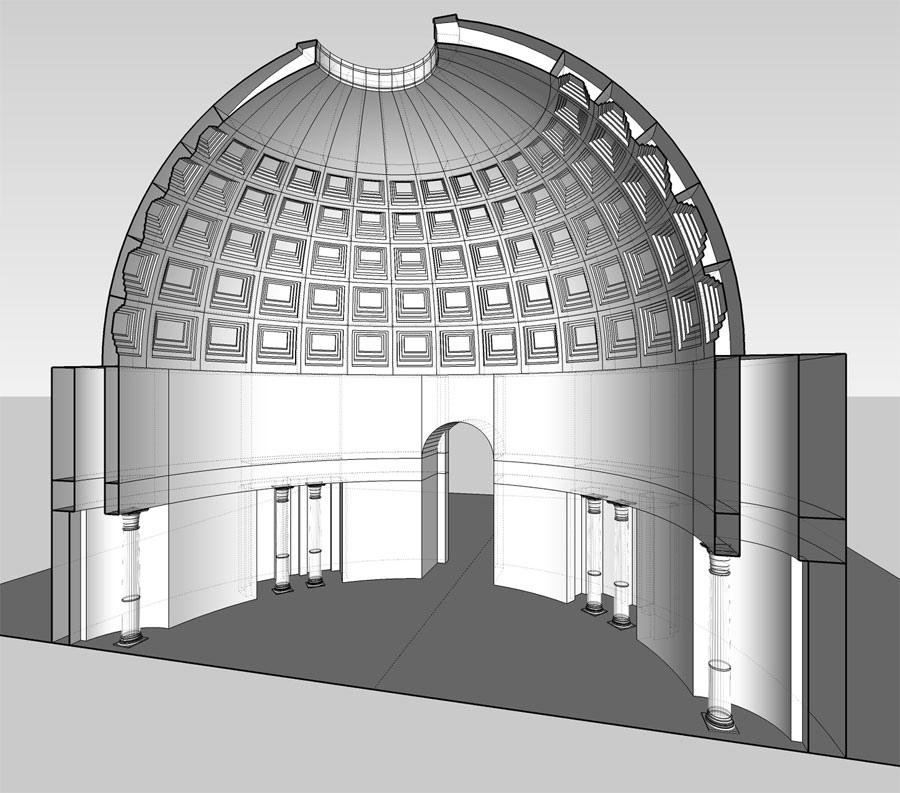
SketchUp model.
Once the main model of the Pantheon was ready in SketchUp, I started to test with different camera angles and after several trials I was happy with my selected point of view.
Camera angle tests.
Next step was to add detail to my model only where it was visible to the camera. I used Blender to model all decorations (Acanthus leaves, volutes, etc.) for cornices and capitals.
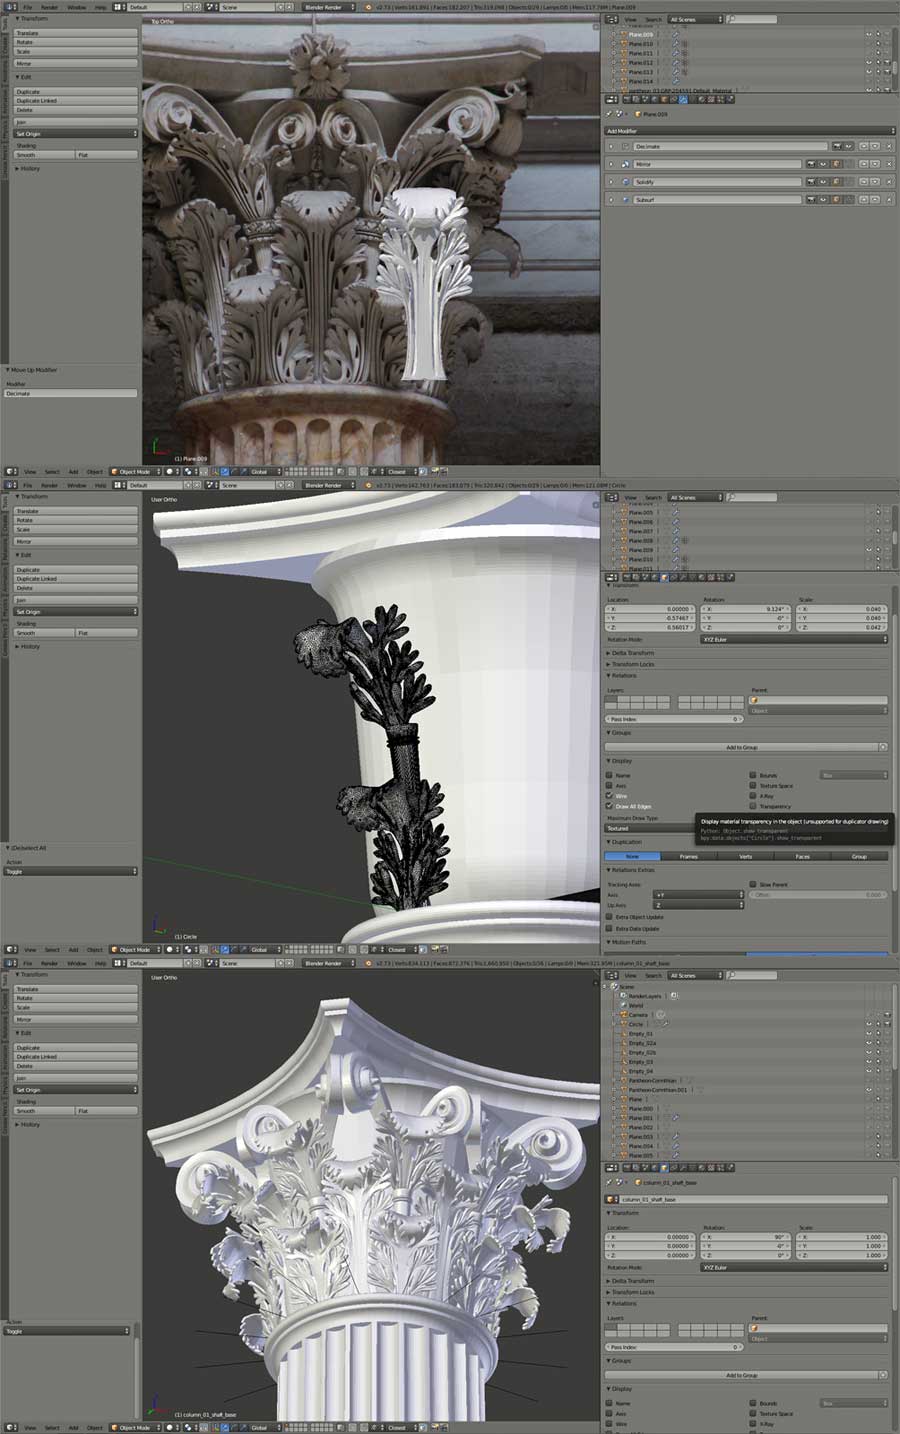
Blender used to model decorations.
Blender used to model decorations.
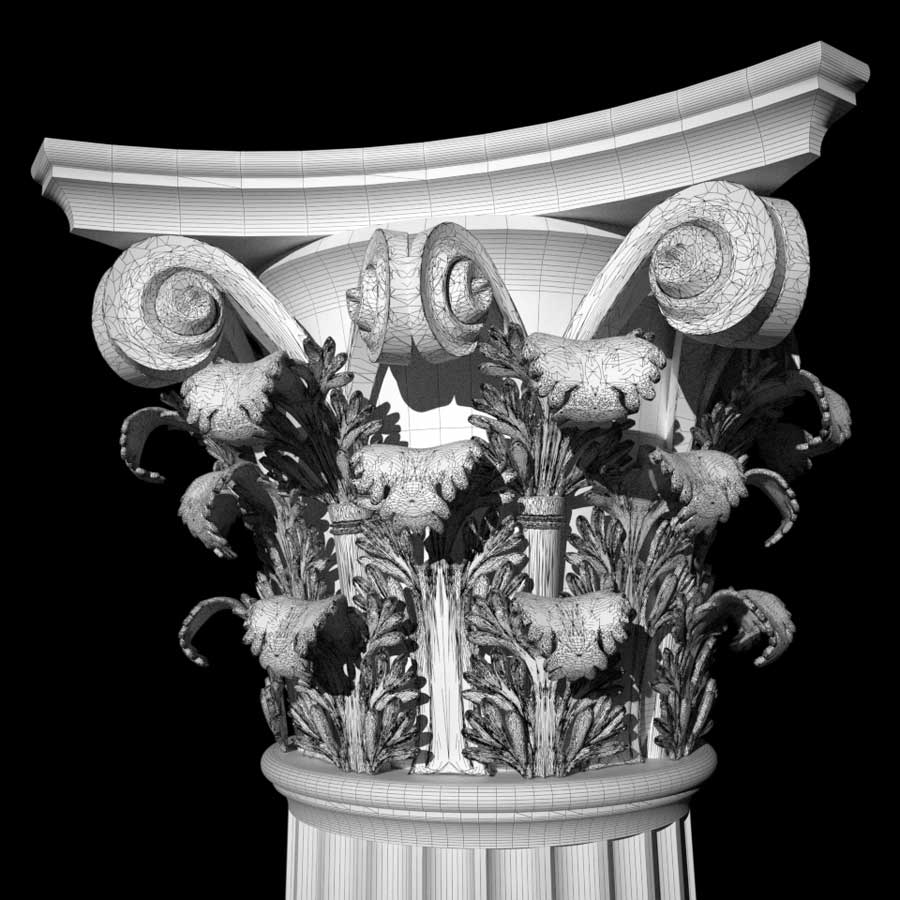
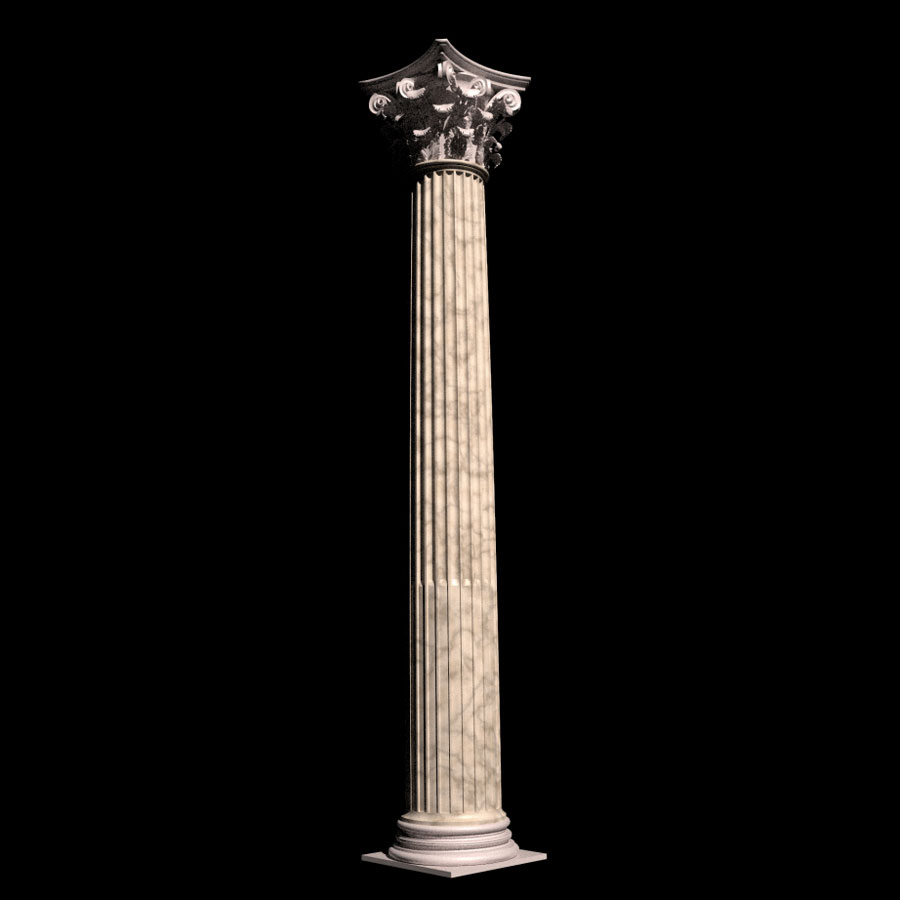
When the Corinthian column was ready with all its ornaments, it was exported to Maxwell Render Studio, using the B-Maxwell (Blender to Maxwell Render exporter add-on), and inserted inside the SketchUp scene as MXS reference, the same process was repeated to insert columns and cornices.
Corinthian column exported to Maxwell Render Studio and then inserted into SketchUp scene as MXS reference.
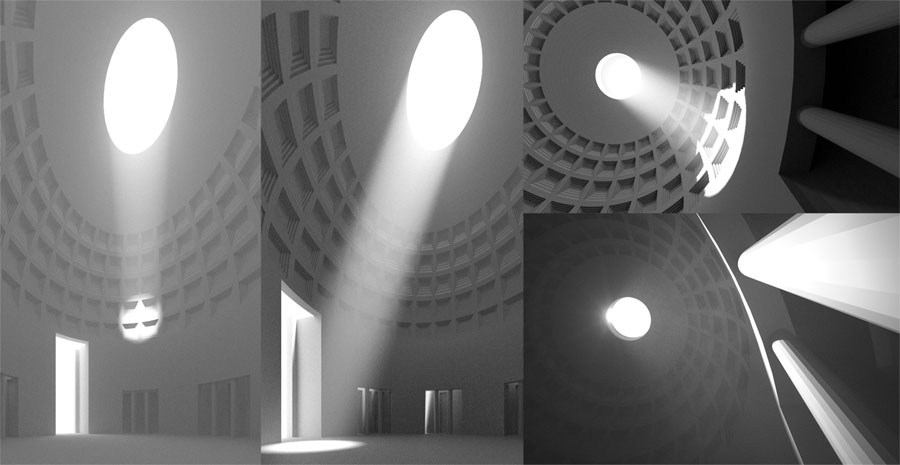
MOOD AND LIGHTING
I wanted to catch the real feeling of that architecture and the lighting of the sun coming through the Oculus. The best option to achieve that was the use of Maxwell Render sun and physical sky, it simulates reality in a very exact way. I intended to use the three-point lighting method, so I added a fill light and two rim lights with very low brightness values. In order to be able to balance the illumination once the render was ready I used Multi-light, a very powerful tool inside Maxwell Render, which allows you to adjust the intensity of every light inside the scene once the render is finished.
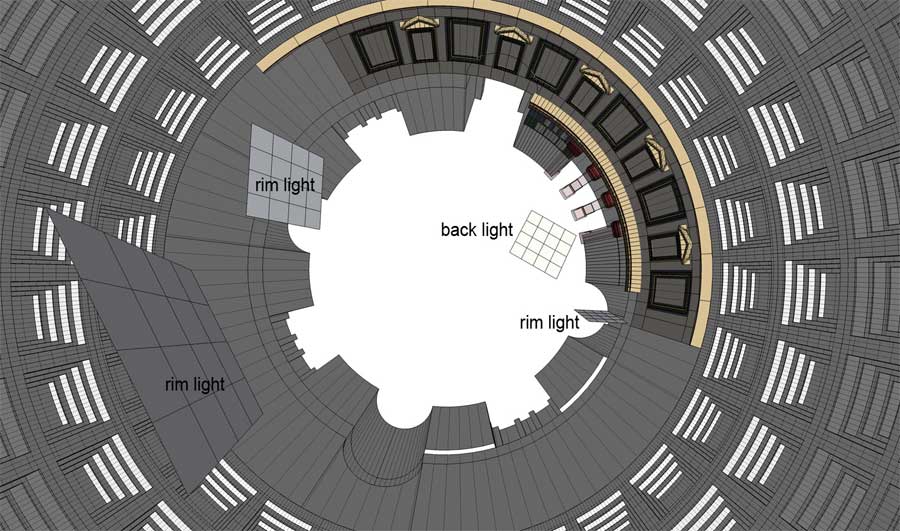
Three-point lighting method.
MATERIALS
All the materials used in the scene are simple procedural textures in Maxwell Render. For mapping the procedural textures I used the world coordinates method, this method is best suited when using procedurals because it does not rely on any UV sets. For the marble I used a combination of different marble and noise textures blended together in the procedurals stack.
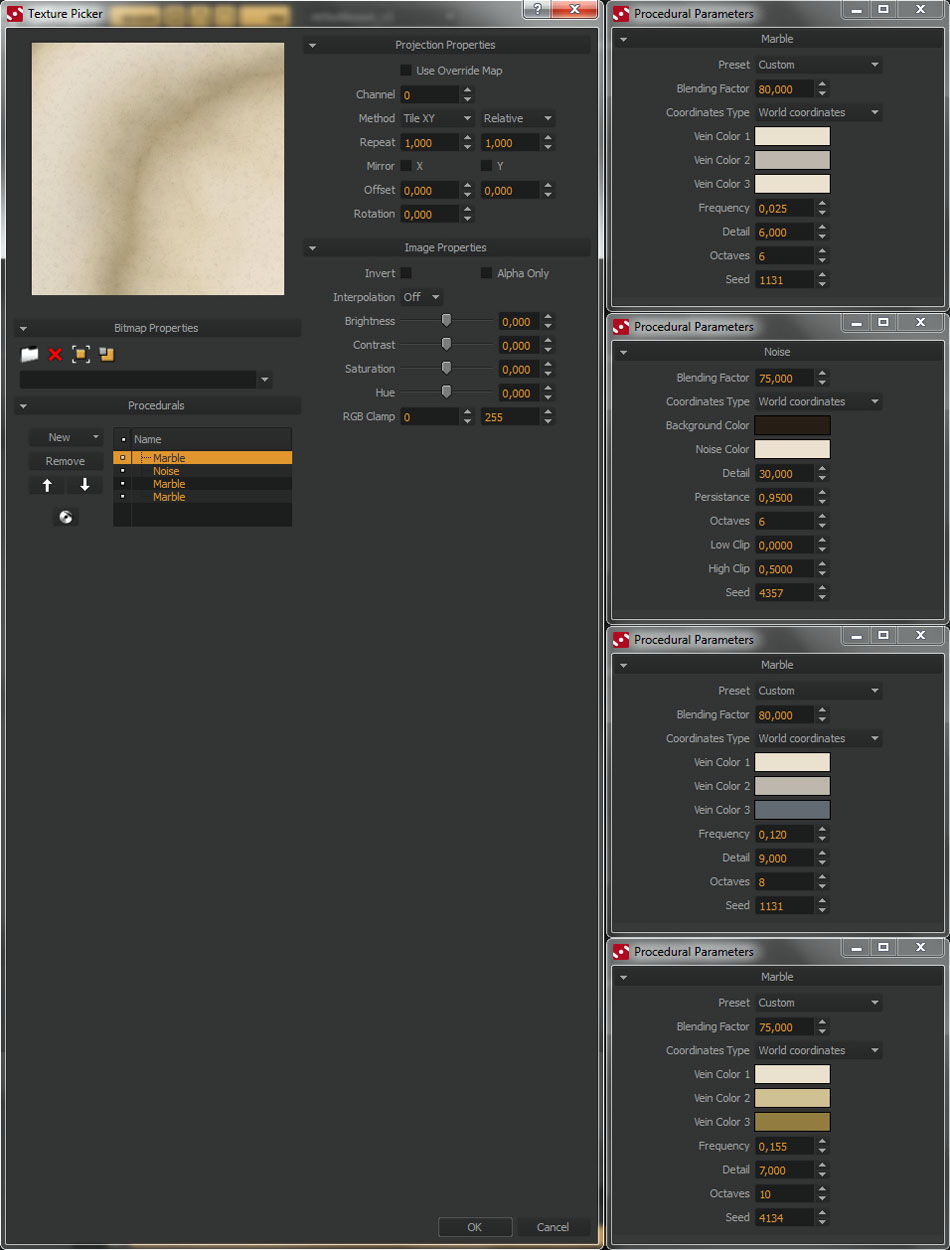
Procedural textures in Maxwell Render.
Textured
RENDERING, MULTILIGHT AND SIMULENS
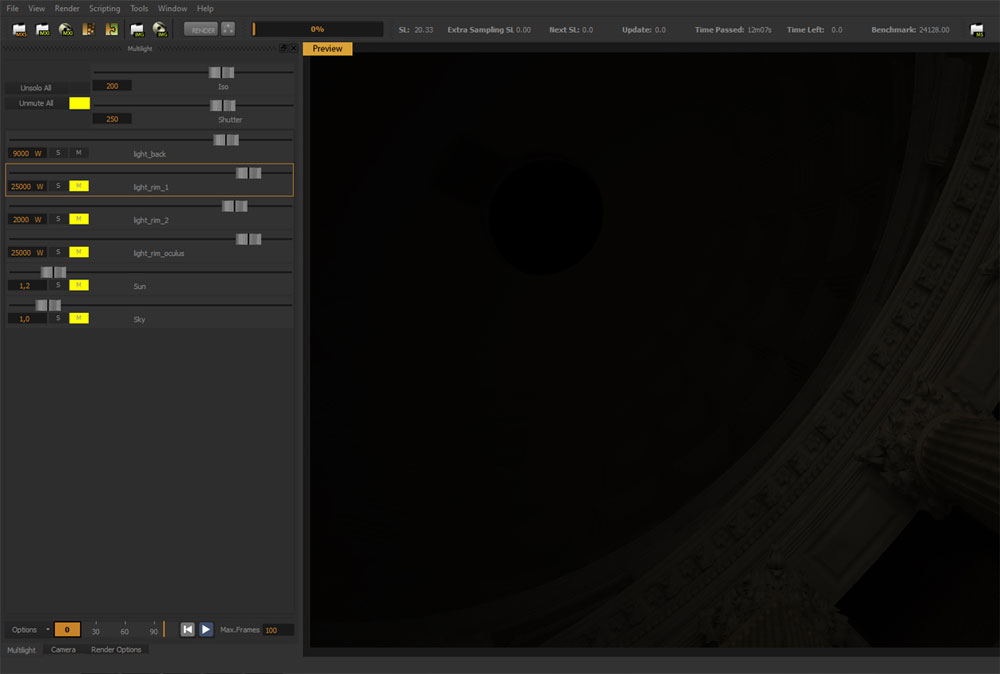
The setup of my scene was done inside SketchUp, Maxwell Render Fire allowed me to visualize that everything had been setup correctly before I exported the whole scene to Maxwell Render Studio. In Maxwell Studio I did the last adjustments to the camera angle in order to get the correct composition, I adjusted as well the date and time to get the desired position of the physical sun. Before launching the final render, the multilight feature must be enabled. When the render process is finished, the resulting image is stored into a MXI file. At this point I used the multilight feature to balance the illumination, using independent sliders to control each emitter.
Slider to control emitter.
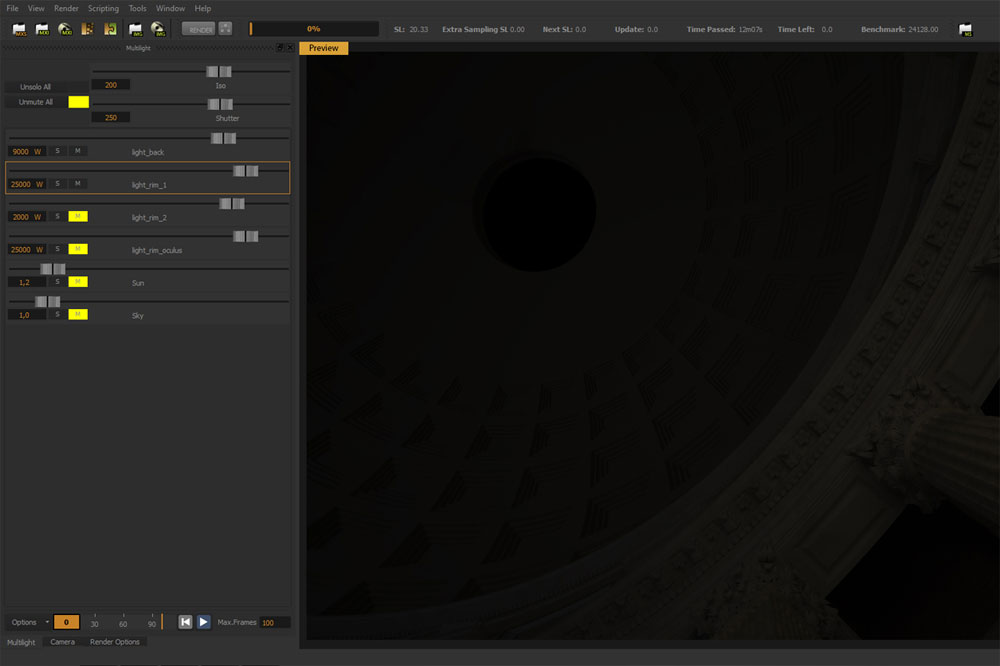
Slider to control emitter.
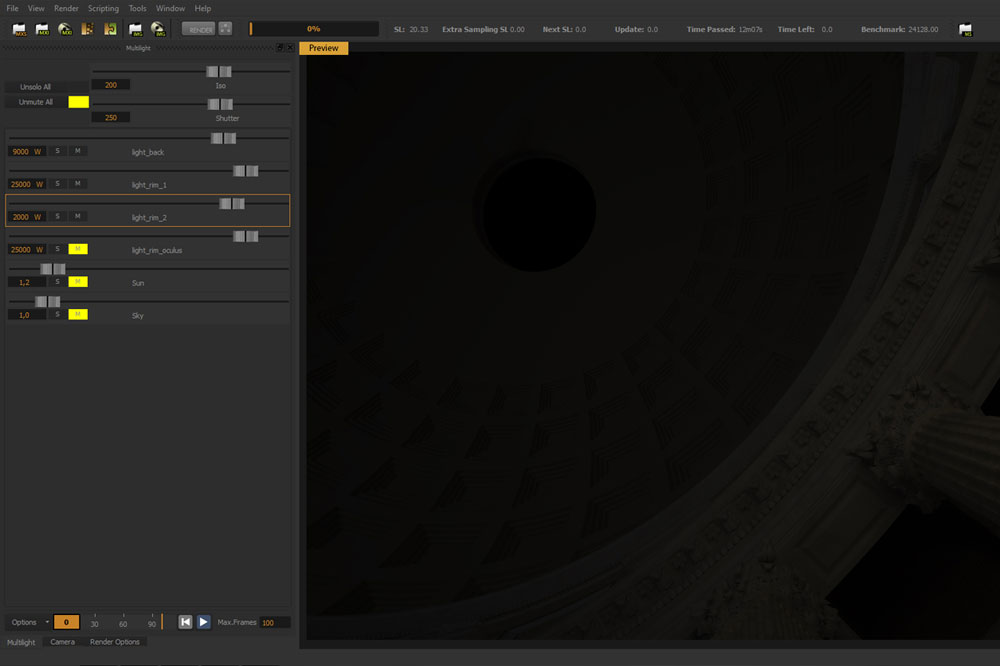
Slider to control emitter.
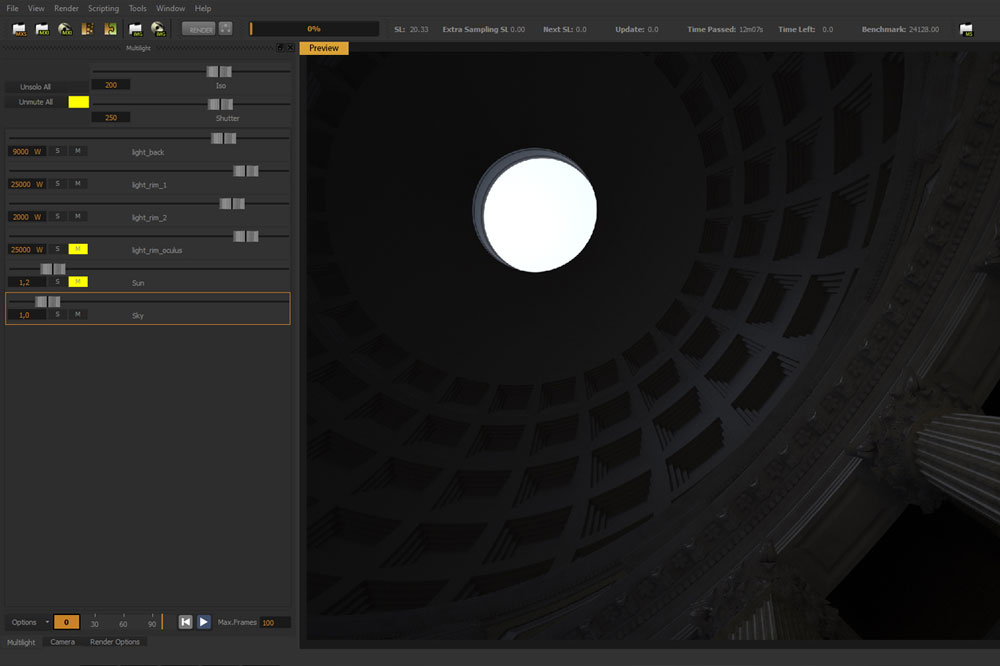
Slider to control emitter.
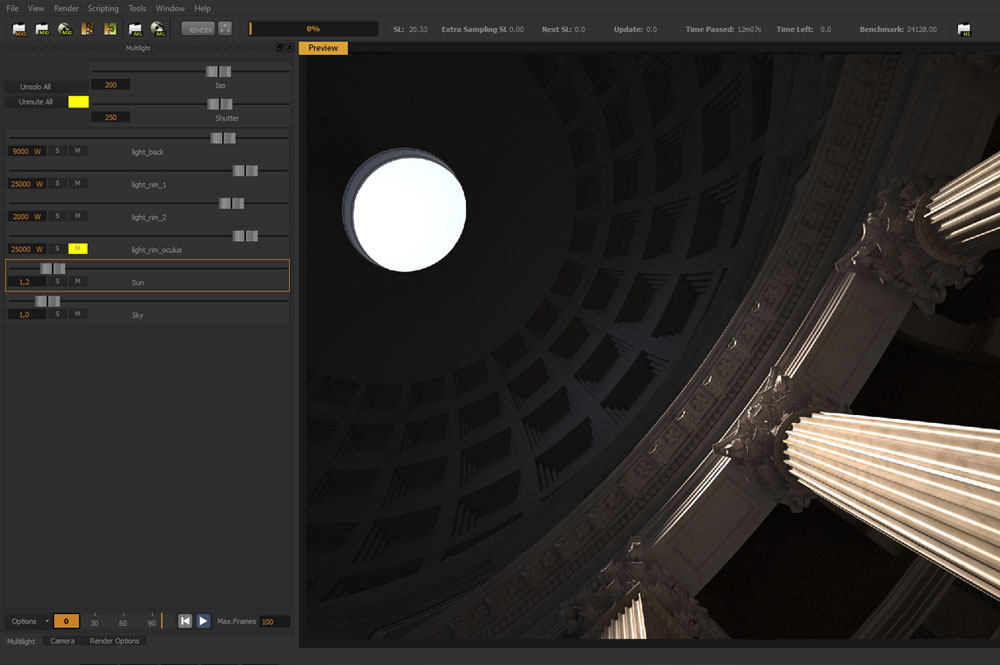
Slider to control emitter.
The Maxwell Render Simulens system allowed me to create a realistic lens diffraction effect (glare).
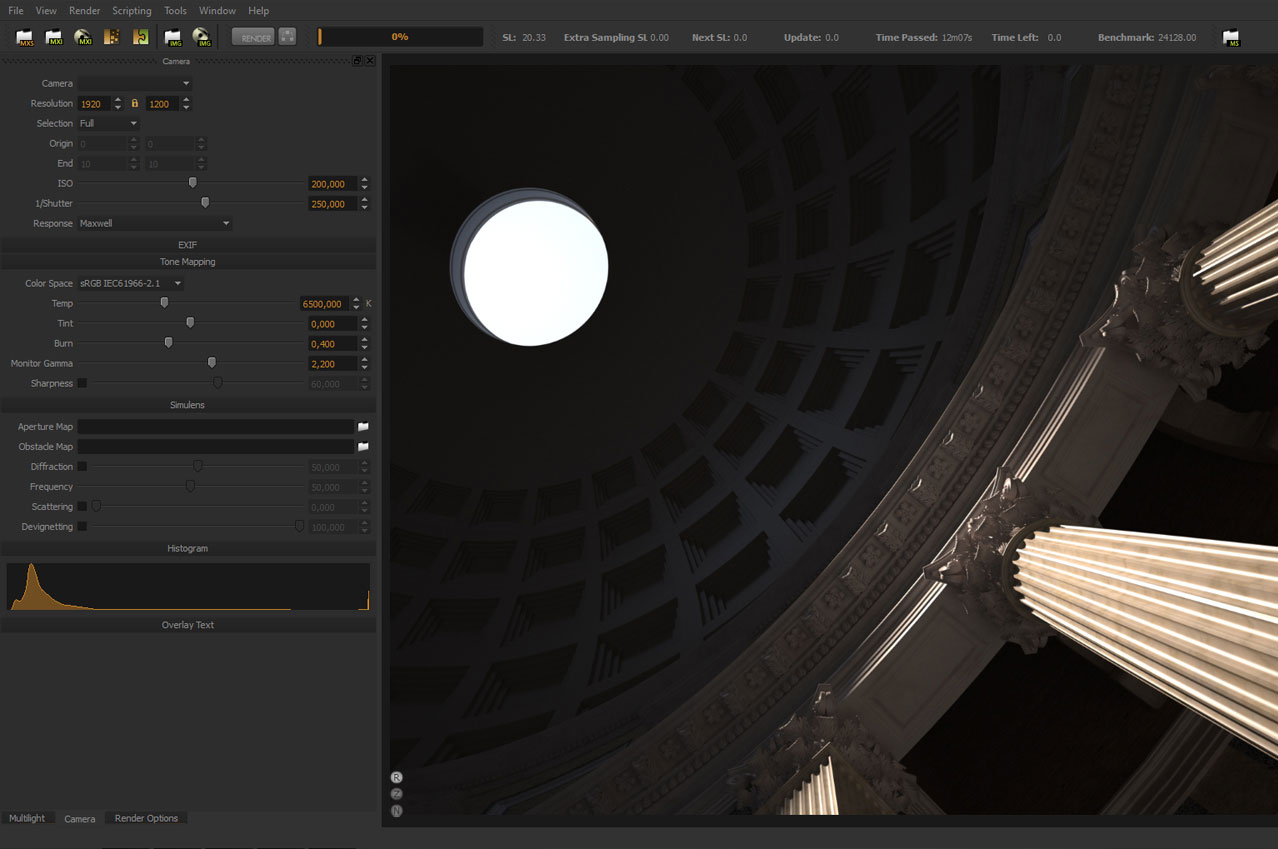
Settings
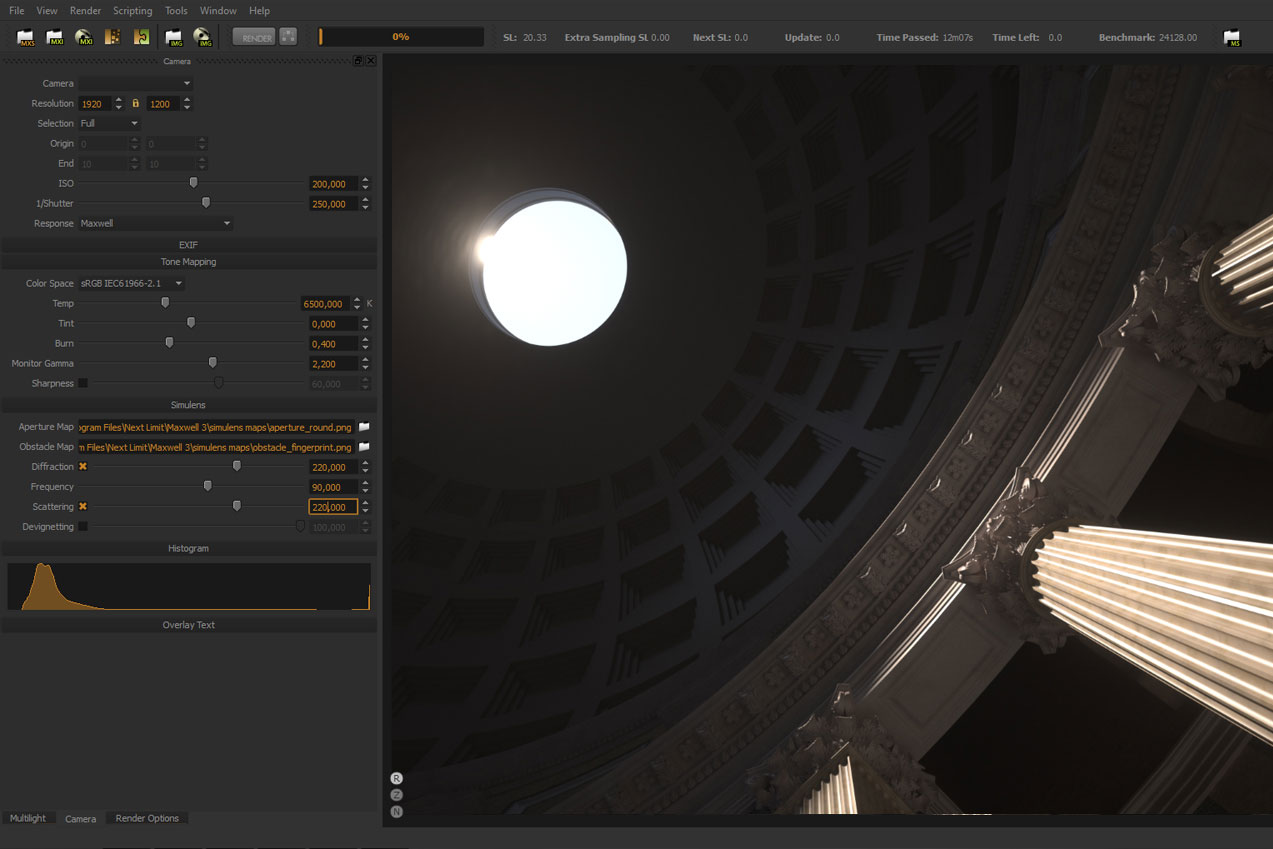
Settings
POST PRODUCTION
The raw render was saved as a 16 bit PNG file, I only rendered a normals channel pass in world coordinates. The normals channel was very useful because I could perform adjustments dependent on the world orientation of a surface.
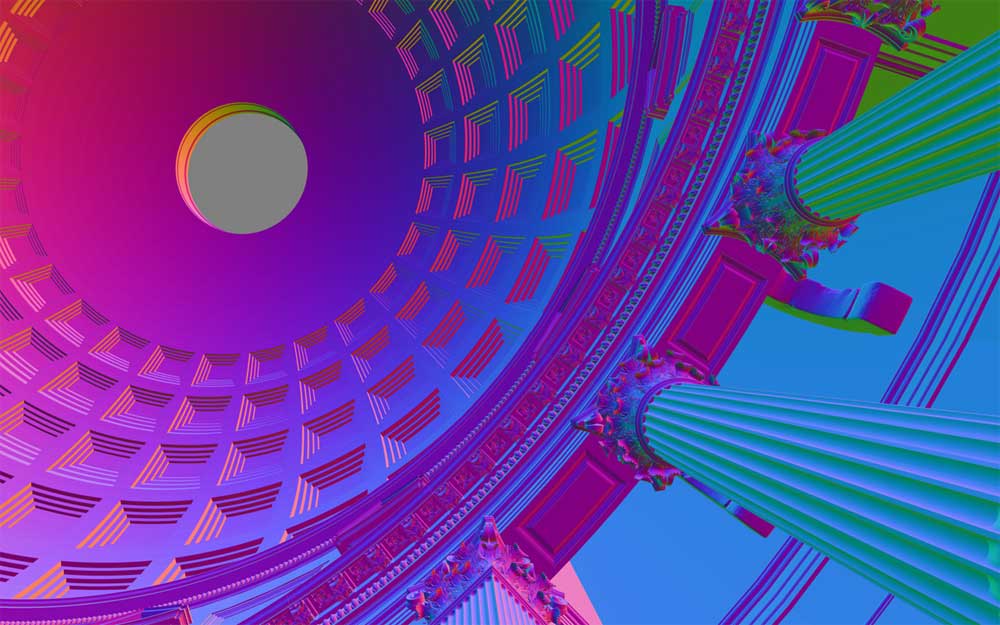
Normals Channel
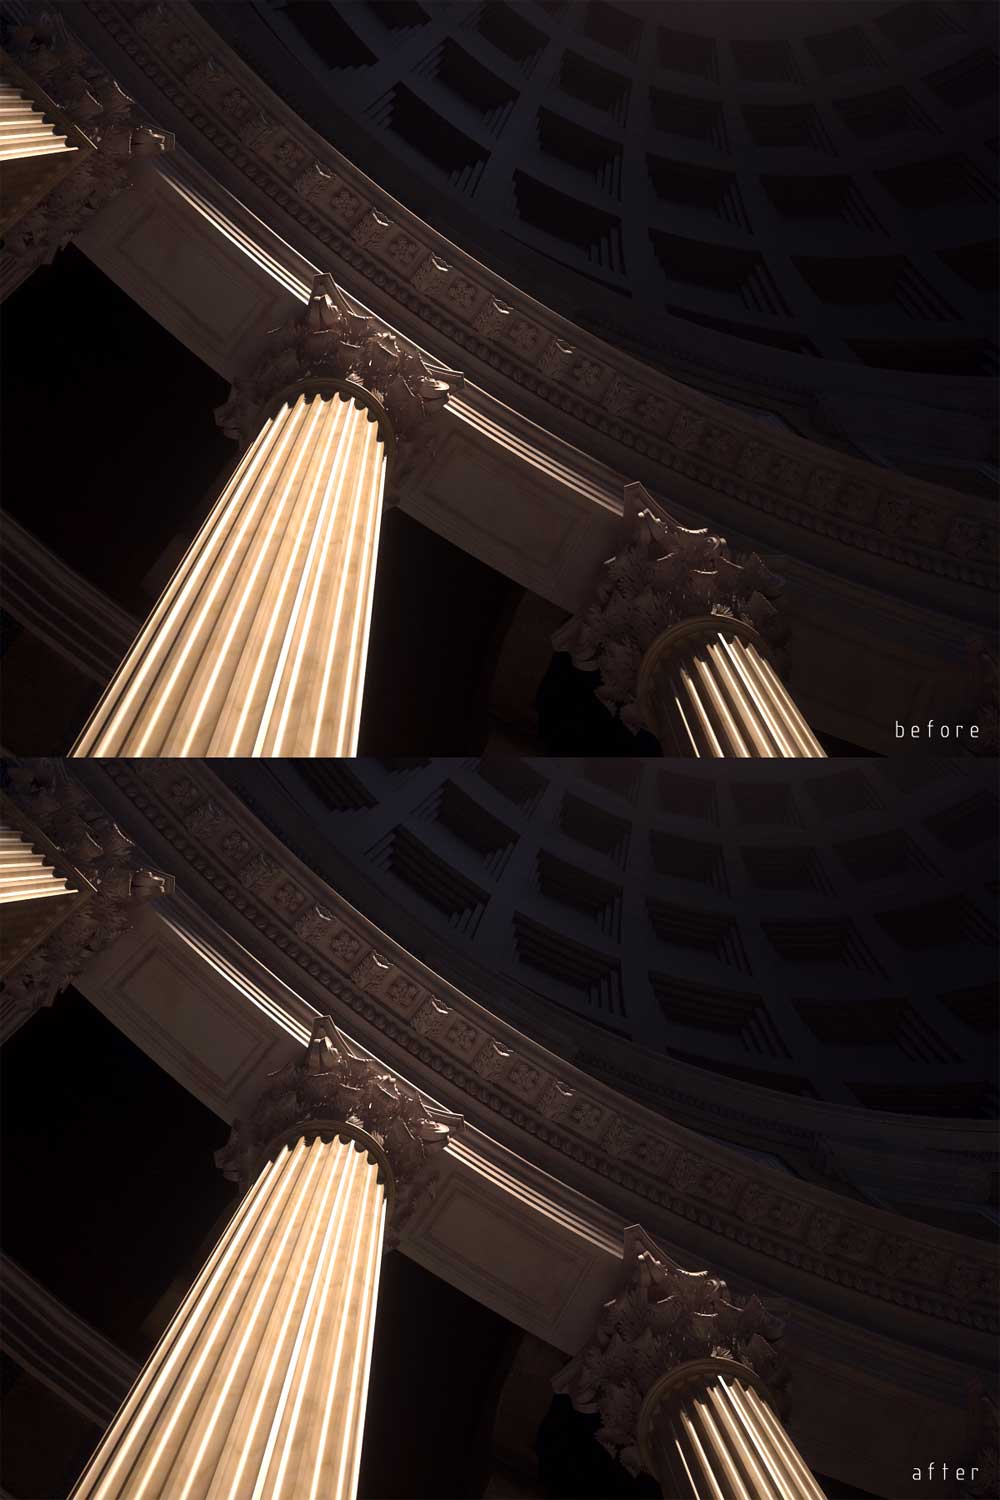
Before and after.
I did the post production in Photoshop, I always like to work in a non-destructive way, so I work a lot with layers.
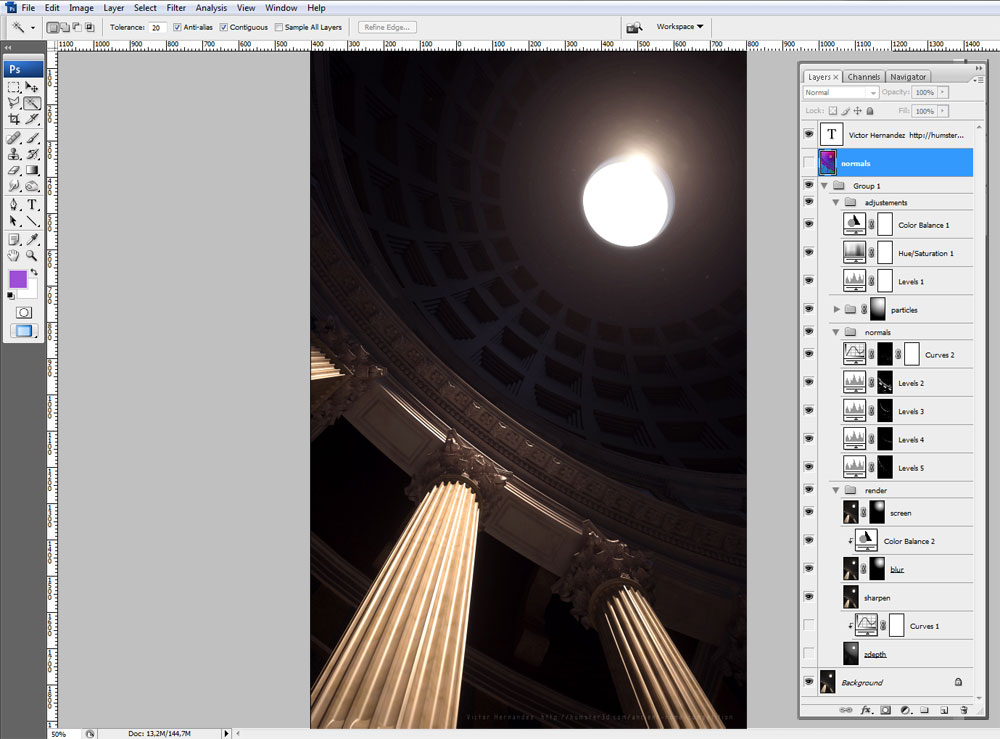
Photoshop Layers.
Final image.
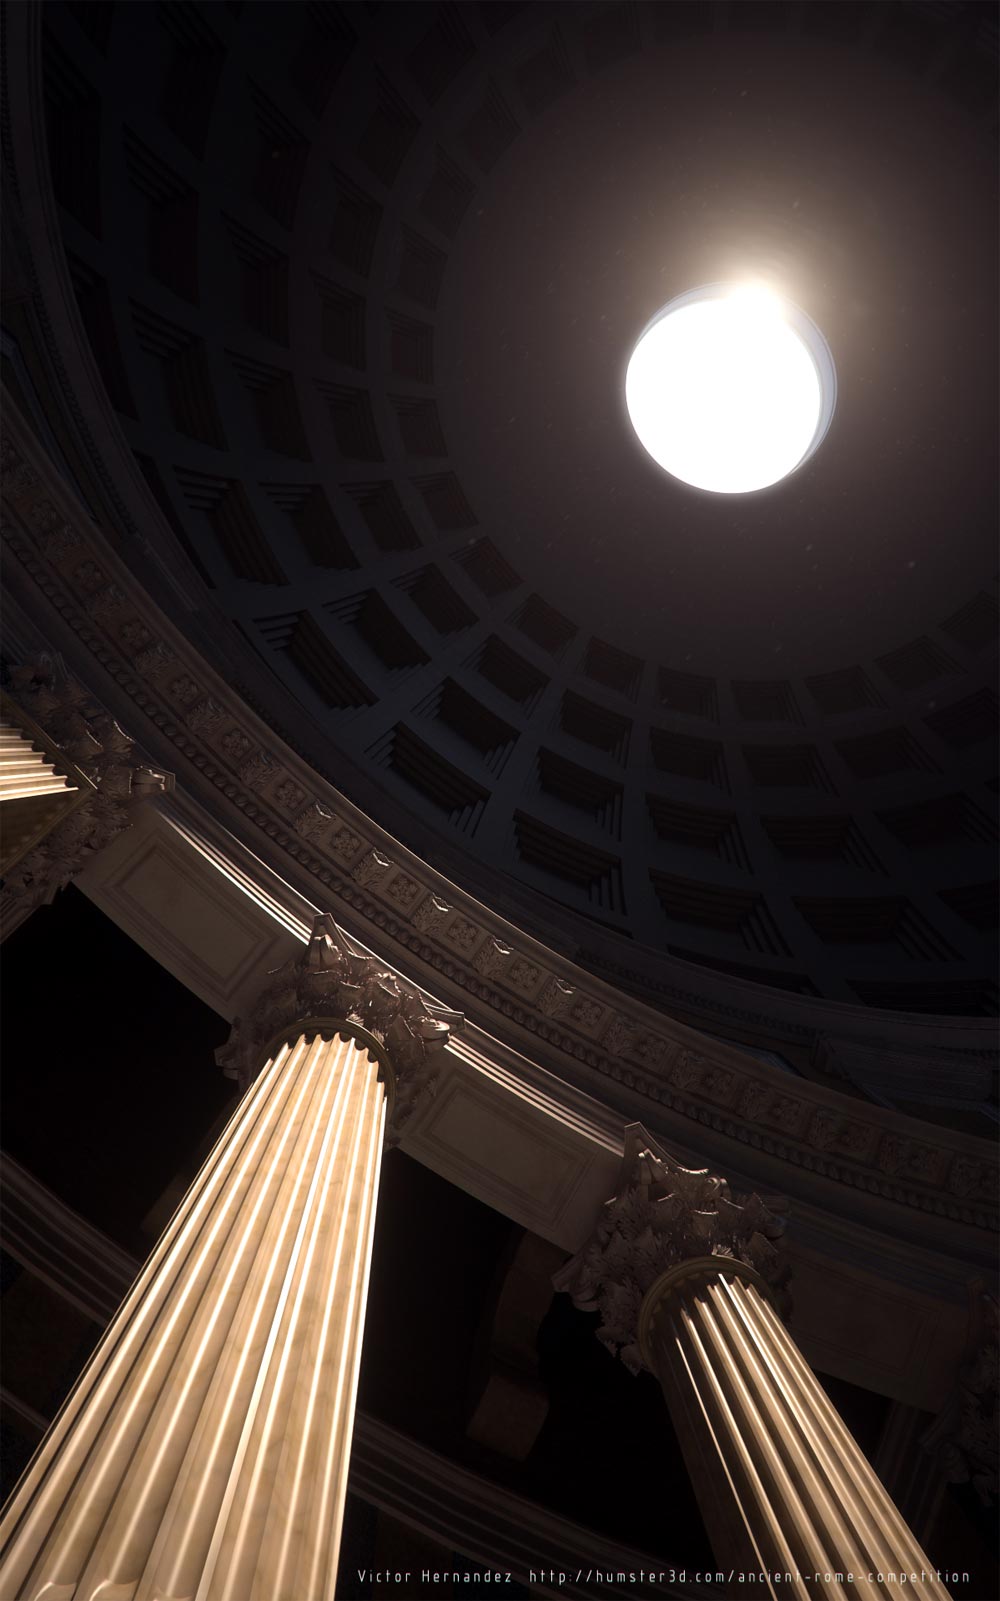
Final image.
That’s all and thanks for reading. It is been a pleasure to write this making-of, I hope you will find it interesting and helpful for your projects. I invite you to visit my webpage and Facebook page and give me some feedback.
Regards
Victor Hernandez
Profile Builder 4

Artisan Organic Toolset

PlaceMaker Version 3
Skimp Pro Import Extension

BIM Bundle Special Offer!
SketchPlus Artist Bundle !
Bevel Tool
V-Ray 5 for SketchUp E-Book
