Making of Hotel Room
 By Mateo Soletic
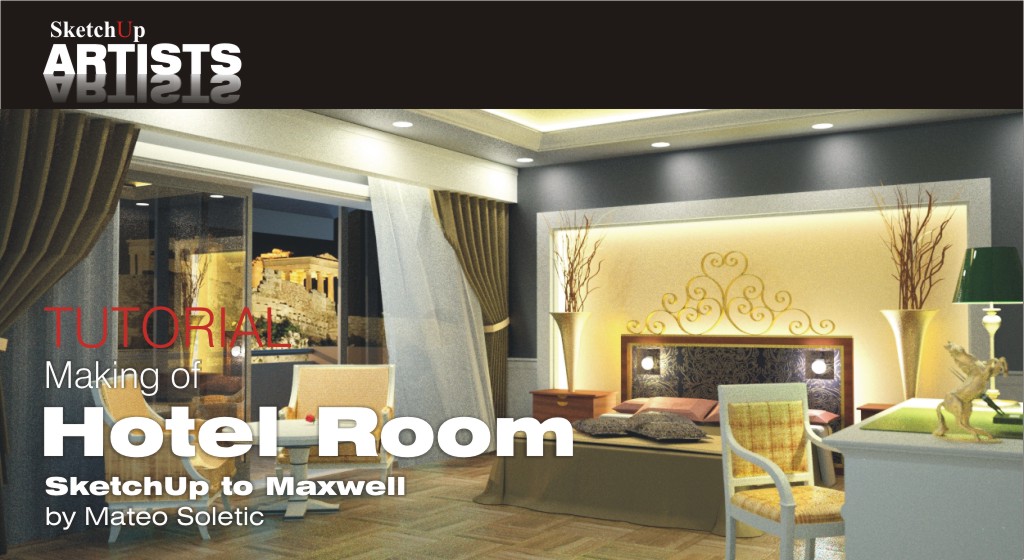
Do you want to create the right mood in your interior design presentations? SketchUp can do some things but if you want to investigate further and create a real life photo-realistic environment you will have to use real life materials, light sources or simply you will have to post process it with a renderer.
In this tutorial I will explain in a step by step process on how set your scene in SketchUp, prepare it for export, add all those materials and lights that make the difference. Finally I will show you how to get a real life photo-real look.
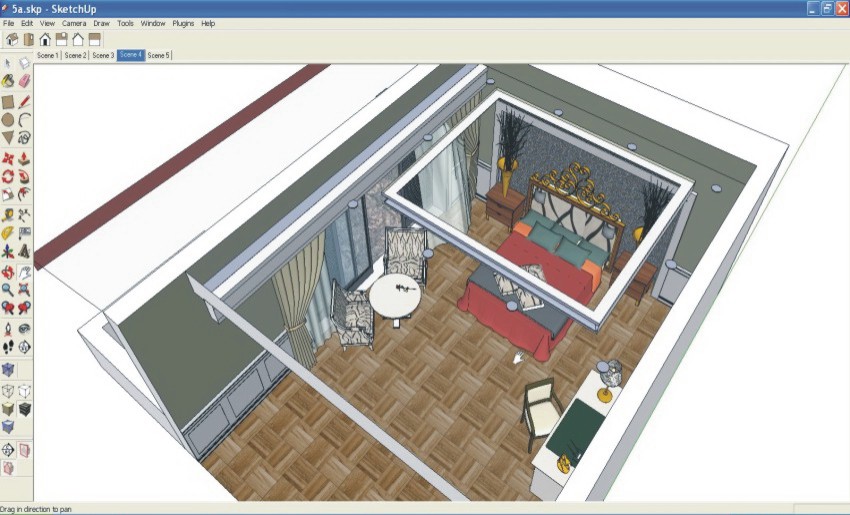
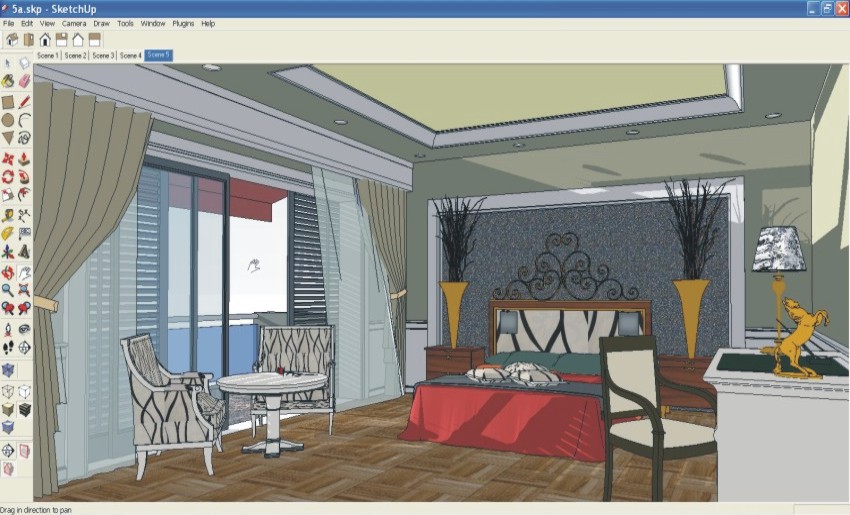
Step 1. Basically the first thing is to model a layout area of a room and populating it with furniture and stuff. Your scene should look something like the one above, like a film or theater set. Now the important thing you should bear in mind with photo-realistic images is always to pay attention to details. Spend some more time on choosing and adjusting the right props like I did here with the wind blown curtain. Not paying attention to details is something that can bring your final image down more than anything else.
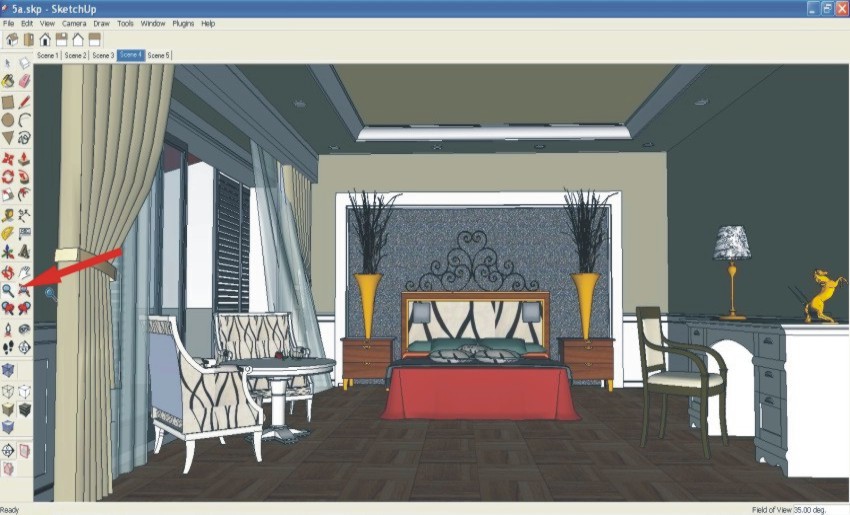
Step 2. Another important detail is to set the right final view/camera angle. I will move around the scene and will finally adjust the camera angle with the help of the zoom tool and by adding value in the measurement box.
Step 3. When I am satisfied with my views/camera angles that capture those scenes I will save them for export .
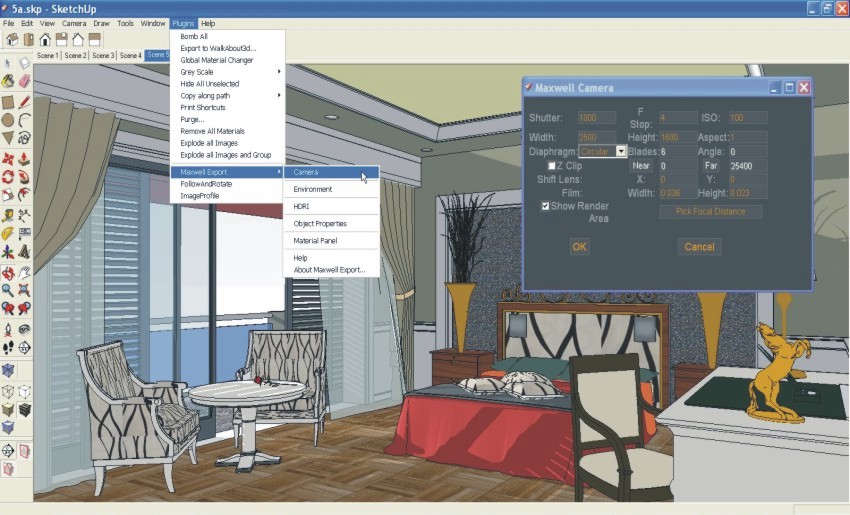
Step 4. Since there is a slight difference between the camera angles from SketchUp to one in Maxwell Render I go to Plugins>Maxwell Export>Camera . After filling in the size of the image, Height and Width values in the dialog box I then tick , Show Render Area box.
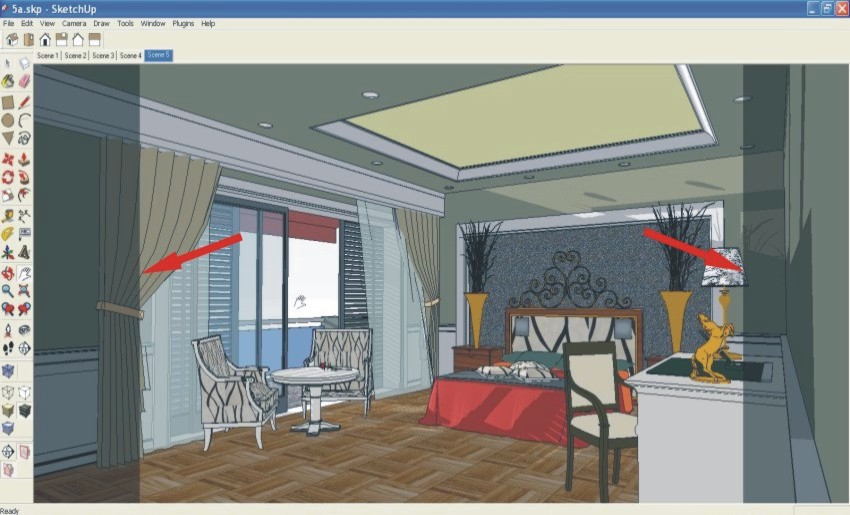
Step 5. This is how my final render output will look like. Note that the grey transparency on each side that covers the image will not be included in the final rendered image.
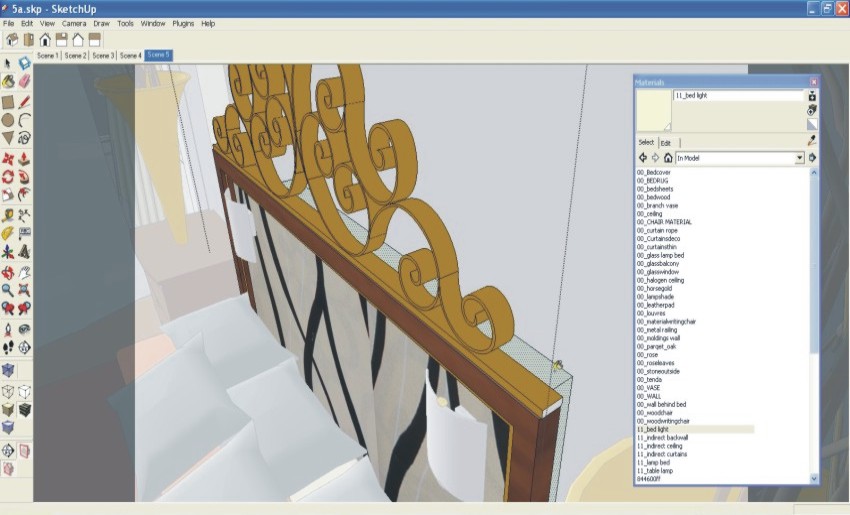
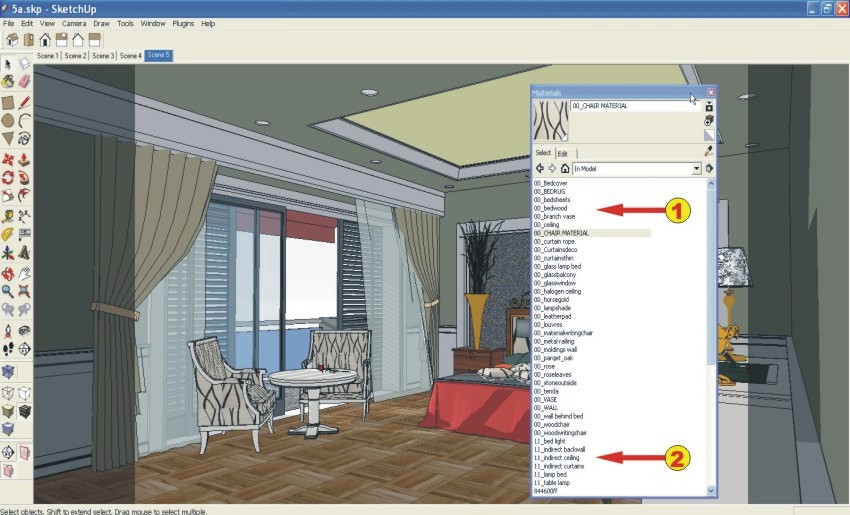
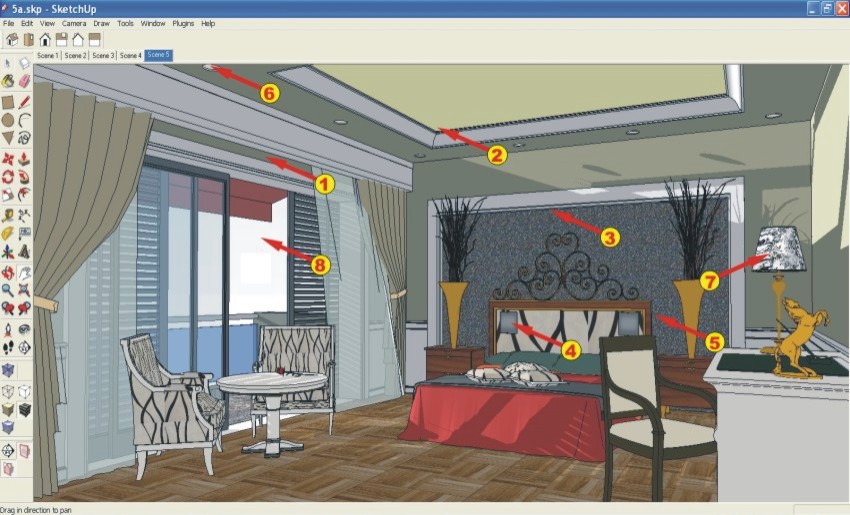
Step 6. I find it much easier to apply/replace SketchUp materials in Maxwell Studio. I don’t replace every single material because that usually takes me too long but I only replace the key ones that will eventually make the difference. Those that I will be replacing I will label 00 see (1). Light sources If I decide to change I will label 11 see (2).
Step 7. In order to get the right mood I will add various light sources in intensity and direction. Here are some examples of this set up:
(1) Indirect strip lighting behind curtain (2) Indirect strip lighting behind ceiling moldings (3) Indirect strip lighting behind wall moldings (4) Bed mounted lights (5) Indirect strip lighting behind the bed (6) Recessed ceiling lights (7) Table lamp (8) Environment.
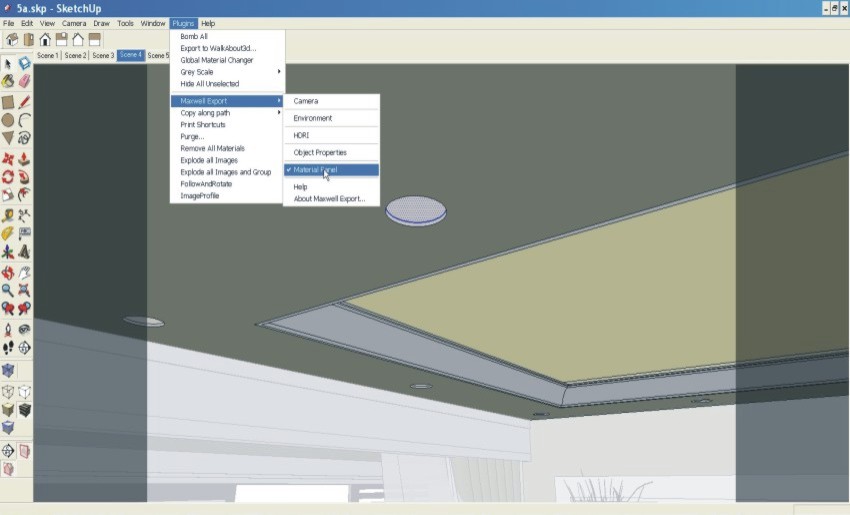
Step 8. Now I will activate the Maxwell material panel to set up lights in SketchUp. Go to Plugins>Maxwell Export and activate the Material Panel.
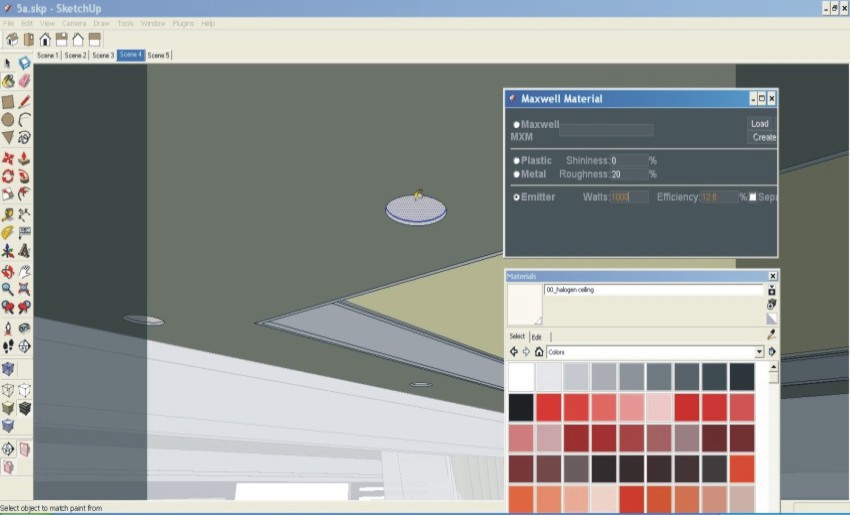
Step 9. Since the material panel is activated now, every time I add a new material the fly out window of the material panel will open automatically. I will now select a color write a color write in 00_halogen_ceiling and in the fly out I will tick Emitter and write a Value – Watts = 1000. This is an average Value and I can at this point more or less add similar values to all my light sources.
 l
l10 - Making of Hotel Room - Placing light material - example
Step 10. I will repeat the same procedure with all the light groups and I will create in this case, eight all together.
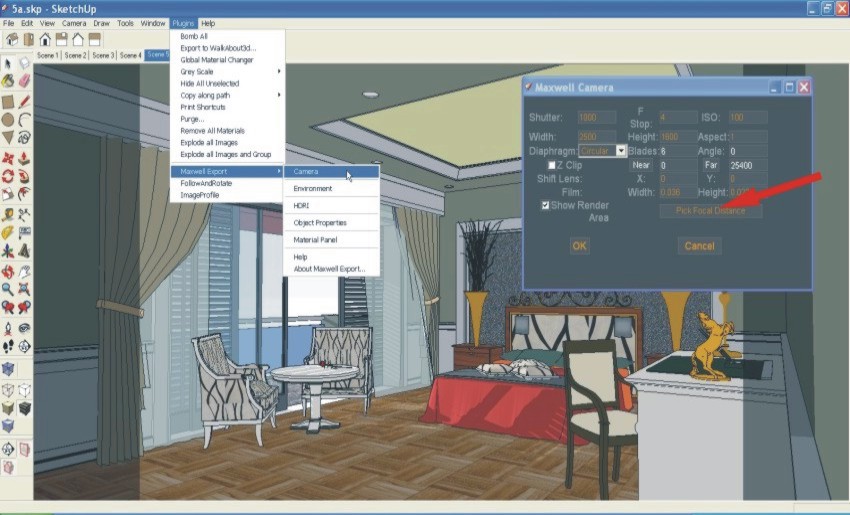
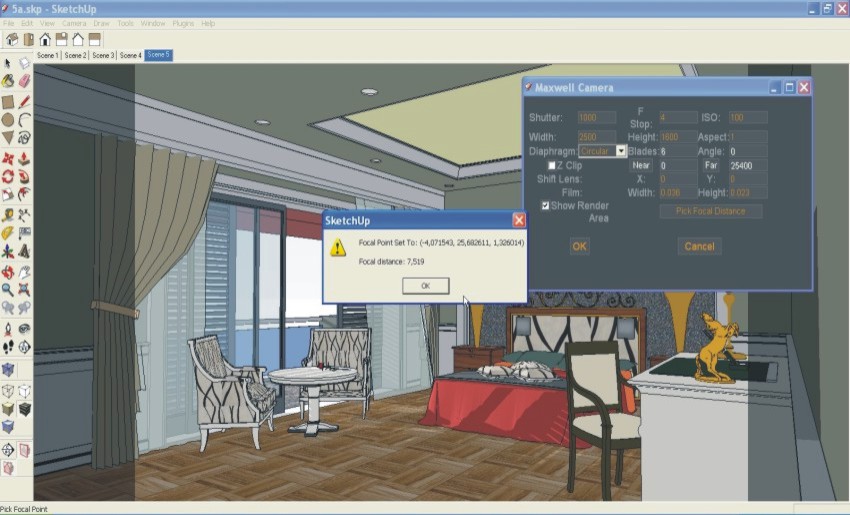
Step 11. I will now set the focal distance by going to Plugins>Maxwell Export>Camera and I will click on the Pick Focal Distance.
Step 12. Clicking on desired spot on the screen I will set my focal distance.
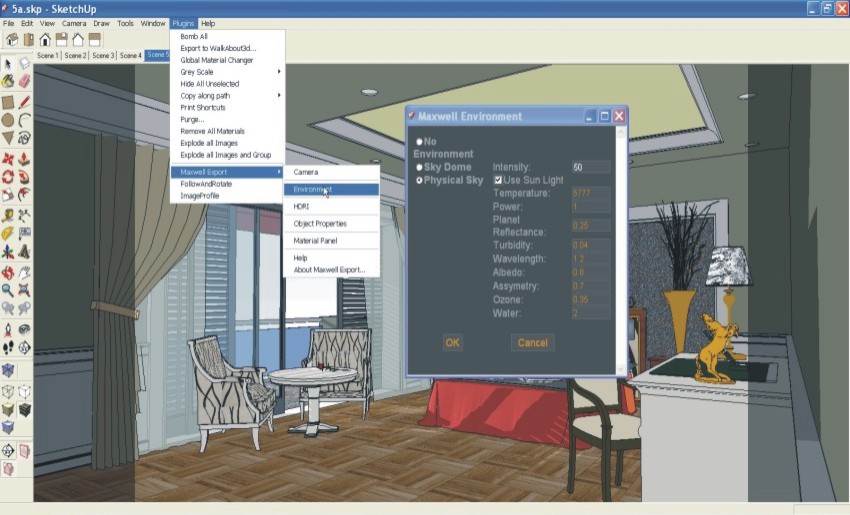
Step 13. Finally I will fill in the Environment settings. In this case by setting it to Physical Sky.
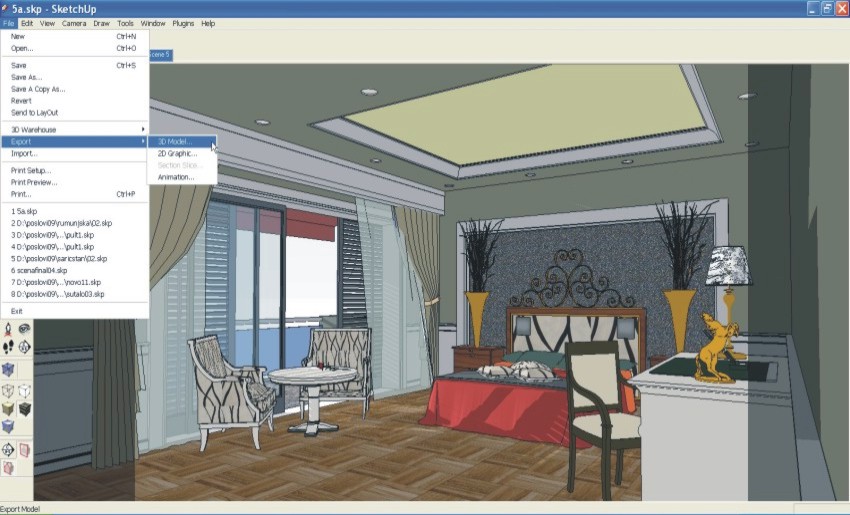
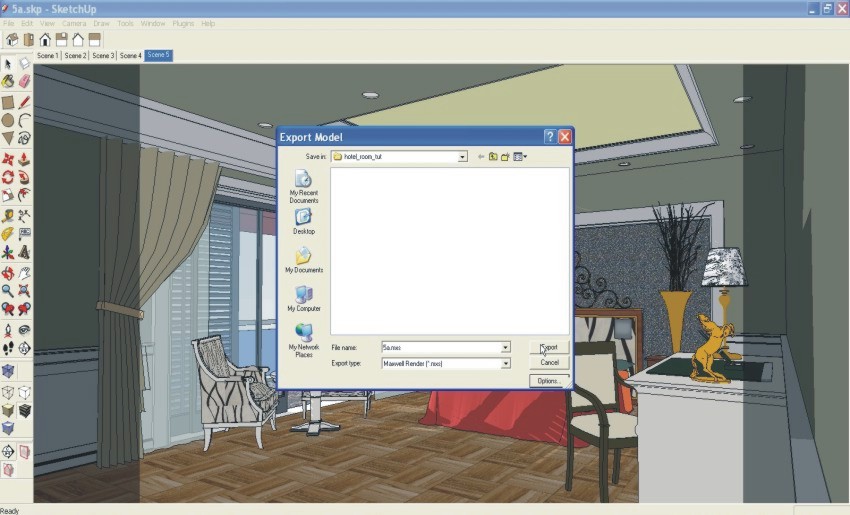
Step 14. I have set all the parameters and will now export my model to Maxwell Render. Go to File>Export>3D Model.
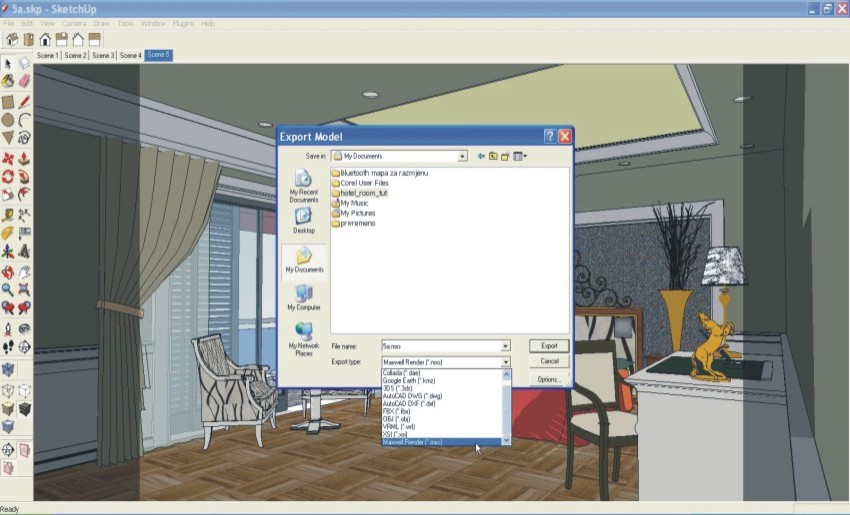
Step 15. In Export Type, I will select Maxwell Render and select the target folder I want my model and final render output to be exported to.
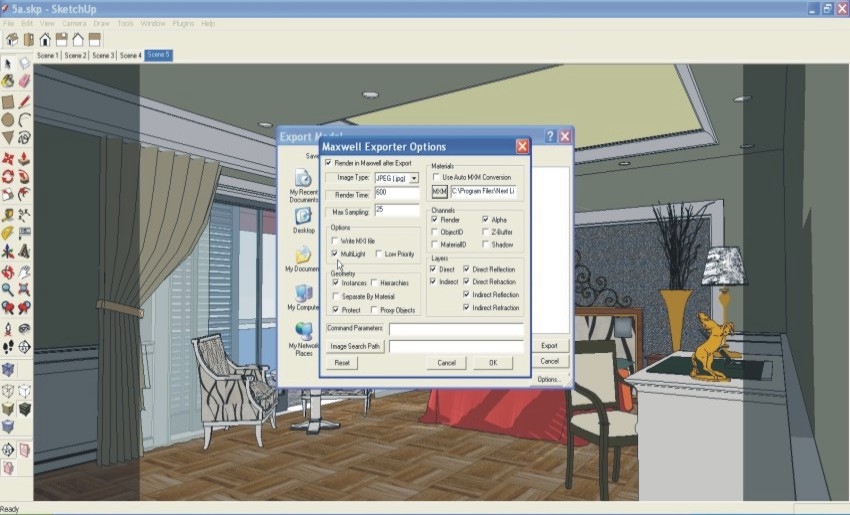
Step 16. Before continuing further I have to fill some more parameters in the Maxwell Exporter Options Box. The most important ones being Image Type, in this case it will be JPEG and for render time I will write 600 (that is overnight). Two more fields I will tick is Alpha since I will be probably replacing the outdoor image with my own in Photoshop and also the most important one, as you will see later in this tutorial, is Multilight.
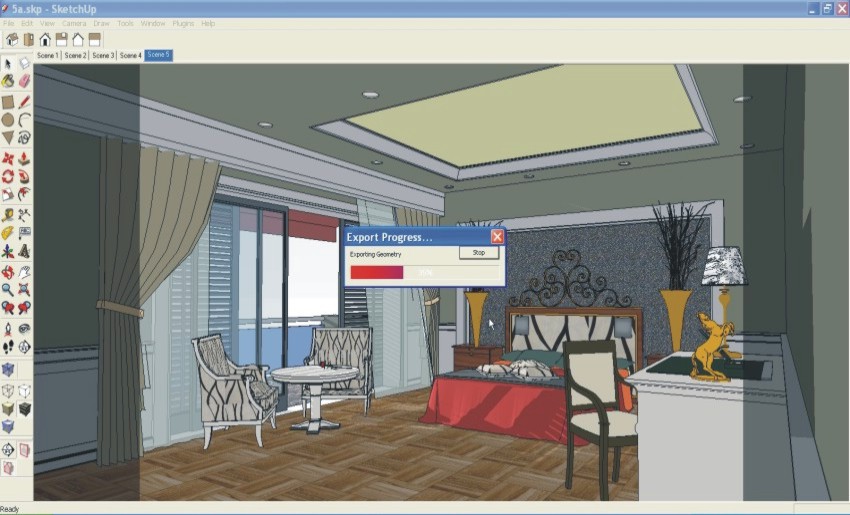
Step 17. Now I will finally export my model for render.
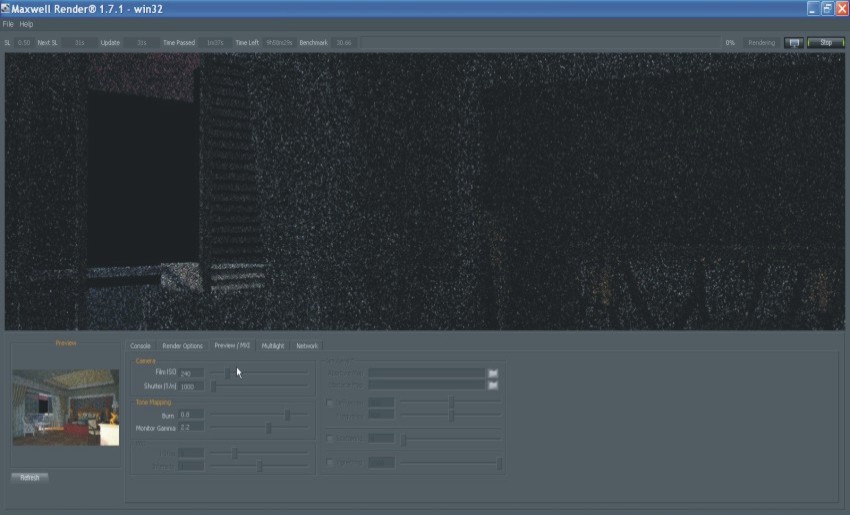
Step 18. I could have unmarked the first box, Render in Maxwell after Export, and all my geometry complete with all my settings would been saved without starting the rendering process. I found out that if there are any problems with the geometry or texture it is better to know right away before I continue any further work in Studio.
Step 19. When I am assured that all is ok, I will stop the render process and start replacing SketchUp materials with Maxwell materials in Studio.
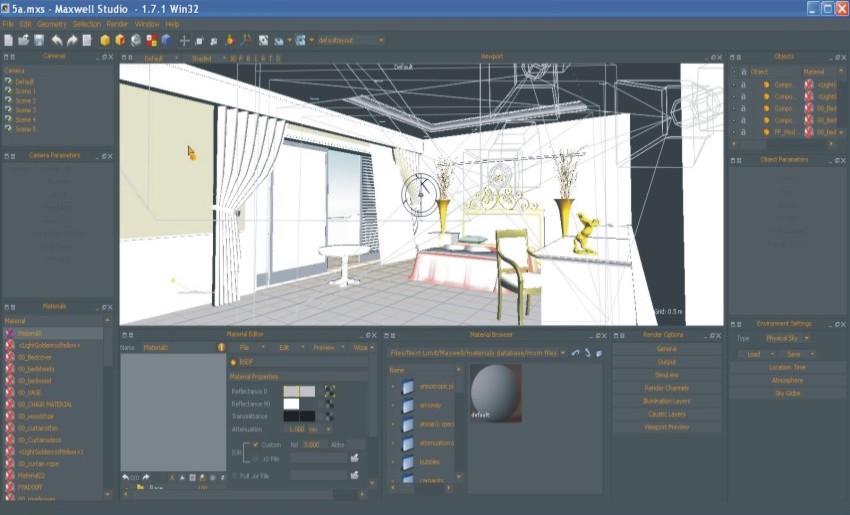
Step 20. This is the basic layout in Studio.
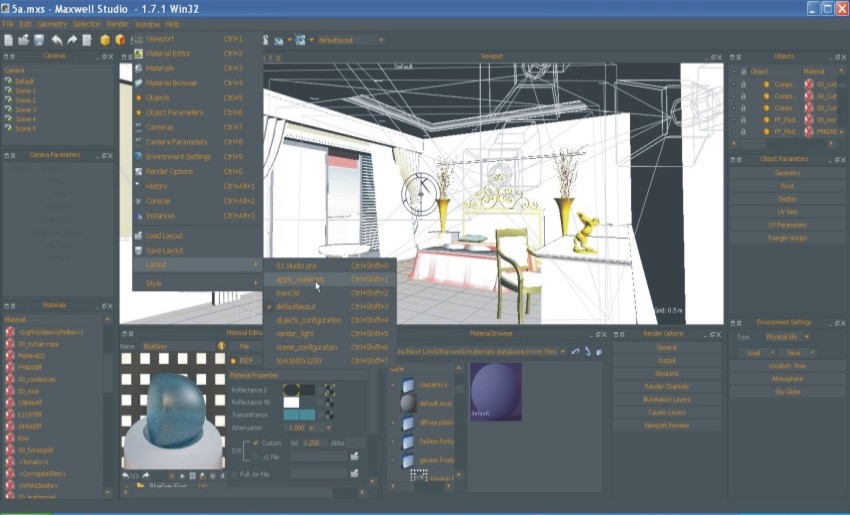
Step 21. I am in so I will go to Window>Layout>Apply Materials.
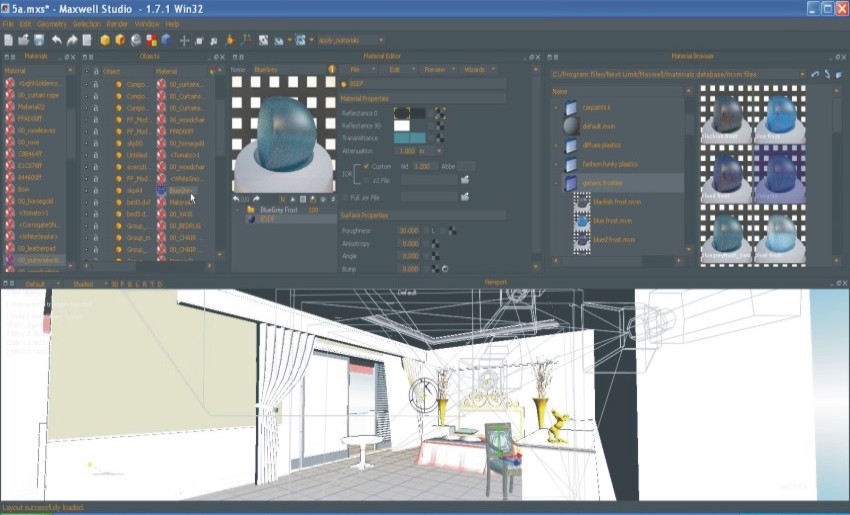
Step 22. The easiest way is to navigate to your Maxwell material folders and search for desired materials and one by one replacing the SketchUp ones I have labeled for replacement.
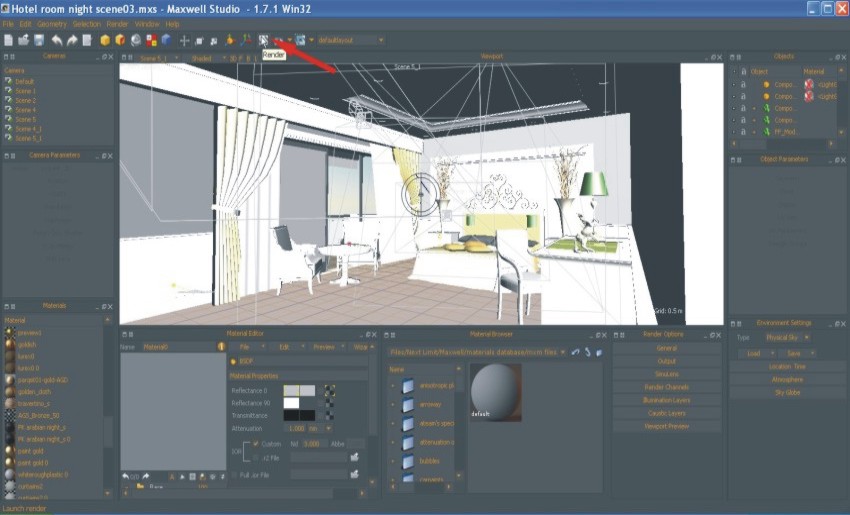
Step 23. When all the materials have been replaced I will check my settings once again and export for render.
Step 24. This is how my final image looks like.
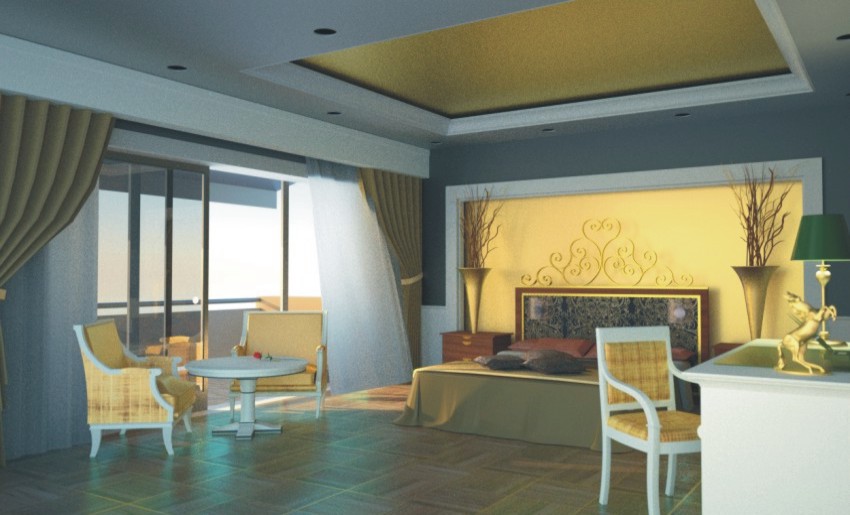
Step 25. Or like this without lights.
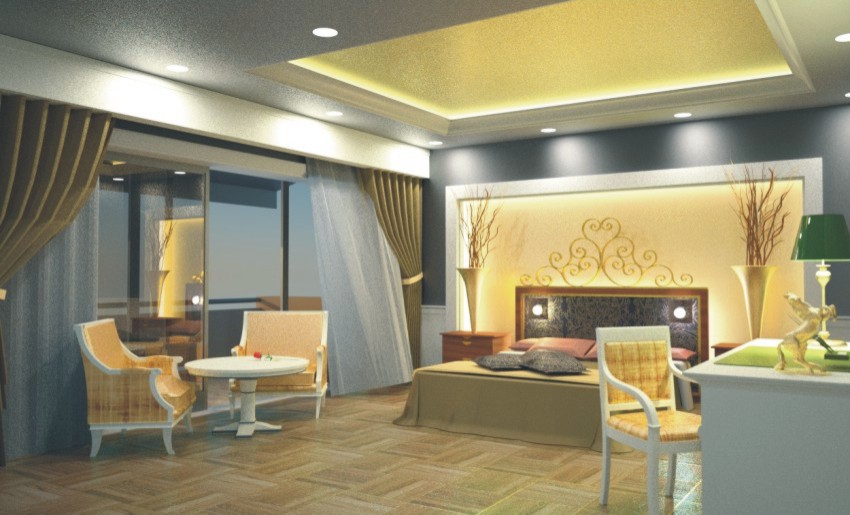
Step 26. Once again a larger image with lights on.
Step 27. In Preview/MXI Dialog You can adjust all the values like Film ISO, Shutter, Burn, Monitor Gamma … during the render itself or after the render has been completed. The changes will be visible immediately on the smaller screen and 0 pressing the refresh button on the main screen.
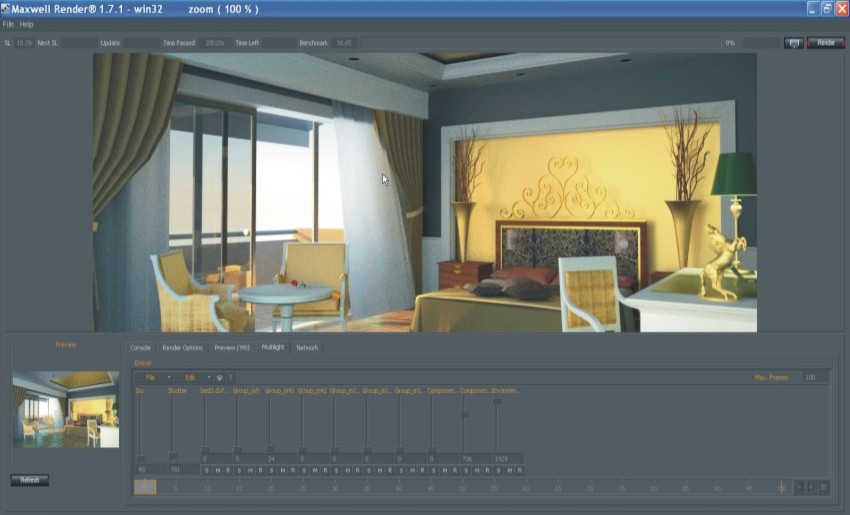
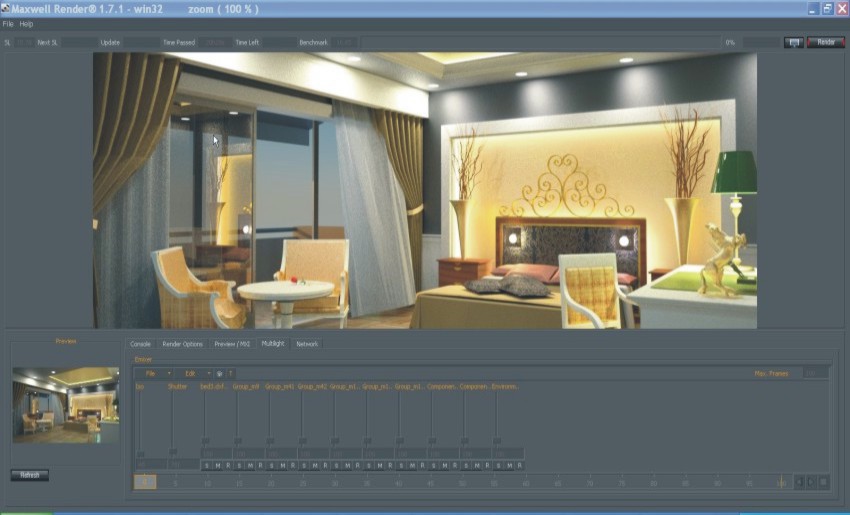
Step 28. This is the Multilight Panel. Multilight is a great feature. On this slider all the swithches of all the light groups I created are positioned. I can add new Values, switch off certain lights and test almost any combination of lights. Further I can save my MXI file and present it to the client and making all possible day and night light simulations in an instance. You can also create a movie out of it. But that is for another tutorial.
Step 29. MXI file set with only daylight and a table lamp light.
Step 30. MXI file set with Environment at dusk and all lights active.
Step 31. MXI file set with Environment at night and all lights active. The final image.
Thanks for reading this tutorial and I hope you found it useful in your daily work process.
Mateo Soletic






i go to erie county vo-tech of erie pa and want to know more about this program.
This is a great tutorial Mateo! And the rendered image is really nice.
I’m glad to see this web site is picking up steam!
Keep up the great work!
~Coen
Thanks Coen for your kind comment much appreciated.
Wow
Having recently started to use Vray for my rendering, I find your work a real inspiration, it is your finished image that keeps the flames burning, stunning.
Kerry Jackson
Woow…cool…I’ll try it
This is Crazy verry great master piece…I give you applause,