Interior Lighting with LightUp for SketchUp

By Adam Bllyard
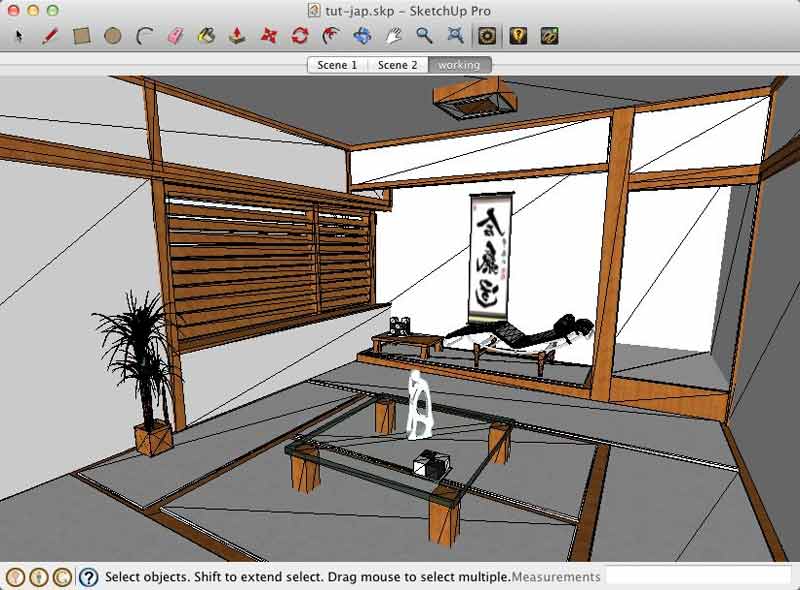
The following tutorial will take you step by step through the process of rigging lighting in SketchUp for rendering in LightUp. LightUp for SketchUp is a SketchUp plugin that adds realistic, realtime lighting to your SketchUp models. This particular model was used on a Italian 3ds Max/V-Ray site and is called the ‘Tatami Room’. We will use it in this tutorial.
You can download the SketchUp model if you want to follow along. Its available on the LightUp website here. After downloading it, open up the file in SketchUp and open the LightUp preferences dialog.
Direct Lighting
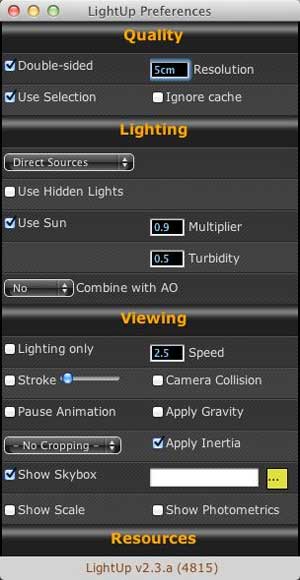
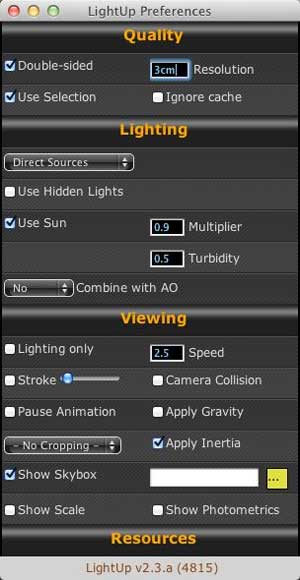
By default, LightUp preferences for a model will be “Direct Sources” and a lighting Resolution of “4x”. You can see “Use Sun” is checked which means LightUp will be using the sun position as defined by SketchUp. Further down, you can also see “Show Skybox” is checked. Because we have not specified a skybox / hdr file, LightUp will create one for us based on the time day and time of year.
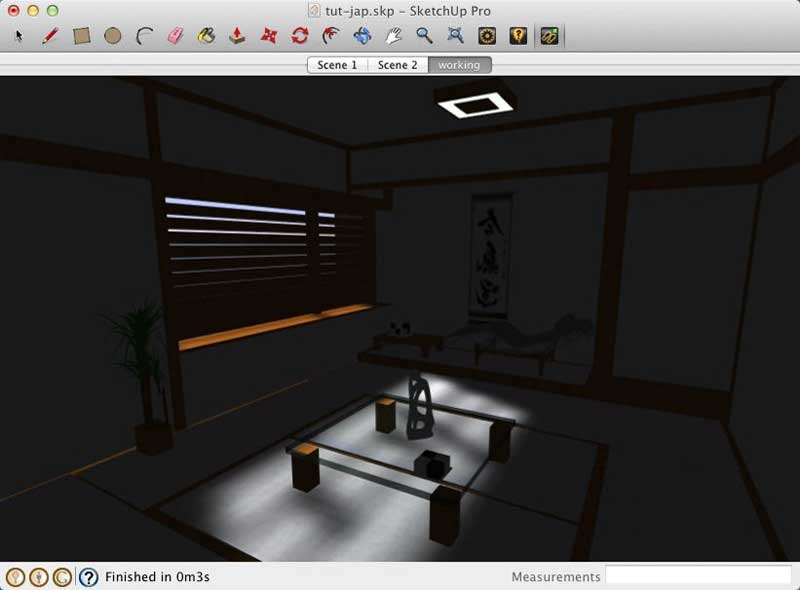
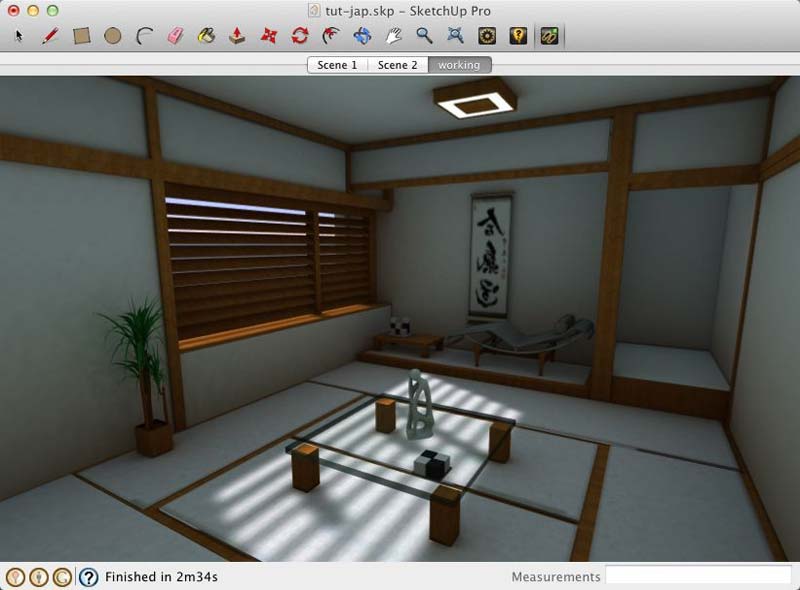
If you press the Tourtool button to start lighting, you should quickly get something like below. The room is dark apart from a little sunlight getting through the slattered windows. First thing you will notice is the sun shadows are very indistinct. This is because we’ve accepted the default LightUp lighting resolution which is very conservative, so we can improve that by editing the Resolution and changing it to a absolute distance.
Using absolute distances when using a model of known scale gives us a much more accurate way of controlling how sharp lighting is because we can exactly specify the grid spacing of lighting calcs. Edit Resolution to be “5cm” and run Tourtool again.
You should get sharper shadows as shown in the image below.
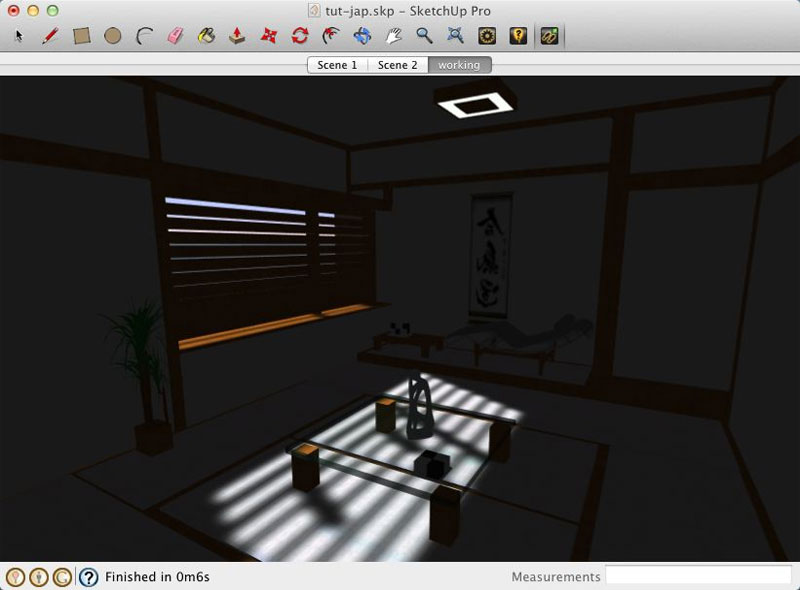
The shadows are more distinct, but still quite blurry and not really satisfactory. Because we can set lighting (and therefore shadow) Resolution as an absolute distance, its sometimes useful to use the SketchUp TapeMeasure to measure a feature in your model to help choose an appropriate Resolution. Edit Resolution to be “3cm” and run Tourtool again.
You should now get much more definition in the sun shadows.
Adding in Ambient Occlusion
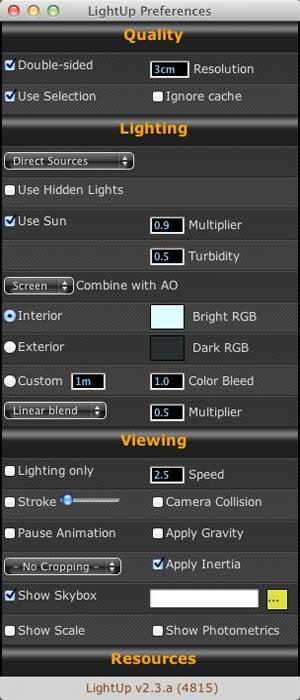
OK, next we are going to blend in some Ambient Occlusion (AO) to give some fill-in lighting. We do this by opening the LightUp preferences and changing the drop-down menu for “Combine with AO” to “Screen”.
You will see that an extra menu unfolds to reveal the parameters for AO. AO works by calculating how much non-directional local shadowing there is. It does this by searching for nearby geometry that could occlude the ambient lighting in your scene, so it is normal to give some cut-off beyond which the software won’t search.
The reason this is particularly neccessary for interior models is because all of your scene is oclluded a little which would result in total blackness. So in LightUp, the preset “Interior” searches for 10% of the size of your model, “Exterior” for the full size of your mode, and “Custom” allows you to input an absolute distance beyond which not to search.
We’ll start with “Interior” and leave everything as the default. Go ahead and press Tourtool.
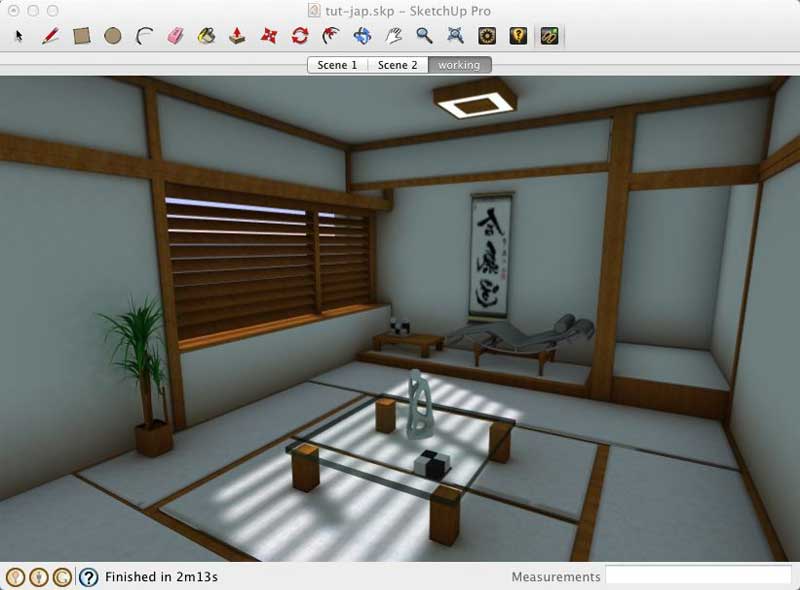
You should get something like the image below which shows the AO blended in with our sunlight.
You will notice the AO falls off quite quickly away from the corners and edges, so we can edit the AO settings to use a “Custom” distance of “2m”. This means LightUp will search up to 2 meters away from every surface for occluders. You can see below that the result is a software fall-off while retaining the color-bleeding.
Tweaking the Daylight
We are going to add some diffuse daylight to the direct sunlight we already have. To do this we will setup a LightUp Area Emitter over the window. We could put the Area Emitter outside, but much of the light would get blocked by the shutters, so we will simply draw in a rectangle in front of the window and mark it as an an Emitter.
Using the Sketchup Paint tool, the face is made totally transparent so we can not see it in the final render. We also take the LightUp QueryTool and edit the material properties marking it as:
– Do not cast shadows (so our sunlight passes straight through it)
– Emitter with a low power (500 lux)
The result of the addition of a diffuse light source is a much more natural look.
Reflections
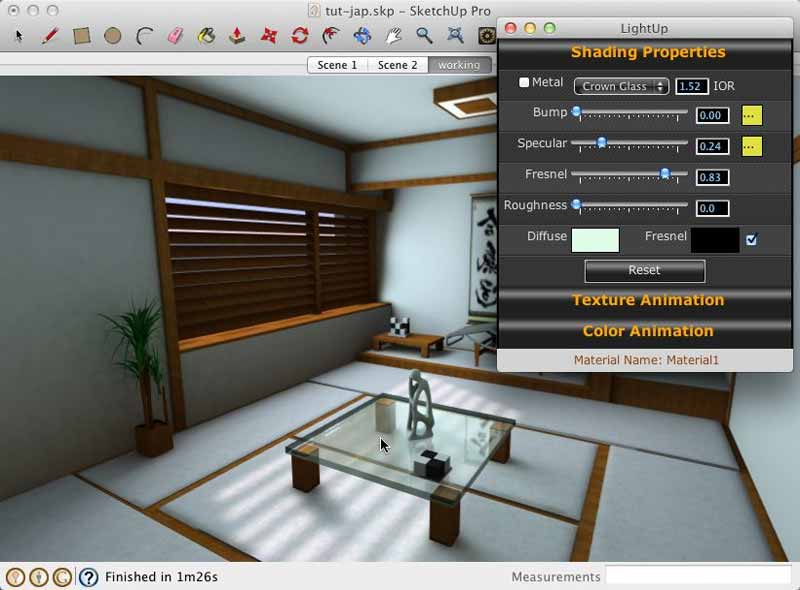
With the lighting pretty much there, we want to turn our attention to editing our materials to add reflections. First up is the glass table in the center of the room. While in Tourtool, we can click on any material we see to edit it’s properties.
The table top uses a material that is just used on flat surfaces – the table itself, so LightUp can automatically generate realtime reflections for it. By adding Specular and Fresnel, we can now see the table reflect the room in a realistic manner.
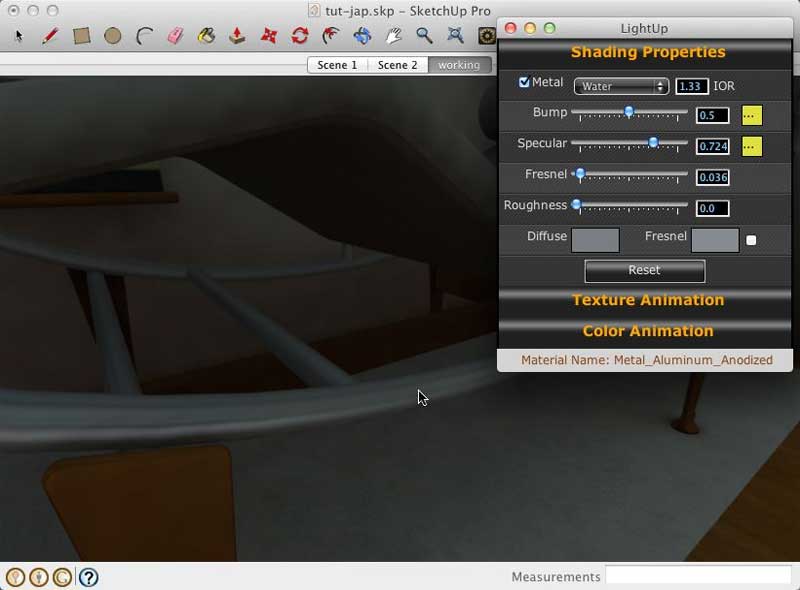
The couch at the back of the room has a curved metal frame which we also want to set as reflective. Because the material is on a curved geometry, we’ll need to place a LightUp IrrCache nearby to capture the surrounding lighting to be used for realtime reflections.
The technique used in LightUp to place an IrrCache, is first to navigate down the Group/Component Instance hierarchy to the object you wish to make reflective. An IrrCache Component is then added nearby and the IrrCache and Component you wish to be reflective all Grouped together.
And the two grouped together. The reason we do this is to ensure that an IrrCache only gets used by the objects within its Group.
The metal frame of the couch is edited during Tourtool as well. Notice we’ve checkboxed “Metal” to attenuate any reflections with the material color.
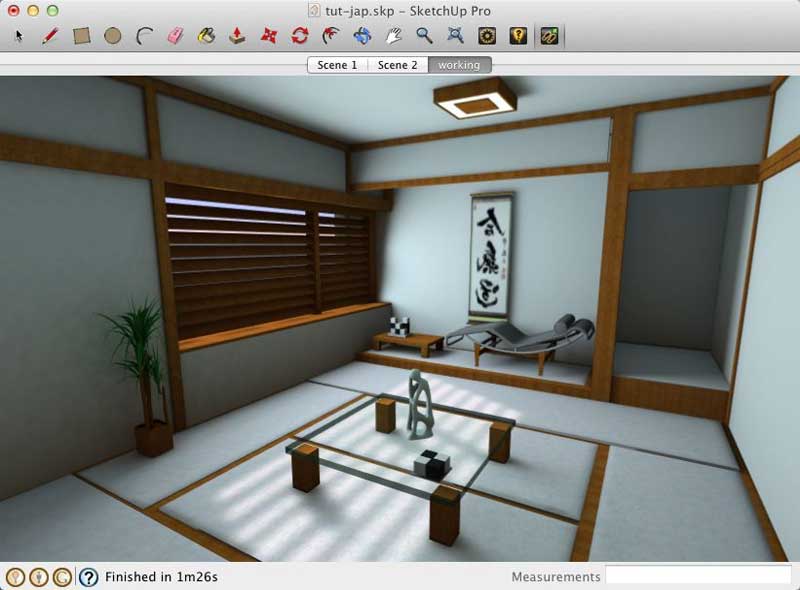
The final rigged lighting is like shown below. This is the output directly from the realtime engine wihout any tonemapping applied which we will do in the last section.
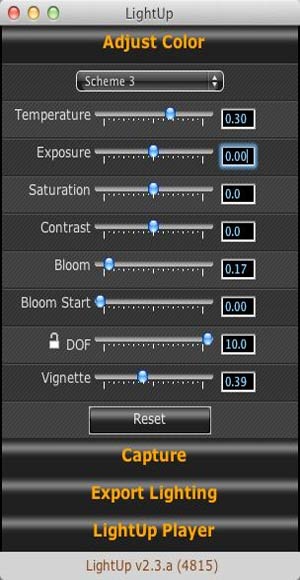
Opening up the Adjust Color dialog (by pressing or using the Toolbar button) allows us to apply realtime tonemapping to the LightUp output as we navigate aorund the model. Here, we’ve bumped up the Temperature, added a little Bloom and a small amount of Vignette.
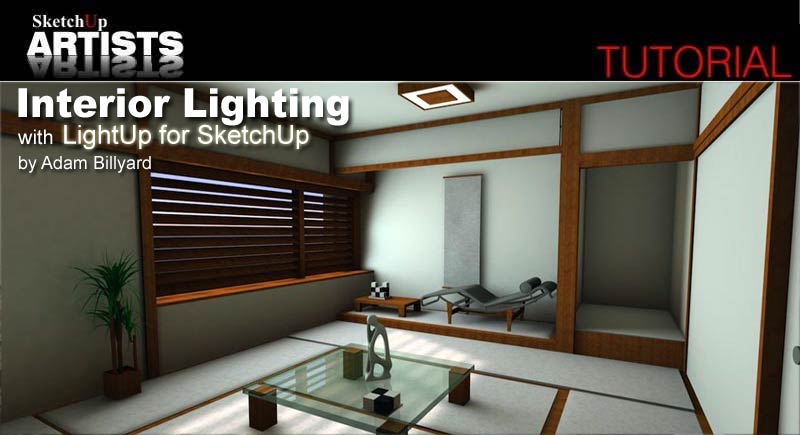
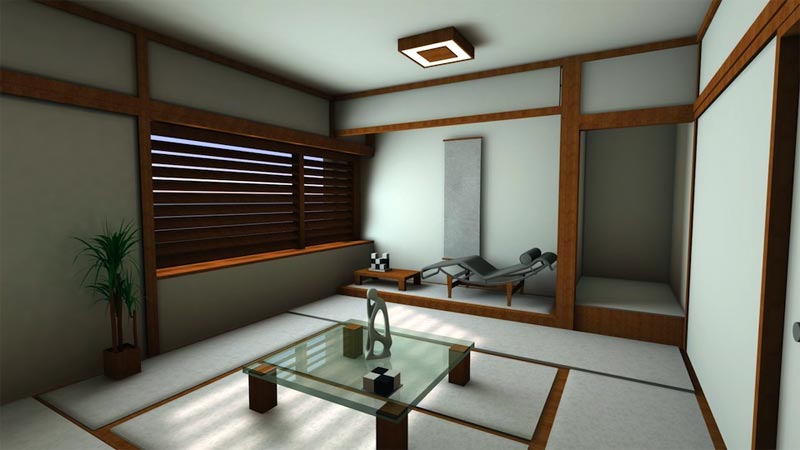
So our final interior lit realtime image looks like this.
Thanks for reading this LightUp for SketchUp tutorial.
Adam Billyard
Please check out Adam’s other tutorial: Blending with Backdrops: LightUp for SketchUp









Great result – nice tutorial
saya ingin mahir menggambar menggunakan sketchup terutama yang dirender, gbr tampak seperti photo,sementara saya sekarang menggunakan sketchup seadanya.saya pingin coba hasil gbr saya dirender, kalaau bisa tolong saya pingin download render trialnya saja kalo ada terimakasih sebelumnya
which skechtup version and which vray is used to render and how can i download it??
Incredible, this make me take the decision to buy Light Up
perfect….
after applying light up cant see the model right now. also used the zoom function but still cant see the model
How can I receive this plugin for lighting in sketch-up?
@ Somaye You can find it here https://www.light-up.co.uk/