Kerkythea – take a deeper look at materials

By Majid Yeganegi
This is an extra little tutorial and an extension to Majid’s ‘KT Fast Start 4Architects‘. In this tutorial Majid goes further into the more advanced techniques in making materials, understanding their settings and then using them as a saved templates which can be edited later to suit your needs. A PDF of this tutorial is also available for download in our Download Section. The Kerkythea Forum can be found here if you have any questions about the program.
At this point hopefully, you will be more familiar with accurate material making and Kerkythea’s abilities. Maybe it scares you at first but let me assure you that after a few attempts, you’ll find it easy to follow and even make your own templates. You can easily change them to fit your needs and also share them later in the Kerkythea forums for other users if you wish.
“Ok let’s start from Fresnel Ramp Procedural, but first let’s try to understand “what the Fresnel Law states”.
Basically it says that the reflection amount that you see while looking at a surface, depends on the ray angle that comes from that surface to your eye. If this ray is perpendicular to that face, then you will see less amount of reflection and when this ray has a tiny degree too the surface you will see the most reflection. You can easily experience this law : if you have a polished surface beside you (like a table etc.). Put your cup on it and now first take a look form nearly on top of the cup and then take a look from the sides, you’ll find that the cup’s image , reflected on the table differs. If you are walking beside a river you will see something like this below (this is rendered and not a real image).
When rays come from the far side of the river and have less angle with the surface, you will see more reflection (sky and environment). Rays that come from the near side and have more angle with the surface – almost perpendicular to it – you will see less reflection. This is the Fresnel Law in practice. Now we are going to use the “Fresnel Ramp” procedural to make realistic materials.
“We are going to use the hidden power of Kerkythea and its layering system. Let’s start by making a new material from scratch”.
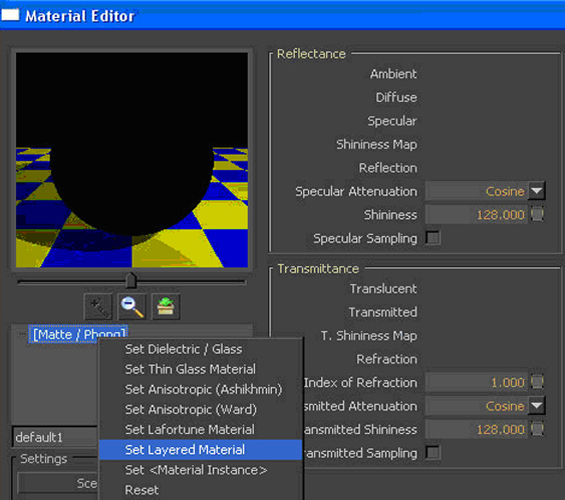
1. Reset your material to a layered material.
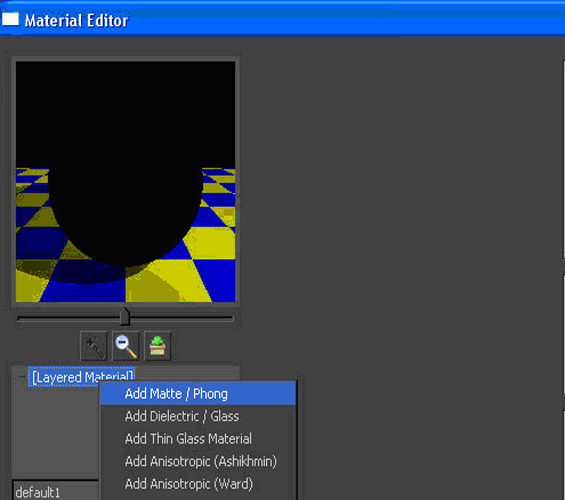
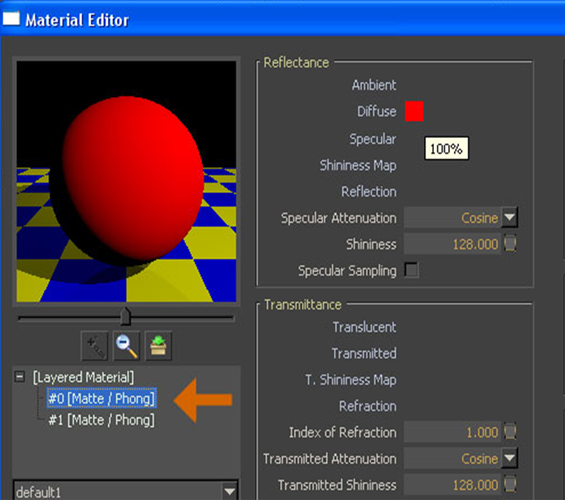
2. Add first layer.
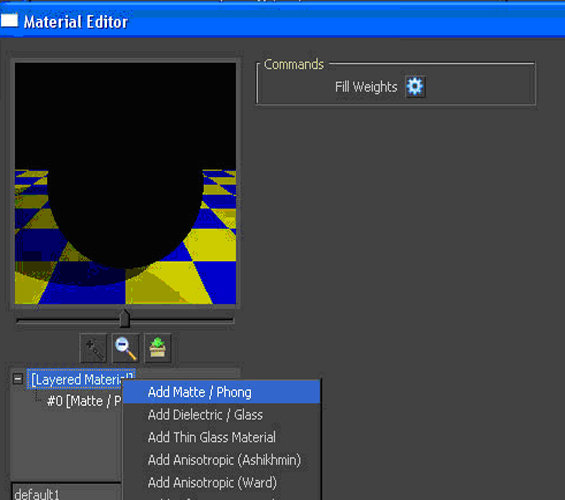
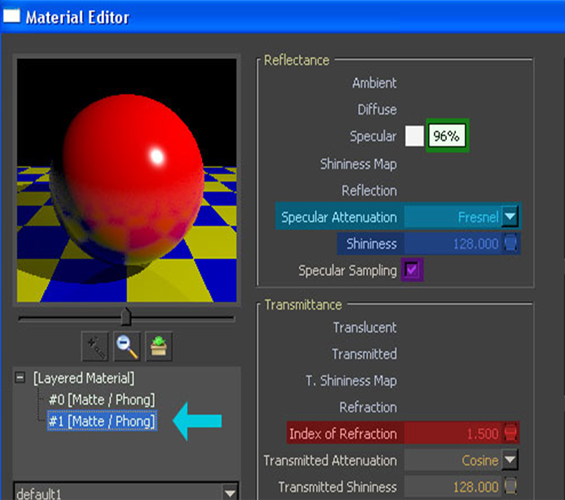
3. Add the second layer. Note the maybe later you can use a different material type rather than Matte/Phong depending on what you need and your experience.
4. Now add Diffuse, by adding color, texture or procedurals. To do this select your first layer of material and then adjust the Diffuse part. We will keep Diffuse and Specularity on separate layers, so we have more control over them.
5. Now we will add Specularity. This is in fact the ‘Reflection’ part of your material. To do this click on the second layer and adjust the Specularity on this layer of your material. Make sure it does not exceed 96% white. Adjust color parts. Note that the Index of Refraction depends on your material properties.
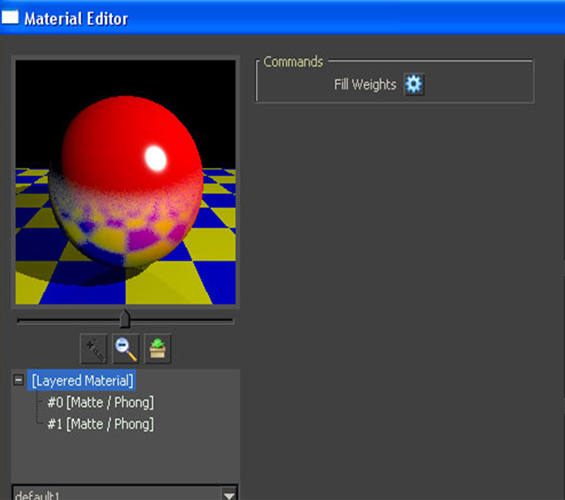
6. Now we are going to adjust layer ‘Weights’. This means you are going to show Kerkythea how to combine ‘Diffuse’ and ‘Specularity’. Firstly go to the top level of your material, select it so it is highlighted in blue. Fill Weights icon will appear. Select it by clicking on it.
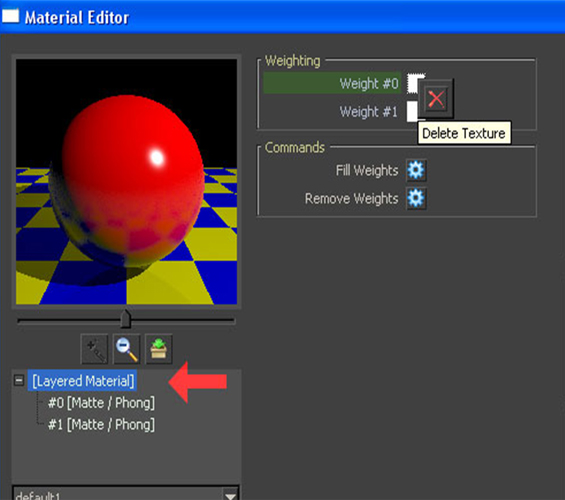
7. Now delete the first Weight. Lets replace it with another Map called ‘Fresnel Ramp’ Map.
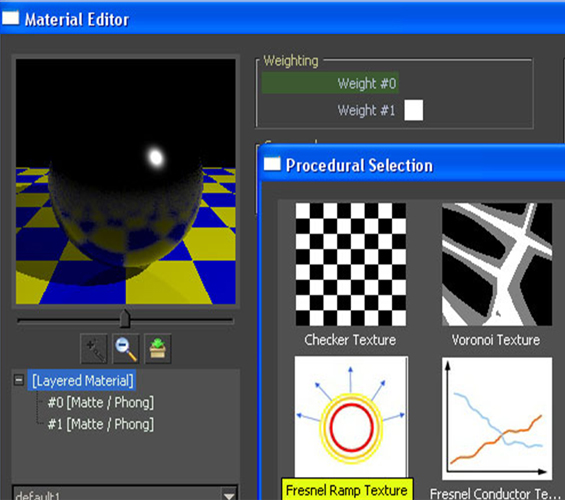
8. Now right click on the ‘Weight #0’ and choose ‘Add Procedural’. Then choose ‘Fresnel Ramp Texture’.
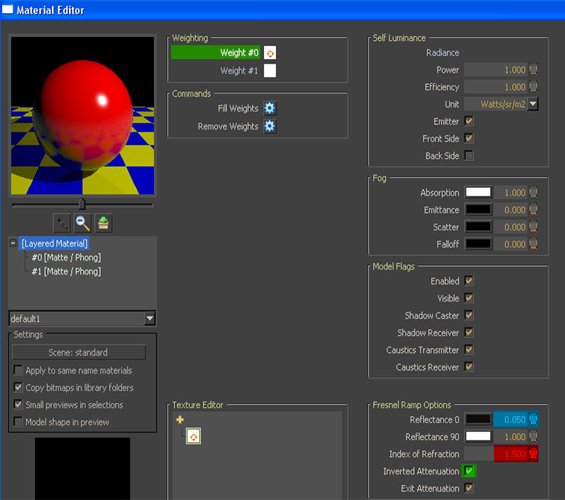
9. We need to adjust the ‘Fresnel Ramp Texture’ now. As we have learned earlier in this tutorial, Fresnel law shows the relationship between reflected rays and surface angle. Set them as image 9 shows. Then adjust ‘Index of Refraction’ to suit your material. Be sure to check the green square ‘Inverted Attenuation’.
“Your material is now ready and also a ‘true’ material. It may seem a bit daunting at first, but I promise you that after two or three attempts, you will be familiar with this process and it will become a lot easier”.
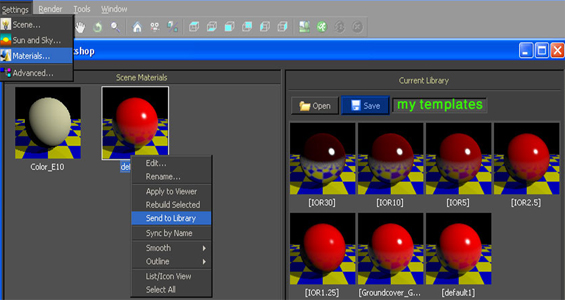
10. Now I am going to share with you one more tip, that will make your job easier. When you make an appropriate material you can save it as a template for later use. Then you can easily change it to fit your needs. After making your material go to Settings>Materials…..to open Material Editor. Right click on your materials and ‘Send to library’. Save them and give the library a name of your choice, so that later you can open and use them again.
On a final note if you are a Google SketchUp user, the renderer ‘TwilightRender‘, which is based on Kerkythea, will automate lots of your jobs. You can easily change your lights, camera etc…so you may find this easier to use and it also works directly within SketchUp. If you are a licensed ‘TwilightRender’ user, you also have an option to send your model (with all its materials, lights and cameras) to Kerkythea for more control and advanced material making, instancing brush tool, etc…
Here is a small material template pack for inspiration.
“Thanks for spending the time to read my tutorial”
Majid




[…] Tutorial – http://www.sketchupartists.org/tutorials/kerkythea-take-a-deeper-look-at-materials/ […]
thenkkkkk youuuuu
We are reviving the KT fast start. This time any and everything is re-written from scratch. here is the news :
http://twilightrender.com/phpBB3/viewtopic.php?f=13&t=5137&p=36649#p36649
Hope you like it