SketchUp Render using Blender and Photoshop

By Jean-Pierre Hurel
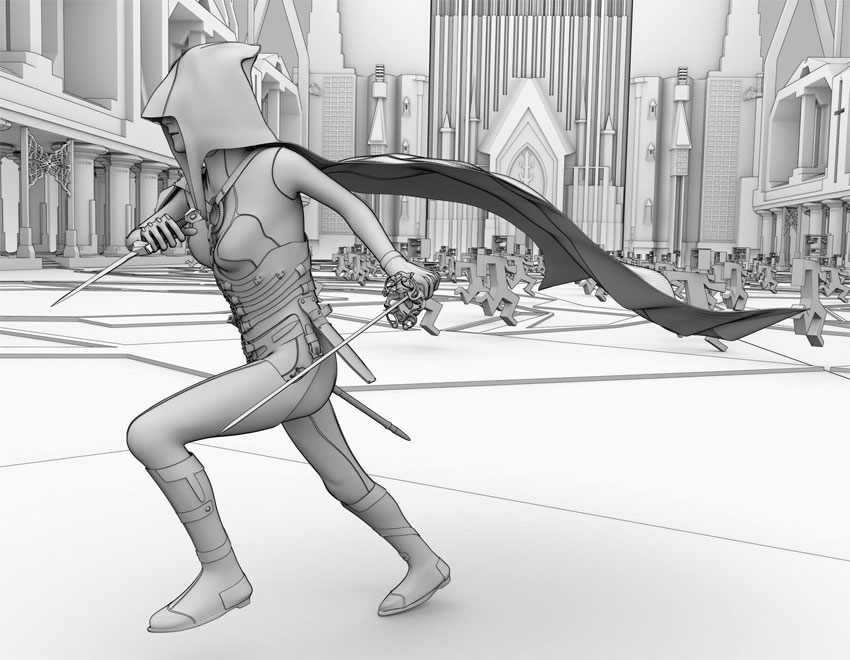
My name is Jean-Pierre Hurel (better known as Orgelf in the internet design communities). I am a Visual Artist. This slightly revised tutorial was recently published and discussed over on the French site www.3dsaloon.fr. In this quick tutorial I will explain my simple technique on how to achieve this render of a SketchUp model I made, by using Blender and Photoshop . To export your files from SketchUp into Blender you can use Babel3d. It is a very useful file converter. You can save your SketchUp file as a version 7 and then upload it to Babel3d (after creating an account first). There convert your SketchUp file to an .obj file which you can then import into Blender. I tried the .3ds file type, but it crashes Blender. This tutorial is not about that though, but that’s a little insight into how I get my SketchUp file into Blender. The character and its accessories/weapons were made in Blender and the environment and giant insect (insect shown in extra image at end of tutorial) were made in SketchUp. The final render produces what has been described as a cartoon/comic book effect.
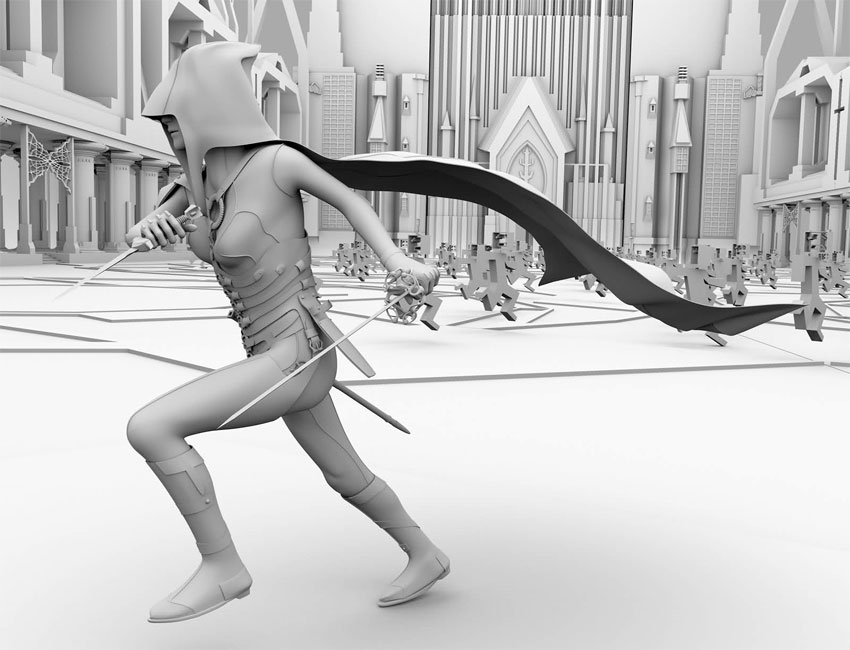
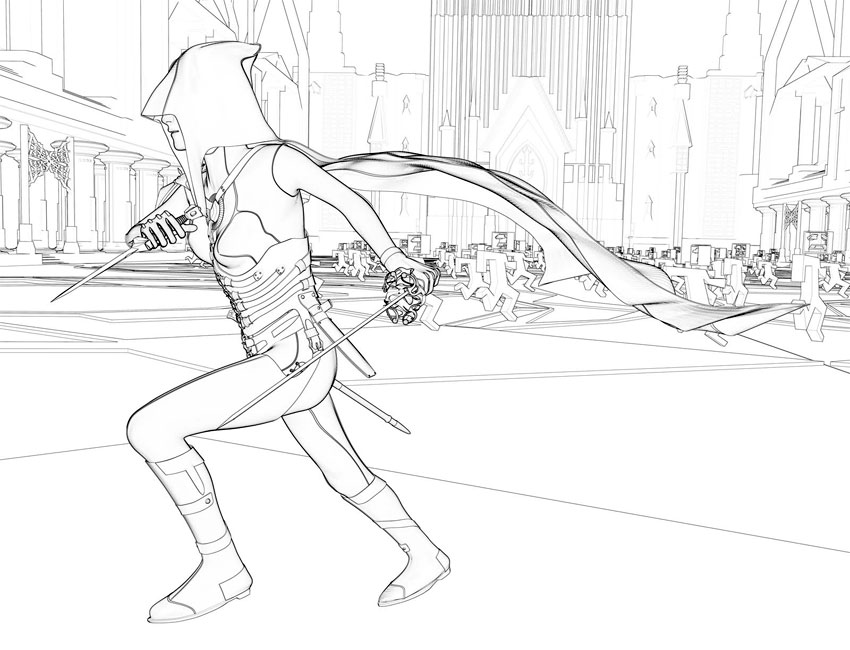
To produce the final image below you will need two renders from Blender, that you will then mix in Photoshop.
The two output renders in this tutorial are:
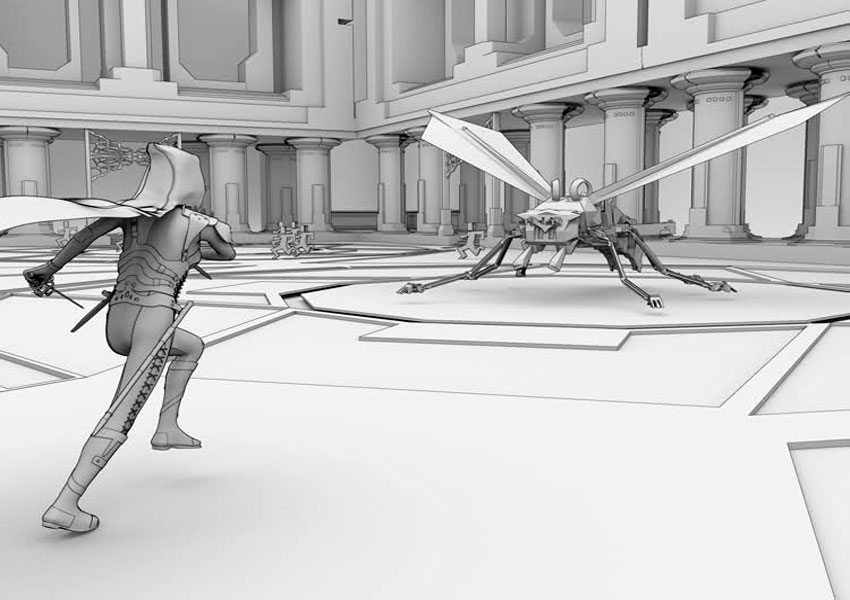
- Ambiant Occlusion Render
- Edges Render
1. Ambiant Occulsion Render
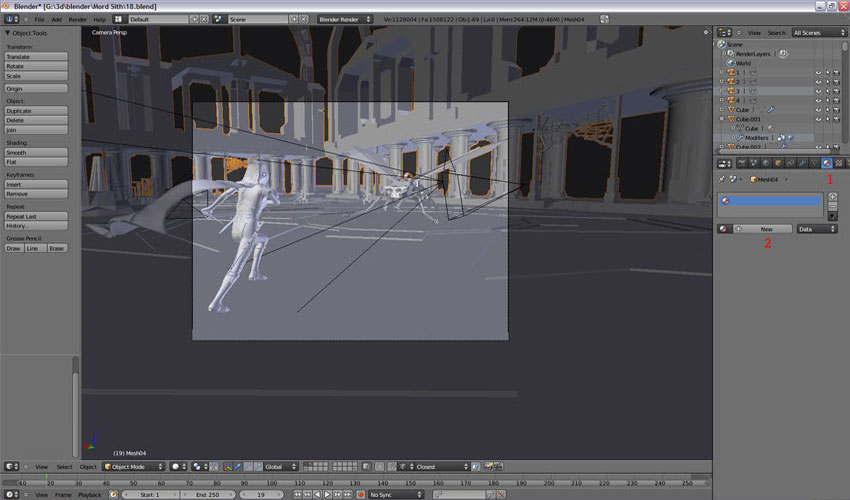
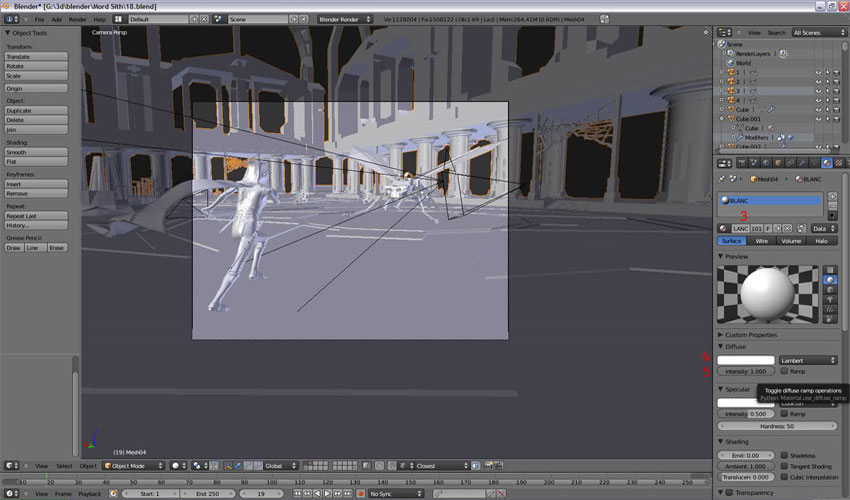
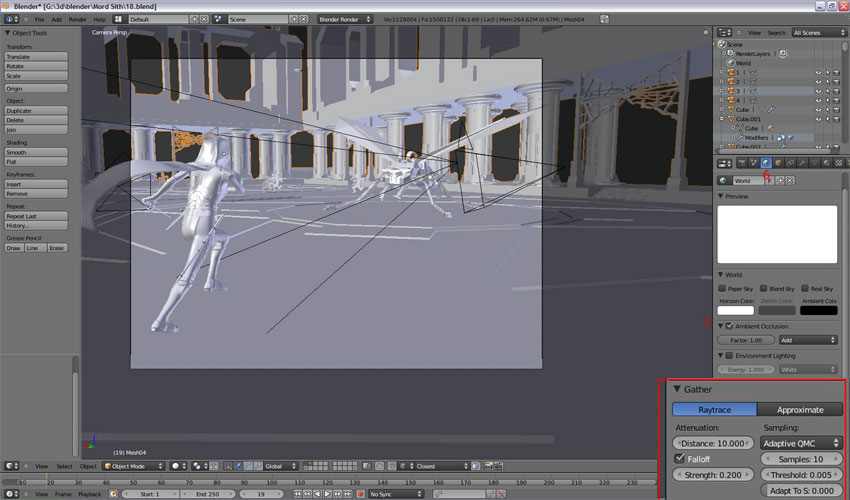
a. In the Material panel (1), Create a new material (2), Name it “White” (3). Choose a pure white color (R=255,G=255,B=255) (4) and set the Diffuse at 100 (5).
b. In the World panel (6), Tick the box to activate Ambiant Occlusion(7) and enter the parameters as shown in the image below (red rectangle).
c. Now place your camera and render at 1600 pixels wide (press F12 to render). Save your image.
2. Edges Render
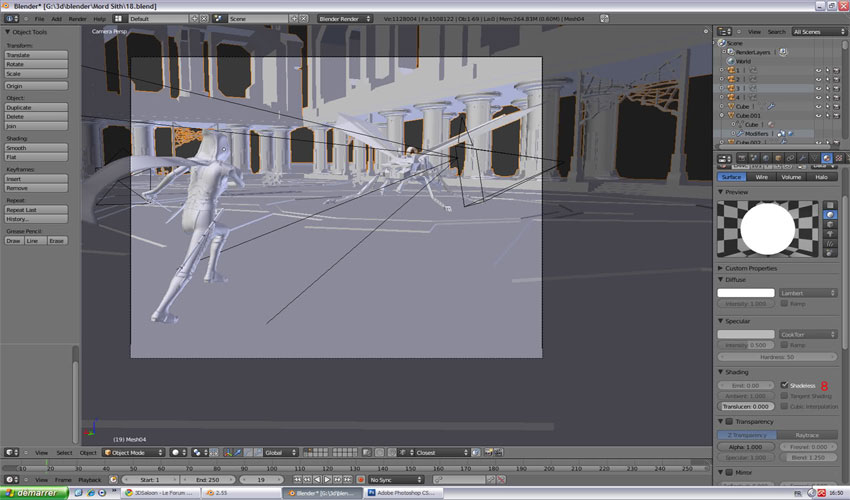
a. First we will set the scene. Turn off any light source and the Ambient Occlusion. In the Material panel, select your material “White” and check “Shadeless” (8).
b. In the World panel choose a pure white color (Horizon Color) (9), the same as that of the material.
c. We will now create the “Edges”. In the Render panel under the “Post processing” section, make sure to check the “Edge” box (10) and set the cursor “Threshold” to the maximum 255 ( 11 ). This slider sets the importance of the number of edges when post processing.
d. Make a render of 6400 pixels wide (we can reduce the size in Photoshop) for this image to give us fine lines and and save it. You can render the image at a smaller size if you don’t mind thicker lines. The problem with “Edge” is that the line width is not configurable in Blender. Therefore a line that is 3 pixels wide will be 3 pixels wide. If you want fine lines you need to render at a huge size but that will increase render time dramatically and probably crash the software.
3. Final Post Processing in Photoshop
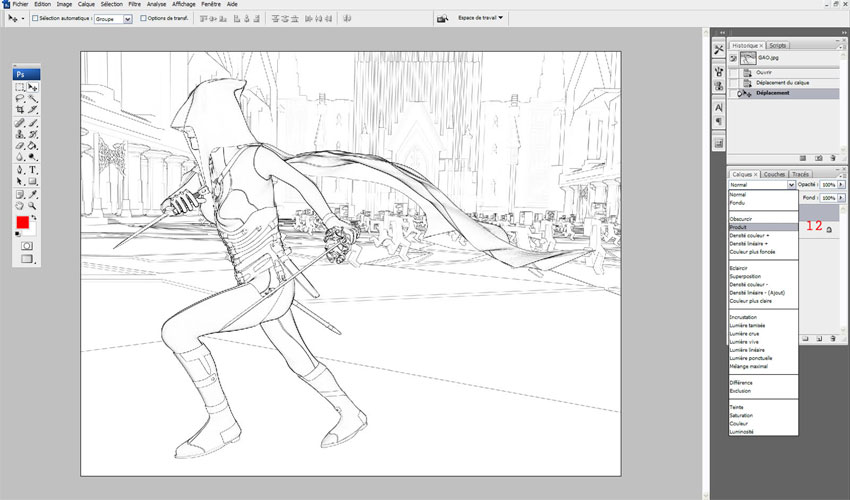
a. Open both images in Photoshop. Make sure the “Edge” image is the same size as the “Ambient Occlusion” image and place it on top of the “Ambient Occlusion”. Set the Blending mode to “Multiply”.
c. If the “Edges” are not dark enough for you in the final image, nothing prevents you from duplicating the “Edge” layer in Photoshop.
Thanks for reading my tutorial and I hope you have gathered some ideas for yourself from it. You can download the latest version of Blender here and the free version of Google SketchUp here.
Cheers
Jean-Pierre Hurel
Check our Jean-Pierre’s site for more samples of his work.






excellent workflow orgelf
nice … but where is sketchup input… am I missing something?
thanks nomeradona !!
@Sid Porobic I use Babel3d to change SketchUp files in .obj files The tutorial will be update soon with more details 😉
[…] SketchUpartists.org released this tutorial of Jean-Pierre Hurel (aka Orgelf) in the Sketchucation community. Check it out HERE. […]