
Making a Cane Pendant Lamp
In this tutorial Thilina Liyanage sets about making a cane pendant lamp using SketchUp and two Plugins.
Plugins used:
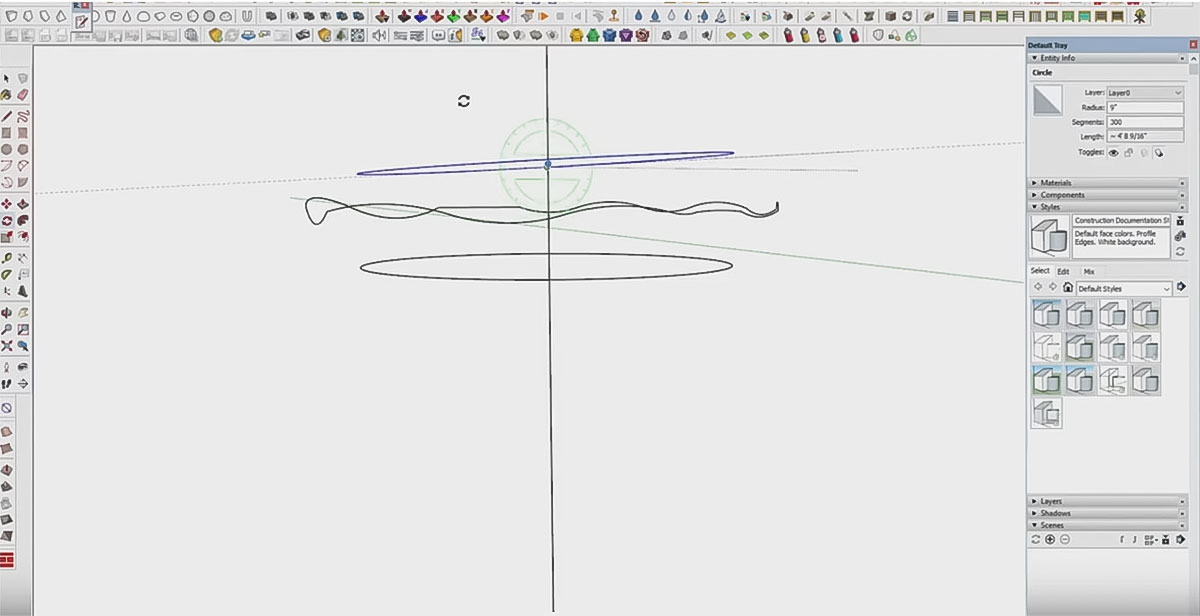
Step 1
Make circle radius 9″. Next, select edge of circle and increase segments to 300. Why 300? More segments will give more lines to the circle as you will see later.

Step 2
Copy circle, Move tool and CTRL. Add curves using Arc tool.
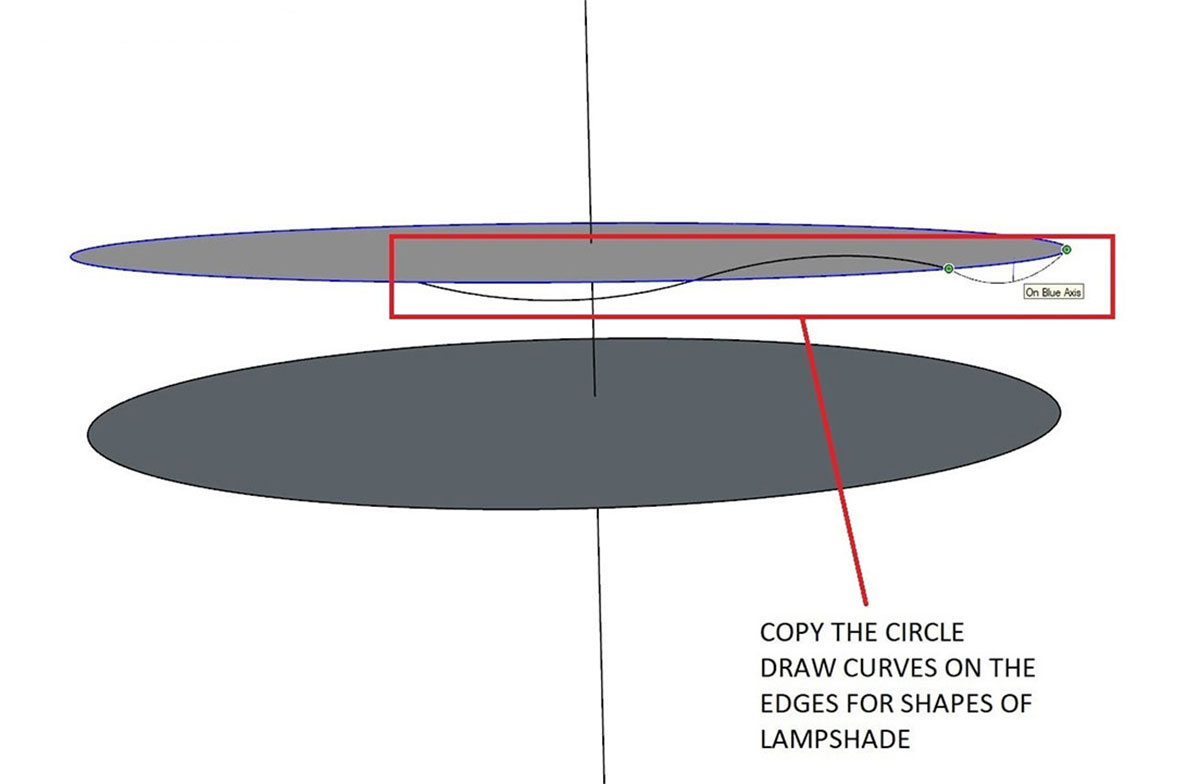
You can select some of the circles and rotate slightly to give some randomness to them as they are currently perfectly horizontal.
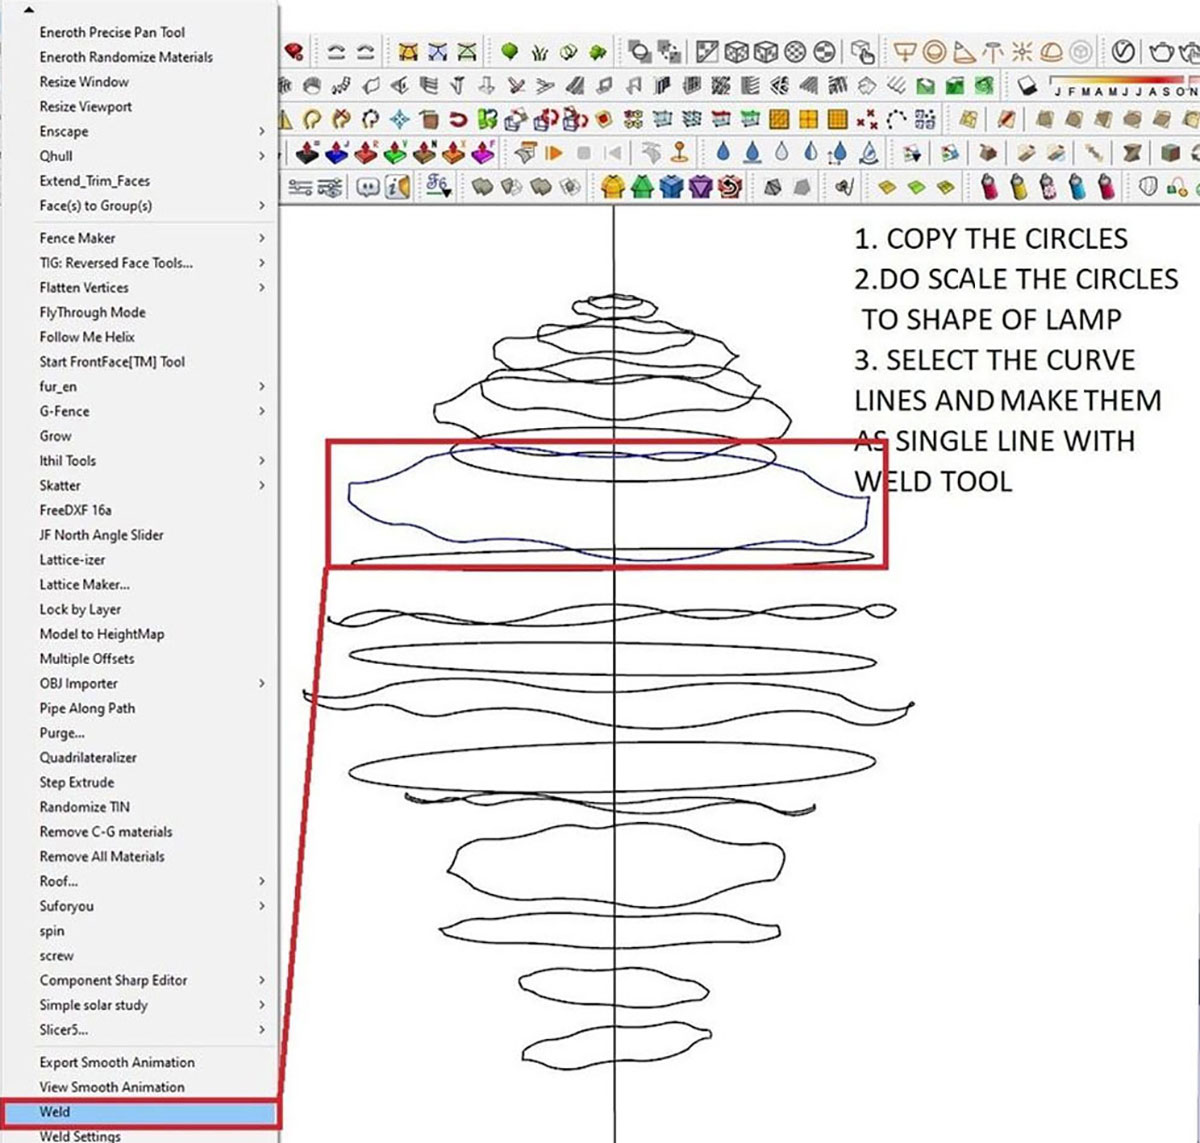
Step 3
Copy circles and do the same to them and then remove the faces and unwanted lines. Select each circle (curvy line) and make them a single line with the Weld tool. You can also select some of the circles and rotate slightly to give some randomness to them as they are currently perfectly horizontal.
Step 4
Use the Curviloft plugin and connect the circle with lines.
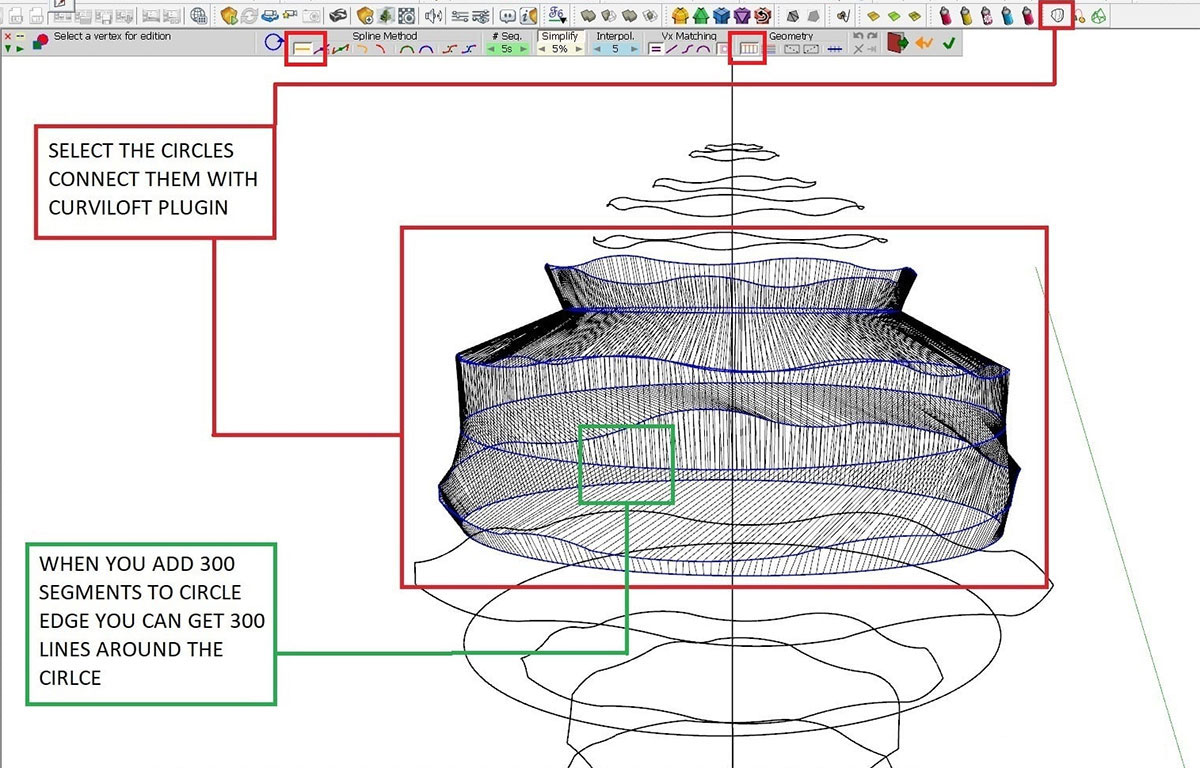
Step 5
Do the same to every circle (connect with Curviloft).
Step 6
Select the circles and make them as tubes with JHS PowerBar. Little tip, if SketchUp file crashes do them one by one.
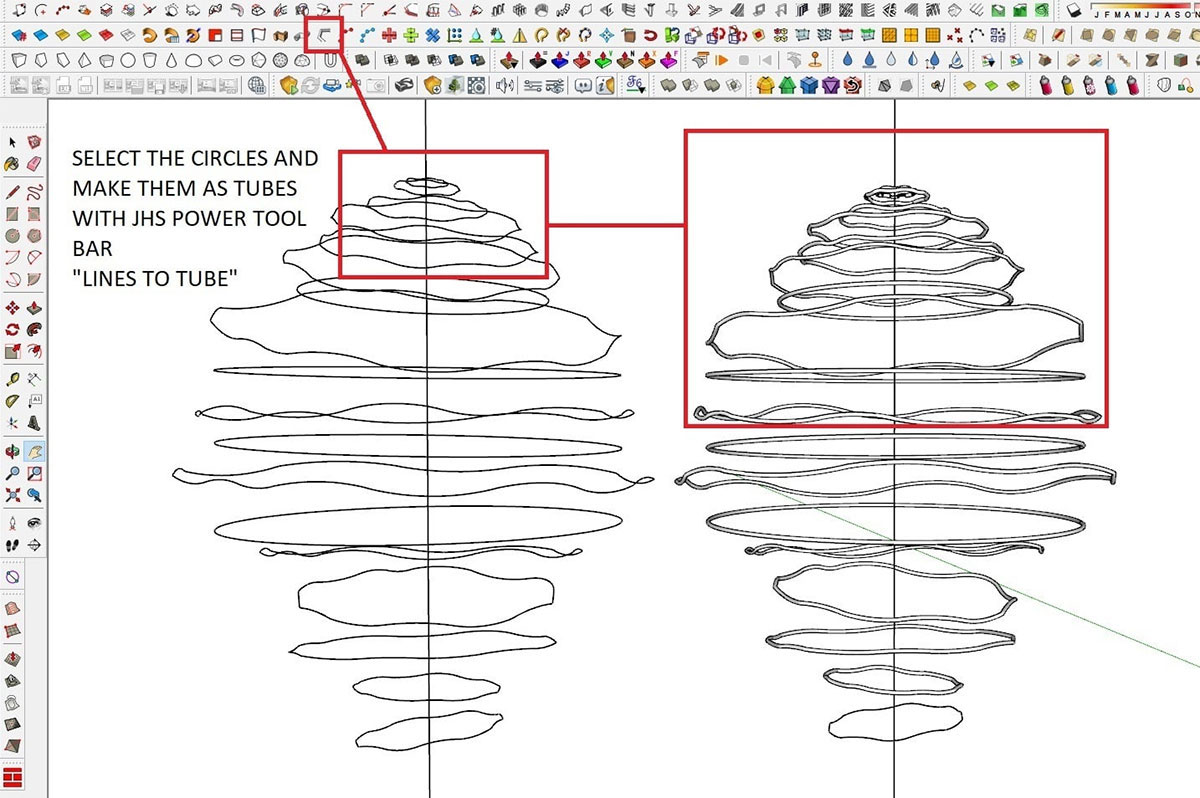
Result of Lines to Tube
Step 9
Select the circles shown in image below and connect them as a surface using Curviloft plugin. Little tip, if SketchUp file crashes do them one by one. Next make them into a group and move them in place over your pendant lamp.


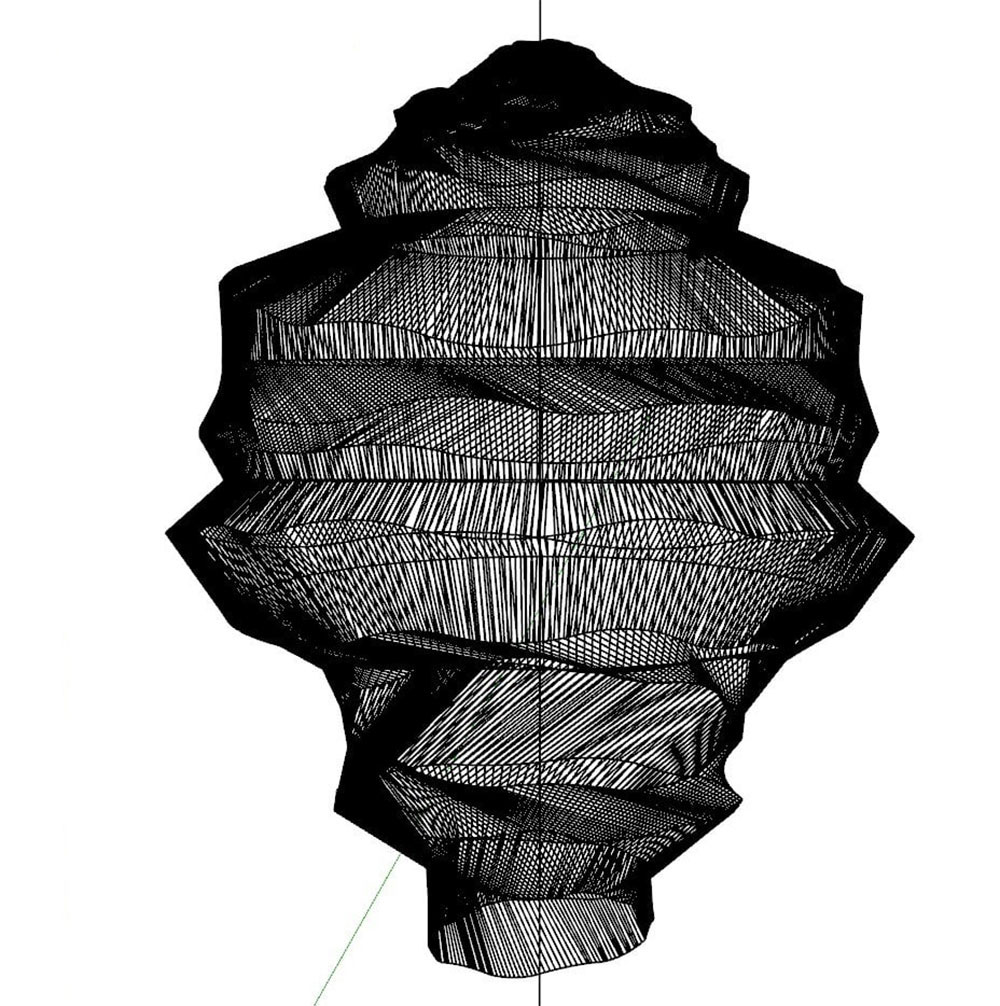
Final Model Result

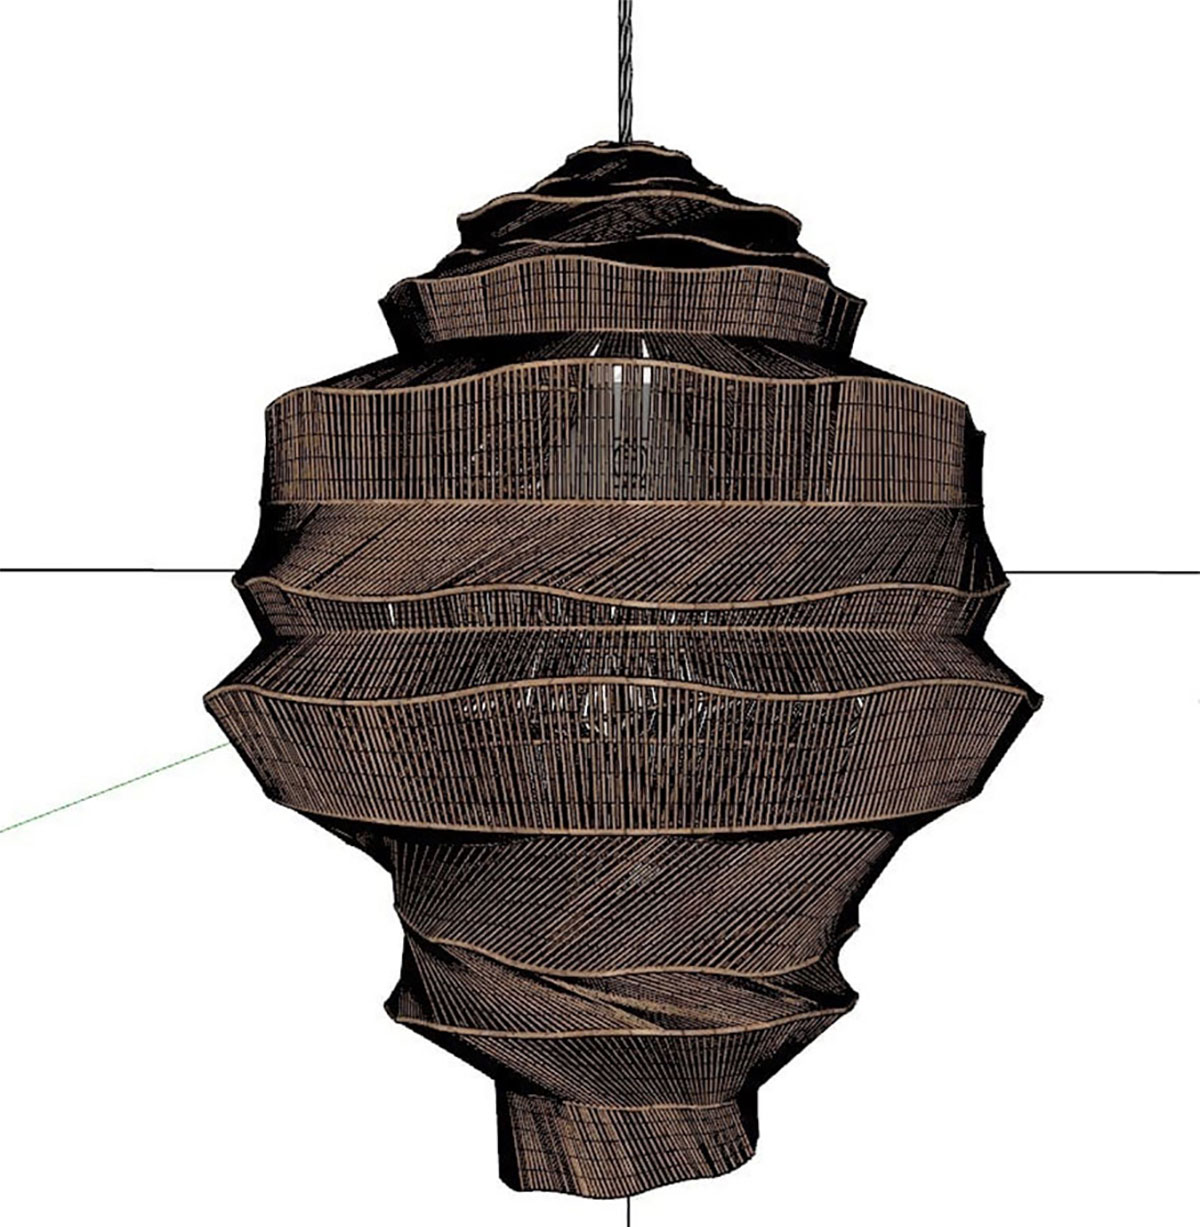
Render in V-Ray
Added V-Ray Omni light inside the lamp and rendered with V-Ray Next for SketchUp.

You can see more of Thilina Liyanage’s work here.
Profile Builder 4

Artisan Organic Toolset

PlaceMaker Version 3
Skimp Pro Import Extension

BIM Bundle Special Offer!
SketchPlus Artist Bundle !
Bevel Tool
V-Ray 5 for SketchUp E-Book
