Raylectron: simple living room render

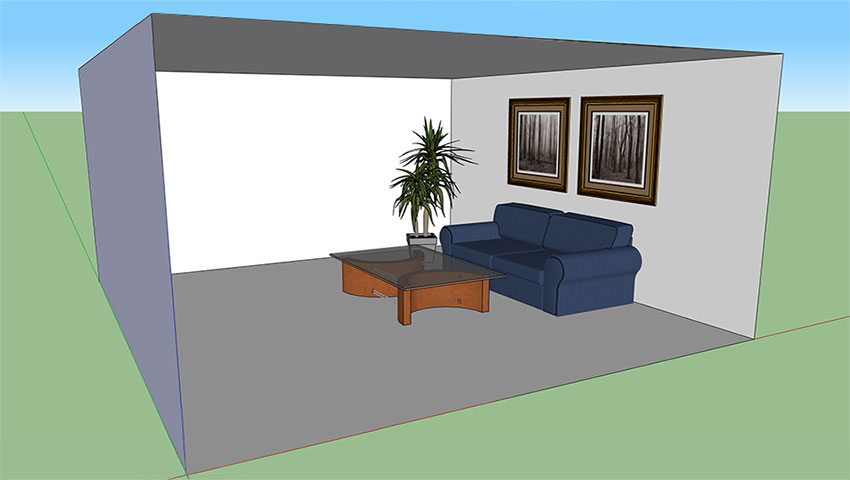
In this tutorial we are going to create a simple render of a living room using Light, Material and Glass. On completion of this tutorial you should hopefully be able to achieve a perfect render from your SketchUp model, and all within minutes. We are going to create a 16’x16’x8′ living room with a couch, coffee table, a plant, wall pictures and some lights in it. Then produce a rendered version of it using the Raylectron render plugin.
Its pretty easy and quick so lets get started and complete our model and render in 10 easy steps and no post processing…
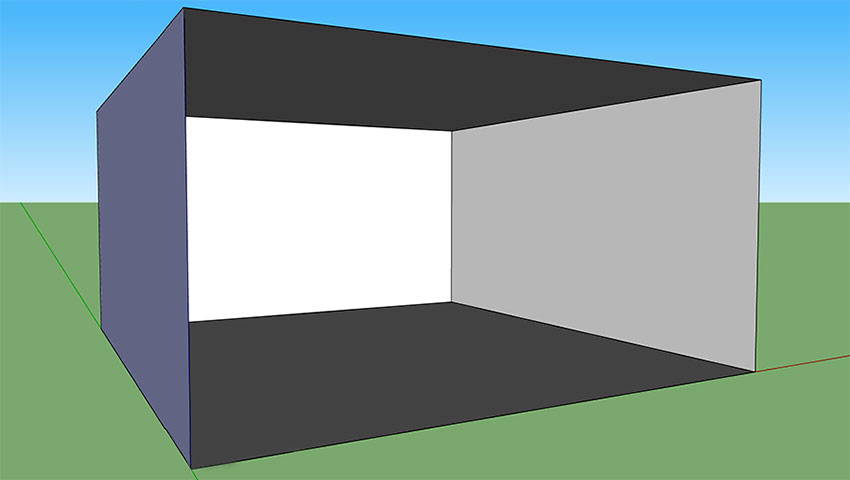
1. Open SketchUp and begin by creating a 16’x16′ rectangle and push/pull it up to a height of 8′. Next assign the back wall to a Layer and hide that layer to enable us to see inside our room.
2. From the SketchUp Components window, search for the following components and position them in the room.
- Couch
- Potted plant
- Glass coffee table
- Framed pictures
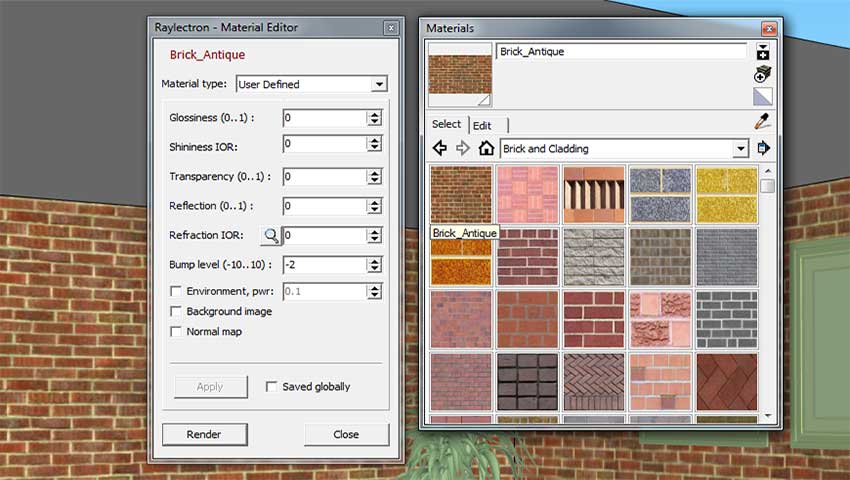
3. Bring up the Raylectron Material Editor from the View menu and the SketchUp Materials window. Select a brick texture and assign it to the walls. Set the bump level in Raylectron to 2, or -2 to reverse the effect. We use -2 for this particular texture.
4. Create a 1’x1′ rectangle on the ceiling and group it. Duplicate it on the opposite corner. These will become our lights.
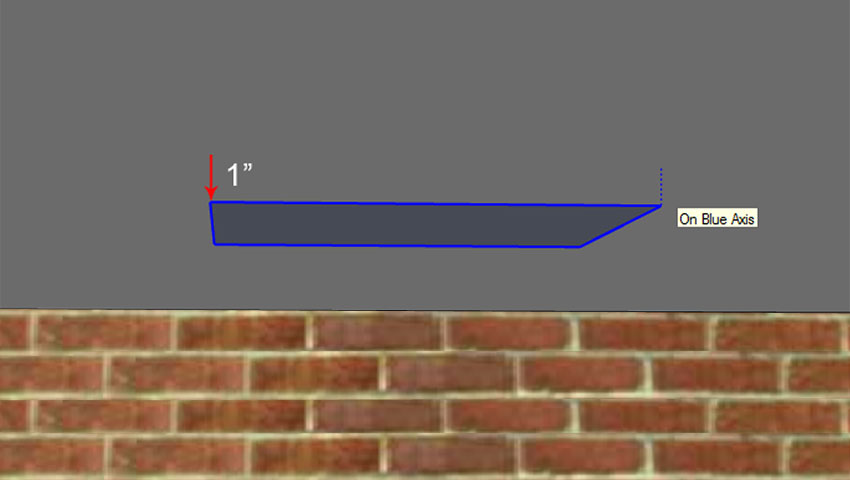
5. Move them vertically down by 1”, so they are not on the same plane as the ceiling.
6. Make sure the front face of the light group faces down into the room. The front face is the direction of the light.
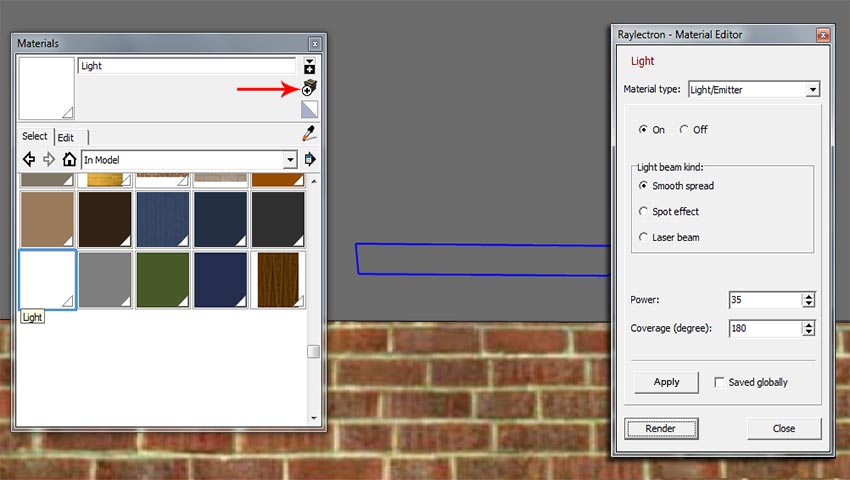
7. Now we are ready to assign a light material to our two newly created lights. In the SketchUp Materials window, click on the + icon to create a new material and name it “Light”. In the Raylectron Material editor, change
the material type to Light and set the coverage angle to 180. Click Apply to record the changes. Now paint both of your light groups with this new material using the Paint Bucket tool.
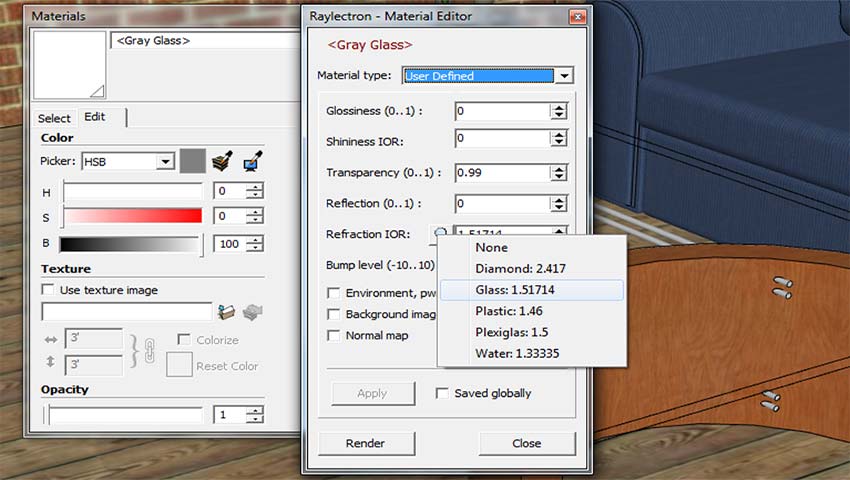
8. Paint the floor with a wood texture, and change the glass table top to white with an Opacity of 1. Then in the Raylectron Material Editor, select “Glass” as the material Refraction IOR and the value will change to 1.51714. Make sure the Transparency is set to 0.99 and click the Apply button to record the change.
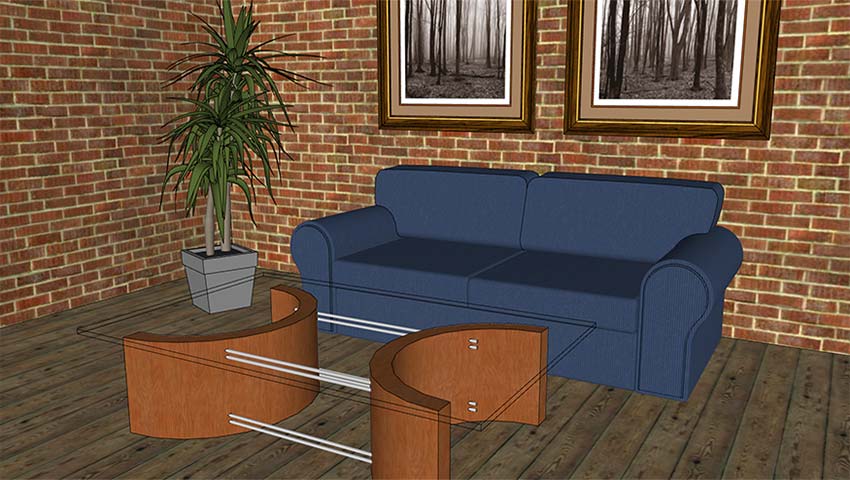
9. We are now ready for the final step. Position the camera as shown below, and unhide your back wall Layer to close the room.
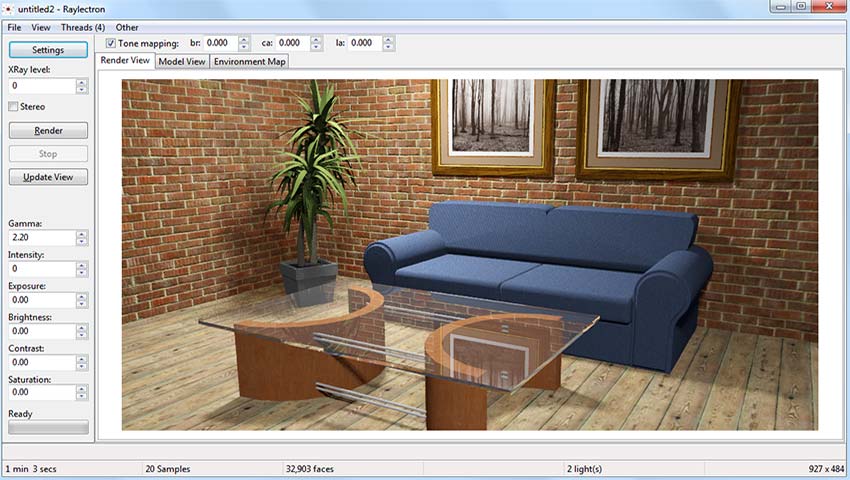
10. Now click on the Render button in the Raylectron window and select a destination folder to save the exported file. When the Raylectron render window opens up, simply click on Render and within seconds you will see your model rendered.
It only took a minute to render this model on an average PC with only 4 threads. I hope you have enjoyed this little tutorial. We are currently working on video tutorials and help manual, it will be available on our website once done. If you have any questions regarding the use of Raylectron, please go to our Support/Forum page which includes FAQ, Hints, How To, Get Models, Post your Renders and See our Gallery. Raylectron can be downloaded direct from Raylectron.com. The Raylectron free version is fully functional, providing you do not mind the faint watermark. Purchasing your copy removes the watermarks and your contribution is used for further development and new updates.
Thanks for reading.
Gary Lee






Forgot to mention to set the X-Ray level to 1 (one) before rendering, because you need to see through the wall we unhide.
its the best artikel…
My render is not showing shadows. Any tips?
[…] Raylectron: simple living room render :: SketchUp 3D … – Raylectron: simple living room render. In this tutorial we are going to create a simple render of a living room using Light, Material and Glass…. […]