Raw Rendered Image – Composition in Photoshop

Interior Designer and 3D Visualizer Onel Pabico shows us how to take a raw rendered output image from 3DS Max and with a few simple steps in Photoshop help make it pop!
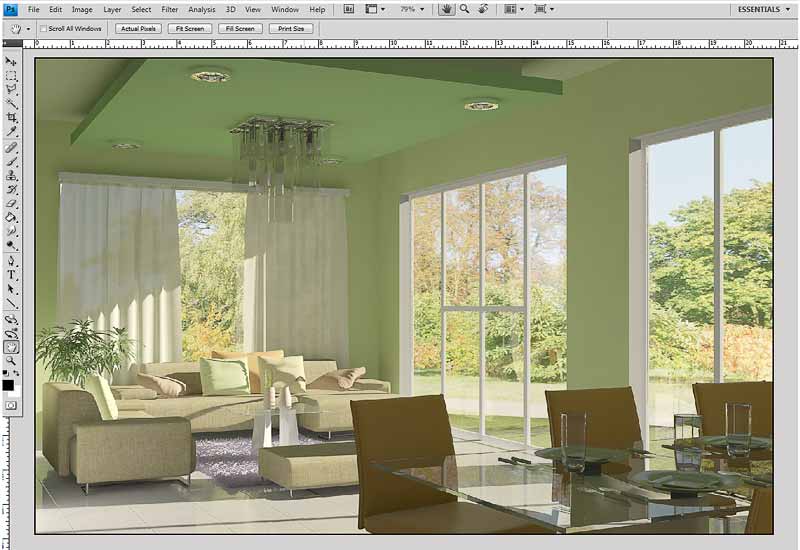
1. This is our subject for composition. It is a raw rendered image (original image by Maychelle Alvior) from 3DS Max, which I have opened in Photoshop. Let us begin by pressing F7 to bring up the Layers Manager in Photoshop.
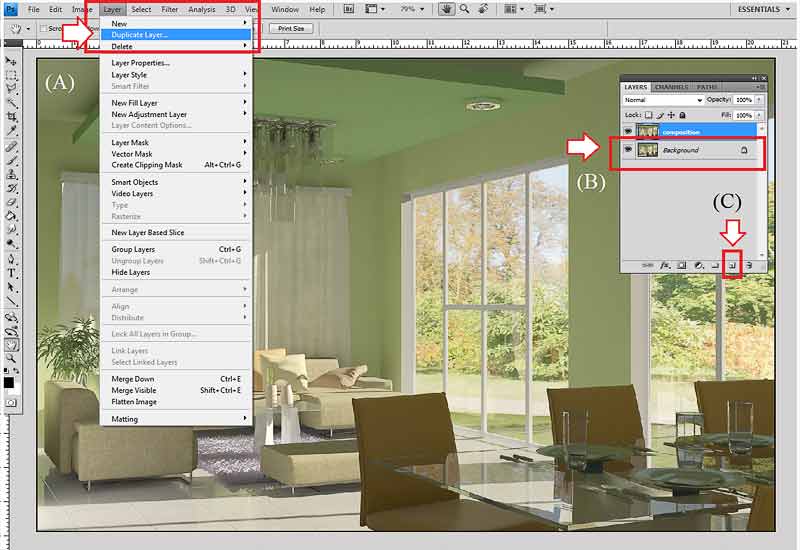
2. To be safe, duplicate your original layer. You can do this by going to Layer>Duplicate Layer (A) or in the Layer Manager (B) right click on the original layer and then select Duplicate Layer or finally you can drag the original layer to the small icon at the bottom of the Layer Manager (C) to duplicate it.
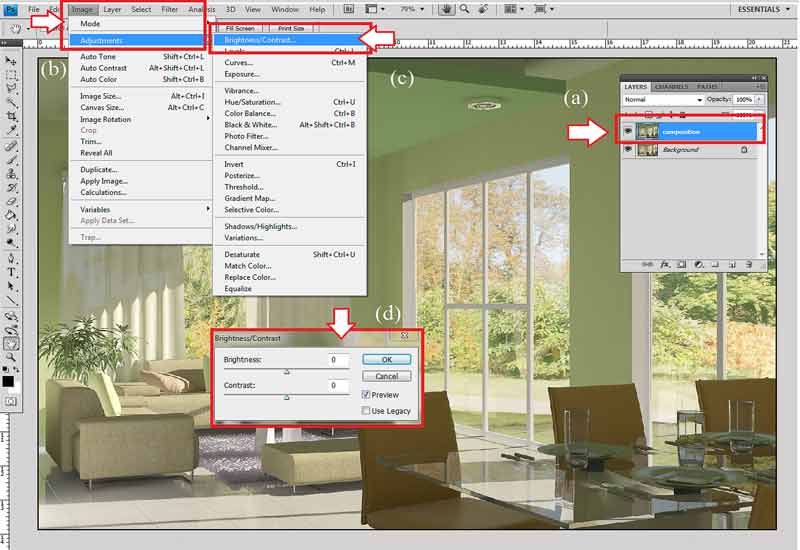
3. Now select your new layer making sure it is on top of the layer stack shown at (a). Next go to Image>Adjustments>Brightness/Contrast (b & c) to bring up the Brightness/Contrast dialogue box shown at (d).
4. Adjust the slider to your preferred brightness and contrast. This will bring life into the color of the image.
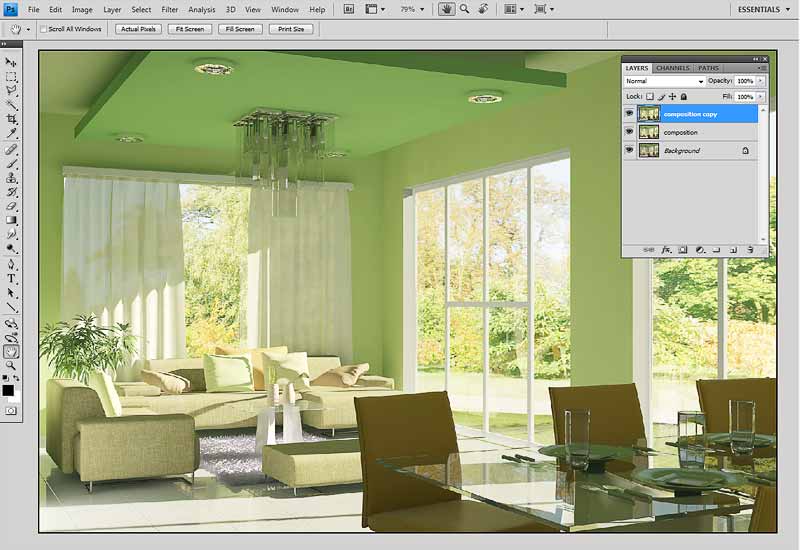
5. When we adjusted the brightness and contrast there was a certain amount of color loss. Lets get some of this back. Duplicate the layer first, so you now have three layers. With this new layer selected go to Image>Adjustments>Color Balance. On the Magenta to Green slider adjust this slightly in the Green direction as shown in the image below.
6. After this color adjustment there seems to be a slight issue with the color of the dining chairs, which were effected by the green color adjusment. We will get rid of this in the next step.
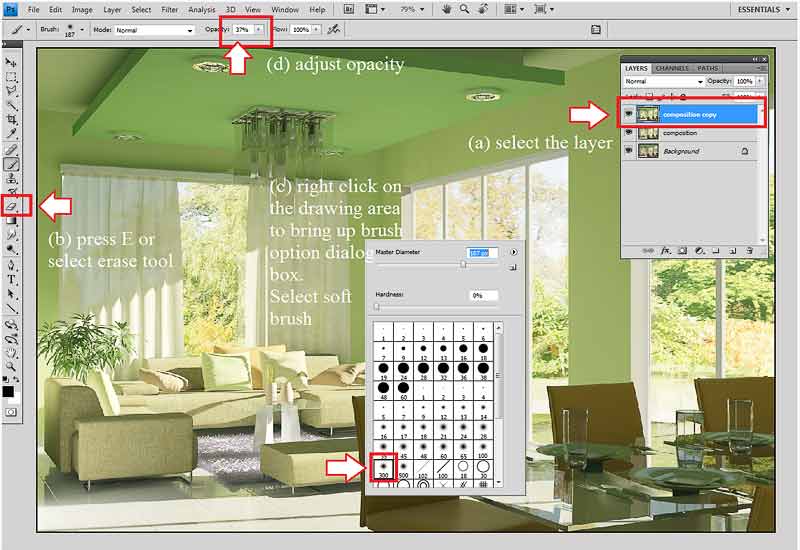
7. With the top layer selected (a), select the Erase tool (b), then by right clicking in the drawing area to bring up the Brush dialogue box (C), choose a soft brush with the Opacity set to around 20 (d) and erase the portion of the dining chair to reveal the original color before color adjustment.
8. Erase part of the image on this upper layer as shown in the image below. It is easier to see what you are doing if you turn off the layers below.
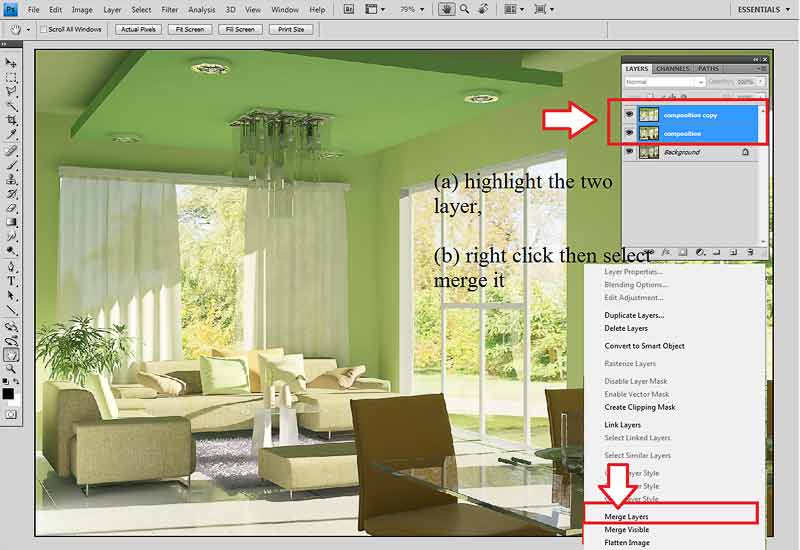
9. You now have the final color corrected image. Next we will merge the two top layers. Highlight the two top layersshown at (a) and right click and select Merge Layers (b) or go to Layer>Merge Down to merge those two layers.
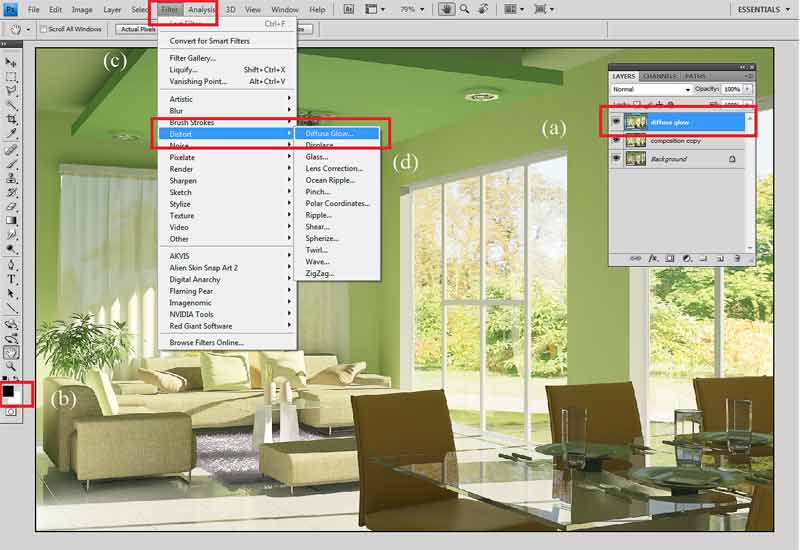
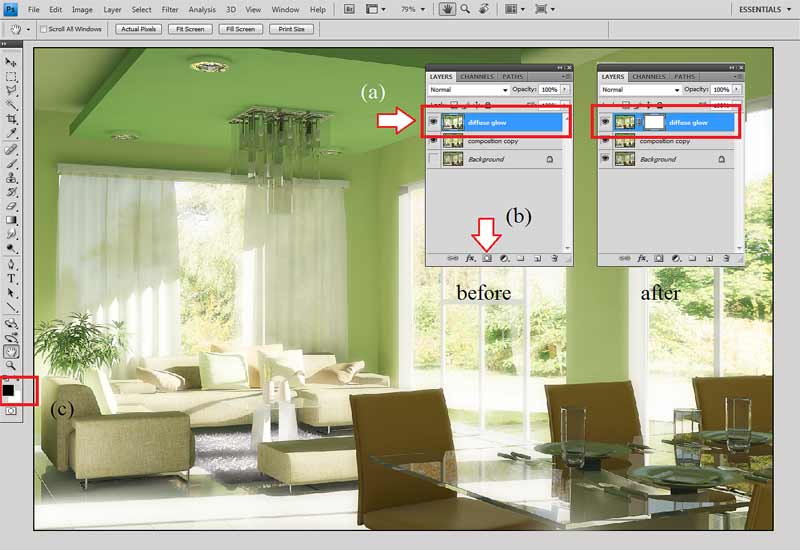
10. Duplicate this layer once again and call it Diffuse Glow as shown at (a). On the color palette make sure the foreground color is black (b). Next go to Filter>Distort>Diffuse Glow (c and d). This will bring up the Diffuse Glow dialogue box.
11. Adjust the Diffuse Glow to your own preference and then click on OK.
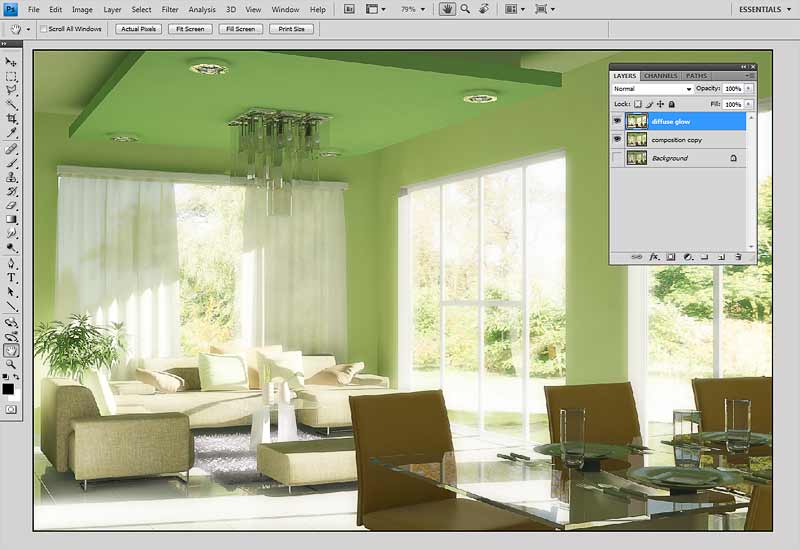
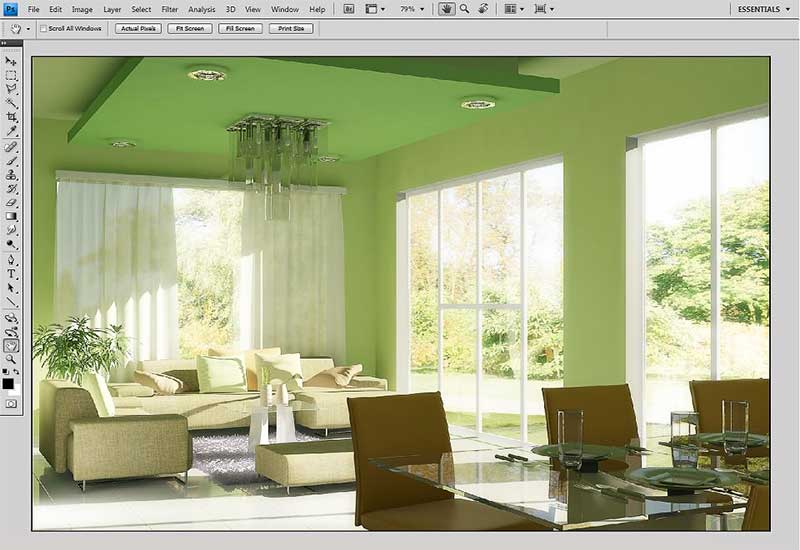
12. This is the image after the Diffuse Glow adjustment. Now lets fine tune it.
13. Making sure the Diffuse Layer is selected (a), add a Vector Mask by pressing on the icon at the bottom of the Layer Manager shown at (B). On the Color Palette, make sure the Foreground Color is black (c).
Note: With a Layer Mask, black hides the layer and white restores it.
14. Be sure Vector Mask is selected as shown at (a). Press b for the Brush tool or just select the Brush icon as shown at (b). Right click in the drawing area to bring up the Brush dialogue box and select a smooth brush (c). Finally adjust the Opacity of the brush (d).
15. Brush on the area you think is affected by to much of the glow. If you make any mistakes just change the Foreground color to white to reverse the process.
The final completed image. Please note that this process may not be applicable to your particular image but it shows some techniques in improving an image and with a keen eye and some post processing skills, you to can improve your raw image output.
Thanks for reading my tutorial.
Onel Pabico
Comments
5 Responses to “Raw Rendered Image – Composition in Photoshop”
Got something to say?









How can i save a vray rendered image in RAW format?
when we say raw image – its an image fresh from your render engine output subject for composition, meaning not yet final at all. Normally i saved that render image in png – in case i need to take out the background, tga and or tiff if its interior or even exterior.
Thank you for your valuable tips.
Photoshop 3d Render Images…
[…] rush with the Opacity set to around 20 (d) and erase the portion of the dining c […]…
hi, my interior glass render doesn’t be translucity, it’s just like a mirror, even with your tips, what can I do??