
Making of Container House: SketchUp, V-Ray and Post-Production Tutorial
In this tutorial, you’re going to learn how to use Photoshop and Picasa for post-production. Post-production is important to all visualizers and deserves an in-depth study and analysis. Some would say that rendering using different ‘render engines’ is enough in order to come-up with a convincingly realistic photo. Whatever you do, don’t stop there! There are some important things you need to factor into your raw render image before it’s worthy of your portfolio. Primary functions of photo editing software is usually to correct color, adjust light intensity, insert entourage and create bump map material, enabling you to create your own compositional style.
SketchUp Modeling
The real deal in achieving such photorealistic images is through detailed modelling with proper application of textures and material settings.
STEP 1. Using SketchUp, make a detailed 3D shipping container 8×40 feet in size or easily download available 3D model(s) from 3D Warehouse that correspond to this specification if available.
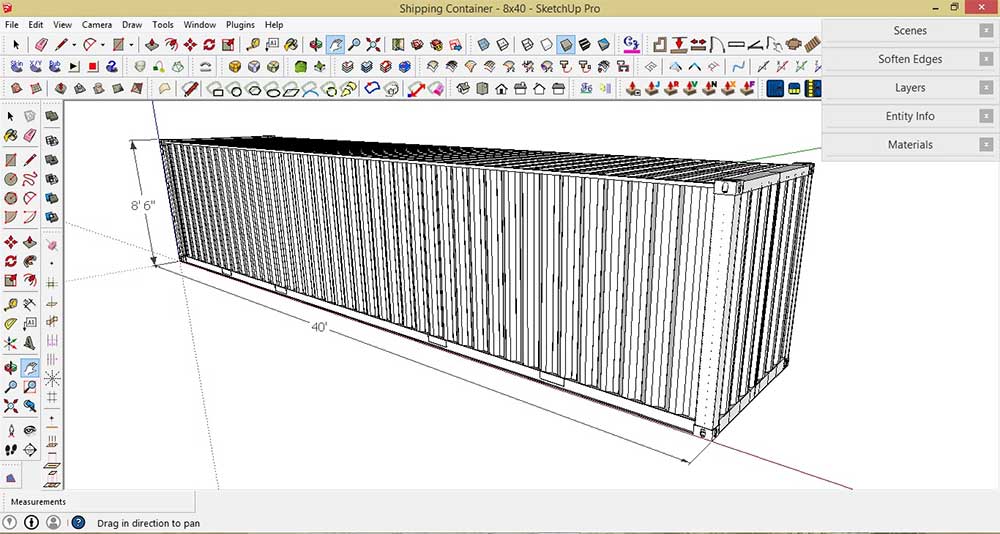
Detailed 3D shipping container
STEP 2. Make a copy of the shipping container model> Place it on top of the other model> Insert 3D sliding doors and windows to your model.
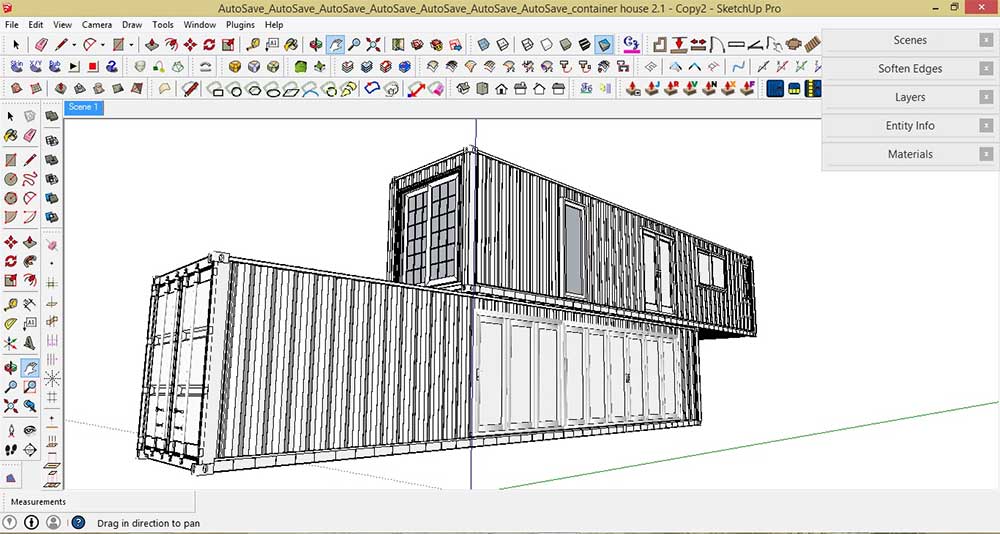
Make copy of the shipping container model & place on top
STEP 3. Add some details to your container house model: roof, railings, balcony, deck, stairs etc.
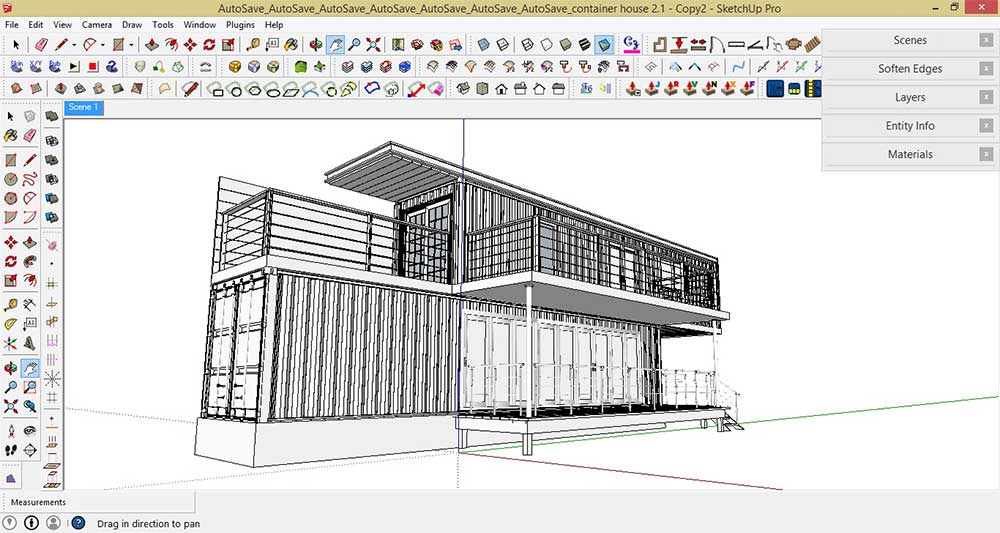
Add details
STEP4. Click on the ‘Paint Bucket’ tool icon> Choose any applicable textures from the ‘materials pallet’> Click on the face to apply the texture.
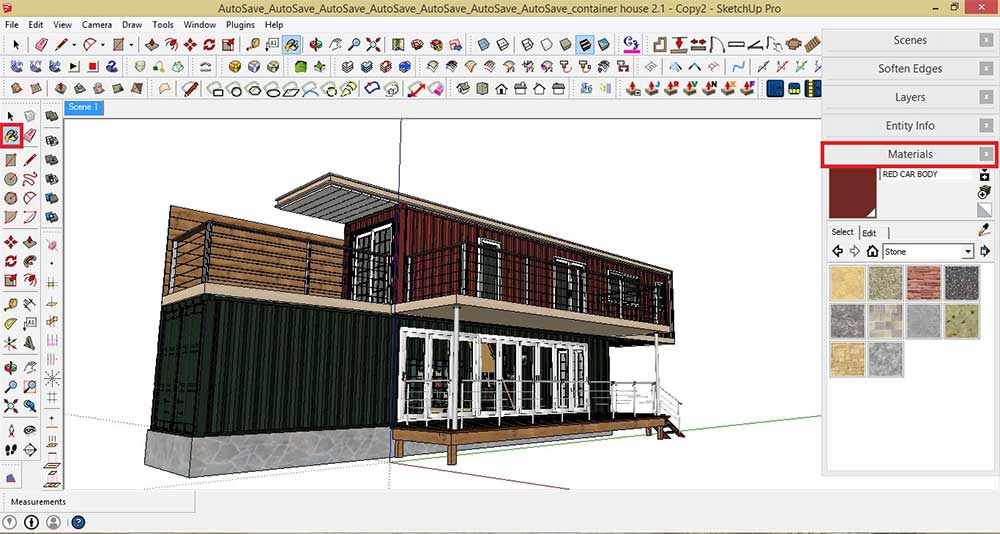
Apply textures
STEP 5. Insert 3D entourage in the scene.
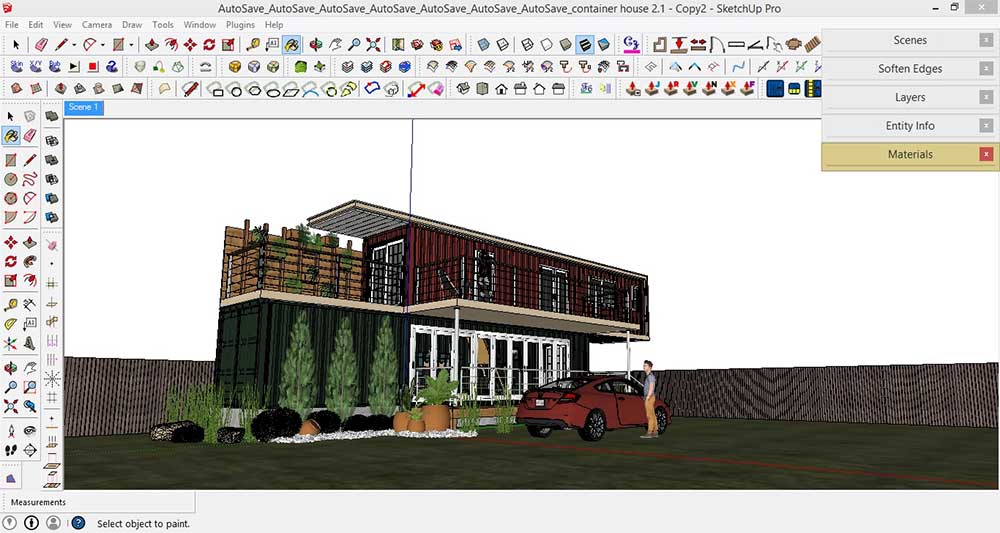
Insert 3D entourage
STEP 6. After finding your preferred perspective view. Save your scene: view> animation> add scene. Creating a scene in SketchUp enables you to capture a state of model, thus you can go back to the same view and settings when needed.
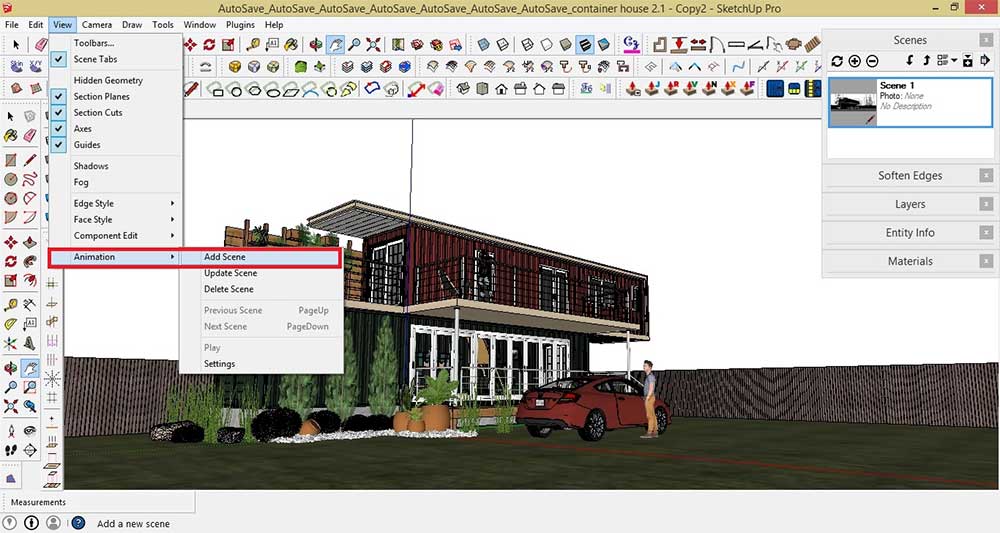
Save your scene
V-Ray Rendering
STEP 1. Apply the following Vismat (V-Ray) materials to your model:
(a) Metal car paint/ Container metal paint
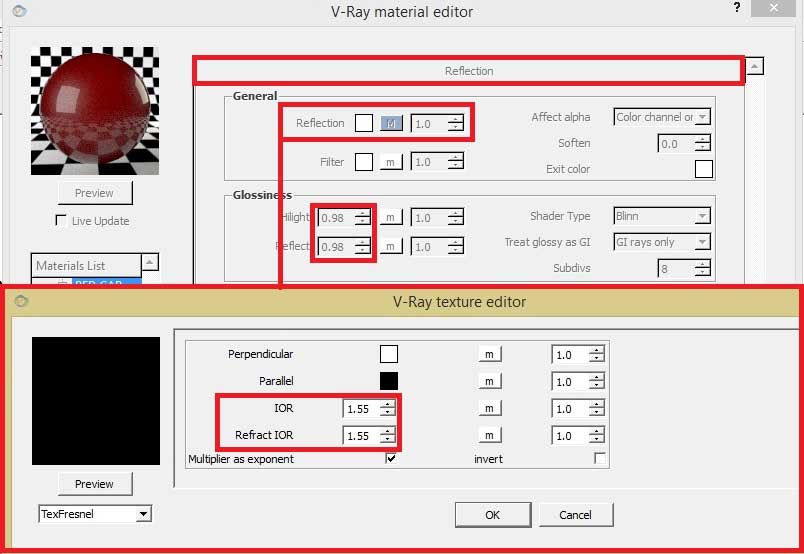
Car paint reflection settings
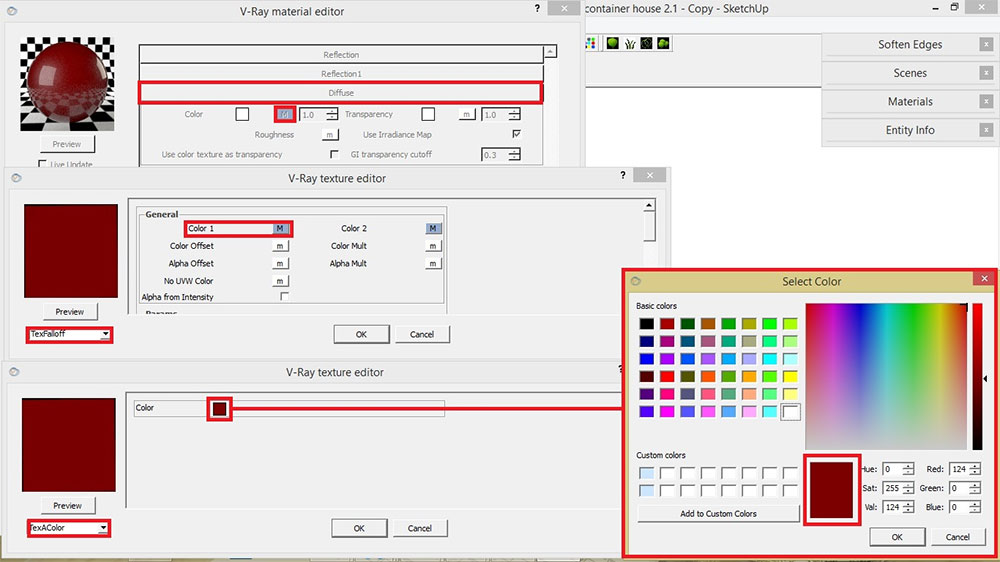
Car paint red color 1

Car paint red color 2
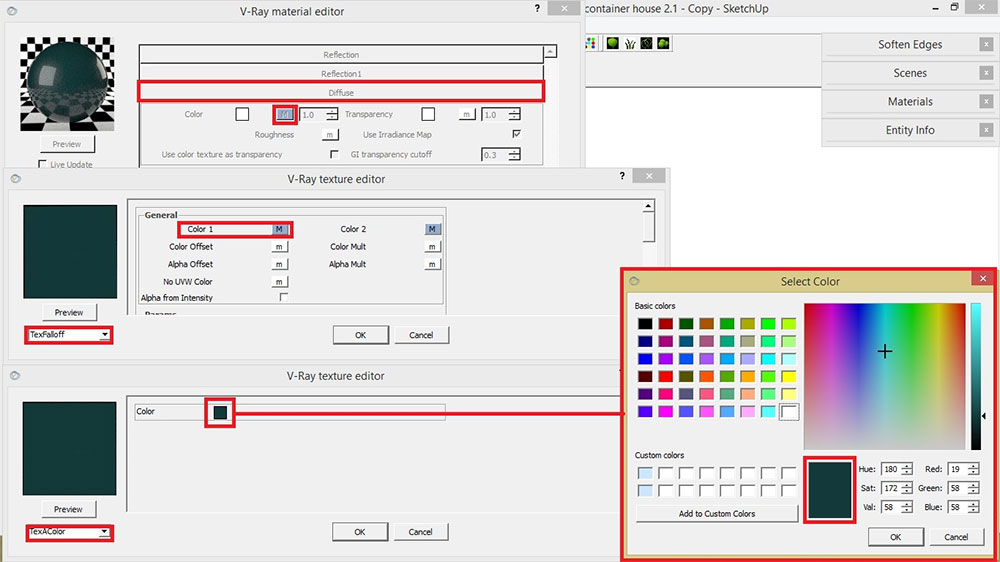
Car paint green color 1

Car paint green color 2
(b) Window glass
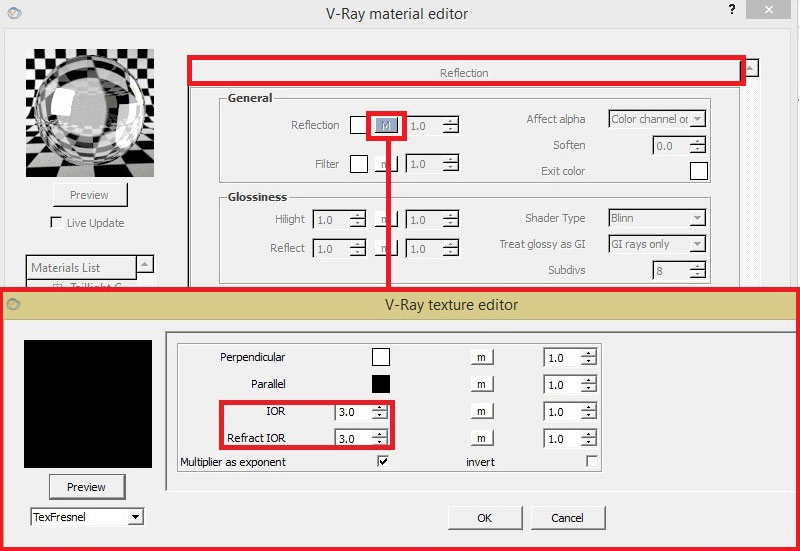
Reflection settings

IOR settings
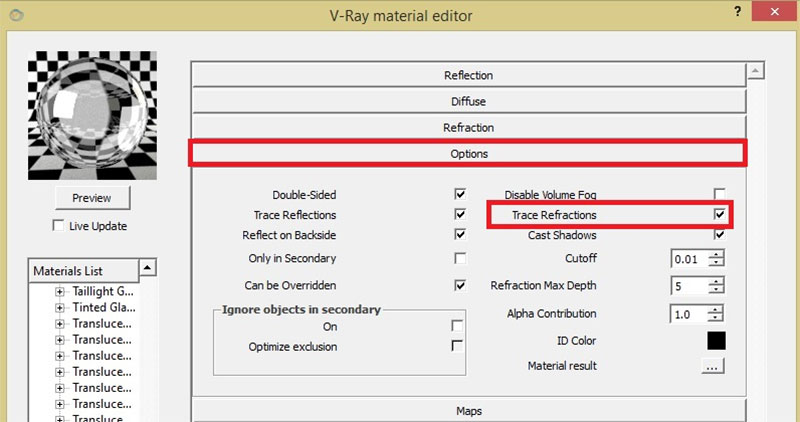
Under ‘options’, check ‘trace refraction’
(c) Wood
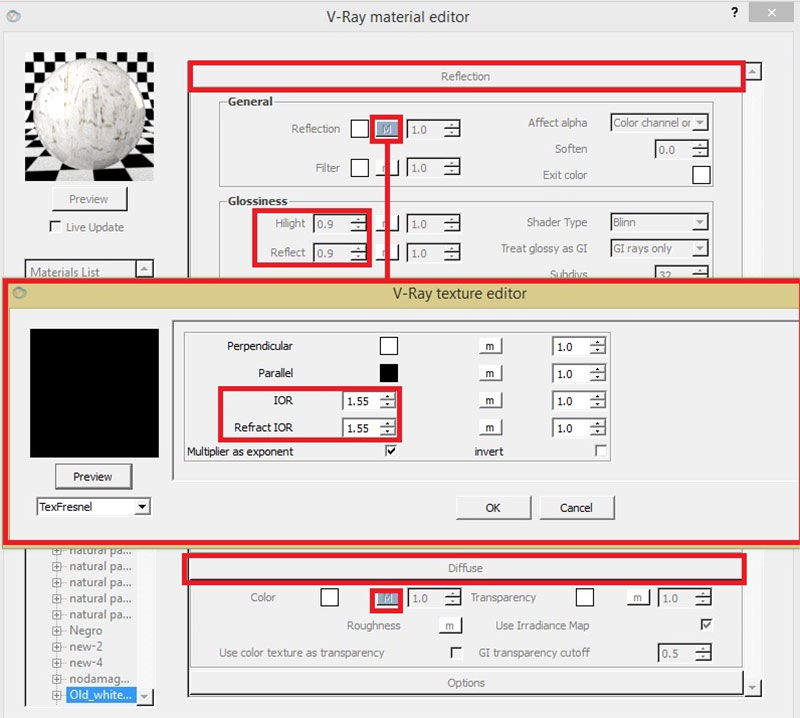
Reflection and Diffuse settings
Diffuse: Old white wood 200cmx10cm #014
(d) Grass

Diffuse and Maps settings
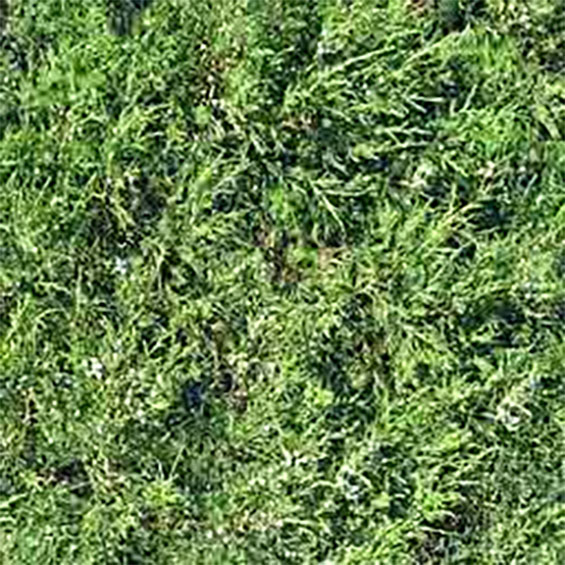
Grass diffuse
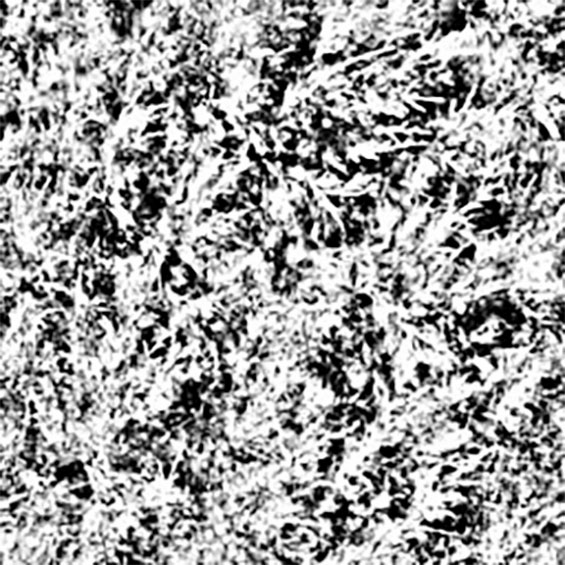
Grass bump
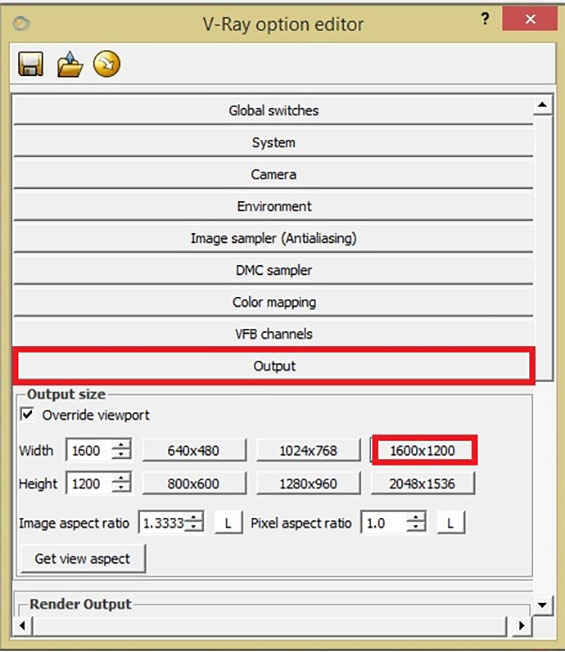
STEP 2. All V-Ray settings should be set in default mode, except for the output setting. Under V-Ray option editor, adjust the output setting to 1600X1200 resolutions. When you’re done, click the render button ‘R’.
STEP 3. Save the following images:
Raw rendered image
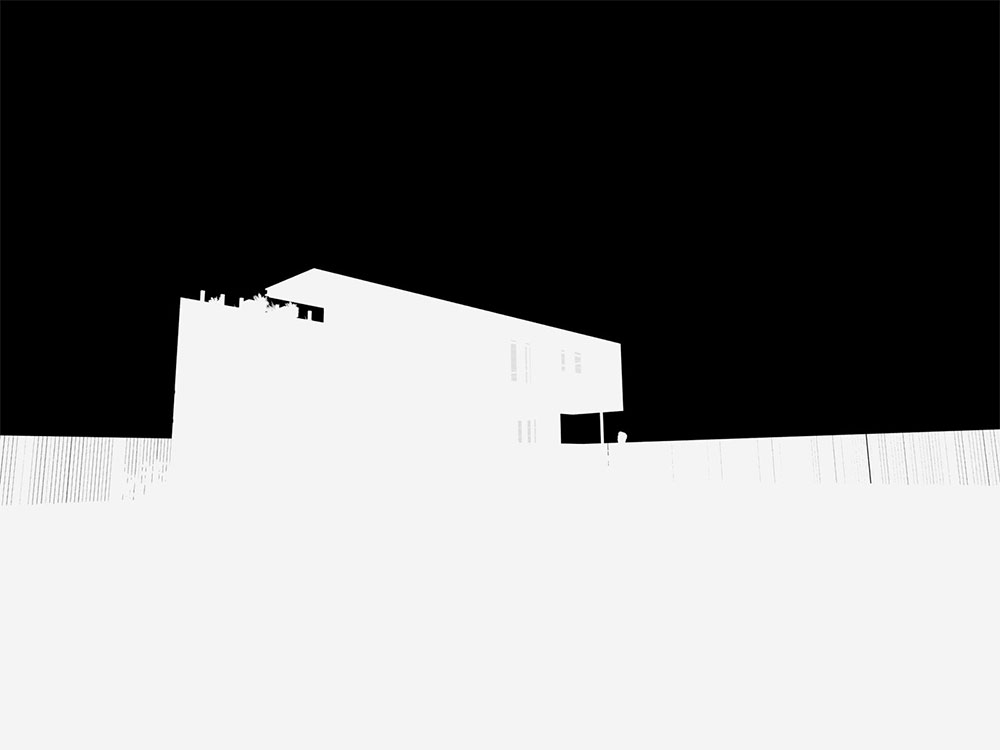
Alpha channel
Note: Alpha channel or mask render is a black-and-white representation of all the outlines from the scene. We will be using this image during the post-production, specifically when we need to replace the background of a scene.
Post-Production
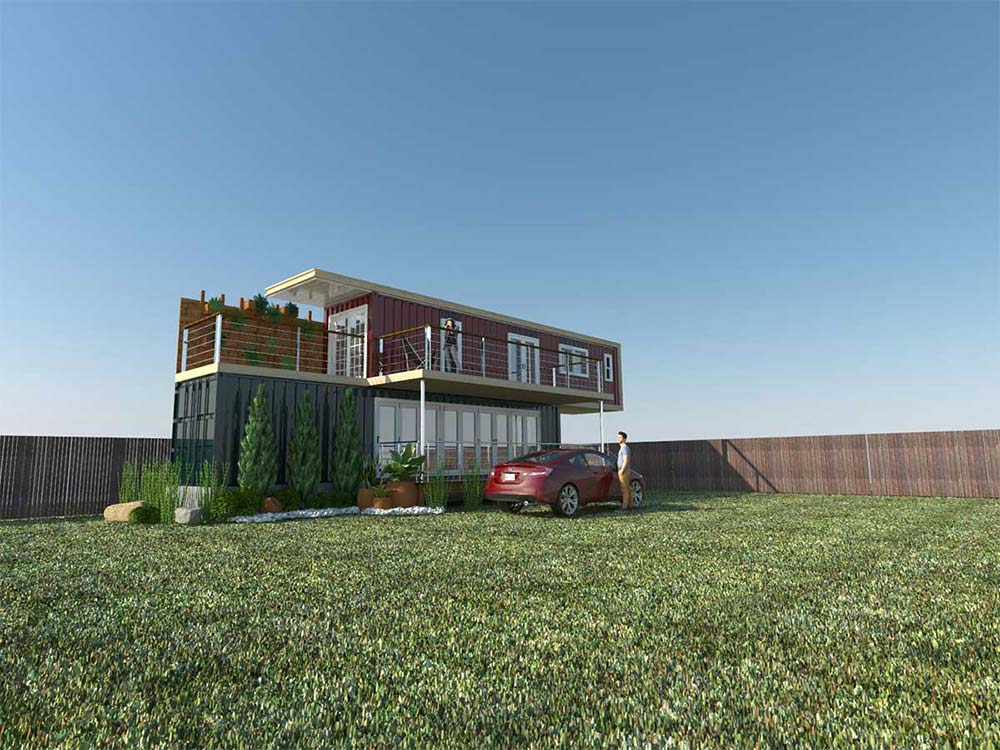
STEP 1: Open the last saved images in Photoshop. The ‘raw rendered image or the main scene’ will serve as the background Layer. Place the ‘alpha channel image’ in Layer 1.

Main scene
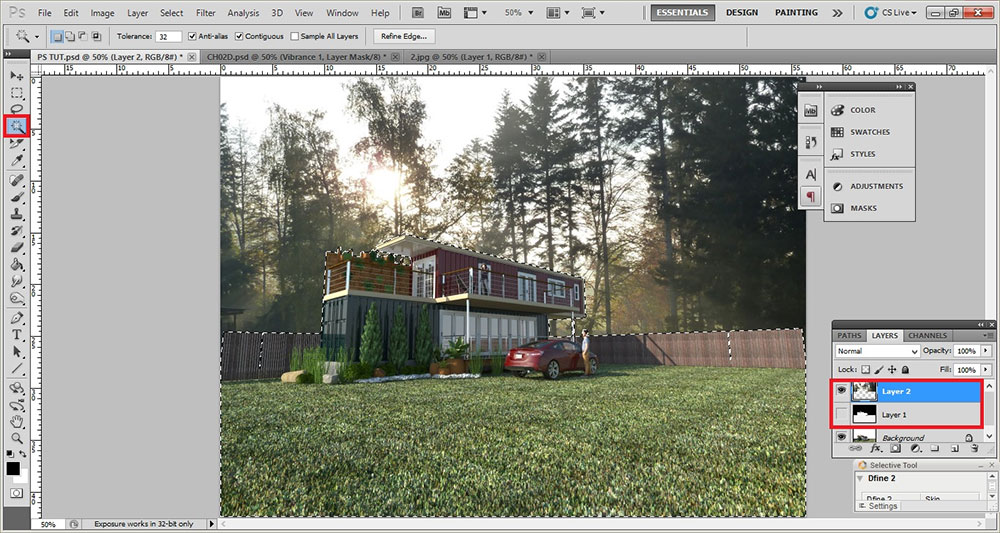
STEP 2: Delete the blue sky horizon from the background Layer (container house raw render). To do that, go to Layer 1 (alpha channel image) then using the ‘magic wand tool’ select the black tinted color> go to Background and press the Delete key. After that, uncheck the visibility of Layer 1 (alpha channel image).

Delete blue sky horizon from background layer
STEP 3: Insert the forest Background image to your scene. To do that, open the file image of the forest scene> drag the image> fit the entourage image using Transform command (press Ctrl+T)> change the image view if needed by clicking Edit > Transform (horizontal or vertical). Place the forest background in Layer 2.
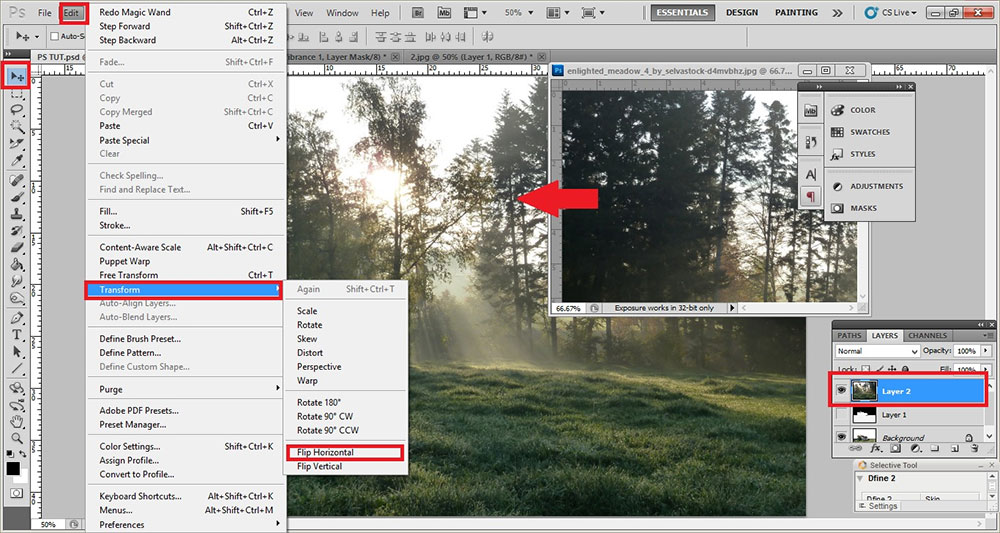
Insert forest background image
Note: Technically, any scenery photo you find in the internet can be used as a background element. However, you need to choose photos that match the lighting conditions and proportionality of your rendered 3D scene.
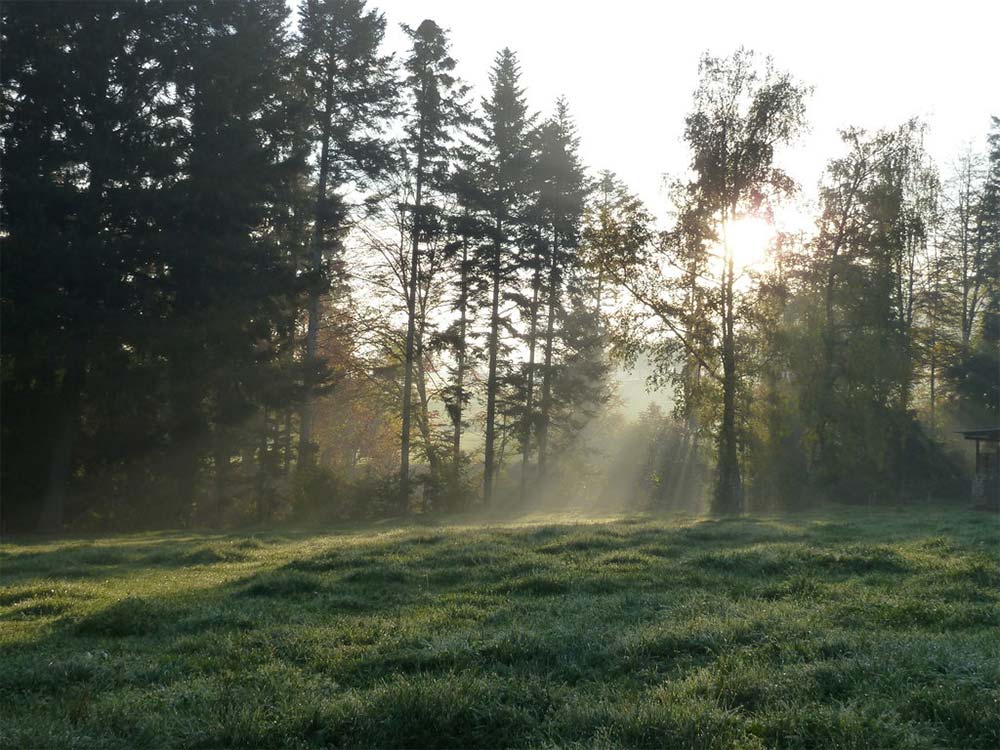
Forest scene
STEP 4: Remove the lower portion of the forest background, especially the part that covers the ‘container house’. To do that, go to Layer 1 again (alpha channel image) then using the Magic Wand tool select the white tinted color> go to Layer 2 (forest background) and press the Delete key. After that, uncheck the visibility of Layer 1 (alpha channel image).
Remove lower portion of forest background
STEP 5: Insert grass landscape in Layer 3. Roughly, erase the upper portion of the image using the Eraser tool.
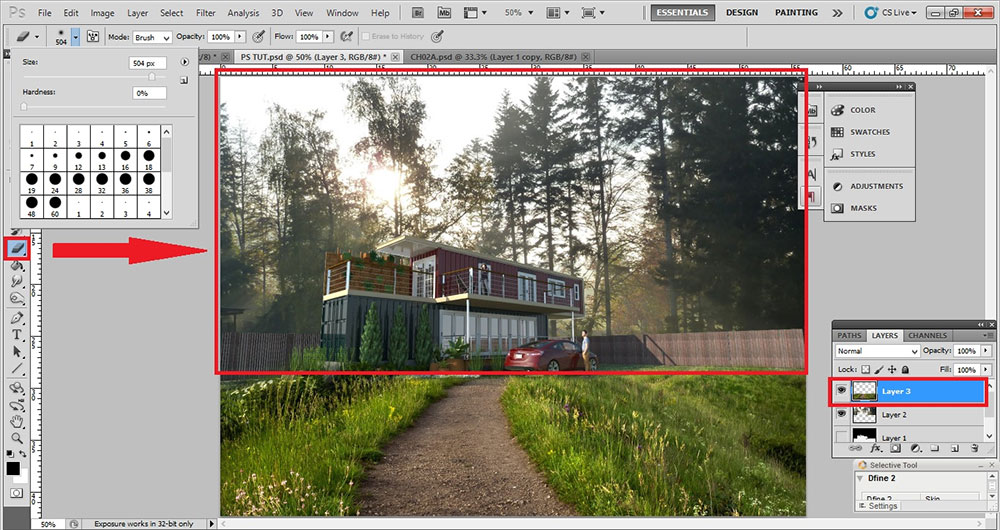
Insert grass landscape in Layer 3. Erase the upper portion
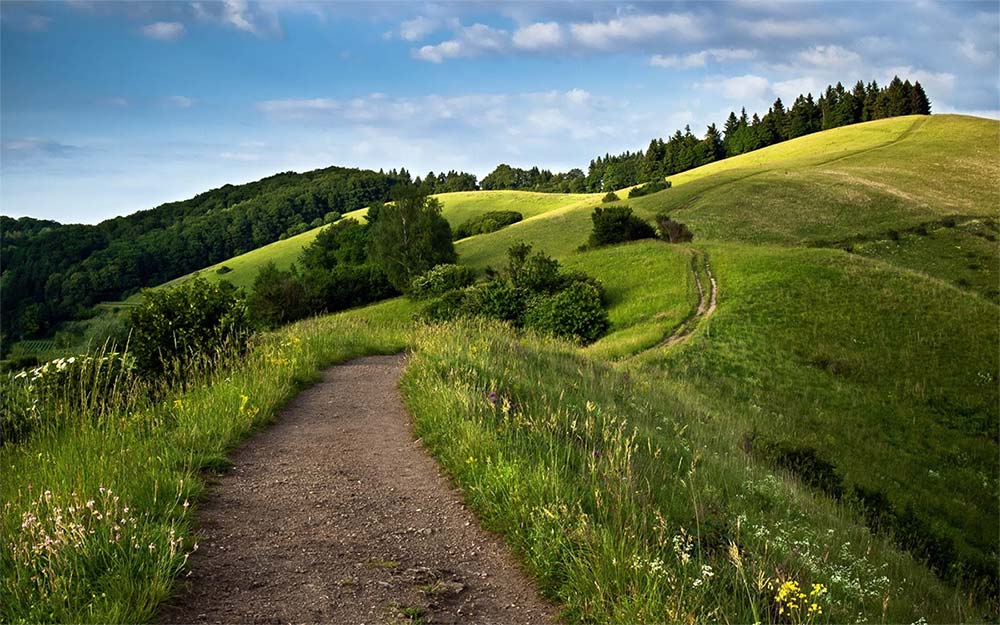
Grass landscape
STEP 6: Insert the following 2D entourage trees. To do that, open the entourage images in Photoshop and drag the images to your scene using the Move tool. Fit the entourage image using the Transform command (press Ctrl+T) and change the image view if needed by clicking Edit > Transform (horizontal or vertical). Place the grass landscape scenery in Layer 3. Place each tree entourage in Layer 4 and 5.
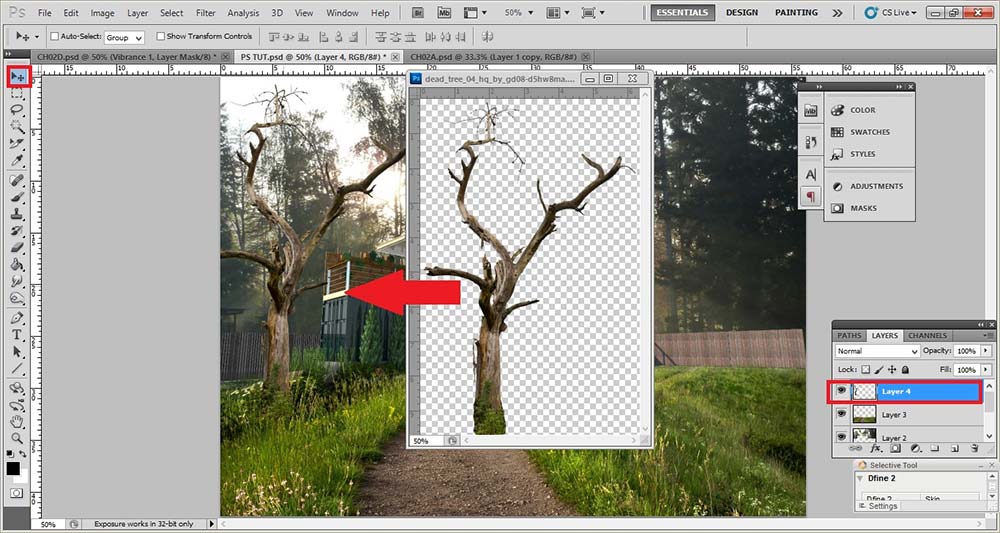
Insert 2D entourage trees
STEP 7: To accentuate the shadows, duplicate the following layers: Background Layer (container house scene), Layer 3 (grass landscape scenery), and (trees entourage) Layers 4 and 5. Make sure that the following duplicated layers are placed on top. Then set the Blend mode to Multiply with the value ranging from 5-100% Opacity.

Duplicate Layers. Set Blend mode to Multiply and values ranging from 5-100% opacity
STEP 8: Select each Layer that is set in Multiply mode, roughly erase the portion you don’t want to be affected by the masking effect or shadows. Result so far.

Result so far
STEP 9: Add vines or creeping plant image in the scene. Set Blend mode to Lighter Color.
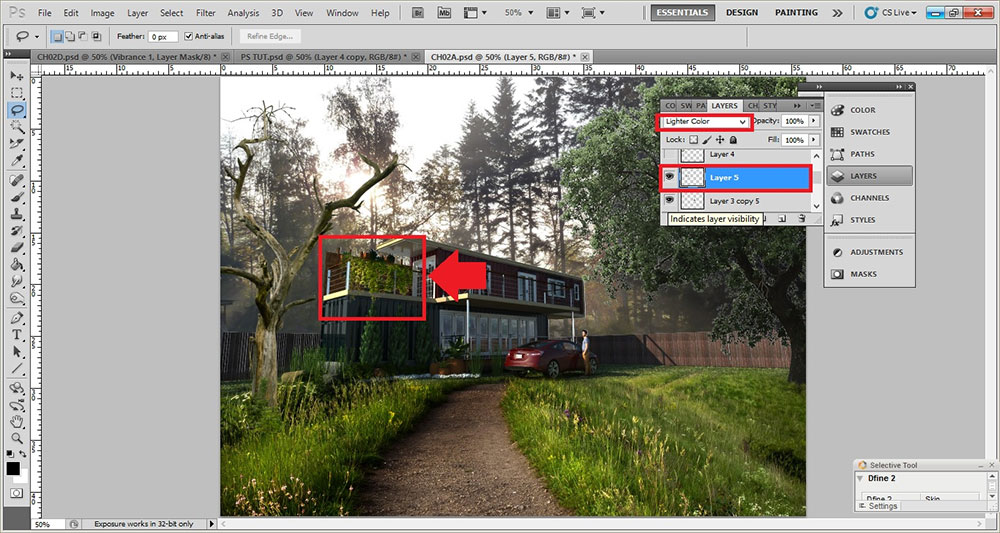
Add vines or creeping plant image. Set Blend mode to Lighter Color
STEP 10: Save your work in JPG or PNG format.

Result so far
STEP 11: In order to blend all the entourage to the main scene (raw render image), adjust the color balance and saturation settings. Open the last saved image and use following settings.
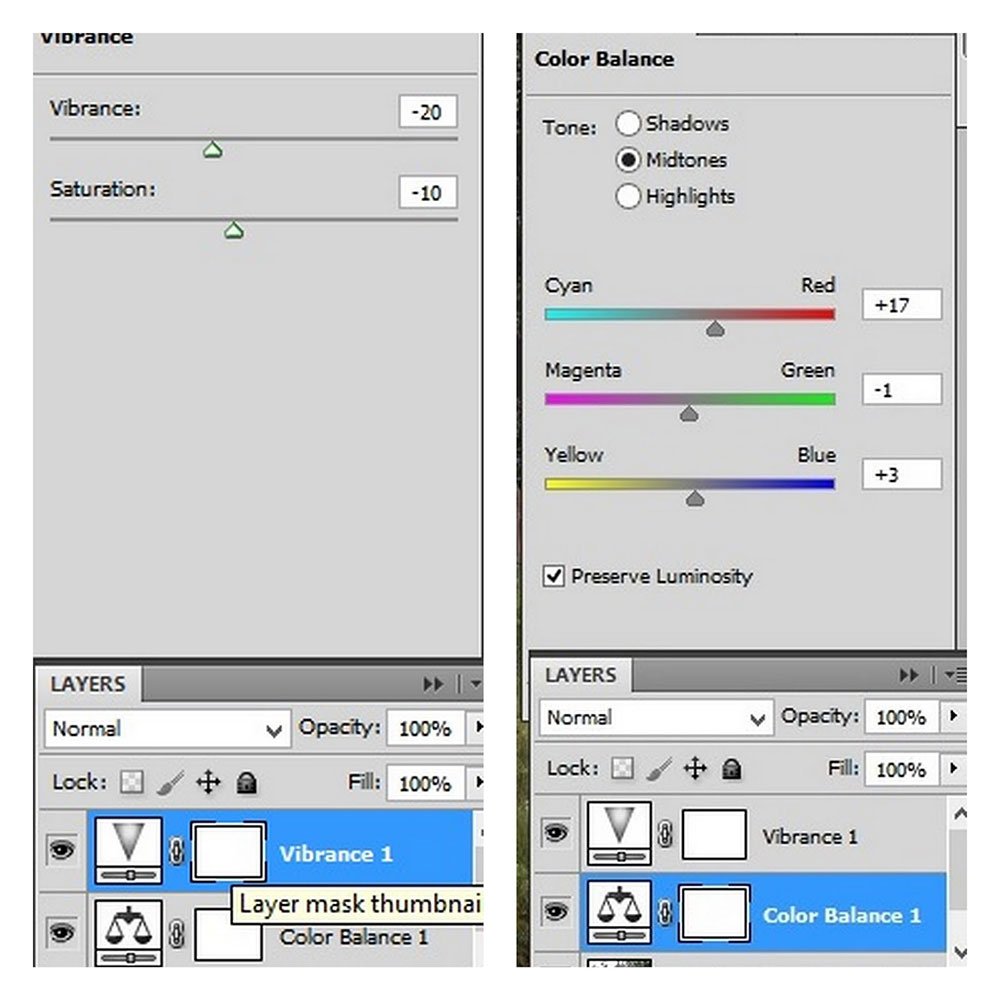
Open the last saved image and follow settings
STEP 12: When done, save your work in JPG or PNG format.
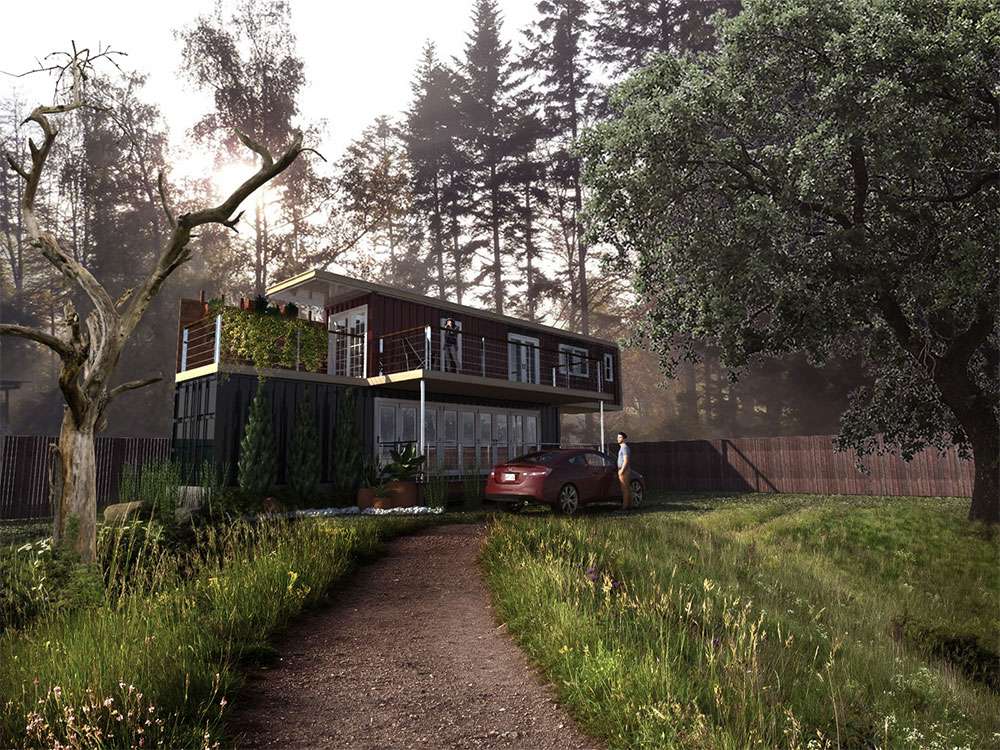
Result so far
STEP 13: Open your last saved image in Picasa. Follow the workflow for Picasa: (1) Orton mode> (2) Glow effect> (3) Color temperature> (4) Click ‘Save as’ and save your work in JPG or PNG format.
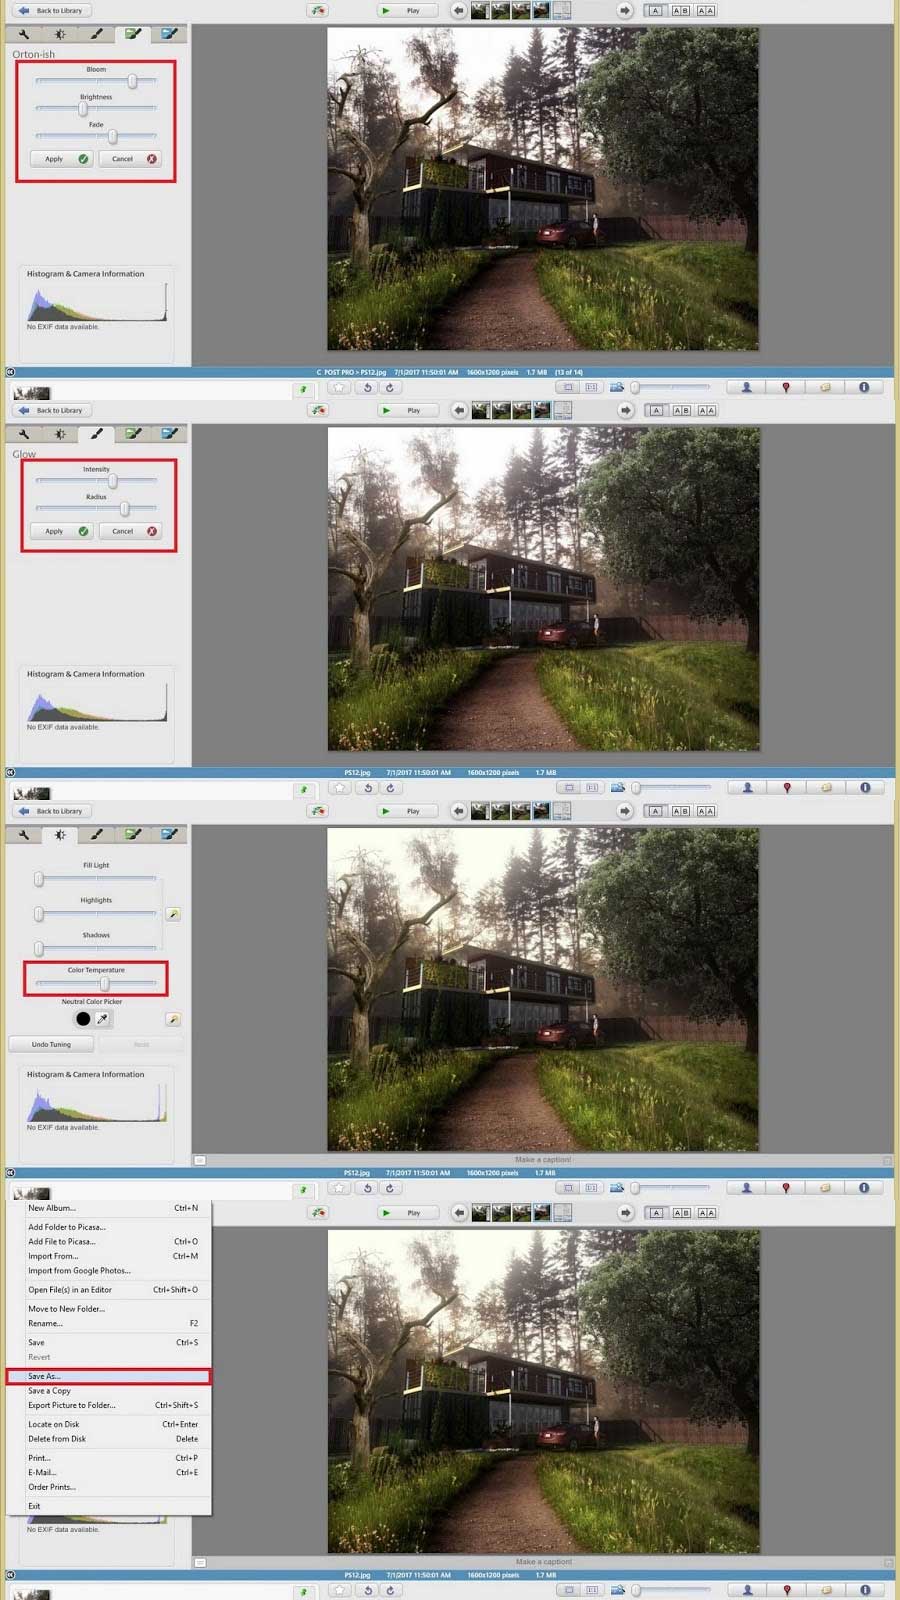
Picasa settings
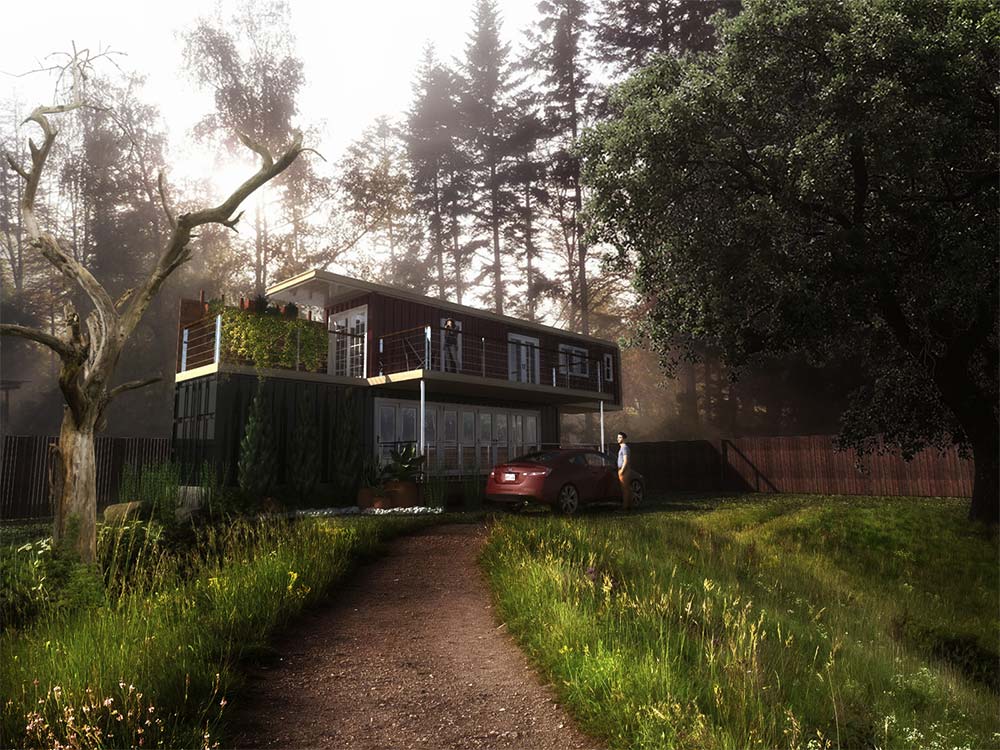
Final render
Thank you for reading.
Benedict Martin Caliwara
Profile Builder 4

Artisan Organic Toolset

PlaceMaker Version 3
Skimp Pro Import Extension

BIM Bundle Special Offer!
SketchPlus Artist Bundle !
Bevel Tool
V-Ray 5 for SketchUp E-Book

i am thankful that we have this site that help us as a young architect.
thanks you so much!
Thank You so much for this tutorial, it sure was helpful.
Sir please upload your all video tutorial on youtube and send me link on my email.I will be highly thankful to you. anasamu46@gmail.com
Benedito Martín, muchas gracias por tu aporte es de gran ayuda