Lighting with V-Ray for SketchUp – definitive guide part 1
Previously Nomer Adona wrote a simple tutorial entitled “Interior Lighting for Beginners” which was published at CGpinoy.org. In that tutorial he used version 1.05 of V-Ray for SketchUp. Since many new features have been added with the latest version of V-Ray for SketchUp, we have decided to do this mini series of tutorials with the latest versions.
In this first tutorial I will be using V-Ray Beta version 1.48.99 (V-Ray for SketchUp User Manual Version 1.48) and SketchUp version 7.0. I will be focusing on IES, Spotlight, Rectagular and emissive lighting. You will learn how to create a realistic lampshade material and how to position the rectangular lights to achieve the right effect for your shade. In this tutorial I will be using the same model that I used in the previous tutorial “Interior Lighting for Beginners” and will be adding components and materials to achieve the desired effect.
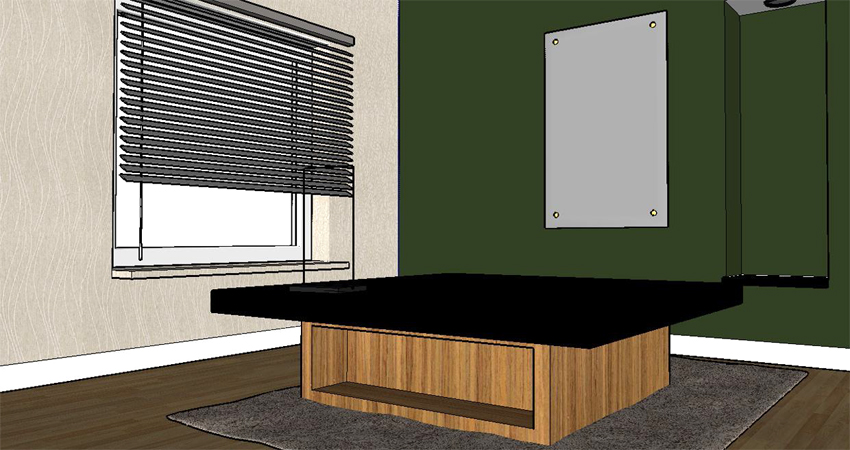
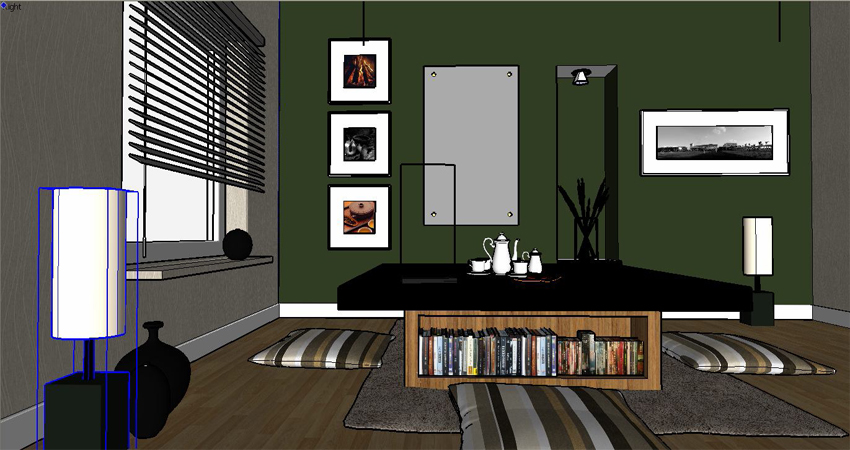
Here is a screen shot of the particular interior that I will be using.
OK lets begin!
1. IES Lighting
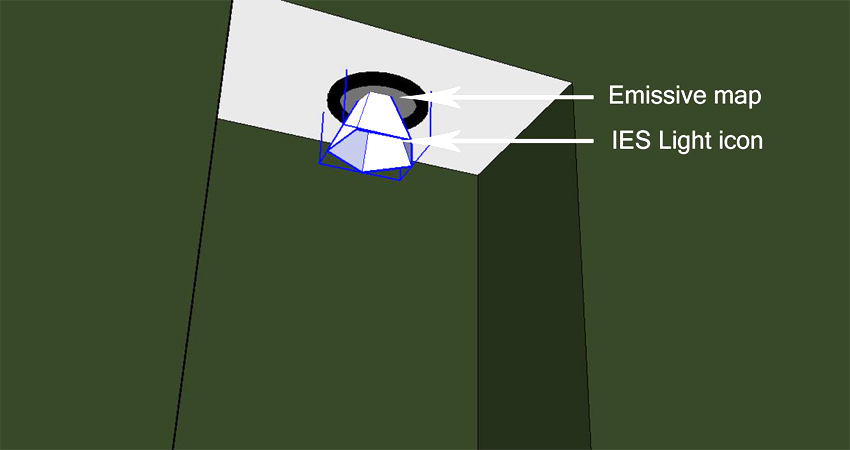
I have done this in a previous tutorial here at SketchUpArtists: Basic IES Tuorial using V-Ray for SketchUp. The only difference is instead of using a rectangular light to show the light source, I will be just using a Emissive map.
Here is the material I used for the Emissive map.
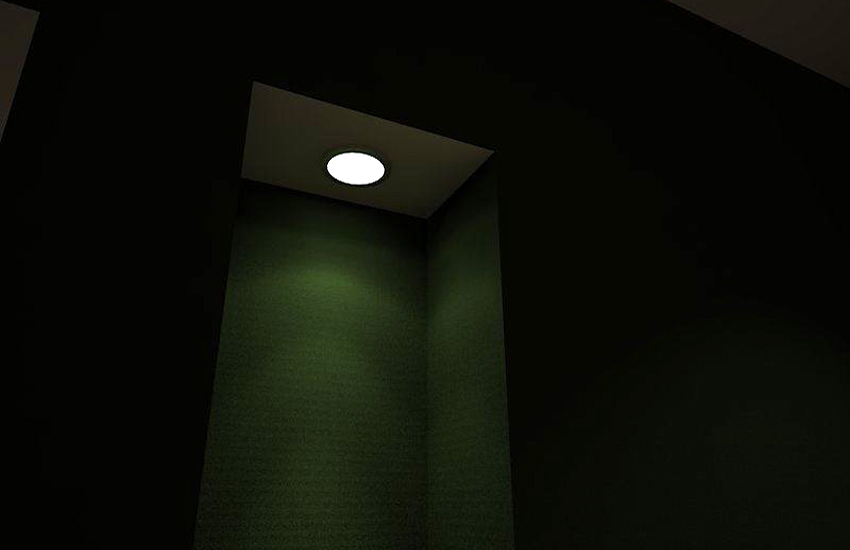
This is the first render.
2. Spotlight
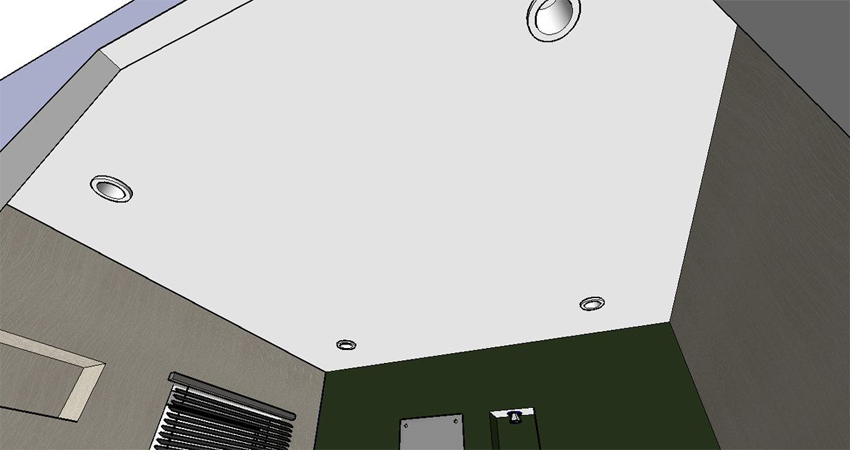
Together with IES lighting, this is also a new feature with V-Ray 1.48.66 and up. Since this is a tutorial, allow me to put 4 spotlights in my four recess lamps.
The Image below shows the position of the Spotlight icon. I also use a Emissive map on the light receptacle.
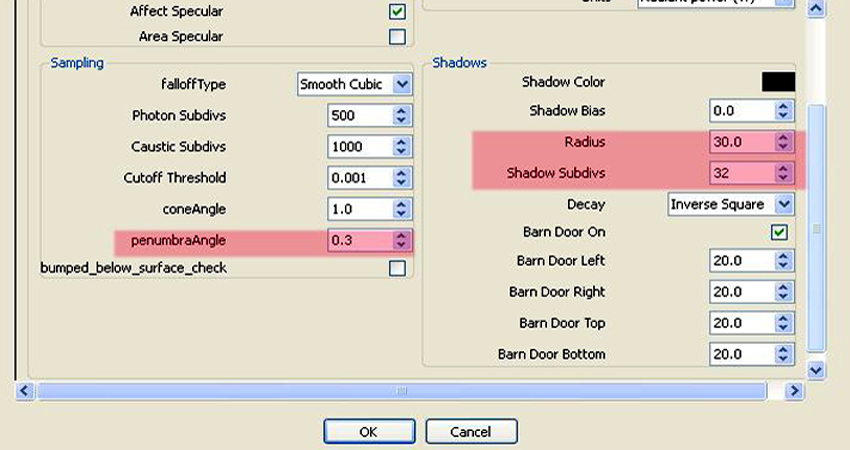
Here is the settings for my Spotlight. For me the most critical setting is the Shadow Radius which controls the softness of the shadows, Shadow Subdivision controls the smoothness of the shadow and last but not the least is the Penumbra Angle. In the image below I used 0.3.
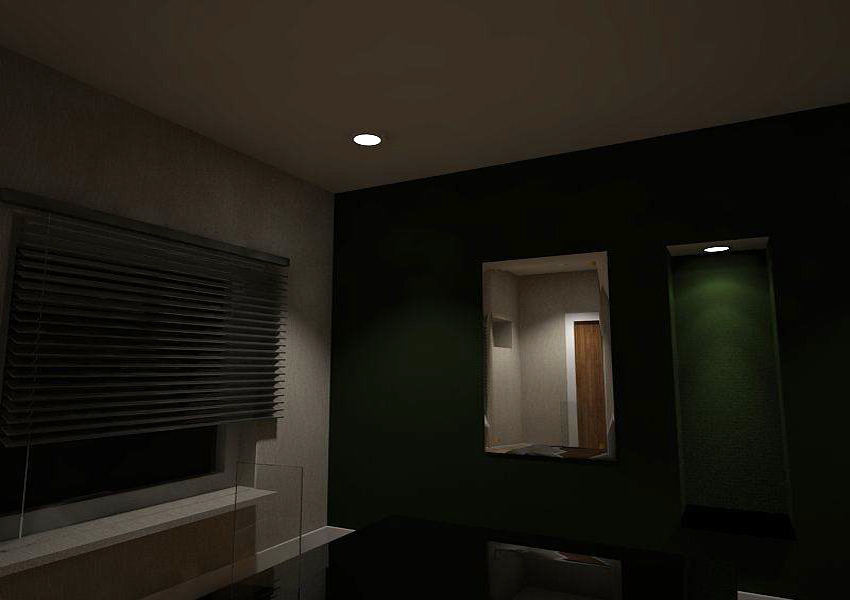
Here is the render using Spotlight. In this render I used a very low resolution. This is the reason why I have splotches and grains. This can be corrected easily by using higher Subdivisions and Samplings.
3. Lampshades
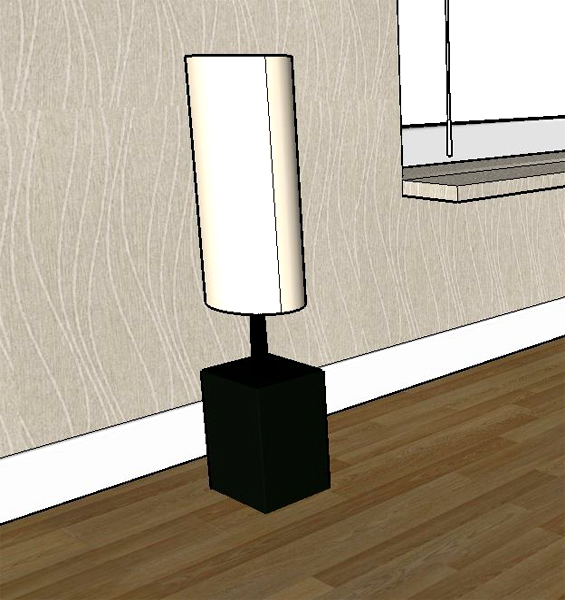
Here is a simple lamp I modeled in SketchUp. I will show you how to place V-Ray rectangular lights.
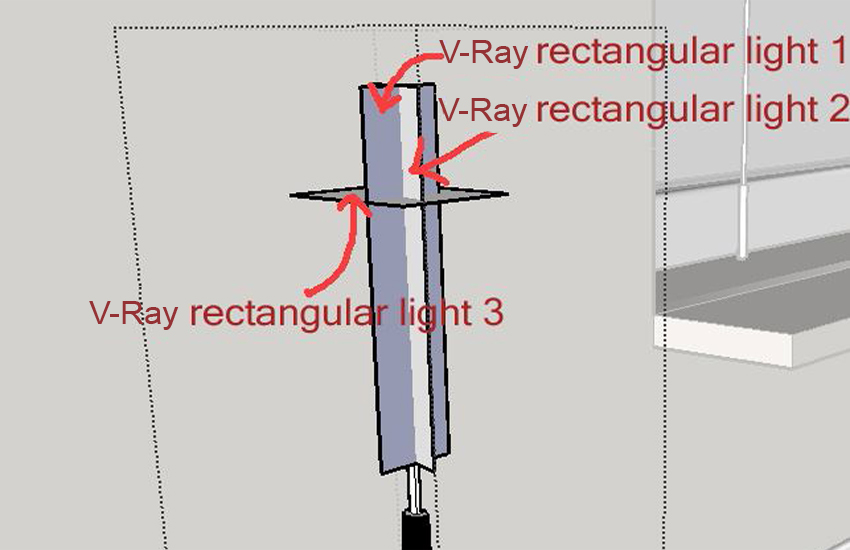
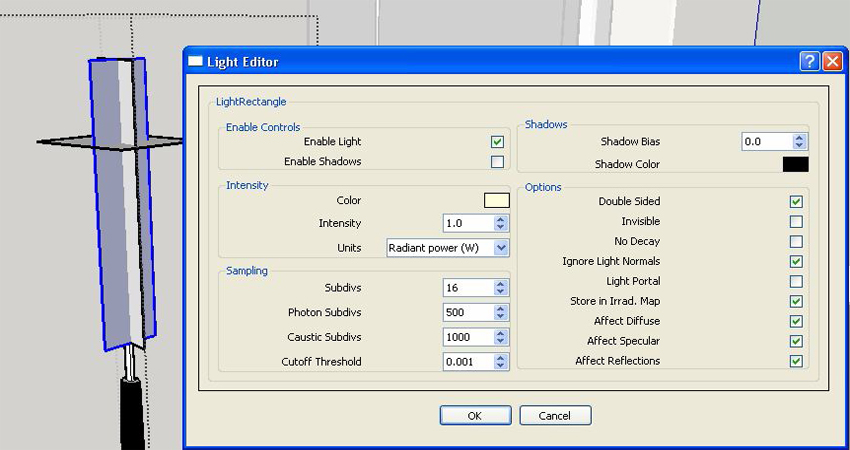
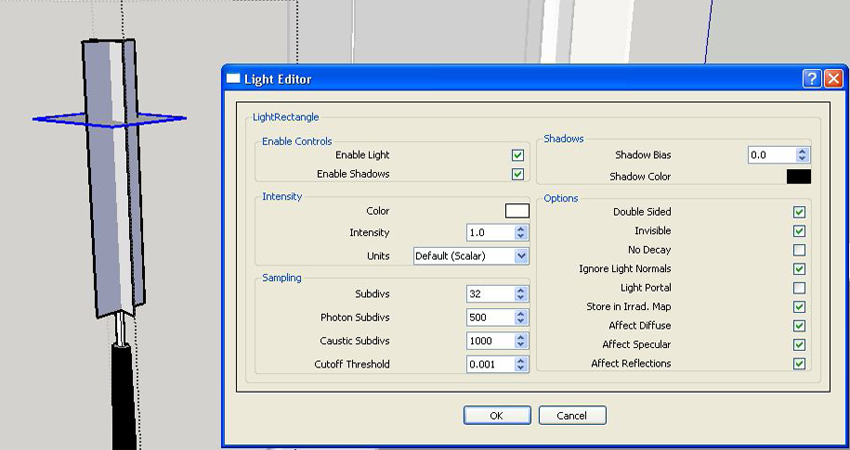
Here I hid the shade of my lamp to show how I set up my rectangular lights. V-Ray rectangular 1 and 2 run along the height of the shade. They are double sided, visible but they don’t cast shadows. The one that casts shadows is the third V-Ray rectangular light. This one casts shadows, double sided but I made it invisible.
Here are the settings of my V-Ray rectangular lights.
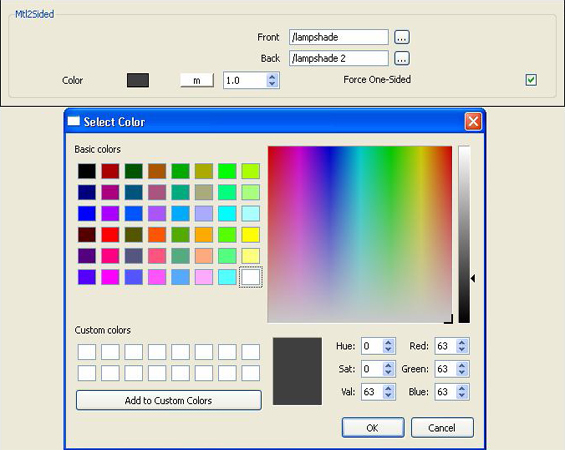
Lampshade material: This is a 2 sided material with about 70% gray mixture.
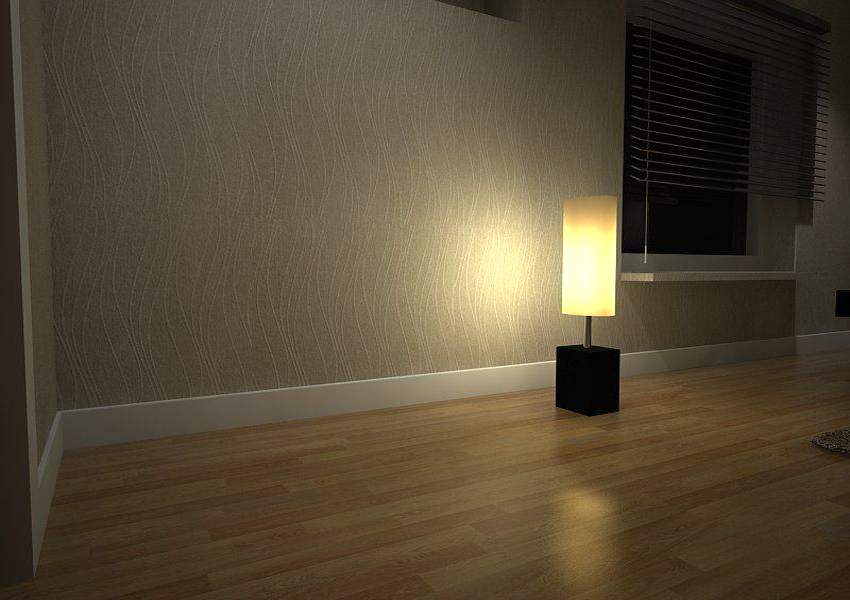
Here is the resulting render.
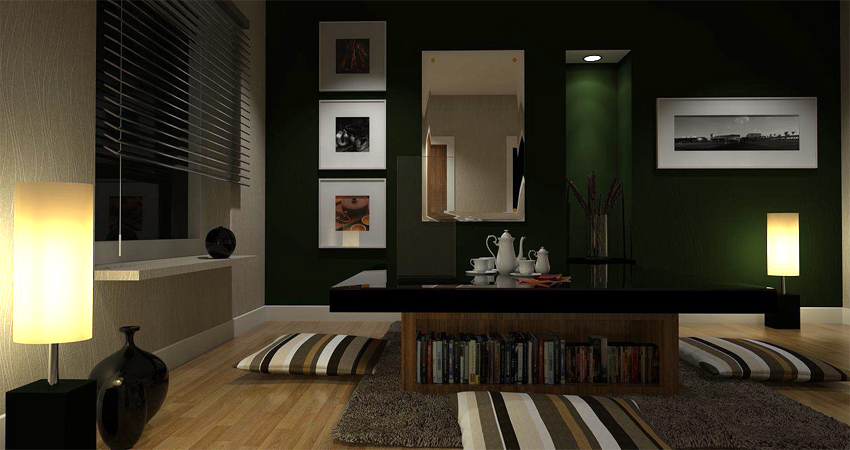
Lastly, I will add a few more components. A special thanks to a friend BTH (Trang An) for some of these great components.
Here is the render.
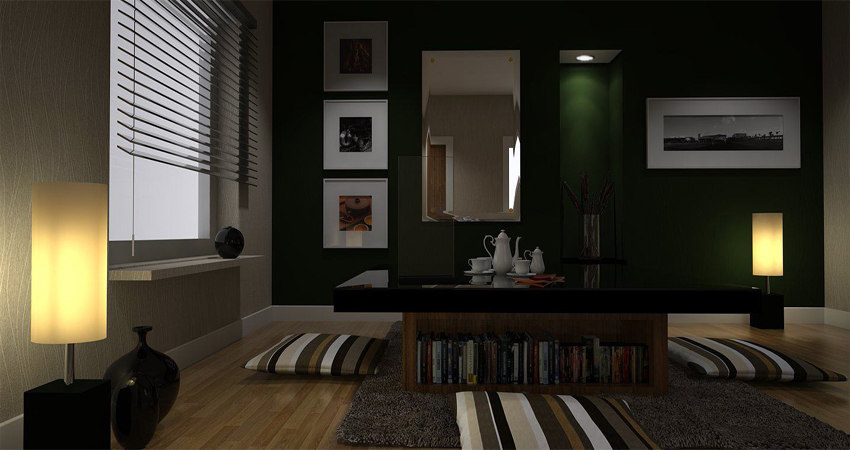
I also attempted to render with the same scene, this time with GI and BG Colors on (no mapping).
Cheers! I hope you will wait for the second part of this tutorial and my guide to lighting with V-Ray for SketchUp.
Nomer
Some of Nomer Adona’s other tutorials here at SketchUpArtists:
- Lighting with V-Ray for SketchUp – definitive guide part 2
- Basic IES Tutorial Using V-Ray for SketchUp
- Using HDRI in V-Ray for SketchUp
- IES Light Tutorial using V-Ray for SketchUp
- Create a Tile Imprint SketchUp, Photoshop, Pixplant and V-Ray
- Texture Workflow with SketchUp, Photoshop and Podium
- Use Image Editing Software Inside SketchUp
- A Watercolor Line Drawing Ink Effect






I just want to thank you for this tutorial, it was really helpful to me!
this is truly helpful to all!
wow.. very helpful.. thanks.. 🙂
hi, i really appreciate what i saw. i dont know if u can help me out on tutorials that is v-ray for sketch up, i dont even know a thing about v-ray, so pls i will appreciate any help, thanks.
great tutorials.. god speed big help for starters.
truly benefit from tis tutorial,
thanks nomer you are a great help
well i’m glad this is a great help. wait for part 2.
Thanks for the great tutorial! But everytime i try rendering a completly enclosed space i get a totally black rendering,its driving me crazy! Could you please post the complete vray option settings ( camera setting, GI setting etc..) for this sort of enclosed space.
i guess your physical camera is on.
Nope, thats what’s driving me nuts, physical camera is off. That’s also why i was hoping you could post the complete vray option settings.
what a nice guy,,, thanks,,, very helpfull…
Thanks!!!! I love to learn this way!
uhm sir. i just want to ask how did you modify the default settings when dealing with the lamp shade material? i mean, i’d tried it but the material was still opaque. how would i use the two-sided material and the right translucency for it? thank you sir. hope you could help me.
I have a problem, on the light editor i cant modify the intensity of lights and also in other parameters is the same problem!
When I render and image whit rectangular lights they appear black, even if I reverse it´s face. Other types of lights just dont appear the program doesnt include them in the scene!
@onin. i think you need to click force one sided material. as for the material the rule of thumb to me is to have 70% dark gray. (front 70% and 30% back materials.
@Noel, what version of vray are you using? I think you are using vray 1.05.33 maybe if the other lights icon are not showing.
1.49
why cant i change the number of the penumbra angle on the spotlight setting?it happens also in the multiplier tab on IES setting..
Thx
hi can you send for me your model i need it for practice it.thanks.i can’t make this lamp material same yous .please so me more thanks
sir nomer sang window mu inopen ung asa taas nung select color mu… ung para sa material.. tsak sir.. bat pag sakin di umiilaw ung lamp q.. e ganyan nmn gingawa q…
Wow , nice tut . thank you very much !
I’ve got a question,
all my lights that I want to use, don’t work, and I’ve tried everything..
I don’t understand, can you help me?
Sorry for my english
Marie from belgium
Thanks very much for these exemple, easy to understand and well explained.
Boudi from Paris, France
such a grt tutorial!! u r doin wonders by tutoring beginners like me!! Thanks a million for ur efforts!!
your renders are awesome. quick question though: how do you get the light to shine through the lamp shade? is your shade just a regular white color? is it just one plane? i have some shades that have a 1/4″ thickness; is this not the way to go? your response will be greatly appreciated!!!
Hi. I want to study these cases, where can I find these scenes (Sketchup)? Sorry , i don’t speak english very well
Sir,
need yout professional advise, i have d same problem with marie, everytime na mg render ako yun mga lights ko na inilagay ay puro black lang, i adjust all setting i know pero ganun pa din. pls advise
ganyna rin sa akin everytime na gagamitin ko yong lighting black ang nagpapakita pag narenderan na , pano po gamitin yon
I’ve the same problem as Noel’s. When I put rectangular lights, it appears as if its an uplight and it’s black. I dont have problems with my IES, Spots and Omni. Will greatly appreciate your advice. 😉 Cheers!
Thank you very much, this is a great tutorial!
good tutorial?!
i am getting a black screen altough i configure same options
Sorry 😀 i am using demo version 😀
i think demo version has some restrictions, doesnt let to use some feautures, such as shining sun, lighting spots etc :PPPP
HOW TO LIGHT A LAMPSHADE?
I had the same black screen problem as a lot of people here..i suggest you try to zoom in a little..sometimes the render renders a little far back and you are inside a wall. That’s what i discovered. Simple but sometimes it’s the problem.
Thnx for that Clarisse
James
Hey, Great tutorial…
I have a question, how do you do for the reflection of a mirror, I saw you have one on the render.
I can’t make that the textures reflect, just objects and colors. I wonder if you can make a tutorial about it or just give the steps you follow, I really appreciate that…
Thanks and sorry for my English, I hope you understand what I tried to say.
Peace!
i like that..
Hi sir! great work on this! really made me want to relearn sketch up… and finally start to understand v-ray.
I am a 3ds max and mental ray user, and this quality of work would usually require a 20-45 render time.
I would simply like to ask how long did the render time took for this kind of great quality.
Thanks,
Van
Do you have the Vray program to send me?
Not sure if I understand what you mean?
Hello,
awesome and helpful tutorial! Thanks!
But i have a problem. All my lights dont work (spotlight, omni, rectangle…) Tested different settings, changed values – nothing.
Only can see lights from emissive materials when start render.
How to fix this?
sorry for my english.
Thanks 🙂
is the lampshade some kind of component or group??
can you explain it more?
I can’t understand about mat 2sided.
thx for your answer & tutorial
regards,
@holando
I believe Nomer used a component for the lampshade and the mat2sided means the material is placed on both sides.
@admin
thanks a lot.. now I understand 🙂
maybe this link can more help about mat2sided
http://sketchupvrayresources.blogspot.com/2011/08/tutorial-how-to-simulate-lampshade.html
nice tutorial
thanks alot, light was big problem for me but now I undrestand it.
hi…i wanna ask ..how do u get the light shine throught the lamp?
great tutorials.. thanks
Hi,
i was wondering if you could help me.
i put three spotlights in my space and only two will work when i render. the light settings are exactly the same, is there a reason just one won’t work???
thank you!!!!!
First of all, thanks for the tutorial, it helps a lot.
Is is possible to use emissive materials and GI together? If I turn on GI, emissive materials does not appear as a lighting elements. Is there any option for that? GI and BG were open in your last renders, Did you have emissive material on those scenes? it looks like emisive and GI work together. Thanks a lot.
Hi Admin,
thanks for the tutorial, it helps a lot.
I have problem with ies light,
i put 6 ies light in 12 x 6 area, but only 4 of them work when i render. the light settings are exactly the same.
could you help me, please
thank you
Guys, I have found the solution behind the mystery of BLACK RECTANGULAR LIGHT when it supposed to be invisible. In my model, Rectangular light are used as general lighting from ceiling. I put the light right under my ceiling and it renders as black piece. After a whole day of exploration, I moved down the rectangular light by 1mm so that it is not directly on the surface. VIOLA! and it worked. Hope it helps you guys!
simple and just what i needed…
Thanks