5Dthink: Merging 2D+3D Visualization

By Jim Leggitt
Designers have been trained to think either in two-dimensions (graphics and drawing) or in three-dimensions (physical and computer models) but not necessarily in terms of combining 2D with 3D into a new language of visual communication. Merging of two and three dimensional representation or what I call “5Dthink” – is a strategy of thinking (and designing) in simultaneous layers – creating design visualization that has never before been so available, rapidly generated, affordable and easy to learn!
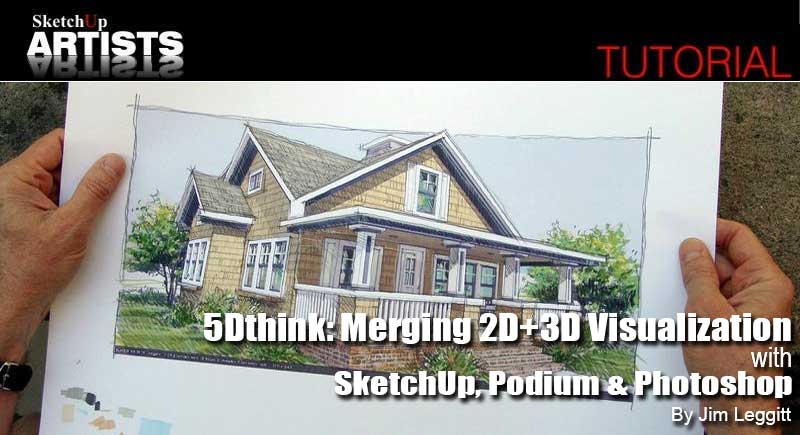
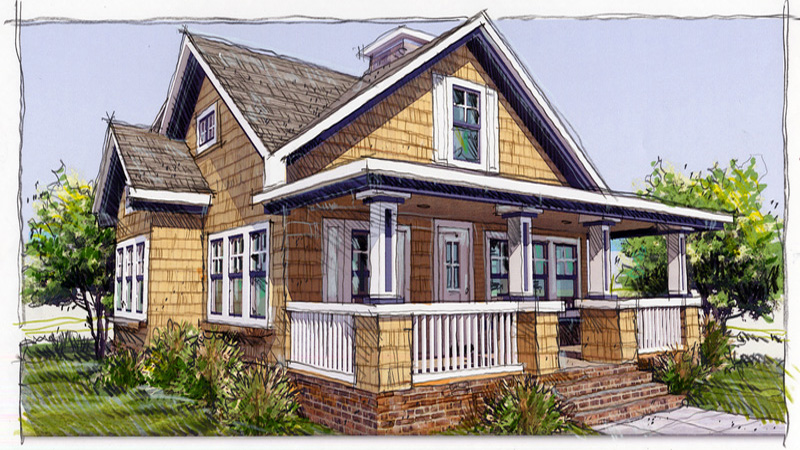
I want to quickly present an example of what I believe is the next generation of visual communication. The test perspective below combines 3-dimensional modeling with 2-dimensional drawing. It seamlessly integrates three separate software programs (Google SketchUp, SketchUp Podium and Adobe Photoshop), digital reprographics and traditional hand drawing. The end product is a hybrid image that represents the merging of high technology and hand drawing.
Step 1: Base SketchUp Model
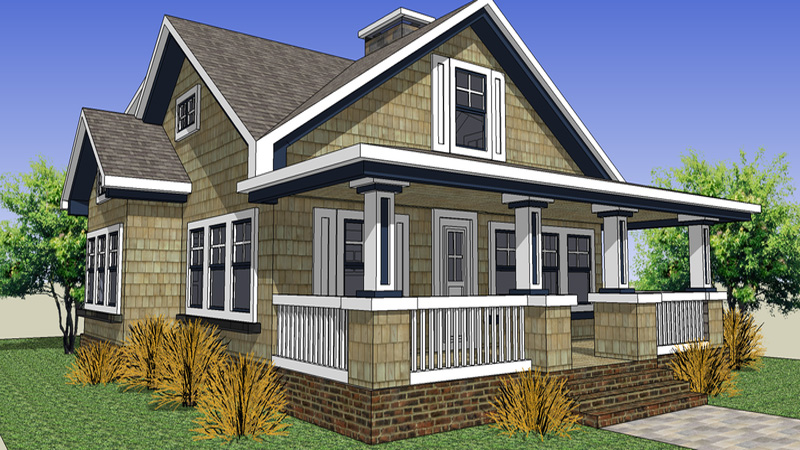
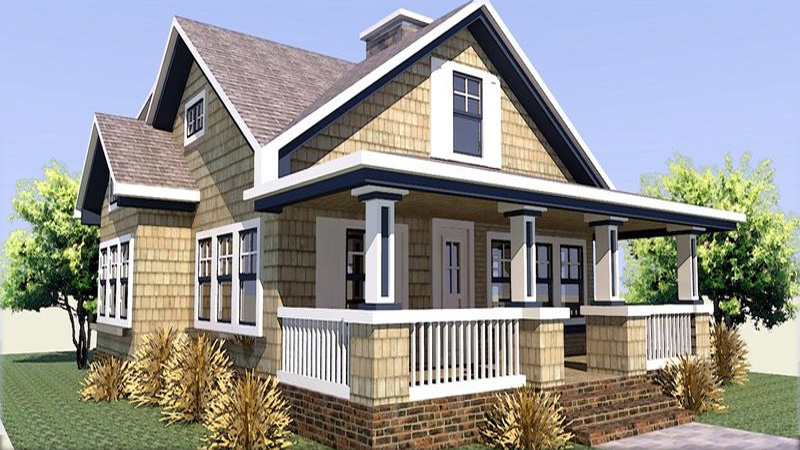
For this test, I downloaded a house model from 3D Warehouse and added some basic landscaping. I did not include people in the scene. Basic default lighting and shadow adjustment emphasized the deep porch and roof overhangs.
Step 2: SketchUp Model Preparation
In advance of the rendering process, I adjusted the SketchUp model “shadow settings” to Dark 25 and Light 35. This significantly darkened the model view but was necessary to pop the shadows in the rendering process.
Step 3: Podium Render
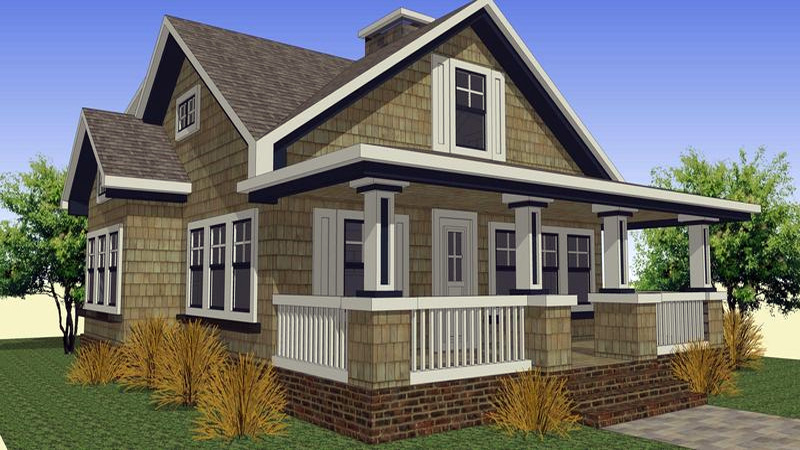
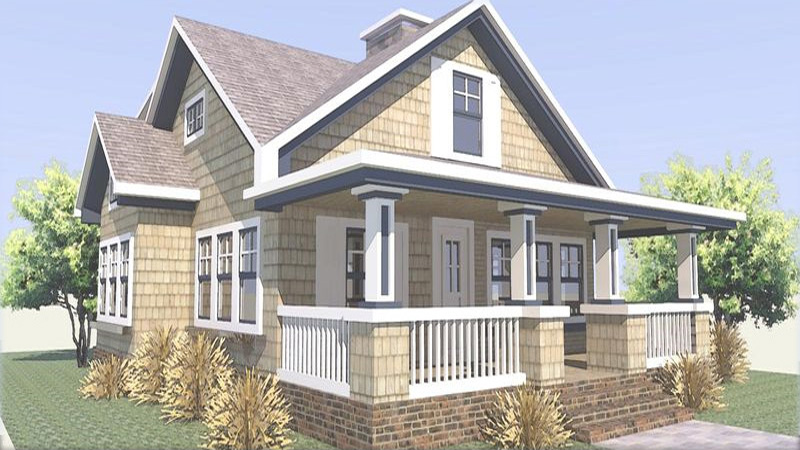
Rendered in just over 6 minutes, the image below was created with the SketchUp plugin SketchUp Podium. It generated a photo-realistic rendering of the house with accurate light modeling (compare the shadows on the four front porch columns) and reflective glass on the windows. This 3D digital rendering was far superior to the exported SketchUp scene, but was only an interim step in my 5Dthink process. Time to add 2D!
Step 4: Image Photoshop Filtering
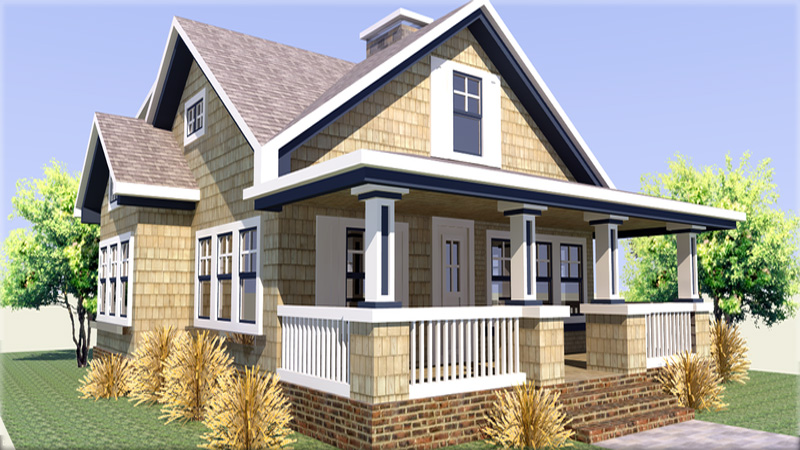
I filtered the image using the filter>artistic>watercolor tool in Photoshop, which popped many of the edges and added contrast to the wall and roof textures. This also masked the photographic dominance of the trees by giving them a more painted appearance.
Step 5: Image Printing
Again in Photoshop, I created a duplicate layer of the background image and adjusted the transparency to 75% of the original intensity. This significantly lightened the image – a necessary step in preparation for adding markers, colored pencils and hand delineation. I printed the image on my Epson Workforce 1100 at 7”x15” on Epson photo quality ink jet paper (matte finish smooth coated paper).
Step 6: Hand Drawn Character
Using a few light colored Chartpak AD markers, I added back color to the windows, walls, roof, grass, trees and landscaping. I did not color the sky. I overdrew the building edges with multiple overlapping pencil lines which gave the image such a hand drawn appearance. Several colors of Prismacolor pencils were used on different surfaces. Final white pencil highlights and black pencil stipple transformed the computer image into what now appears as a hand drawn rendering!
For more information about merging hand drawing with SketchUp models, visit Jim’s website www.drawingshortcuts.com and pick up his new book Drawing Shortcuts Second Edition.



Will be buying ” Drawing Shortcuts”.However,is it possible to master the tricks of the trade in Presentation drawings in quite a considerably short time.
Today I use a lot Hand Presentations as I feel they look FRESHER !
Would this be a good substitute ?
Regards,
Renzo