SketchUp to Photoshop – lighting

By Alex Hogrefe
A lot of people have been asking me how I create my renderings. Since I am finished with grad school, I decided to develop some tutorials that explain techniques I used throughout architecture school. Many of the techniques only require SketchUp and Photoshop.
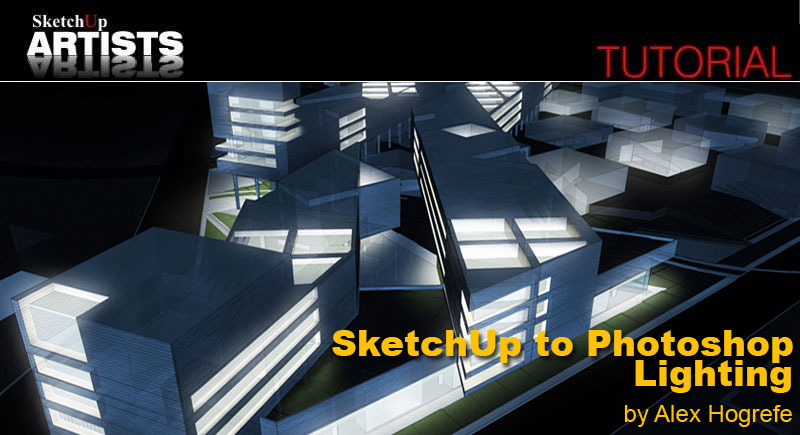
This tutorial will explain a way to create a night scene with lights, using only SketchUp and Photoshop. I typically use this style when I need to light a large building with many windows. Inserting hundreds of lights though a rendering program in a large structure with a lot of windows is difficult, takes an enormous amount of time, and really increases the rendering times. This technique is quick if your under a time crunch.
OK Lets start…
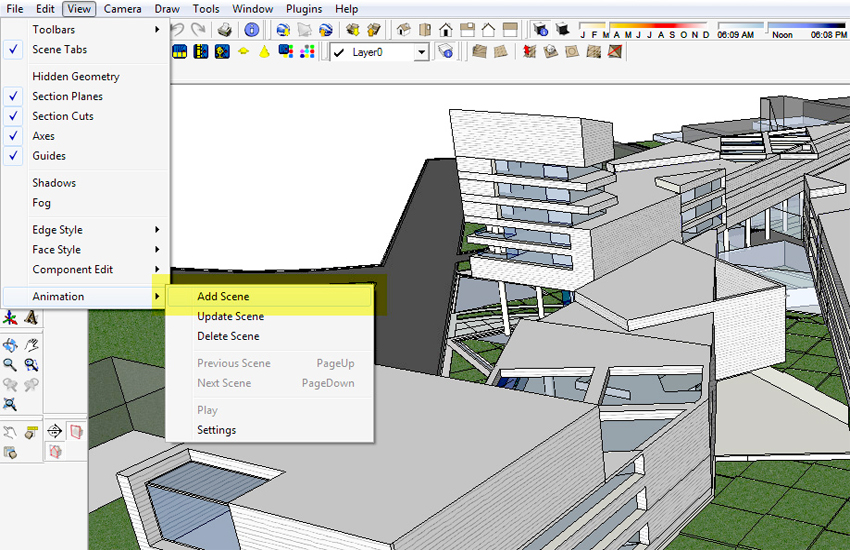
1. The first step, as always, is to save a scene of the preferred view in SketchUp. This can be done by going to View>Animation>Add Scene.
2. Next export (File>Export>2D Graphic) 2 images with the following Face Styles and Edge Styles (Window>Styles):
- Image 1 – Face Style: shaded with textures, Edge Style: shadows off, edge lines off
- Image 2 – Face Style: x-ray on, shaded with textures, Edge Style: shadows off, edge lines on
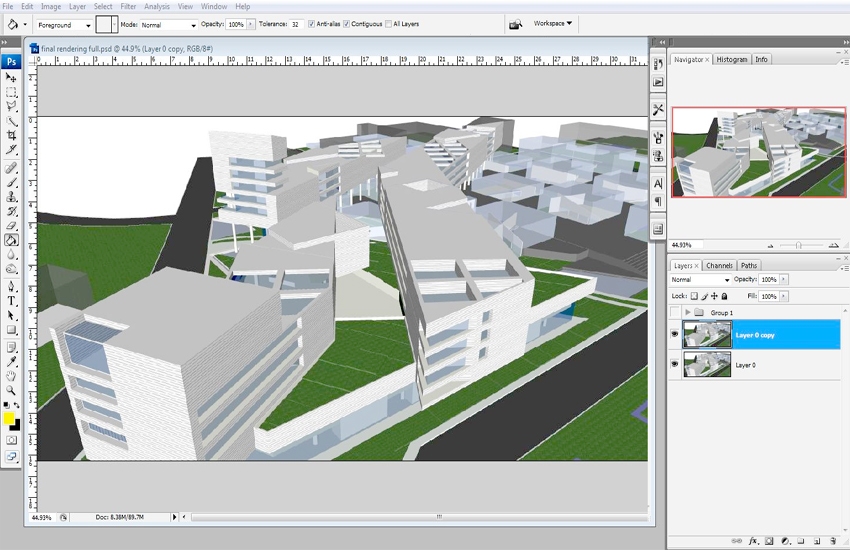
3. Open the exported Image 1 (shaded with textures, no edge lines, shadows off) in Photoshop. Duplicate this layer (right click Layer>select Duplicate) and move it to the top.
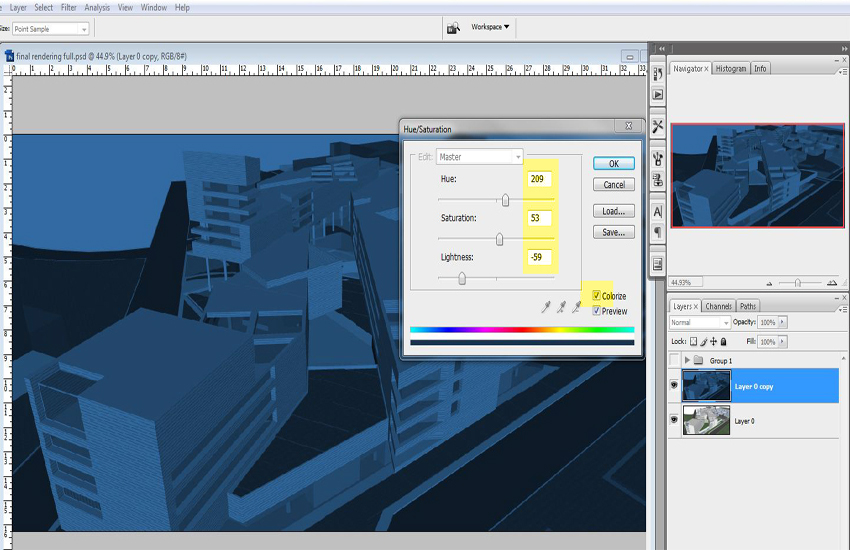
4. With the top layer selected, open the Hue Saturation dialog box (Image>Adjustments>Hue/Saturation). Check the Colorize box in the bottom right hand corner. Adjust the Hue, Saturation and Lightness similar to the image below, you can see the settings I used.
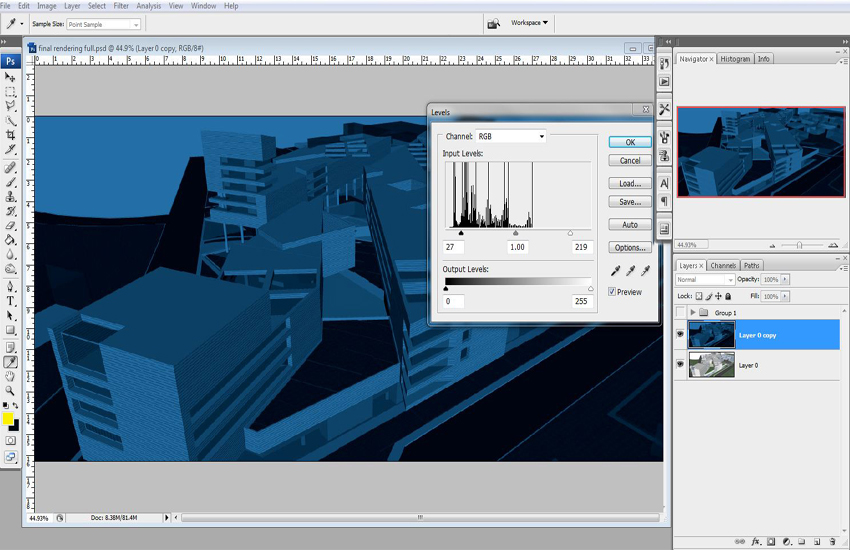
5. With the same Layer selected, open the Levels dialog box (Image>Adjustments>Levels). Move the left triangle slider to the right until the dark colors in the image are almost black. You can see the settings I used in the image below. Typically, you want to move the sliders to where the curves on the graph are the highest.
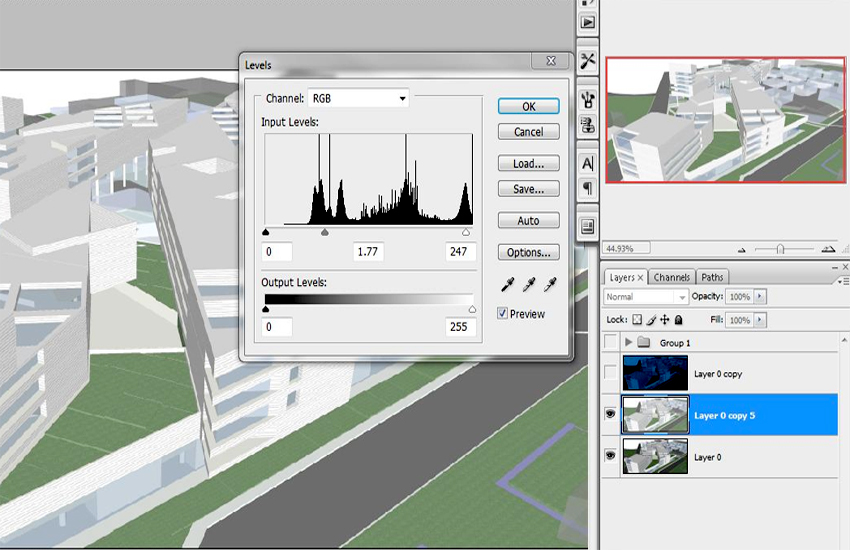
6. Duplicate the original Layer (the one straight from SketchUp). Move it between the two Layers already created and turn Off the blue Layer (click the eye next to the Layer). Open the Levels dialog box (Image>Adjustments>Levels), but this time, move the center triangle to the left to make the image brighter. You can see the settings I used below.
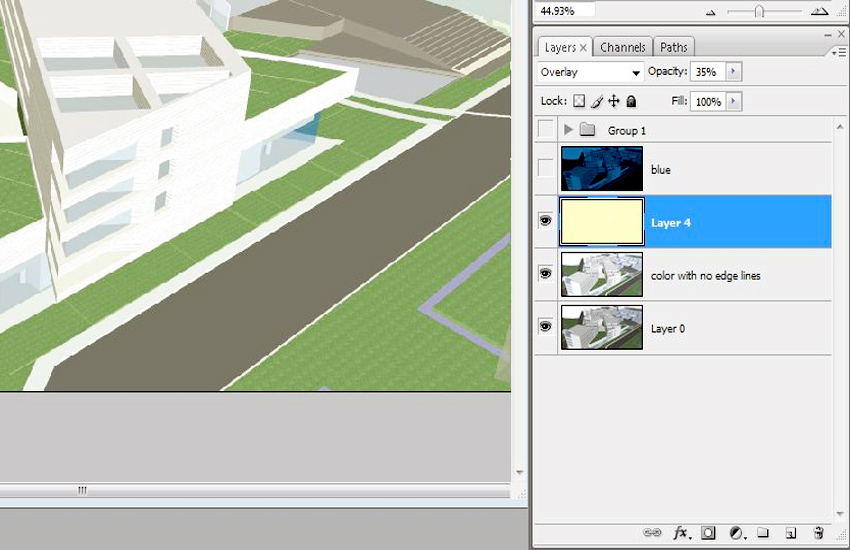
7. Above this Layer, create a new Layer (icon next to the trash can in the bottom right of the Layers Palette). Fill this Layer with a faded out yellow color using the Paint Bucket Tool (Shift G). Change the Blend Mode (drop down menu on the top left side of the Layers Palette) to Overlay. Set the Opacity (top right of the Layers Palette) to 35%. Your Layers Palette should look something like the one below.
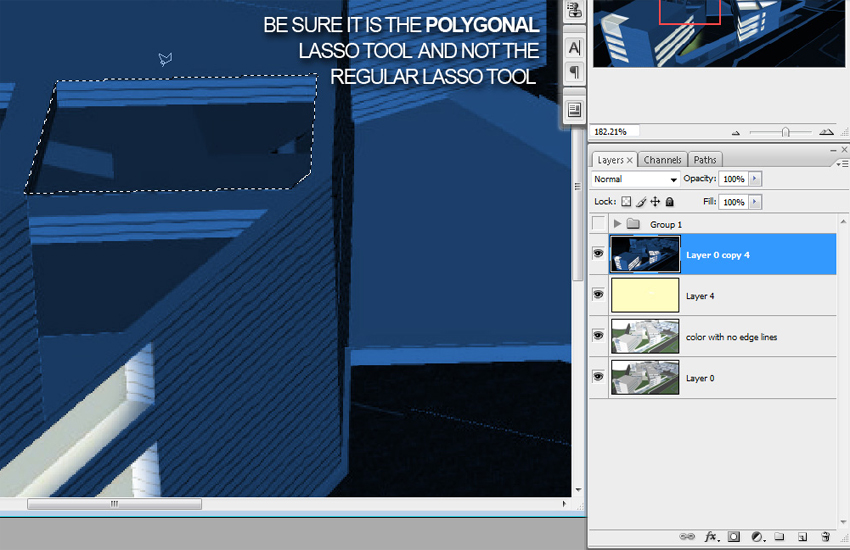
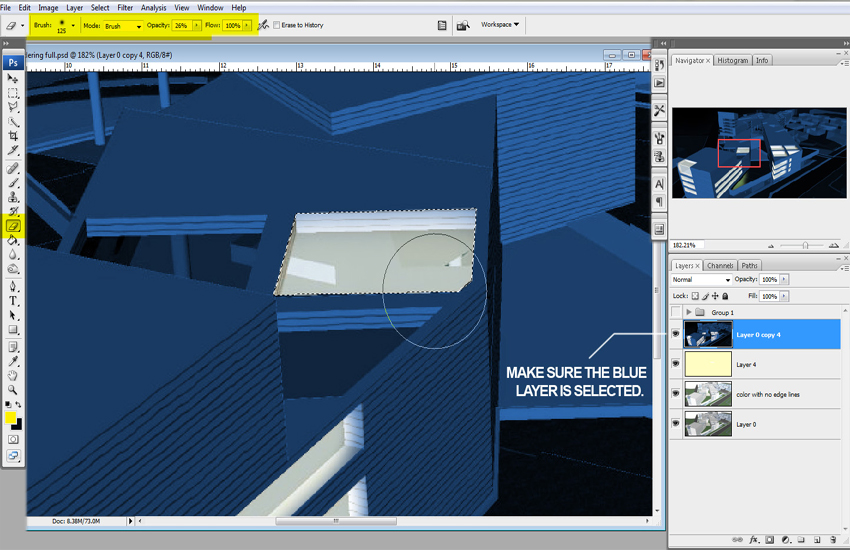
8. Now we can begin to add lights. Select and Turn On the top blue Layer created earlier (use the eye next to the layer in the layers palette). Select the Polygonal Lasso Tool (Shift L for PC’s). With the blue Layer selected, begin lassoing windows or areas you would like to light up.
9. With the area selected, select the Eraser Tool (Shift E for PC’s). Set the Hardness to 0, Size to 125 or so, and the Opacity to 35%. Begin erasing away the blue Layer, and you will see the other layers show through giving the appearance of light (NOTE: it would probably be more appropriate to use a Layer Mask for this step if you plan on making many changes. For simplicity reasons, I am just using the Eraser Tool for this tutorial).
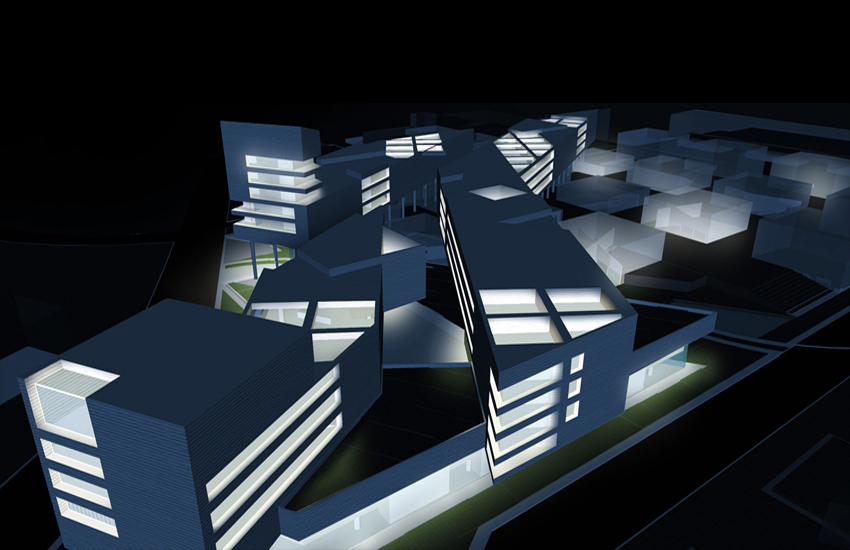
An important thing to remember is how light will be reflecting off of surfaces and the ground. This will ultimately bring realism to the image. Here is what the image looks like after this step. Notice how the green color of the grass shows through and how light is fading out on certain surfaces.
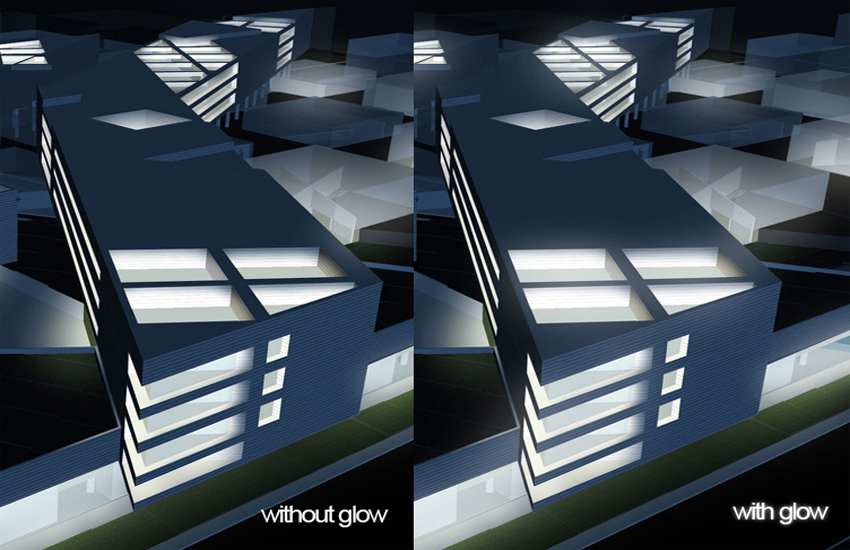
10. These next few steps are personal preference that add a little interest to the final image. Create a new Layer and move it to the top of the pile. Select the Paint Brush Tool and use the settings: Hardness=0, Size=200, and Opacity=10%. With the new Layer selected, paint around the windows to give a glow effect. This step is very subtle, but adds a little more drama to the image.
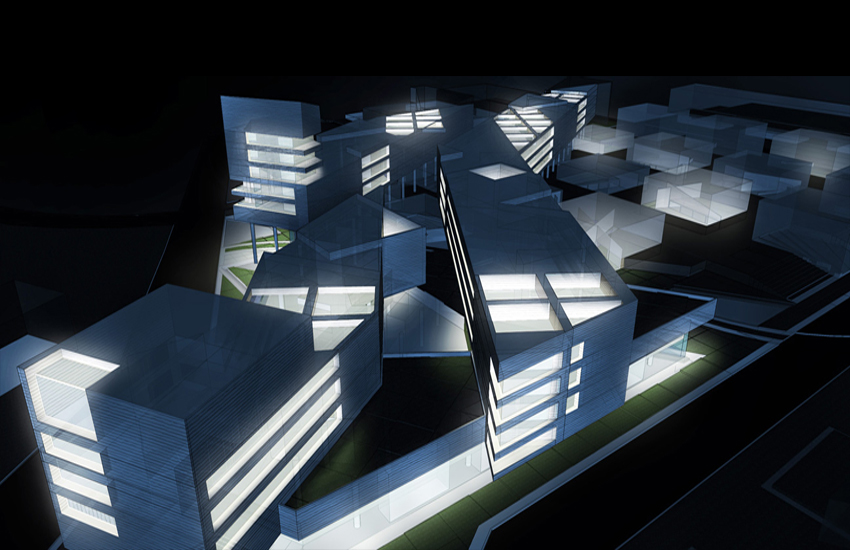
11. This last step I like to do when I am using SketchUp images that have a lot of flat, evenly shaded areas. This will add a little texture and excitement to those areas. Open Image 2 (Face Style: x-ray on, shaded with textures, Edge Style: shadows off, edge lines on), the one exported from SketchUp at the beginning of the tutorial. Move this layer to the top and set it to Overlay Mode. With the Eraser Tool, erase away areas where you may not want the X-Ray showing.
Hope you found this tutorial useful and a new way of adding lighting to your images without having to actually render it.
Cheers
Alex Hogrefe
Check out Alex’s other tutorials here at SketchUpArtists:
Daytime Rendering – SketchUp to Photoshop
Exterior Night Rendering: SketchUp to Photoshop
Check out Alex’s own website for more of his great work – Alex Hogrefe Architectural Blog



Very cool technique!
i’m a fan of sketch up and photoshop, nice technique…
[…] semana tenemos un link para un tutorial en Sketchup Artists para crear un render de […]
ohh this is cool. you really are my savior..
Awesome tips.
thank you!
brilliant idea, I never thought of using photoshop with sketchup like this. it could really speed up the process. you really must love your one view though, and you would have to go through the same process if you neede more images…great idea though
[…] http://www.sketchupartists.org/tutorials/sketchup-and-photoshop/sketchup-to-photoshop-lighting-2/ […]
Way cool!!
thanx alot,, your work is awesome..
Thanks for your tutorial.
Great tutorial, thanks for sharing!
thank you for all the effort may God reward you.
please I do follow the step and I understand it but what I didn’t get is how you come up with the black background.
Interesting stuff to read. Keep it up.