Creating a Sketchup Model Using Match Photo

By Jim Leggitt
I recently needed to create a new drawing from a photograph of an old house – adding windows to the buildings, people, landscaping, signage and other elements. I typically create a red pencil overlay and trace, guessing the proper scale of the new elements and sometimes not happy with the results. Here is an option for constructing your drawing by importing the photograph directly into SketchUp using the ‘Match Photo’ feature.
If the original photo shows two good faces of your subject, the resulting SketchUp model can be very accurate and make your drawing process much easier – taking the guess work out of sizing and placing entourage.
Step 1: Import a Photograph
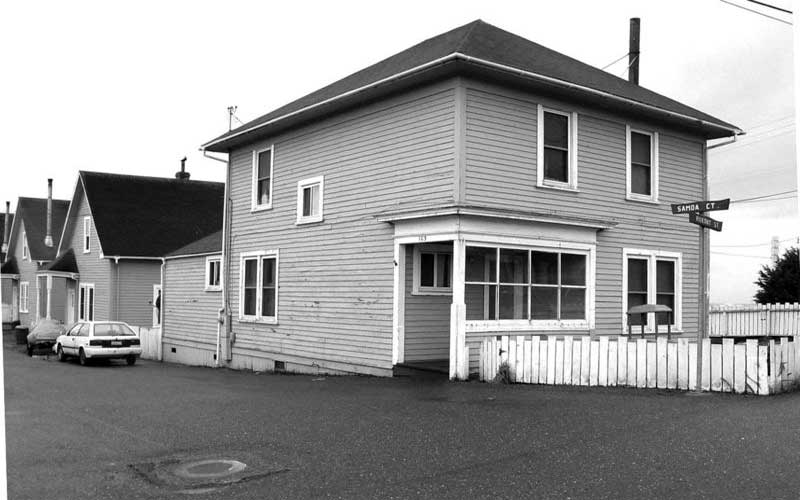
This photograph is a great base image for the Match Photo feature as it equally reveals two sides of the building. The building has many straight roof and wall lines making it easy to establish the perspective view. Make sure when you import the jpeg image that the option ‘Use as New Matched Photo’ is selected.
Step 2: Position the Perspective Grips
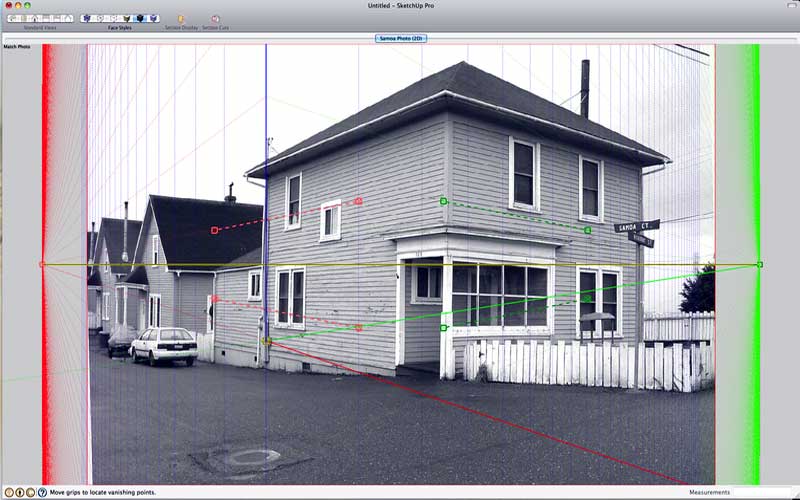
When the image opens, a series of colored lines appear representing the perspective bars. Grab and position the red and green vanishing point grips so they align directly with roof edges and wall lines from the photograph. By doing so, you are ‘reverse engineering’ the perspective and establishing the exact two-point perspective of the image. The yellow line represents the horizon line.
Step 3: Position the Axis Origin
Grab the axis origin – the yellow square where the blue and red lines intersect – and reposition it to the corner point where the building meets the ground. This will establish the ground plane of the SketchUp model.
Step 4: Set your Image Scale
Find a know dimension of the subject to measure and re-size your SketchUp model. In this case, I knew that the porch opening was 7 feet high. I traced the measuring tool over the opening, set the length at 7 feet and re-sized the model. This step is mandatory for adding components to the model.
Step 5: Trace Edges with the Line Tool
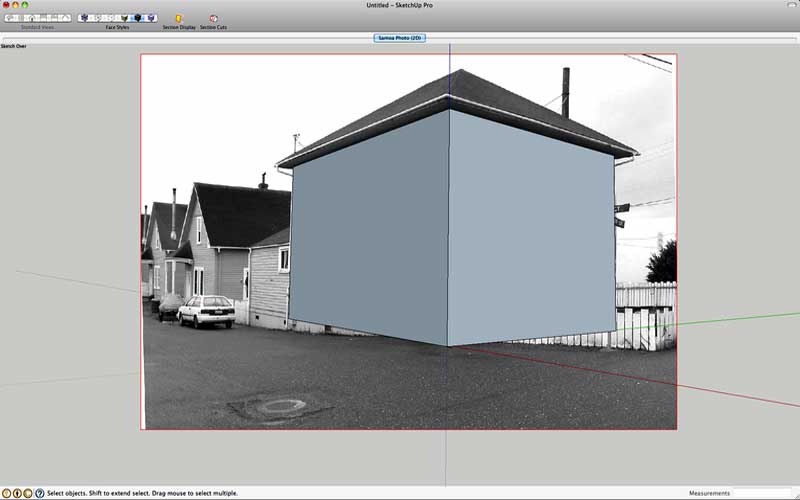
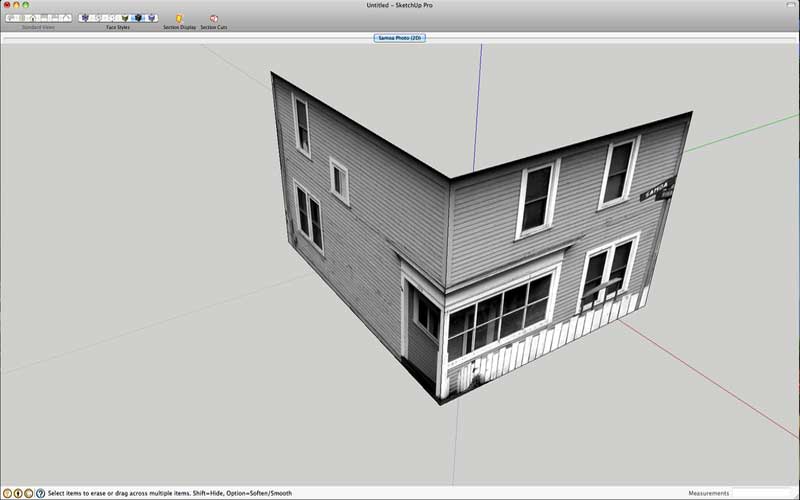
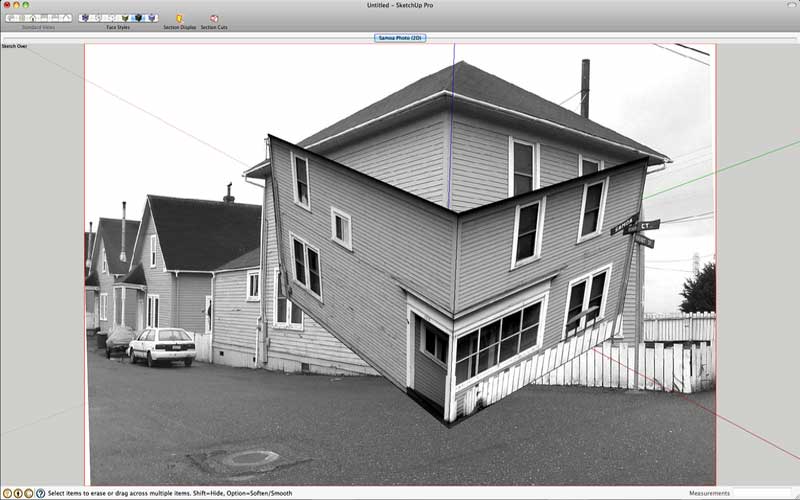
Using your line tool, start tracing edges of the photograph (building corners and roof lines) eventually creating faces. Each face is represented with a default color. By right clicking ‘Project Photo’, the original photograph will be mapped onto the surface.
Step 6: Check the 3D with your Orbit Tool
Save and start spinning the model around to check the accuracy of your faces and placement of the different 3D elements. Keep returning to the scene that was automatically set up when you first began the model.
Step 7: Add Entourage and Other Elements
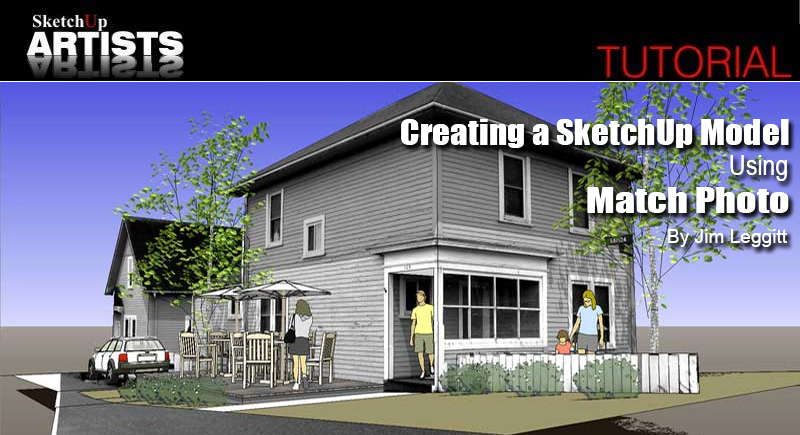
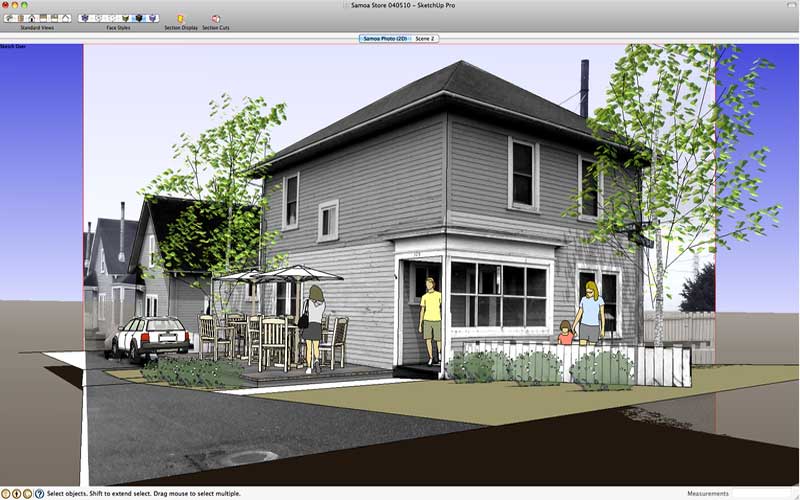
I inserted some people, a couple of 3D trees, furniture and a car into the model. I also constructed a small outdoor deck. This is the step in which you add to and modify your scene. Have fun!
Step 8: Final View Adjustments and Export Image
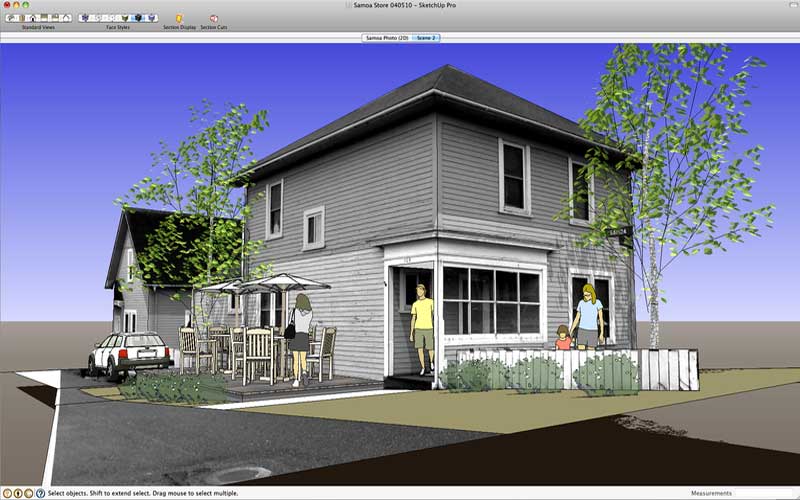
I find that you can either use the default scene which represents the original photograph view or by slightly shifting the model view, you can save a new scene which allows you to eliminate unwanted portions of the original photograph and to insert you own sky and ground color. Export your image to a high resolution jpeg or tiff, setting the ‘Export 2D Graphic’ format options to 4000 pixels wide. This will capture the greatest amount of detail. Print your image and then you are ready to start the drawing process!
To learn more about modeling with SketchUp, look for Jim Leggitt’s book Drawing Shortcuts or visit his website www.drawingshortcuts.com.




[…] Att skapa en sketchup-modell genom att använda photo-matchning […]
Is it possible to scan old photographs for Photomatch?
thanks Jim
[…] Creating a Sketchup Model Using Match Photo :: Google SketchUp …By Jim Leggitt I recently needed to create a new drawing from a photograph of an old house – adding windows to the buildings, people, landscaping. […]
i’m still confused
About what?…can you explain more…
I am attempting to create more musical instruments for my SU model collection, as well as using SU8 for mapping out an old guitar I have (that I am willing to disassemble to get -exact- measurements) in prep for a CNC copier for the neck and body.
For reference, it is a Univox Hi-Flier (Phase 2) that I have now, have had many of these since ’76 come and go, wanting to re-create the neck/body (to which I’ll make little tweaks) for a personal IRL collection of these incredible instruments.
Question I have is, I wanted to make a Korg RK-100 in SU since I wasn’t able to find one, and I need to start making my OWN models rather than raiding the 3DW and making tweaks. I have SEVERAL pics, including the user manual with dimensional specs, though the pics I have are flat, not 45-degree as suggested for PhotoMatching…Will I still be able to make models from flat photos (I have some good snaps from most directions) or will I have to find the real thing local and take my own pics of it?
When making models of my kids (my instruments, see my website), I intend using a neutral background and suggested 45-degree camera angles when photographing them for modeling.
If using flat photos for matching is possible, I’ll be cranking out some basic outlines in record time, as all the videos and tutorials I’ve seen are all 45-degree matchings. Is there a tutorial/video of flat matching? I want to avoid using photo textures at all costs, I don’t mind my models looking cartoony-ish, the key is their dimensions be accurate, and to scale. Anything more than that is gravy…I like gravy, just too much at once makes the bigger picture take longer to appear. (I have a dinoputer that is made out of rocks and twigs in compare to newer ones)
Thanks in advance!
(Please reply via email if you want response)
Could someone go into more detail about Step #4 above. Jim says” I traced the dimensioning tool over the opening, set the length at 7 feet and resized the model”.
I thought the measuring tool does just that, i.e. measure. I’ve been playing with Photo Match for the last couple of days; what I’m not exactly getting is how to achieve high sccuracy in dimensioning quickly (or even slowly for that matter).
@anton: to resize your model using the tape measure, press ctrl after selecting the tape measure. You’ll see the plus sign disappears. Click on point a then drag to point b as you would measuring. After clicking point b type the length of the distance you just marked out, in jims case 7 feet. Clicking enter sketchup will ask if you want to resize the model. Select yes and your model is resized using the dimension you marked out as a reference
How do you make the roof and the other two sides of the building that is not in the picture?
How do I see only the model I drew? I want the photo to go away so I can print only my model. Thanks.
Hi everybody! I’m relatively new to 3d printing and I have a lot of questions on the subject, so I hope you will not get mad at me for asking here at least a few of them. I think before I’ll get seriously into designing I should focus on the software I’m going to use, and that’s what I would like to ask you about. Mainly, should I begin with the most simple software there is or would it be better to start on something more complicated? I’m worried that I’ll get some undesirable habits while working on less complex software. Second question is about the CAD software as well: should I look for CAD software that would let me design and slice it in it, or should I use a different program for each of them? Does it even make a difference? Surprisingly, I couldn’t find the answer to that, as it seems like most websites want to focus on the very basics (like what is 3d printing and so on), and while the answers to those questions are fine, it seems like no one wants to go into the details (it looks like some of them even plagiarise each other! I swear I’ve found the same answers to the same questions on at least 3 different websites) but I’m getting off-topic… The last question is about 3d pens. Would it be possible to somehow convert whatever I draw with a 3d pen to a 3d model in a program? For example, if I’ll draw a dog with 3d pen, would it be possible to get its outline in a program? I’m not sure how that would even work, but the very idea sounds appealing to me. Anyway, I think I’ll stop here just in case no one will answer me and all of this writing will be for nothing. I’m sorry that I’m using your content to ask questions, but I hope you’ll understand and advice a newbie like me. Anyway, thank you for posting. I learned something from this and that’s always appreciated. Thank you, and I hope to hear back from you very soon 🙂