
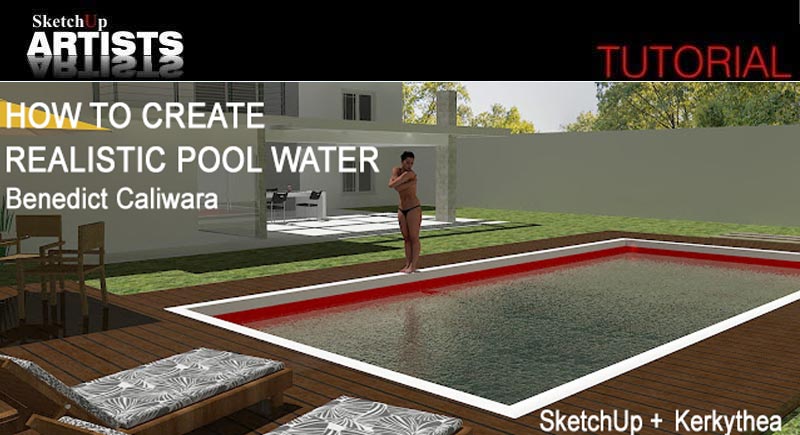
How to Create Realistic Pool Water in SketchUp and Kerkythea
In this tutorial, we will show you three different methods on how to render realistic pool water inside Kerkythea. I will also discuss some important points on how to create effective environment settings in Kerkythea. Choosing the right environment setting(s) will enable us to produce such a good-quality pool water scene. For those who don’t know, Kerkythea is a free standalone rendering plugin for SketchUp.
Note: For educational purposes, we will be using the model ‘Mansão moderna’ by Anderson R. Link: 3D Warehouse
Applying Water Texture in SketchUp and Exporting KT XML File
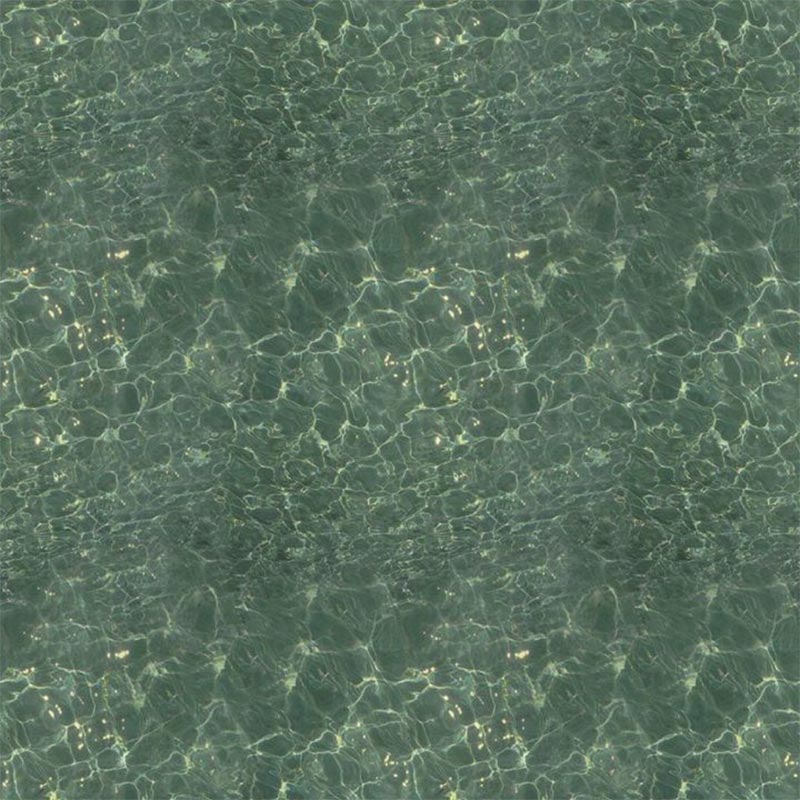
Step 1: Open your SKP model> apply water texture to your pool water model using ‘Paint Bucket Tool.’ Choose any available water textures from the Materials dialogue box. In this case, I will be using the ‘Water Pool Light’ texture.
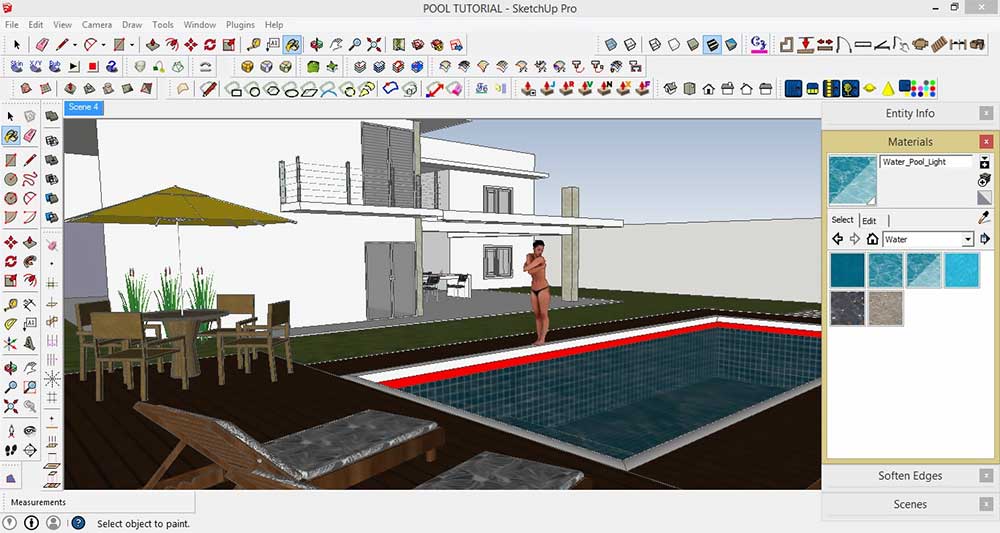
Apply water texture
STEP 2: Click the icon ‘Export Model to Kerkythea’ from the KT tool bar> follow the ‘Export Options’ settings> Click OK
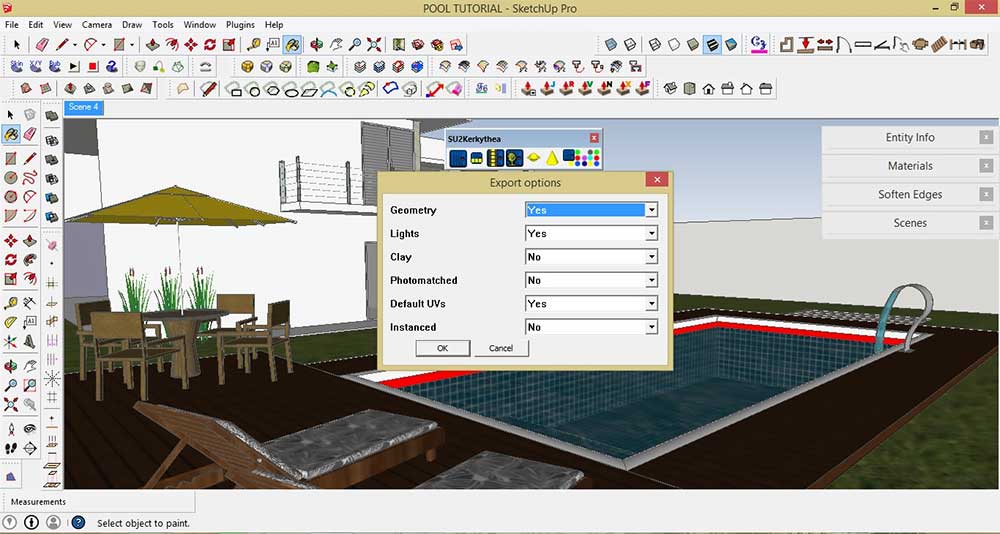
Export model
Step3: Open your exported xml. file in Kerkythea
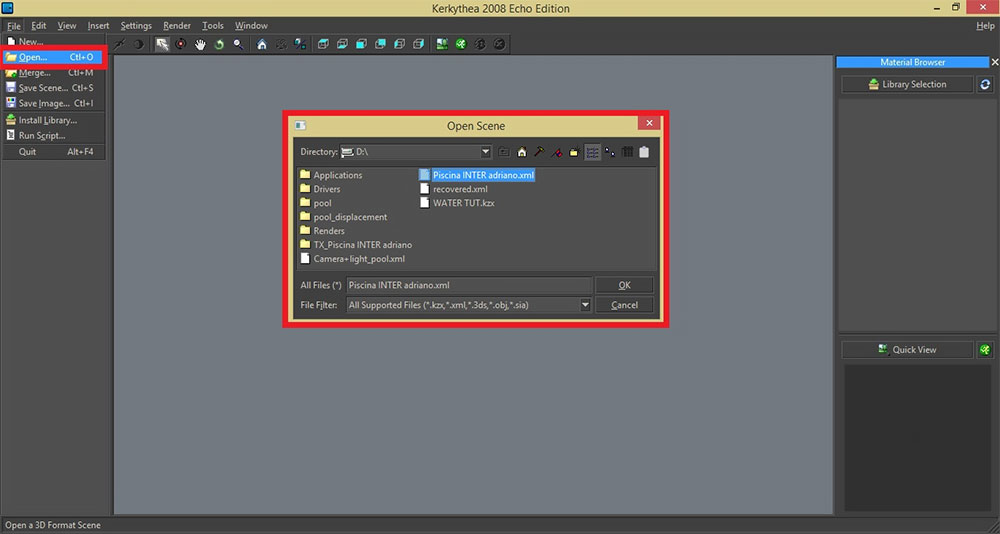
Open XML file
Step 4: In order to see the model clearly, adjust the view from ‘Wireframe’ to ‘Solid Rendering’
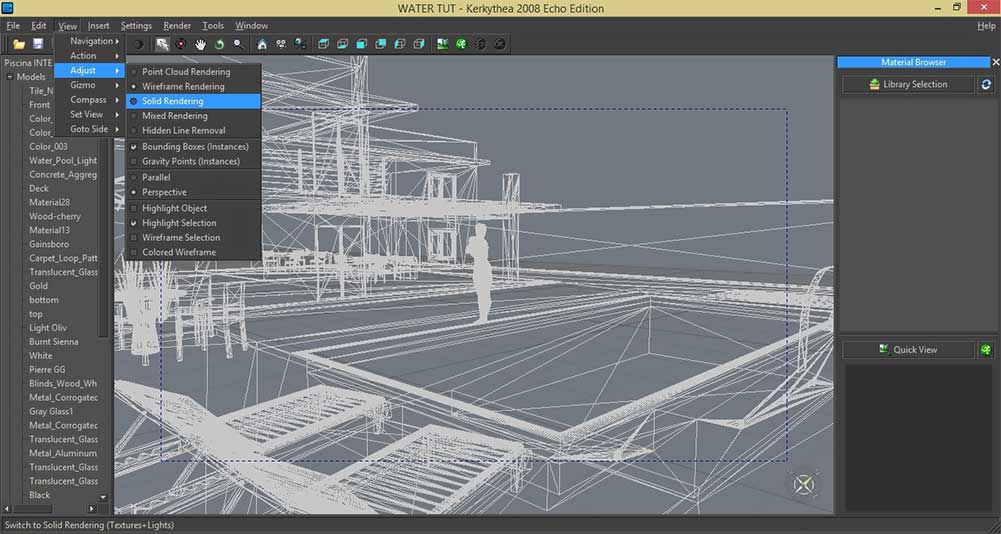
Adjust view
WATER MATERIAL # 1: Kerkythea Wavy Water
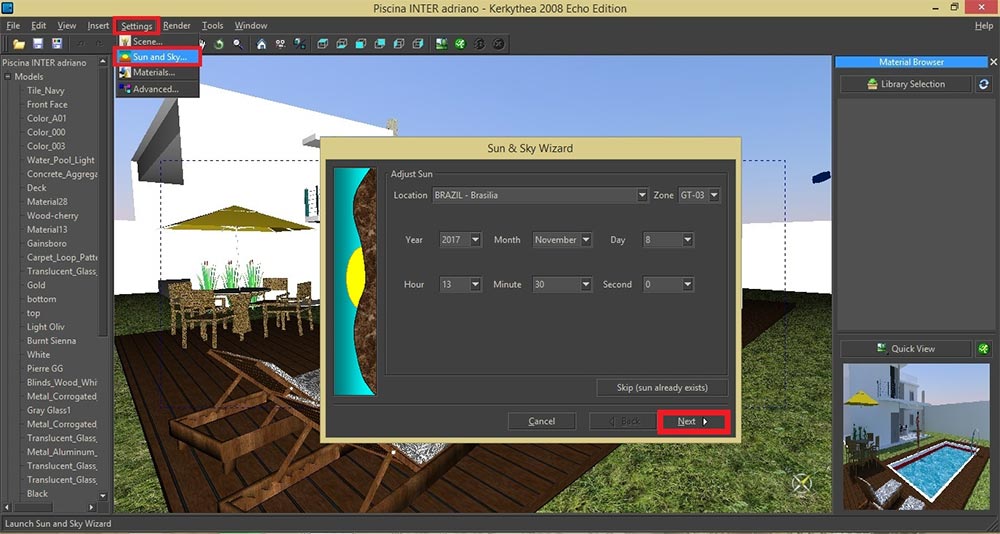
Step 1: Under KT ‘Settings’ Menu, Click the ‘Sun and Sky Wizard’> Click ‘Next’

Click the ‘Sun and Sky Wizard’
STEP 2: Under ‘Sky Type’ Menu> Choose ‘Hemispherical Sky’ or ‘Spherical Sky’
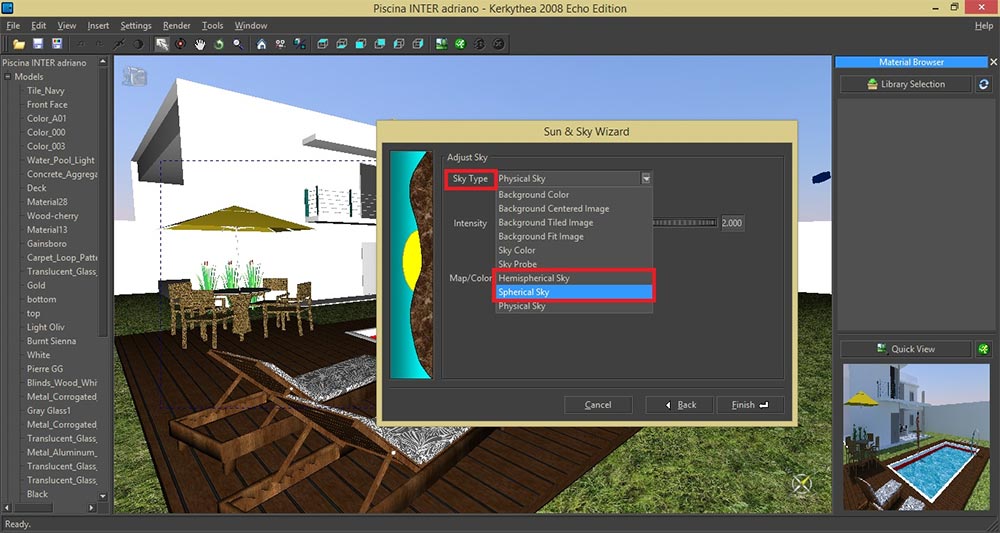
Choose ‘Hemispherical Sky’ or ‘Spherical Sky’
STEP 3: Click ‘Map/ Color’> Select Sky background (HDRI, PNG or JPEG)> then click OK

Select Sky background
STEP 4: Adjust the ‘Intensity and Turbidity, based on your preference
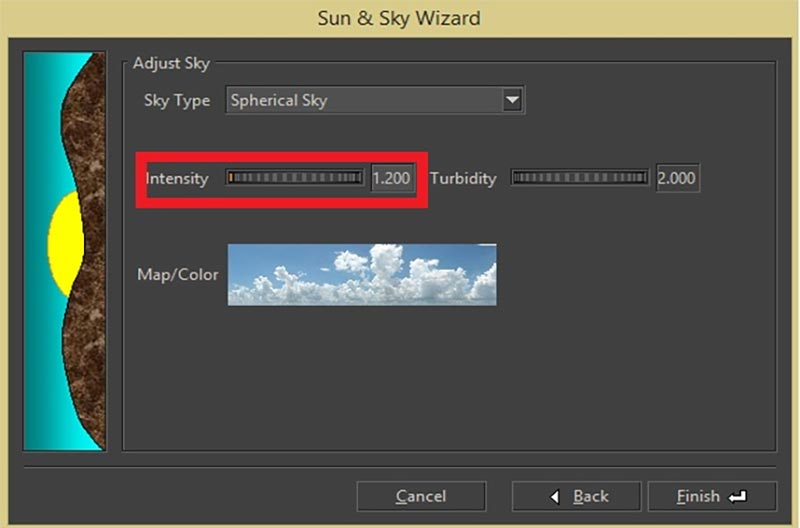
Adjust ‘Intensity and Turbidity’
SKY BACKGROUND

Sky Background
STEP 5: Search the ‘Water Pool Light’ texture from the ‘Models’ material box> Right Click> select Apply Material> click ‘Wavy Water.’ To download the Wavy water KT Material click HERE
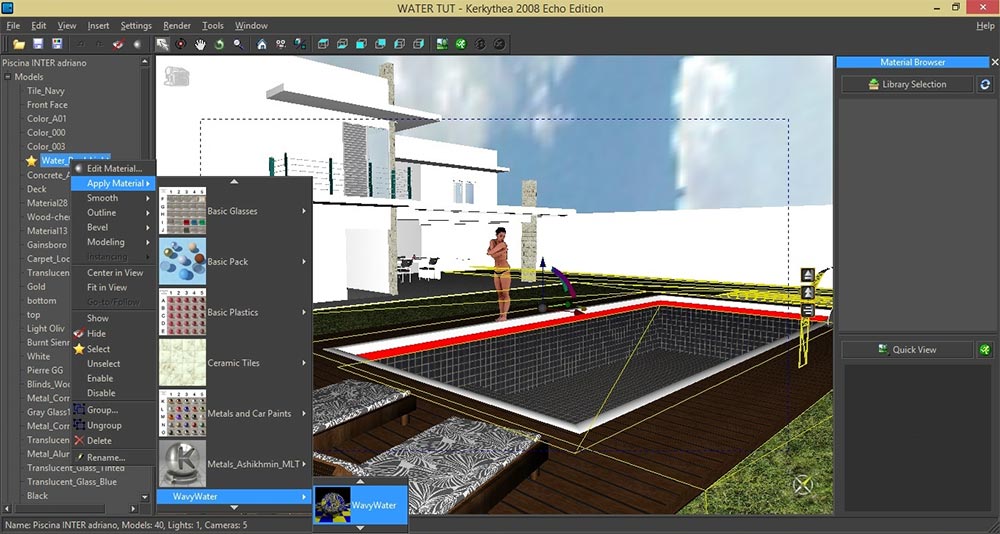
Search ‘Water Pool Light’ texture from the ‘Models’ material box
Wavy Water Material Settings
Water Material Settings
STEP 6: Click ‘Start Render’> Follow the ‘Camera and Settings’ parameter> click OK
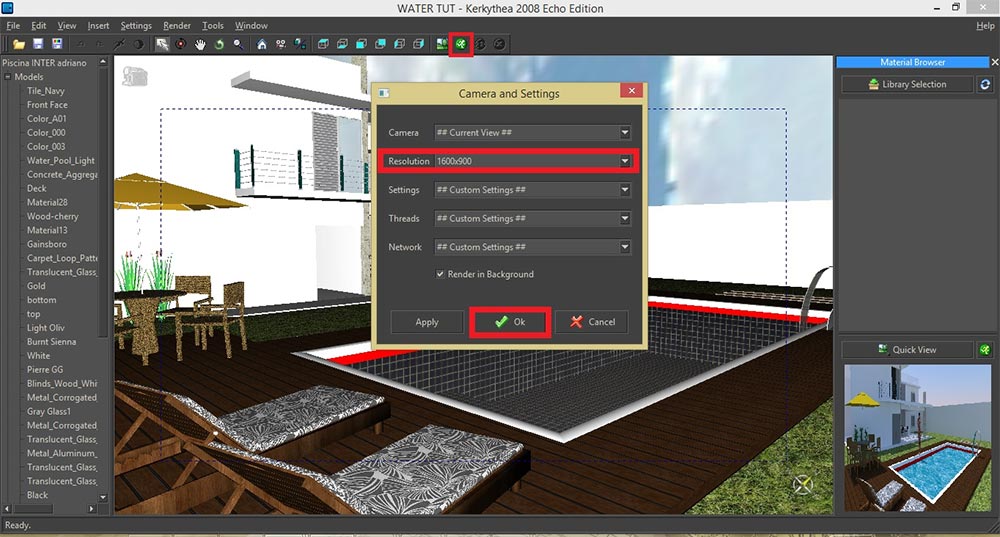
Click ‘Start Render’
RENDER RESULT
Render Image
WATER MATERIAL # 2: Dielectric/ Glass Setting
Use the same Environment Setting and proceed to water material settings.
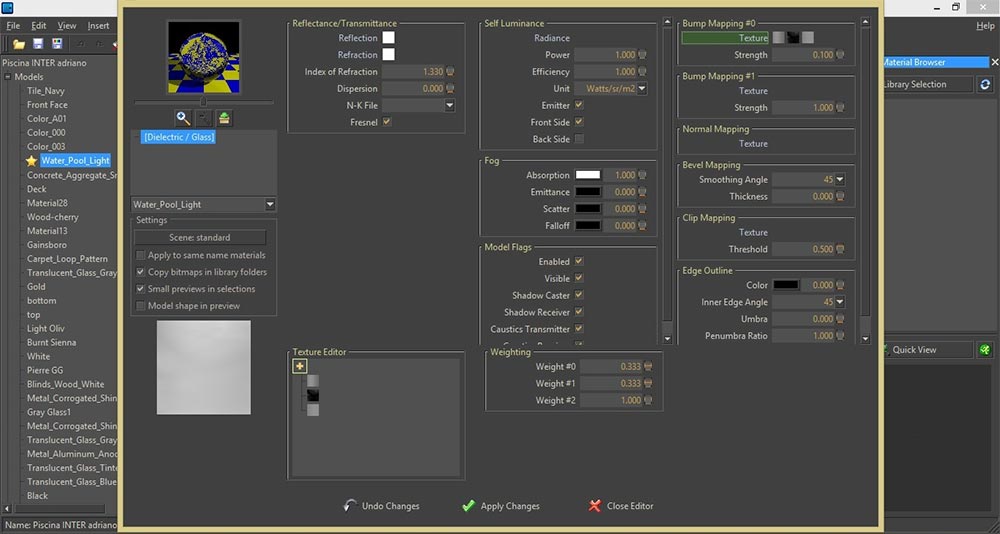
STEP 1: Search the ‘Water Pool Light’ texture from the ‘Models’ material box> Right Click> click ‘Edit Material’> click ‘Set Dielectric/ Glass’> under the ‘Reflectance/ Transmittance, change the color of ‘Reflection’ and ‘Refraction’ into white> change the IOR value, here I used 1.33 (This is the typical IOR value of water).

Search for ‘Water Pool Light’ texture from the ‘Models’ material box
Index of Refraction Reference Values
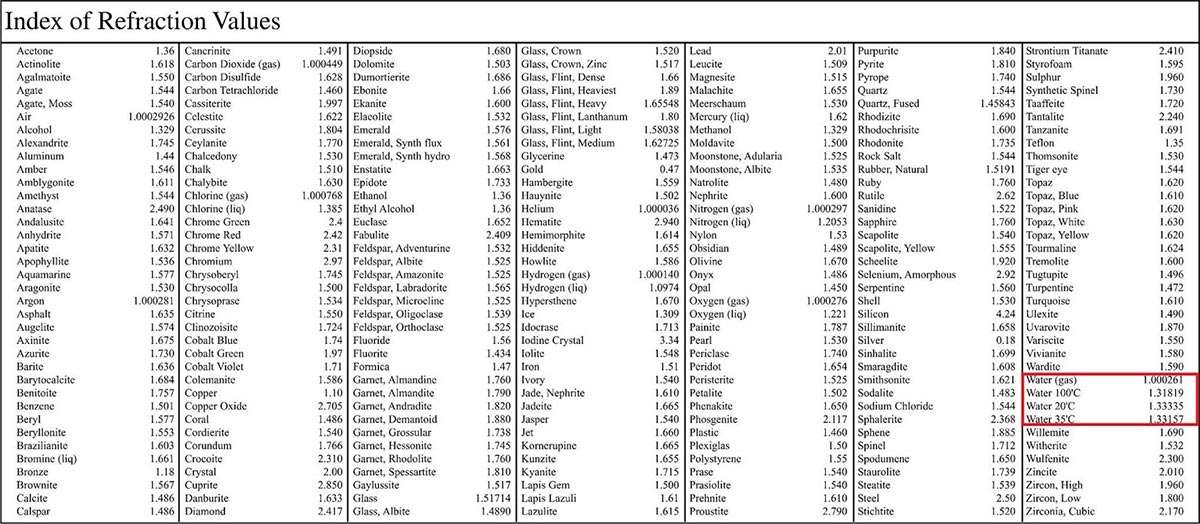
Refraction Reference Values
STEP 2: Adding bump maps to water material is a great way to add realism because bump maps add depth and detail to materials. Under the ‘Bump Mapping’, right click the ‘Texture’> click ‘Add Bitmap’> under ‘Bitmap Selection’ click ‘Browse’> Select the Bump map texture (JPEG)> click OK> type 0.5 value under ‘Bump Mapping Strength’
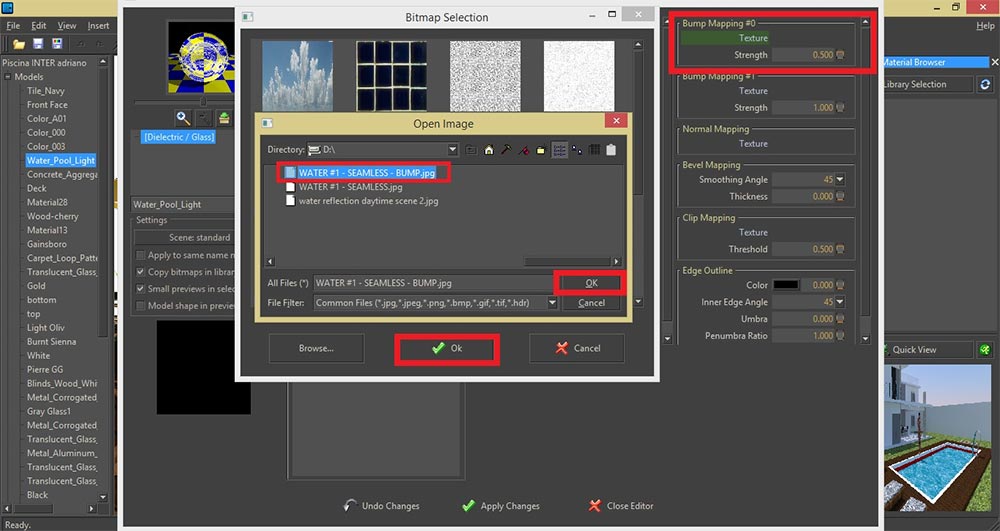
Under the ‘Bump Mapping’, right click the ‘Texture’
WATER BUMP MAP
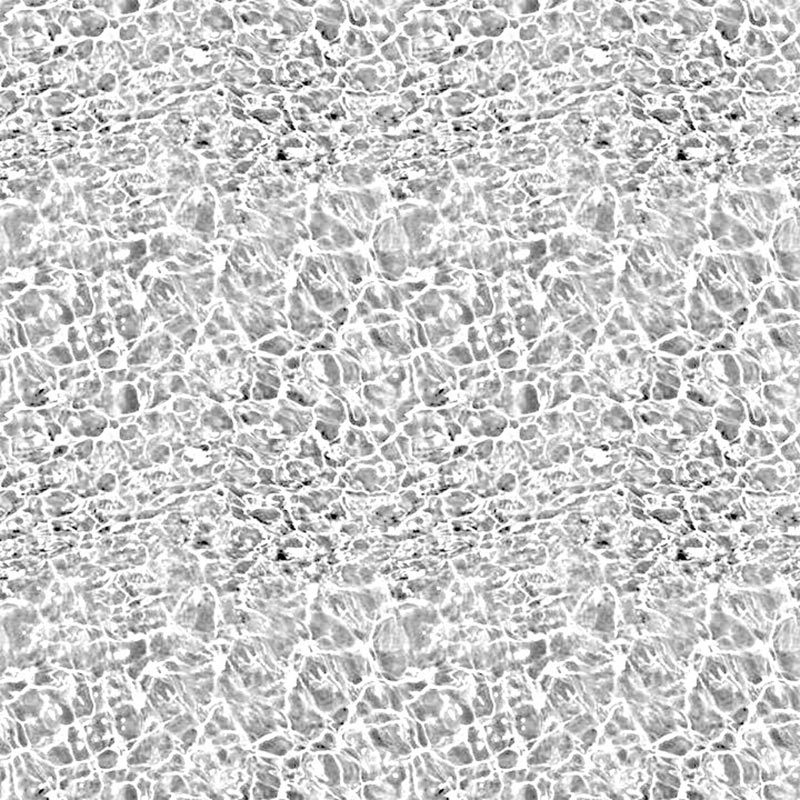
Bump Map
STEP 3: Dielectric/ Glass Water Material Settings> click ‘Apply Changes when done’
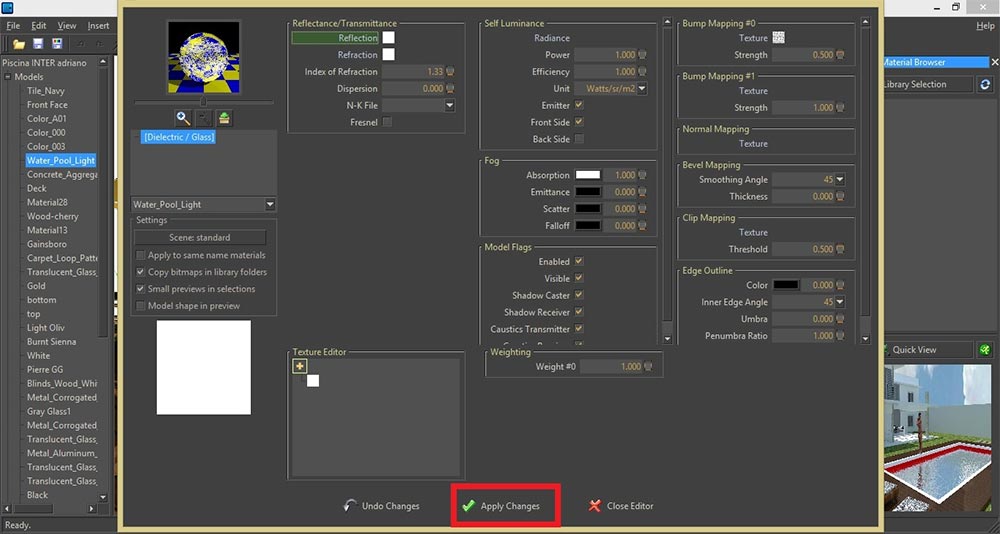
Dielectric/ Glass Water Material Settings
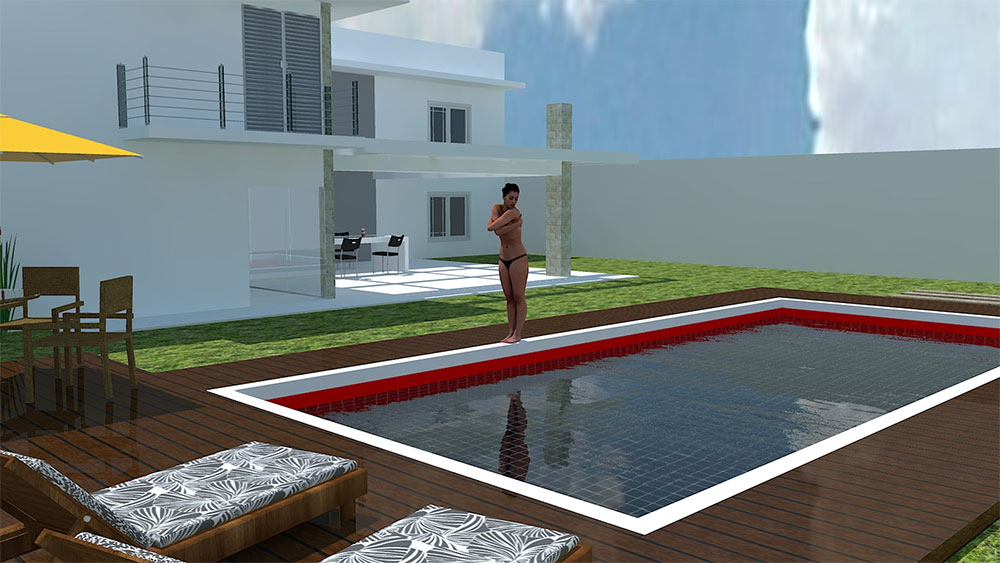
RENDER RESULT
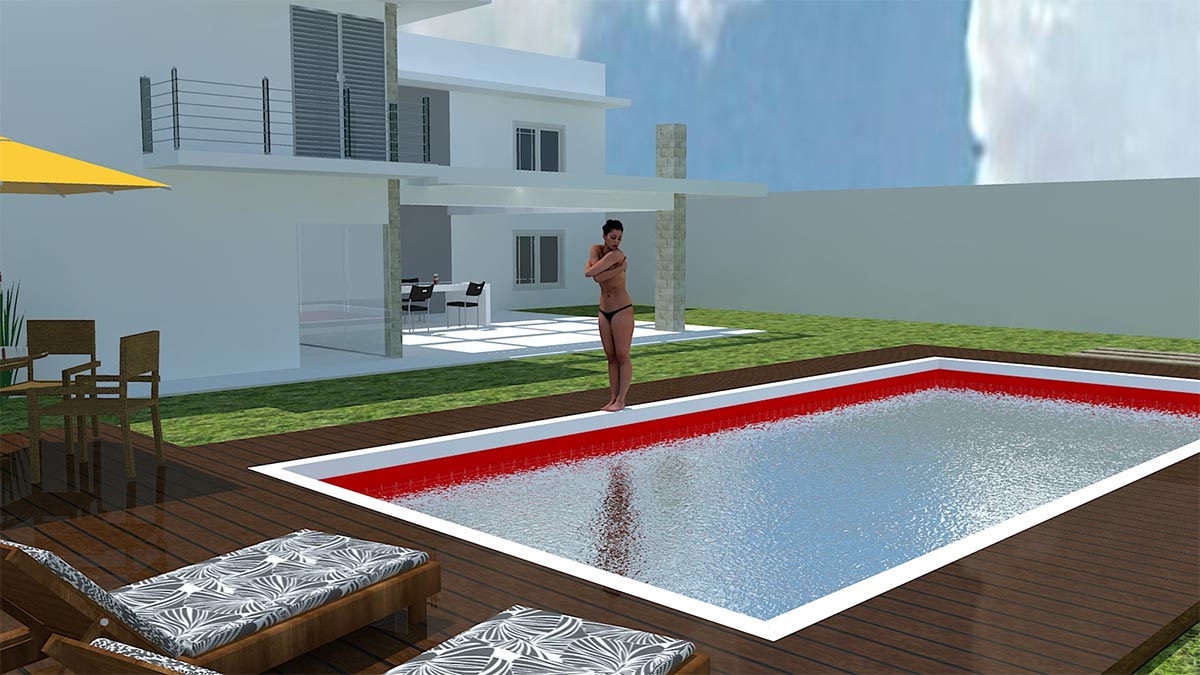
Render Image
WATER MATERIAL # 3: Matte/ Phong Setting
STEP 1: Change the environment settings, to do that, go to ‘Settings’ Menu> Click the ‘Sun and Sky Wizard’ option> Click ‘Next’
Change environment settings
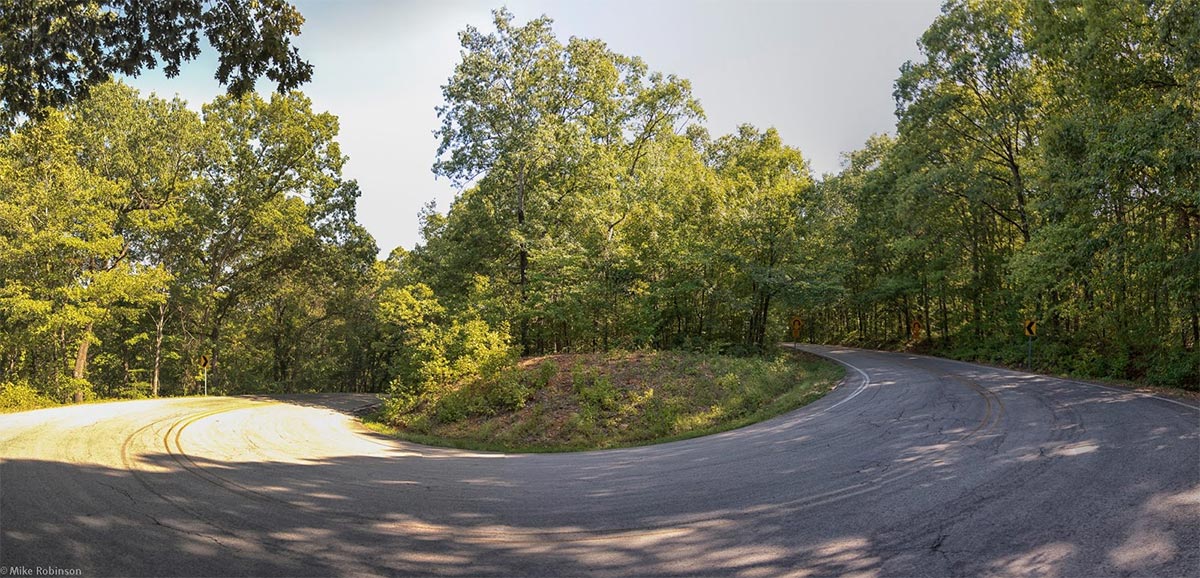
STEP 2: Under the ‘Sky Type’ Menu> Choose ‘Background Fit Image’> Change the Intensity and Turbidity based on your preference> change the image of the ‘Map/ Color’> click ‘Finish’
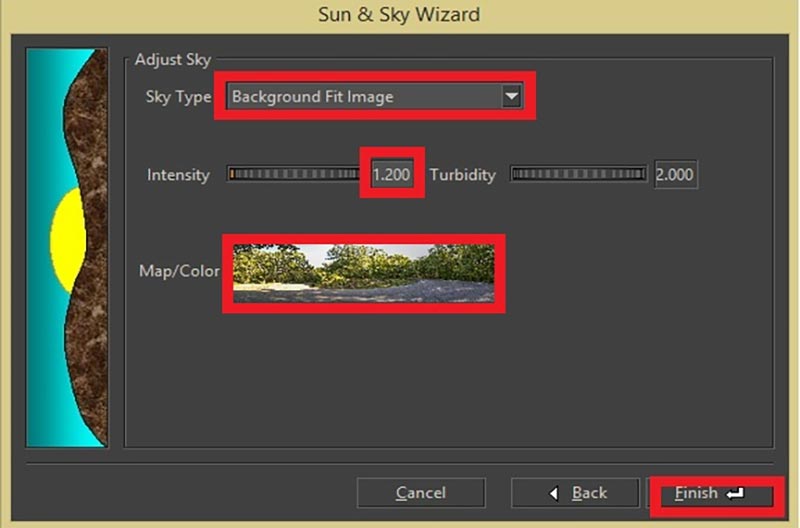
Under the ‘Sky Type’ Menu> Choose ‘Background Fit Image’
BACKGROUND
Background
STEP 3: Search the ‘Water Pool Light’ texture from the ‘Models’ material dialogue box> Right Click> click ‘Edit Material’> click ‘Set Matte/ Phong’ > right click the ‘Diffuse’> select ‘Add Bit Map’> under ‘Bitmap Selection’ click ‘Browse’> Select the Water texture (JPEG)> click OK> type 0.5 value under Diffuse ’Weighting.’

Search the ‘Water Pool Light’ texture
WATER DIFFUSE TEXTURE
DIFFUSE TEXTURE
STEP 4:

Specular settings
Step 5:
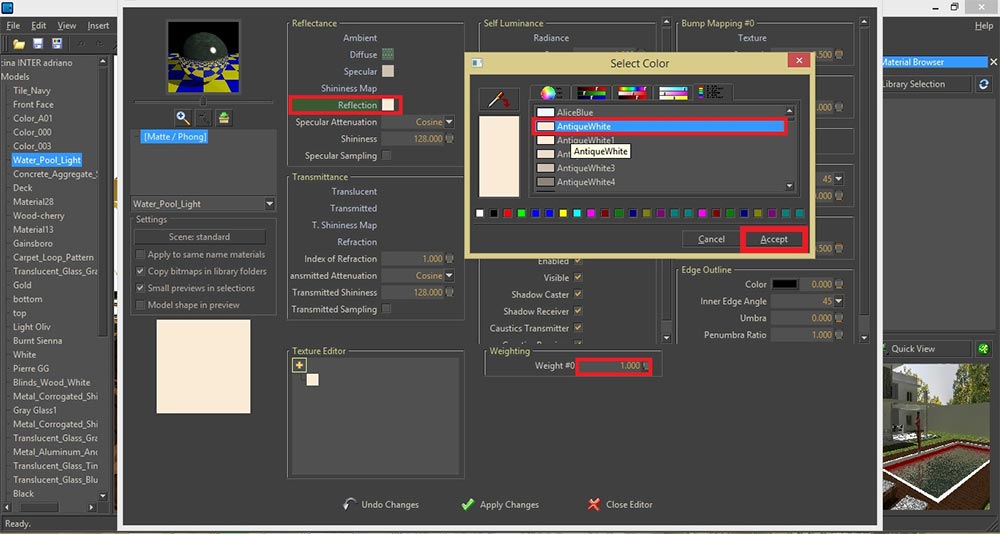
Reflection settings
Step 6:
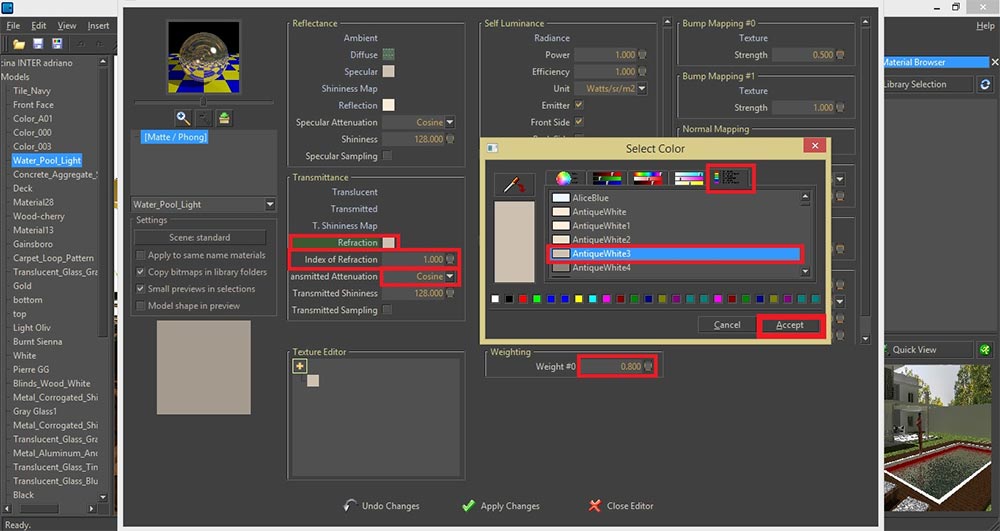
Refraction settings
Step 7:
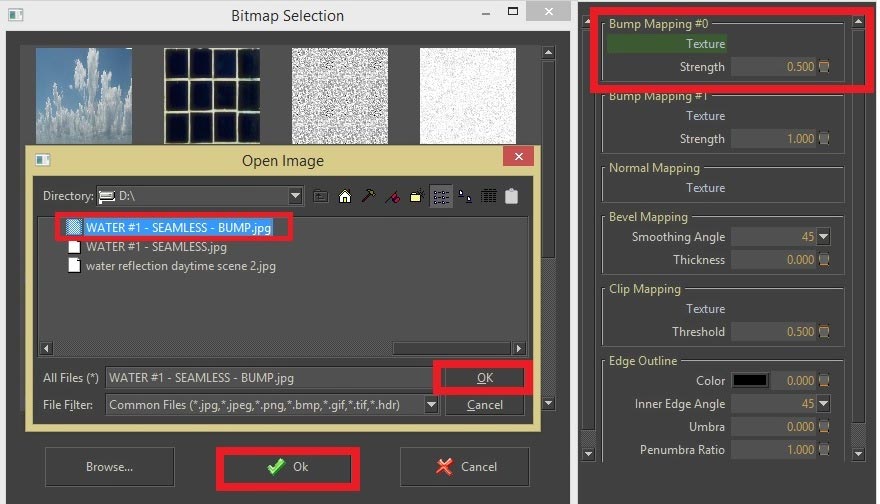
Add Bump Map
WATER BUMP MAP
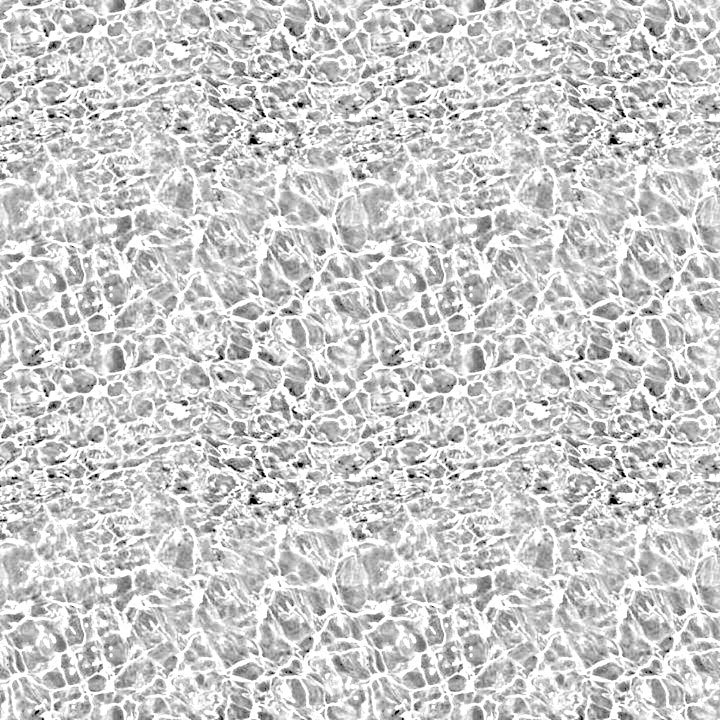
Bump Map
Step 8: Matte/ Phong Settings> click ‘Apply Changes’ when done
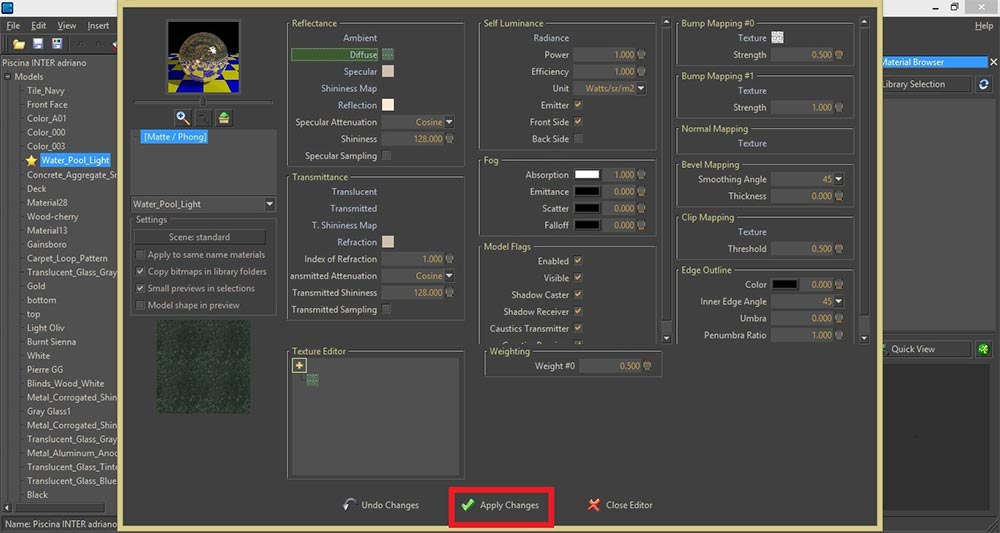
Matte/ Phong Settings
Render Result
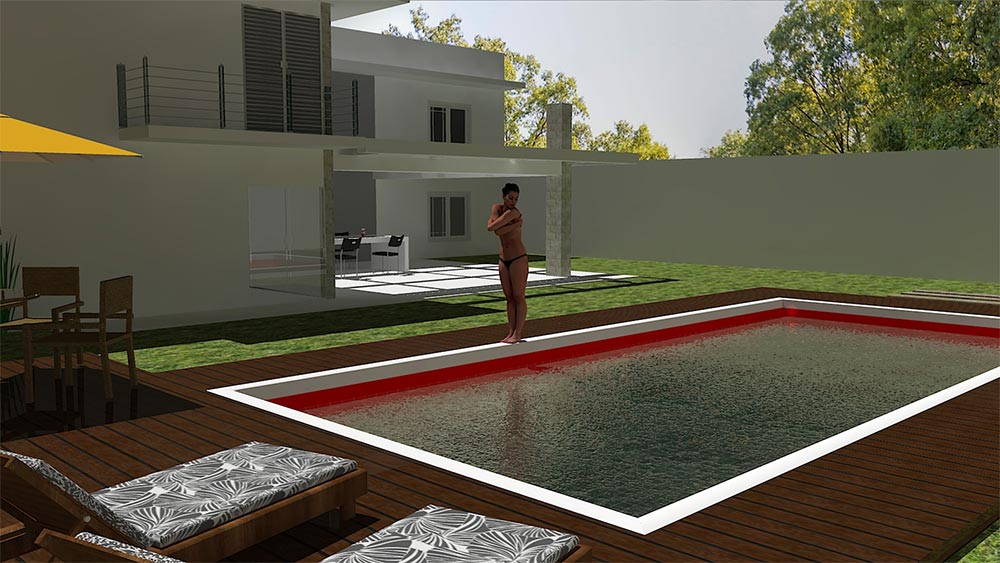
Render result
Thanks for reading
Benedict Caliwara
Profile Builder 4

Artisan Organic Toolset

PlaceMaker Version 3
Skimp Pro Import Extension

BIM Bundle Special Offer!
SketchPlus Artist Bundle !
Bevel Tool
V-Ray 5 for SketchUp E-Book

Thanks
extraordinario!!!
le daba horas y no me resultaba, ahora gracias a ti solucioné mis renderizados