Create a Fake Render in Photoshop
 By Majid Yeganegi
This tutorial is going to show you how to ‘fake’ a render using Photoshop. It is very simple and straight forward and we hope you find it very useful as it could be one quick option in your work process.
Lets get started!
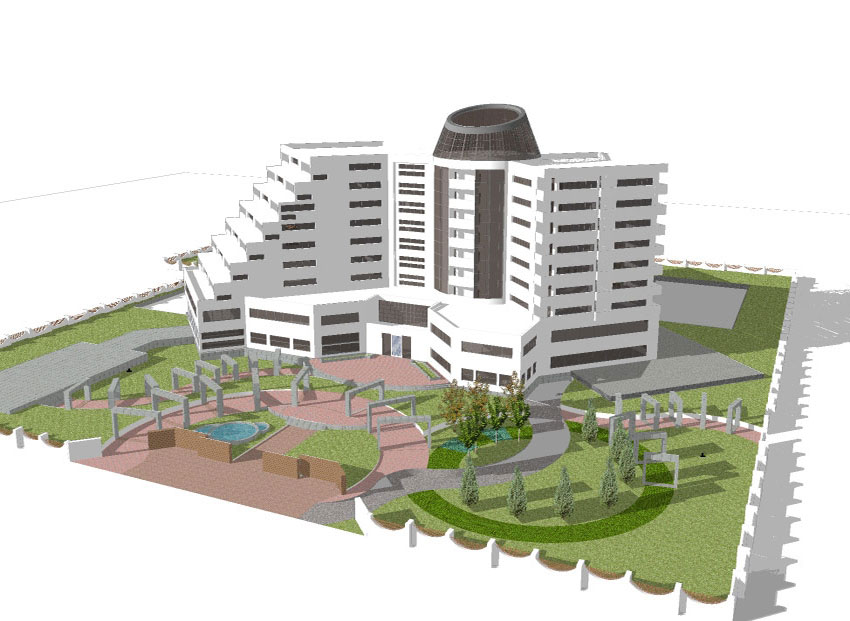
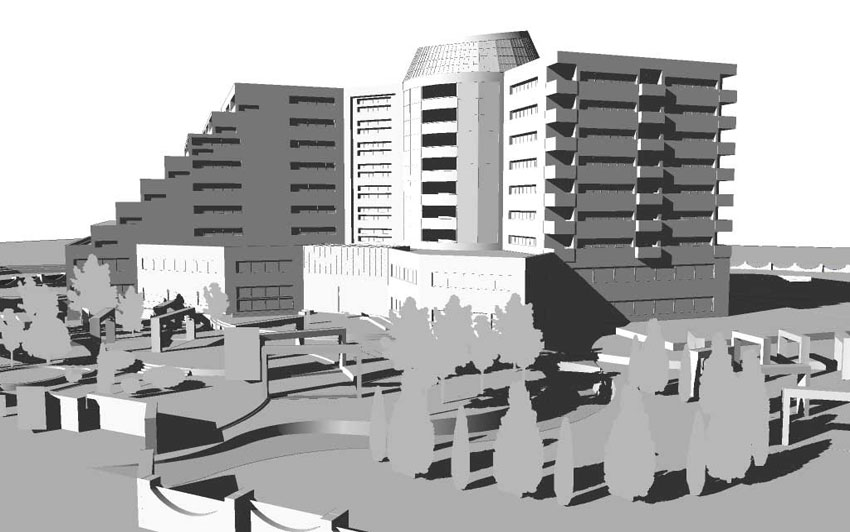
Step 1. Let us start with two direct SketchUp output images.
- one color and shadows
- one “monochrome” style and shadows.
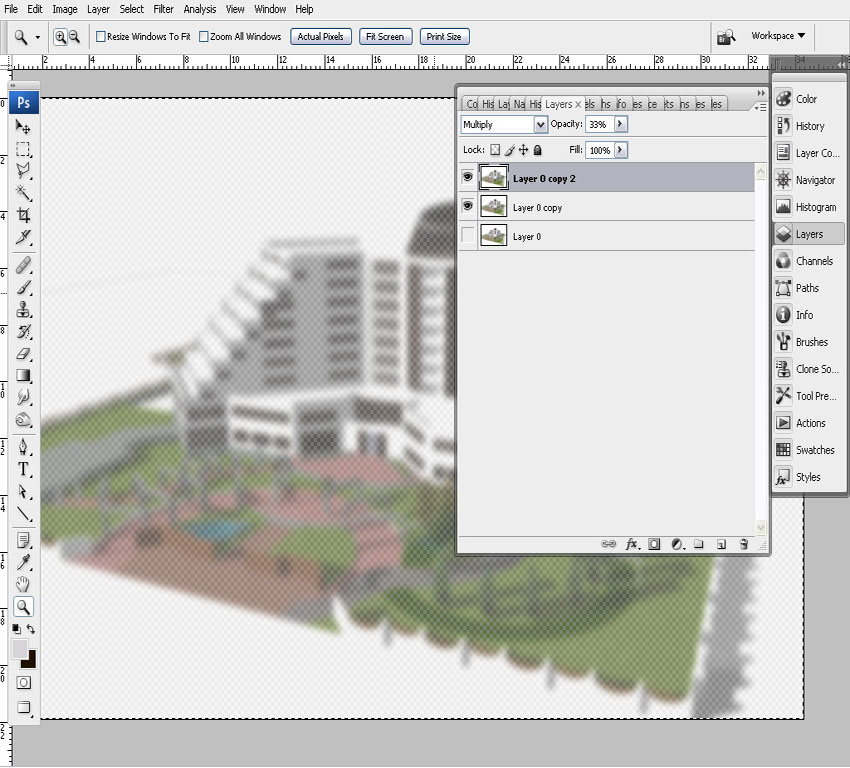
Step 2. Now using your image editing software, here we are using Photoshop, open both renders from same scene. First we will enhance the color and shadow one. To do this, copy the base layer two times, and change the first copy to “Overlay” Blending Mode with an opacity of about 70% and go to Filter>Blur> Guassian Blur and set the radius to 6.
Step 3. Apply the same filter to the second copy (upper layer) and change it’s Blending Mode to “Multiply” with an Opacity of about 30%, depending on your scene.
Step 4. Next merge all layers using “Ctrl+Shift+E”
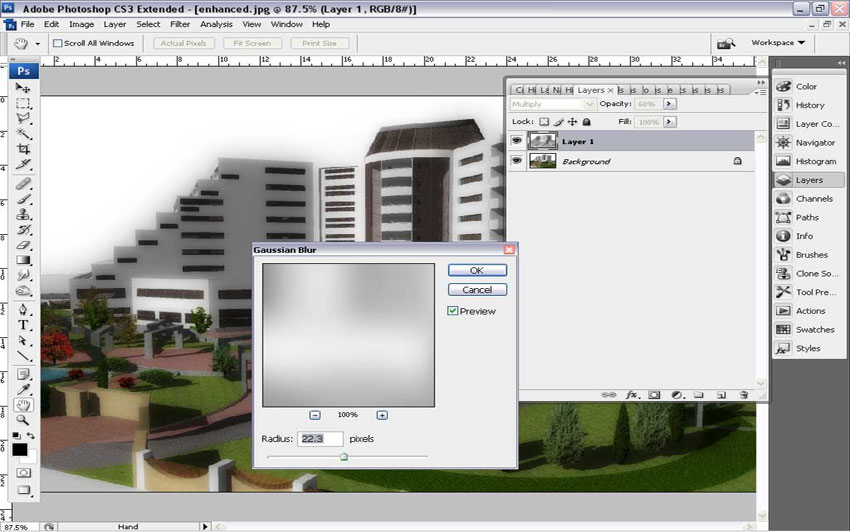
Step 5. Next go to the shadow render image and using “Ctrl+A” and “Ctrl+C” copy it to clipboard. Go to previous image and using “Ctrl+V” to paste it. Change the Blending Mode to “Multiply” with an opacity of about 60% and do a Gaussian Blur Filter with radius set to 22. This makes a fuzzy shadow effect.
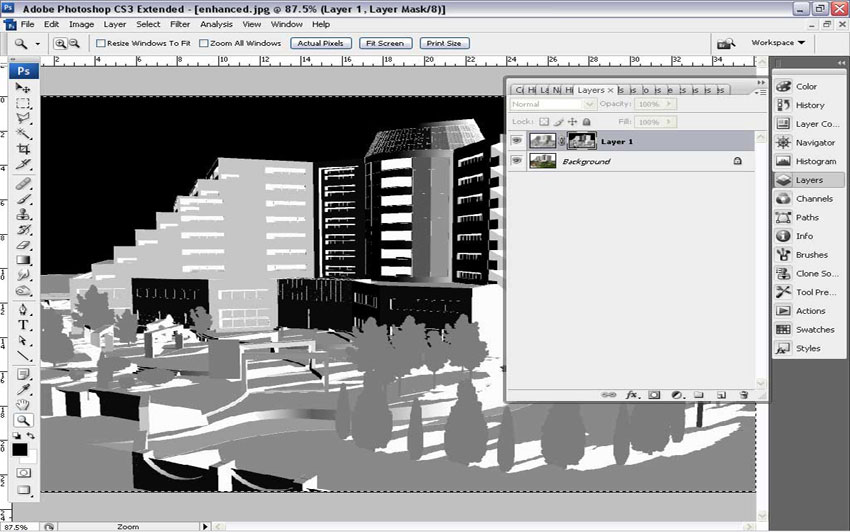
Step 6. Next we need a neat edge for our shadows and to do this we need a Layer Mask. Make a Layer Mask, “Alt+click” over the Mask and using “Ctrl+V” paste the shadow image over the Mask. Then using “Ctrl+I”, inverse it. Also you may do a level enhance using “Alt+Ctrl+Shift+L.
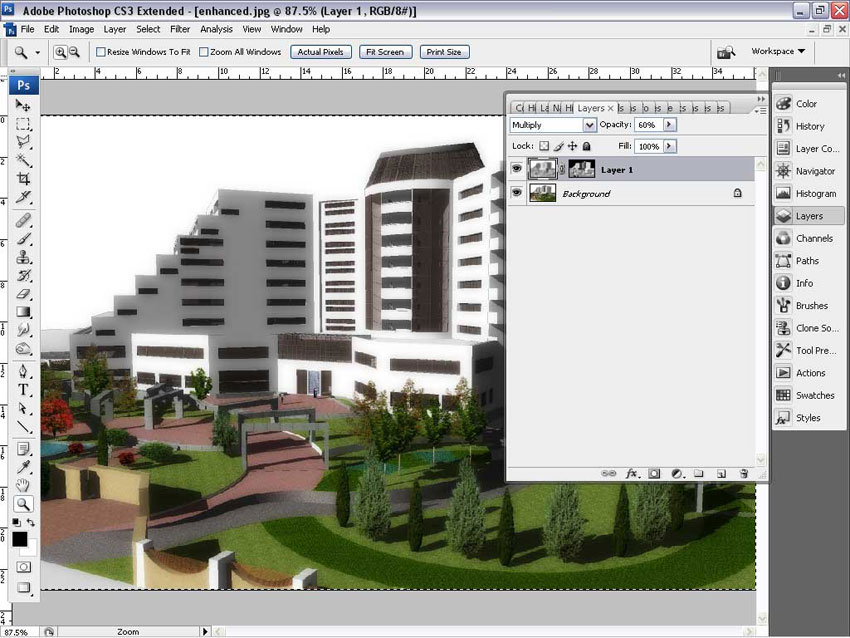
Step 7. The final step in Photoshop is to click on the (fuzzy) Shadow Layer to exit the Mask, as shown in the image below.
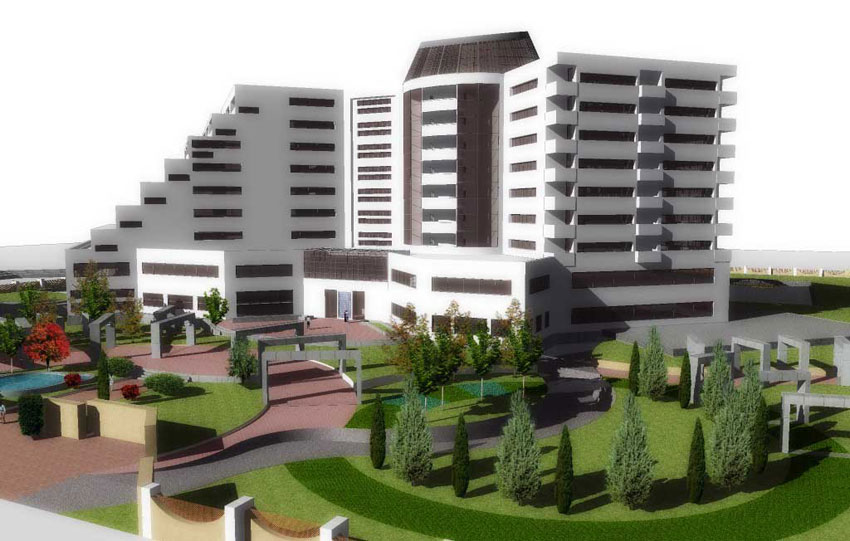
And the final completed Photoshop render.
Hope you enjoyed this little tutorial and may you find use for it in some of your future projects.
Majid





tips: this could be used widely for outdoor renders…
it is fast for large size images.
yours majid
thanks a lot
The angle of the color and the shadow render are different.
@ stenionet Yes the angle is different in that particular image. In step 1 The output images should be all at the same angle to match up when editing in your image editor…
خيلي خوب بود مرسي
thanks a lot!!!!!!
Realy its helpful for large renders..thnx
thanx ……..
The fact is that good texturing isa key point at this sort of rendering. also the blur radius depends on the image size. it is because the blurred shadow will give a sense of gradual shadow that mimes the reallity.