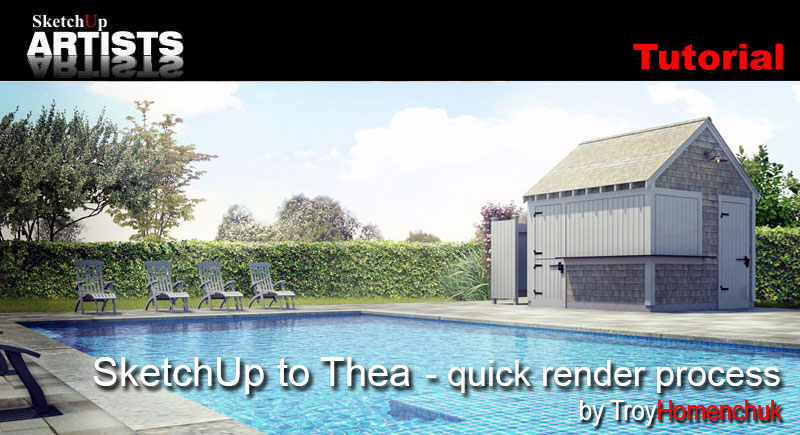
SketchUp to Thea – quick render process

Troy Homenchuk, based out of Michigan, runs his own design studio called Inside Out Viz. Troy has a background in architecture, urbanism and design. His design studio builds 3D digital models, produces renderings, photo manipulation, and consults with professionals, who want to bring their in-house rendering workflow to the next level. Here Troy shares with us his workflow on how to get SketchUp models into Thea for a quick render.
For those of you who use SketchUp and want to get serious about producing high quality renderings, I suggest Thea for SketchUp. There are many good rendering engines that integrate well with SketchUp, but I like the big three – Maxwell, V-Ray for SketchUp, and Thea. For ease of use, speed, and quality, I find Thea to be my top choice. V-Ray offers the greatest variety of shaders, and Maxwell has a rich library of pre-made materials. Really, you can’t go wrong with any of these three. But if you’re interested in getting your SketchUp models into Thea for a quick render, I’m sharing this little tutorial that takes you through my workflow. It’s not perfect but it works for me. So enjoy and feel free to ask questions if you have any. The design is by Ethan McMorrow Design and modeled by Robert Scott Residential Designs.
Step 1
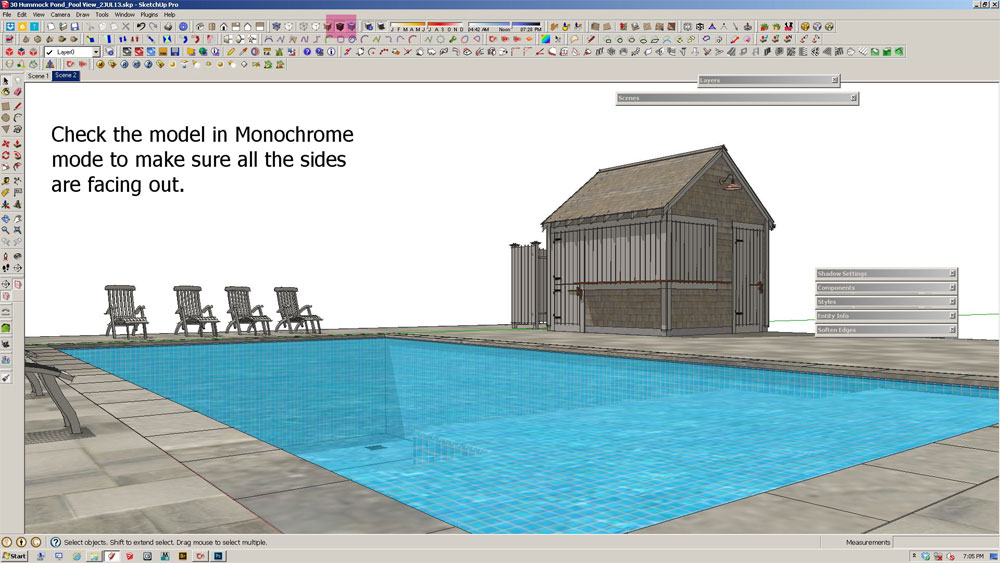
First check the model in Monochrome mode, as all faces must be facing out. By doing this you will be able to see immediately what your face orientation is like.
Step 2
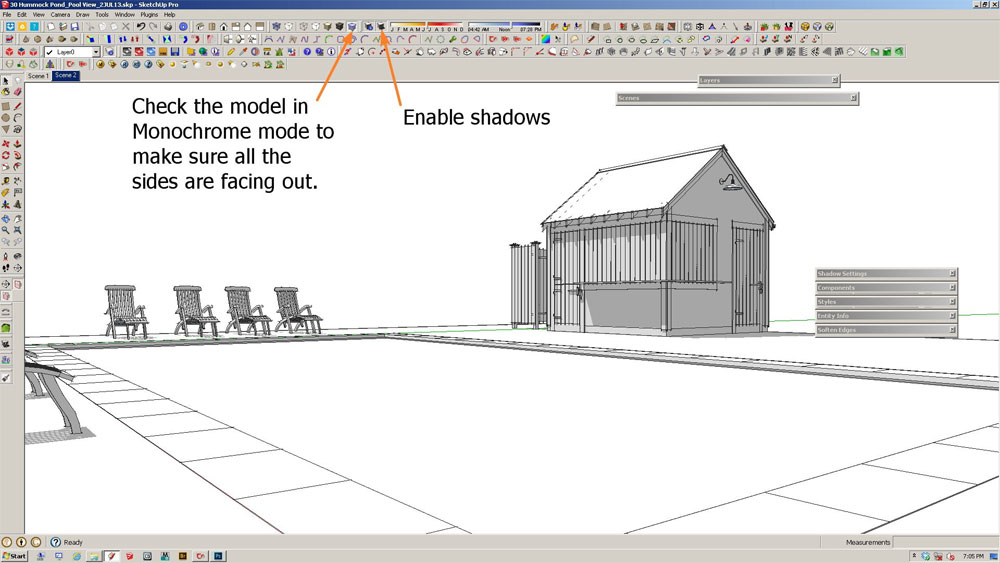
After checking your faces, enable Shadows and adjust your daylight as desired.
Step 3
Start the Thea Tool window and select your aspect ratio. In this particular case I used SketchUp Window.
Step 4
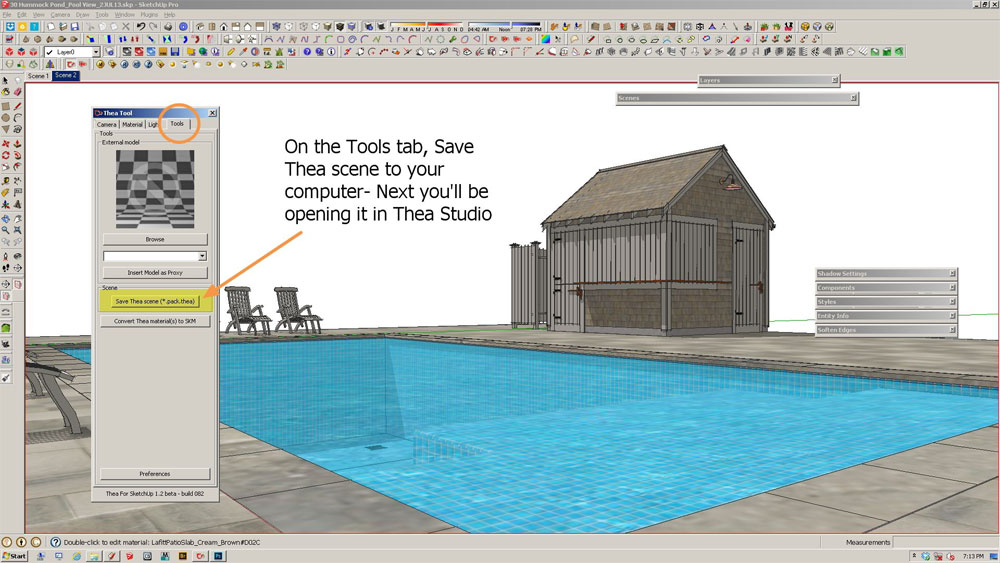
In the Thea Tool window select the Tools tab and Save Thea scene to your computer (you should get a message saying your scene has been saved successfully).
Step 5
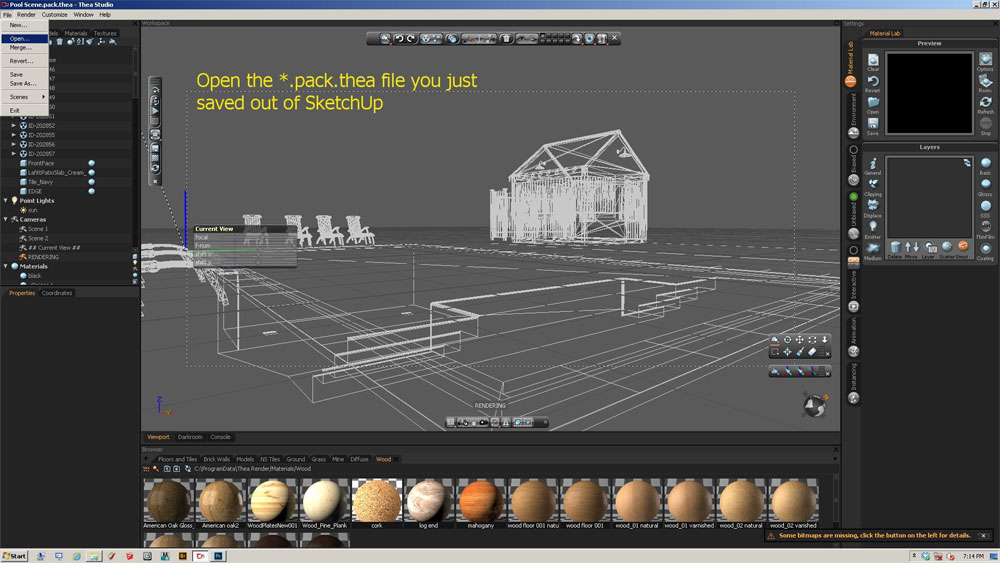
Open Thea Studio and find your saved file and open your scene.
Step 6
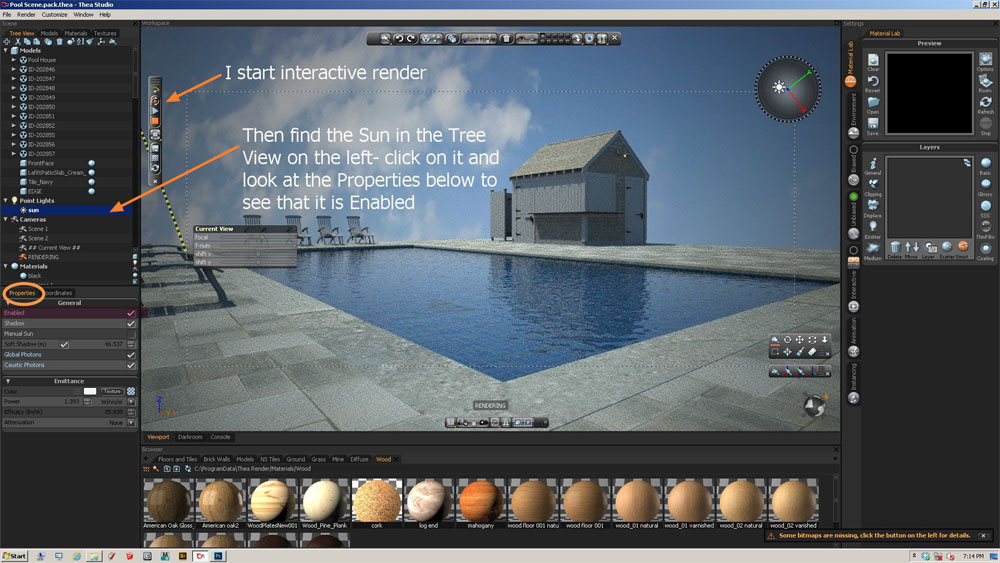
Click on the Interactive Render button in the Active Render toolbar and find Sun in the Tree View (you may have to scroll down). If your sun is not enabled, the scene will be dark. Refer to step 9 if there is no sun at all.
Step 7
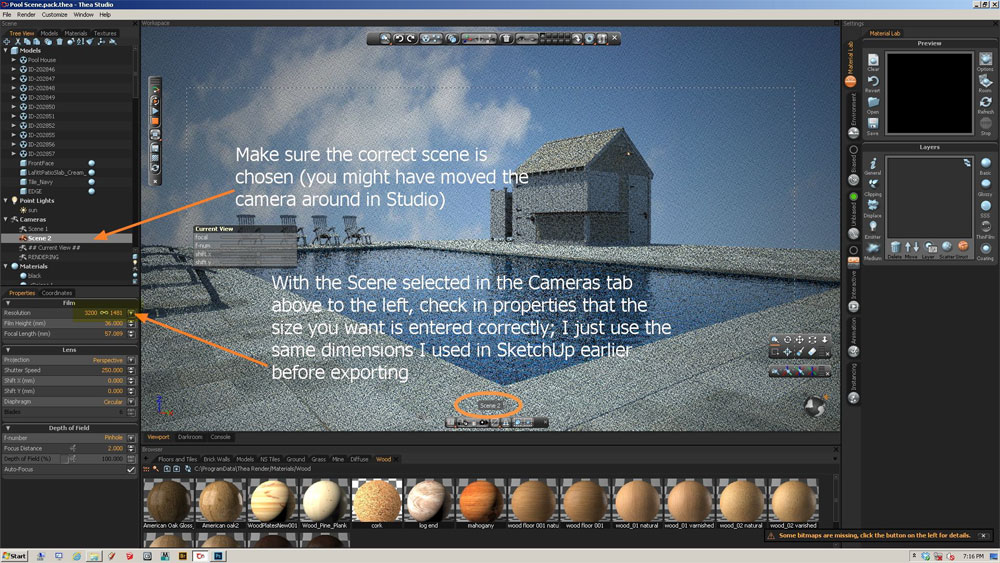
Make sure the correct scene is selected. With the little camera tab under Properties selected (Properties>Current View Properties), check to see the size (Resolution) you want and that it is correctly entered.
Step 8
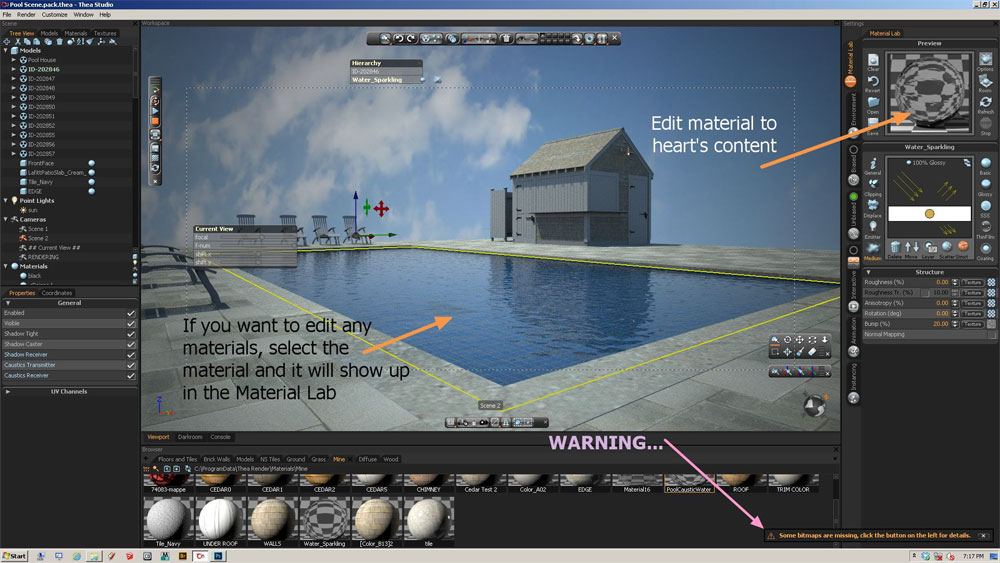
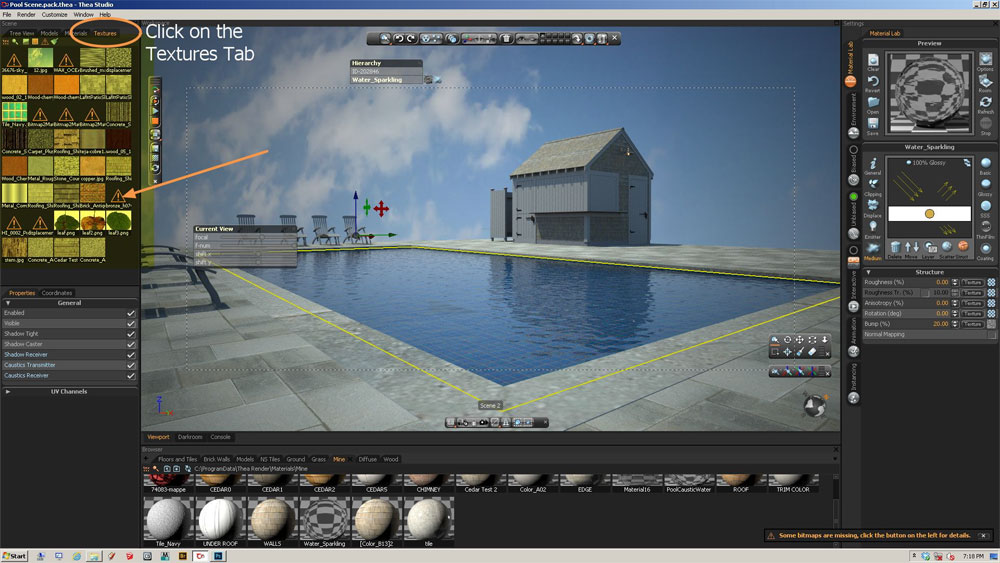
Select the materials you want to edit if you wish (a warning has appeared in my model, some bitmaps are missing, so click the button on the left for details’)
TIP: If this should happen, you can render regardless, but if you want to recover them, click on the Textures tab where you see the warning symbols.
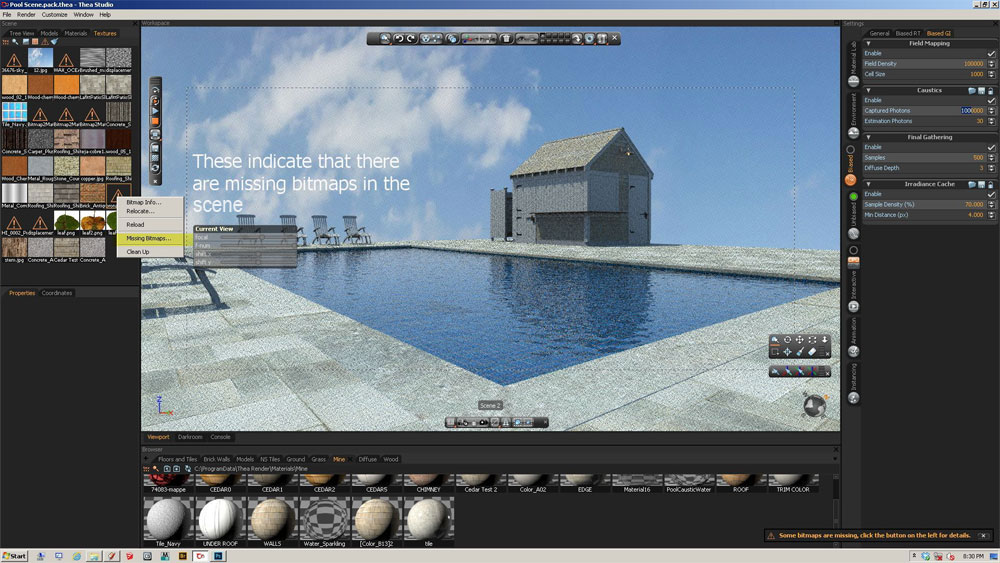
They indicate that there are some missing bitmap files. Right click on the symbol.
Then click Missing Bitmaps, and you will get a list of files you need to track down if you wish.
Step 9
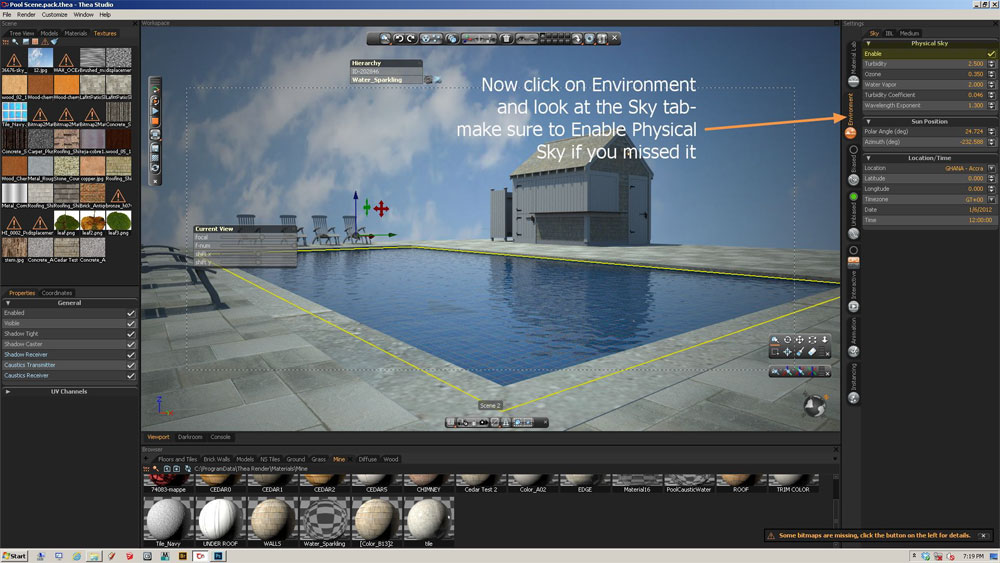
In Settings, click on Environment>Sky and make sure you have enabled Physical Sky.
Step 10
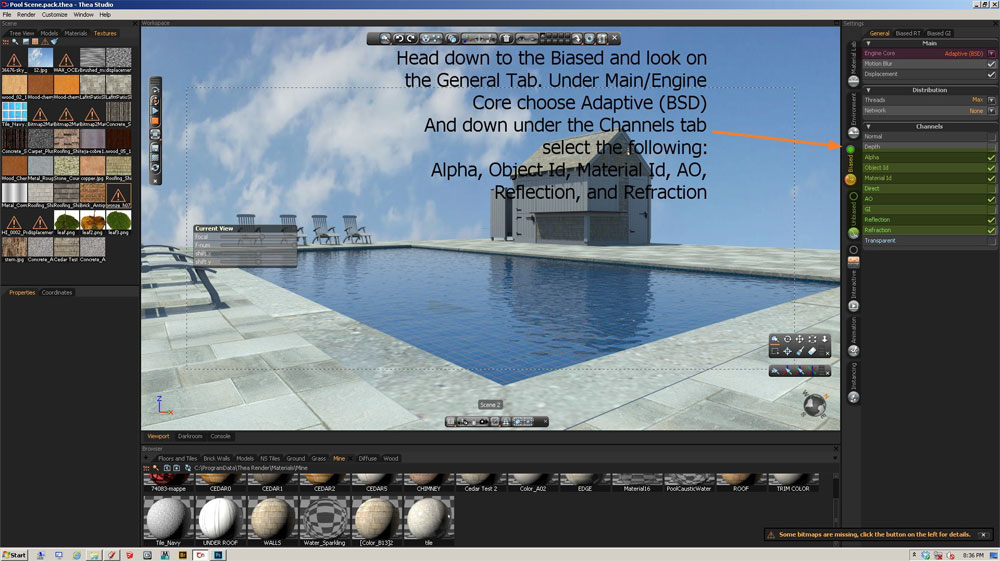
Head down to the Biased tab and click on General tab. Under Main>Engine Core select Adaptive (BSD). Then under Channels tab select the following: Alpha, Object ID, Material ID, AO, Reflection and Refraction.
Step 11
Under the Render tab select Biased RT and enable Ambient Occlusion.
Step 12
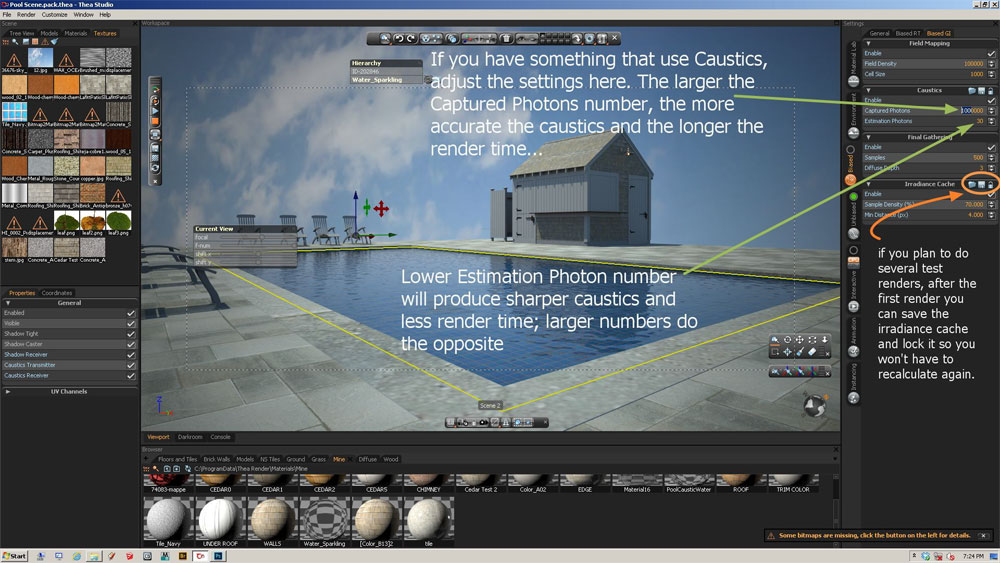
Now look under the Biased GI tab. If you have something that uses caustics (water for example) you can adjust this under the Caustics tab. Small Estimation Photon number will produce sharper caustics and reduced render time. Larger numbers do the opposite.
Step 13
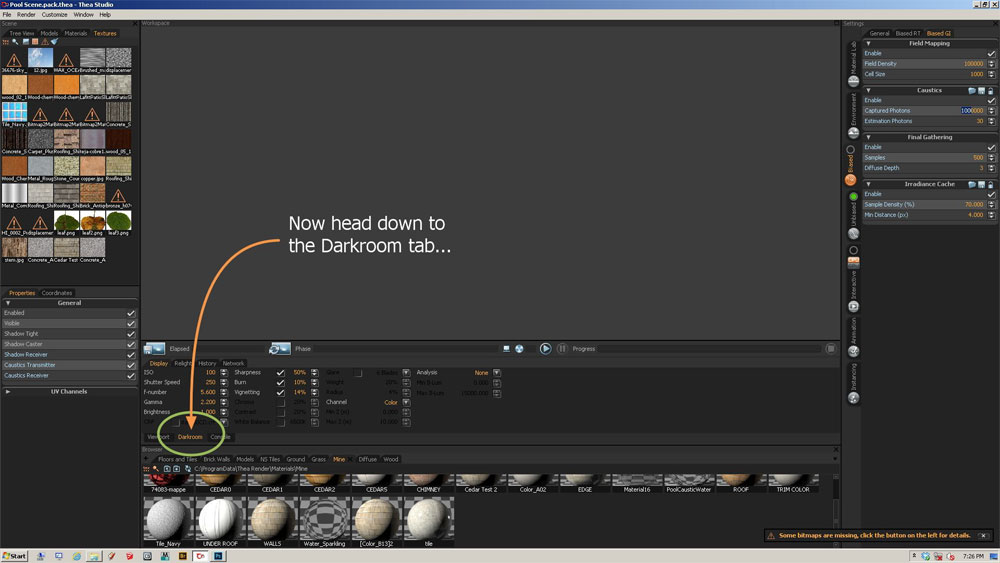
Next we head to the Dark Room situated between Viewport and Console.
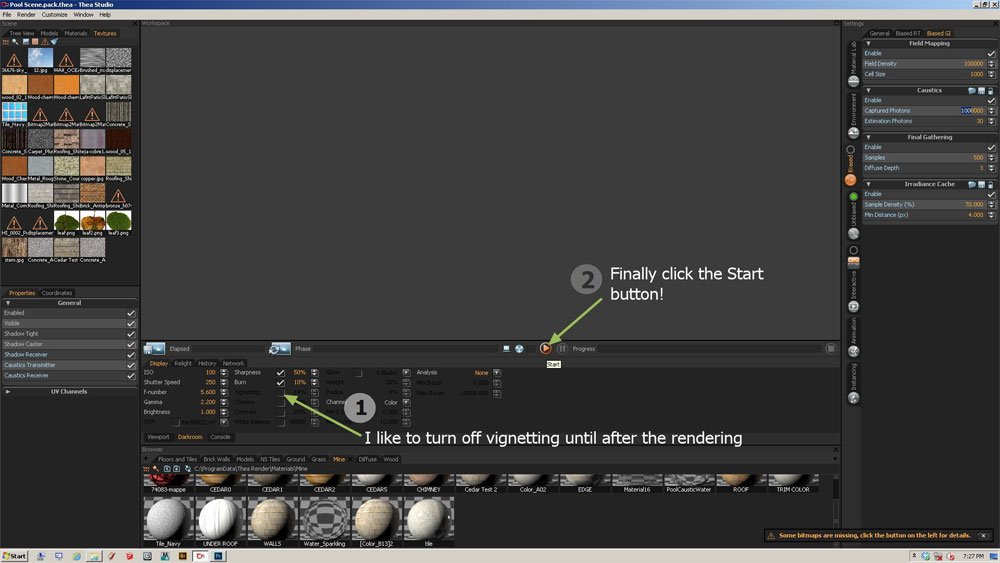
Click on the start button.
Step 14
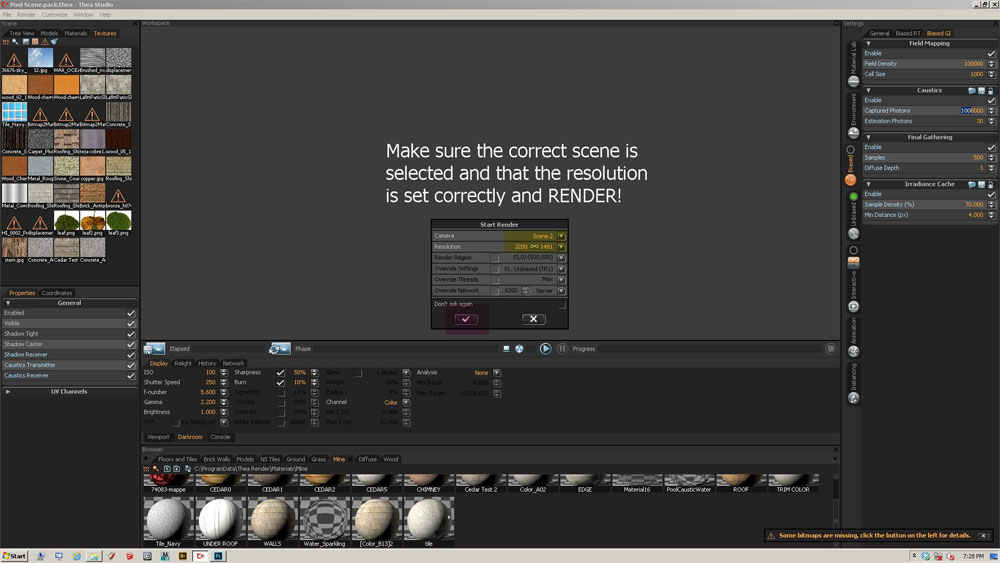
The Start Render window will pop up. This gives you the opportunity to make sure you have the right scene and resolution. Click the ‘tick’ button to start your render.
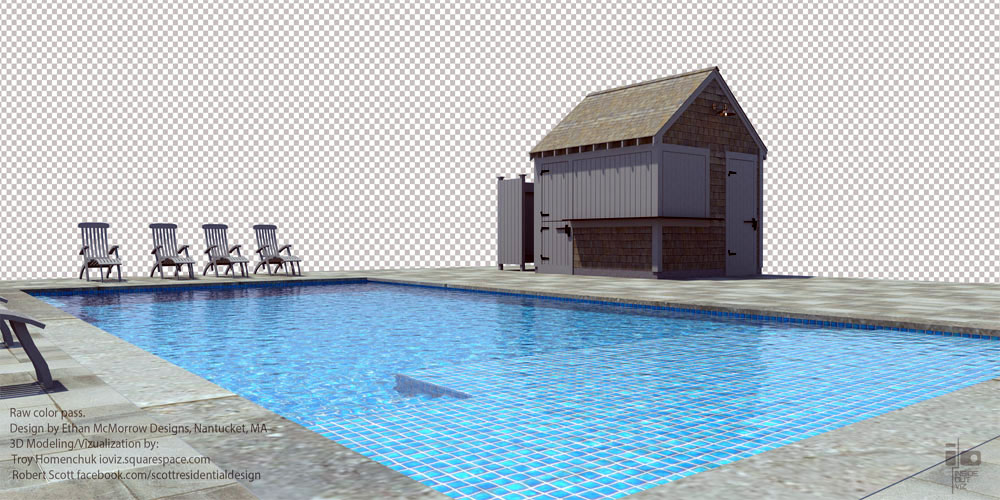
Raw render output.
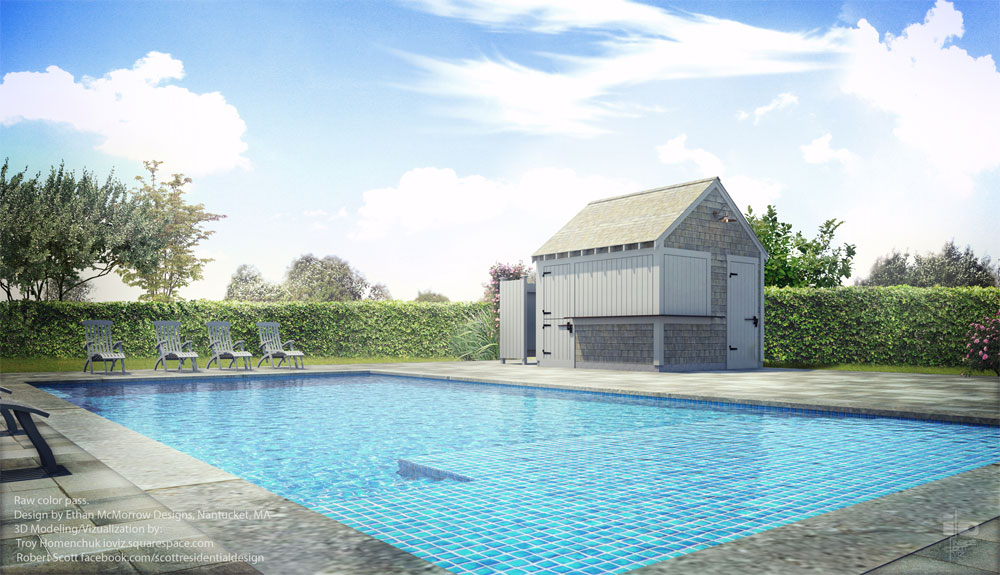
Final render after post production.
Thanks for reading
Troy Homenchuk
Troy’s website, where you can contact him and see more of his work: IO Viz






Thanks for this great tutorial! Thea seems to be a great tool and I cannot wait to start playing around with it!
Hi Troy, this was impressive to see. Someday I hope I can hire you to render some images of a project!
Best wishes,
Christine Franck
[…] Troy Homenchuk […]
Great tutorial but how did you get the bushes and trees in the background?
@ Mike….I would say they were added using photo editing software such as Photoshop in the post processing stage of the project, I am sure Troy will chip in on this 🙂
Just wondering if the lightening of the items on the post process image was done on photoshop coz they are darker on raw render?? Cheers
Thank you for this although I’m a C4D user i can still apply this. i didn’t find any tutorial like this so thank you very much.
i’d like to know how did you do on the background like putting those trees and bushes.
best regards,
fr: philippines
impressive works
thx man
amazing\
i don’t know that we can do this with thea.
Great Tutorial but i have a question
how can i set the render region to a different size and save it
Thanks